1. Introduction
Thank you for choosing the Fissler Vitavit Premium Pressure Cooker and Pressure Skillet Set. This manual provides essential information for the safe and efficient use of your new cookware. Please read all instructions carefully before first use and retain this manual for future reference.
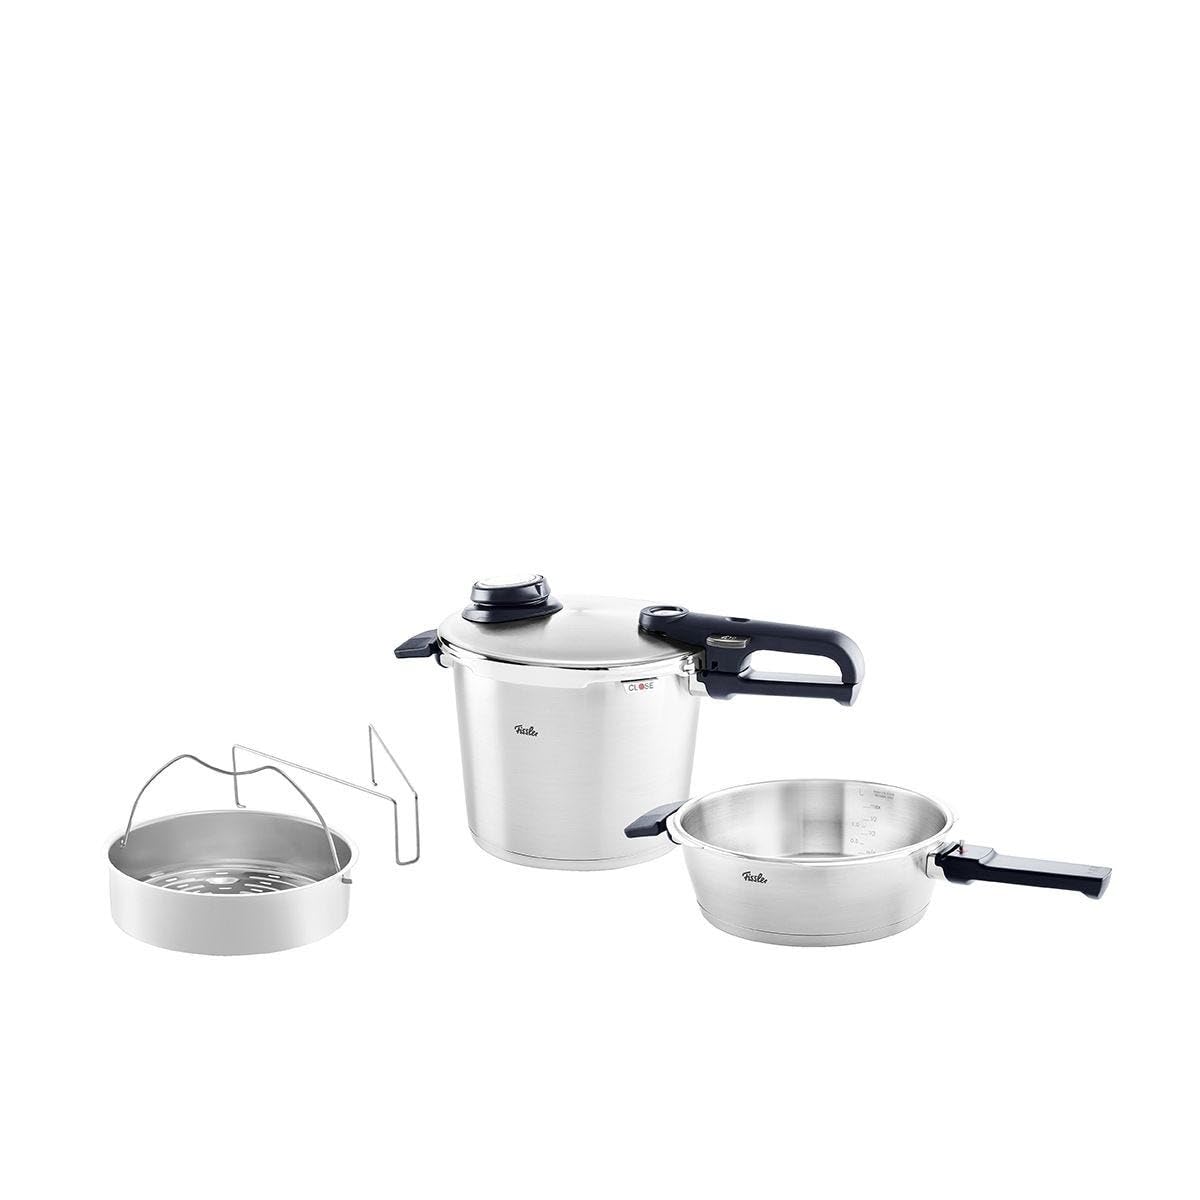
Image 1: Fissler Vitavit Premium Pressure Cooker and Skillet Set.
2. Product Overview
The Fissler Vitavit Premium set includes a 6.3 quart pressure cooker and a 2.6 quart pressure skillet, both crafted from durable stainless steel. This system is designed for healthy and energy-efficient cooking.
Key Features:
- Healthy and Energy Saving: Reduces cooking time by up to 70% and preserves up to 90% of vitamins.
- 4 Adjustable Settings: Allows for gentle cooking, quick cooking, express cooking, and steaming without pressure.
- Advanced Safety Features: Includes a pressure release feature, control button on the safety handle, and a locking indicator that audibly clicks from red to green when securely sealed.
- All Stove Tops Compatibility: The Cookstar all-stove base works on gas, electric, ceramic, and induction cooktops.
- Novogrill Base: Ideal for browning with a grill effect.

Image 2: Interior view of the pressure cooker, showing the Novogrill base and fill lines.

Image 3: Close-up of the lid's safety aid and locking indicator.
3. Safety Instructions
Always prioritize safety when using a pressure cooker. Failure to follow these instructions can result in serious injury or damage to the appliance.
- Never attempt to open the lid while the pressure cooker is under pressure. The locking indicator must be green before opening.
- Do not fill the pressure cooker beyond the maximum fill line (2/3 of total volume) to ensure safe operation. For foods that foam or expand, fill only up to the 1/2 mark.
- Always use at least the minimum amount of liquid specified in recipes to generate sufficient steam.
- Ensure the lid is properly closed and the locking indicator is green before heating.
- Do not immerse the lid in water for cleaning until it has completely cooled down.
- Keep hands and face away from the steam release valve when depressurizing.

Image 4: Visual guide to the pressure cooking process, highlighting safety steps.
4. Setup
Initial Cleaning:
- Before first use, wash all parts of the pressure cooker and skillet (pot, lid, sealing ring, valve) with warm soapy water.
- Rinse thoroughly and dry completely.
Assembling the Lid:
- Ensure the sealing ring is correctly seated in the lid.
- Align the lid with the pot, matching the metal tab marked "CLOSE" on the lid to the groove in the pot handle.
5. Operating Instructions
5.1. Opening the Pot
To open the pot, ensure there is no pressure inside. Press the button on the lid handle and turn the lid to the right until it unlocks. Then lift the lid.
Video 1: Demonstrates how to open the pressure cooker lid (0:00-0:12).
5.2. Adding Ingredients and Liquid
Place your ingredients into the pot. Always add at least the minimum required amount of liquid (e.g., water, broth). Be aware of the maximum fill level indicated inside the pot. The contents must not exceed the "max" line for safe operation. For foods that foam or expand, fill only up to the 1/2 mark.

Image 5: Adding liquid to the pressure cooker, observing fill lines.
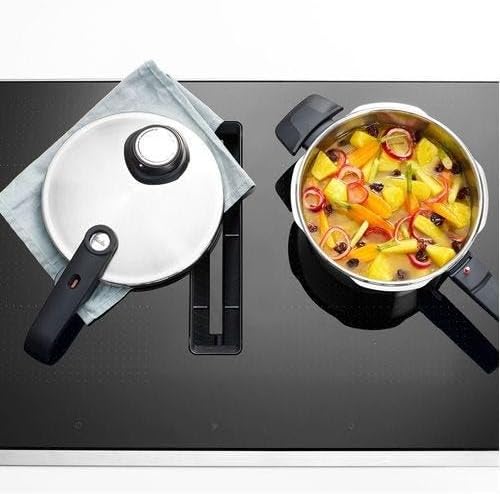
Image 6: Ingredients prepared in the pressure cooker.
5.3. Closing the Lid
Place the lid on the pot, aligning the "CLOSE" tab with the handle groove. Turn the lid to the left until the locking indicator audibly clicks from red to green, confirming the pot is securely sealed.

Image 7: Closing the pressure cooker lid.
Video 2: Demonstrates closing the lid and the locking indicator (0:45-0:57).
5.4. Setting Cooking Level
Turn the adjustment ring on the lid to select your desired cooking setting:
- Setting 1 (Gentle Cooking): For delicate dishes like fish.
- Setting 2 (Quick Cooking): For vegetables.
- Setting 3 (Express Cooking): For stews or meat.
- Steam Setting: For gentle steaming or cooking without pressure.
Video 3: Demonstrates selecting cooking settings (0:57-1:21).
5.5. Cooking Process and Traffic Light System
Place the pressure cooker on the stovetop and heat on the highest energy level. Steam (oxygen) will escape from under the lid handle for a few minutes. Once the steam release stops, pressure begins to build.
The cooking indicator on the lid features a color-coded traffic light system:
- Yellow Ring: Your cooking temperature is almost reached. Reduce the heat.
- Green Ring: The cooking setting has been reached. Your cooking time starts now. Regulate the heat to maintain the green ring.
- Red Ring: The pressure in the pot is too high. Reduce the heat immediately. If not, the pot will automatically and safely regulate the pressure.
Video 4: Explains the traffic light system for pressure indication (1:36-1:57).

Image 8: Pressure cooker with steam indicating pressure build-up.
5.6. Depressurizing
After cooking, release the steam using one of the following methods:
- Option 1 (Gradual Release): Gradually turn the cooking valve towards the steam release position until all steam escapes.
- Option 2 (Quick Release): Press the control button on the lid handle in the direction of the arrow to release steam. Continue pressing until the cooking indicator has completely lowered and no more steam escapes.
- Option 3 (Energy Saving / Natural Release): Remove the pressure cooker from the stovetop shortly before the end of cooking time. Use the residual heat from the base to allow pressure to drop naturally. Once cooled, press the button to release any remaining steam.
Video 5: Demonstrates three methods for depressurizing the pressure cooker (2:29-3:15).
5.7. Opening After Depressurizing
The Fissler pressure cooker lid will only open when there is no more pressure inside the pot. Once the cooking indicator is fully lowered, press the button on the handle and turn the lid to the right to open.
Video 6: Shows opening the pressure cooker after pressure has been released (3:15-3:22).
6. Maintenance and Cleaning
Proper maintenance ensures the longevity and performance of your Fissler Vitavit Premium set.
- The pots are dishwasher safe.
- The lid, including the handle and valve, should be hand-washed. Disassemble the lid components (sealing ring, cooking valve) for thorough cleaning.
- Ensure all parts are completely dry before reassembling and storing.
- Regularly check the sealing ring for wear and tear. Replace if damaged.

Image 9: Disassembled lid components ready for cleaning.
7. Troubleshooting
If you encounter issues, refer to the following common problems and solutions:
| Problem | Possible Cause | Solution |
|---|---|---|
| Lid will not close. | Lid not aligned correctly; sealing ring misplaced. | Ensure the "CLOSE" tab aligns with the handle groove. Check and reposition the sealing ring. |
| Pressure not building up. | Insufficient liquid; lid not sealed properly; heat too low. | Add more liquid. Ensure the locking indicator is green. Increase heat. |
| Steam escaping from under the lid during cooking. | Sealing ring damaged or dirty; lid not closed correctly. | Inspect and clean/replace the sealing ring. Re-close the lid, ensuring the green indicator. |
| Lid cannot be opened after cooking. | Pressure still inside the pot. | Ensure the cooking indicator is fully lowered. If not, release remaining pressure using one of the depressurizing methods. |
8. Specifications
Detailed technical specifications for the Fissler Vitavit Premium Pressure Cooker and Skillet Set:
- Brand: Fissler
- Model Number: 622-412-12-070/0
- Capacity: 6.3 Liters (Pressure Cooker), 2.6 Liters (Pressure Skillet)
- Material: Stainless steel
- Color: Stainless Steel
- Finish Type: Satin
- Product Dimensions: 16.9"D x 9.8"W x 9.3"H
- Item Weight: 6.4 Kilograms
- Special Features: Induction Compatible Base, Locking Lid
- Control Method: Touch (for stovetop interaction) / Hand Control (for lid)
- Operation Mode: Automatic (pressure regulation)
- Closure Type: Outer Lid
- Dishwasher Safe: Yes (pots only, lid components hand wash recommended)
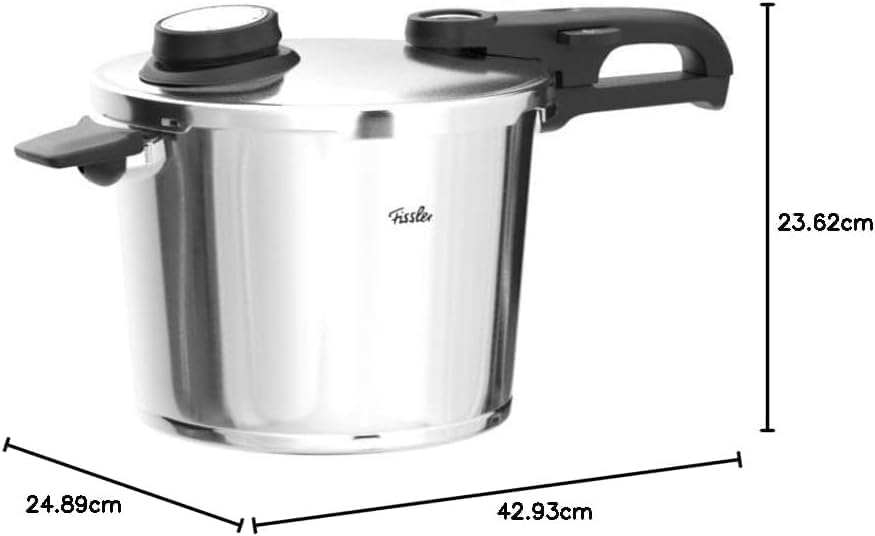
Image 10: Product dimensions for the Fissler Vitavit Premium Pressure Cooker.
9. Warranty and Support
Fissler products are known for their quality and durability. For specific warranty information, please refer to the documentation included with your purchase or visit the official Fissler website. Extended protection plans may also be available for purchase.
For customer support, spare parts, or further assistance, please contact Fissler customer service through their official channels.