1. Introduction
This manual provides essential information for the installation, operation, and maintenance of the zatagen TM30MU01E Microwave Timer. This component is designed as a replacement part for various microwave ovens, specifically functioning as a timer switch without grill or flame adjustment capabilities. Please read this manual thoroughly before attempting any installation or repair to ensure safe and correct usage.
2. Safety Information
WARNING: Risk of Electric Shock. Always disconnect power before servicing.
- Ensure the microwave oven is completely unplugged from the power source before beginning any installation or repair work.
- Installation should only be performed by a qualified technician or an individual with experience in appliance repair and electrical safety.
- Microwave ovens contain high-voltage capacitors that can retain a dangerous electrical charge even after being unplugged. Exercise extreme caution.
- Do not operate the microwave oven with covers removed or if the timer is improperly installed.
- Wear appropriate personal protective equipment (PPE), such as insulated gloves, during installation.
3. Product Overview
The zatagen TM30MU01E is a mechanical timer switch designed for microwave ovens. It controls the duration of the cooking cycle by providing an electrical contact closure for a set period. This model is specifically for microwave functions and does not include controls for grilling or flame adjustment.

Figure 1: Main view of the zatagen TM30MU01E Microwave Timer, showing its overall structure and electrical terminals.

Figure 2: Top-down view of the timer, highlighting key dimensions for compatibility assessment. The distance between mounting posts is approximately 75mm.
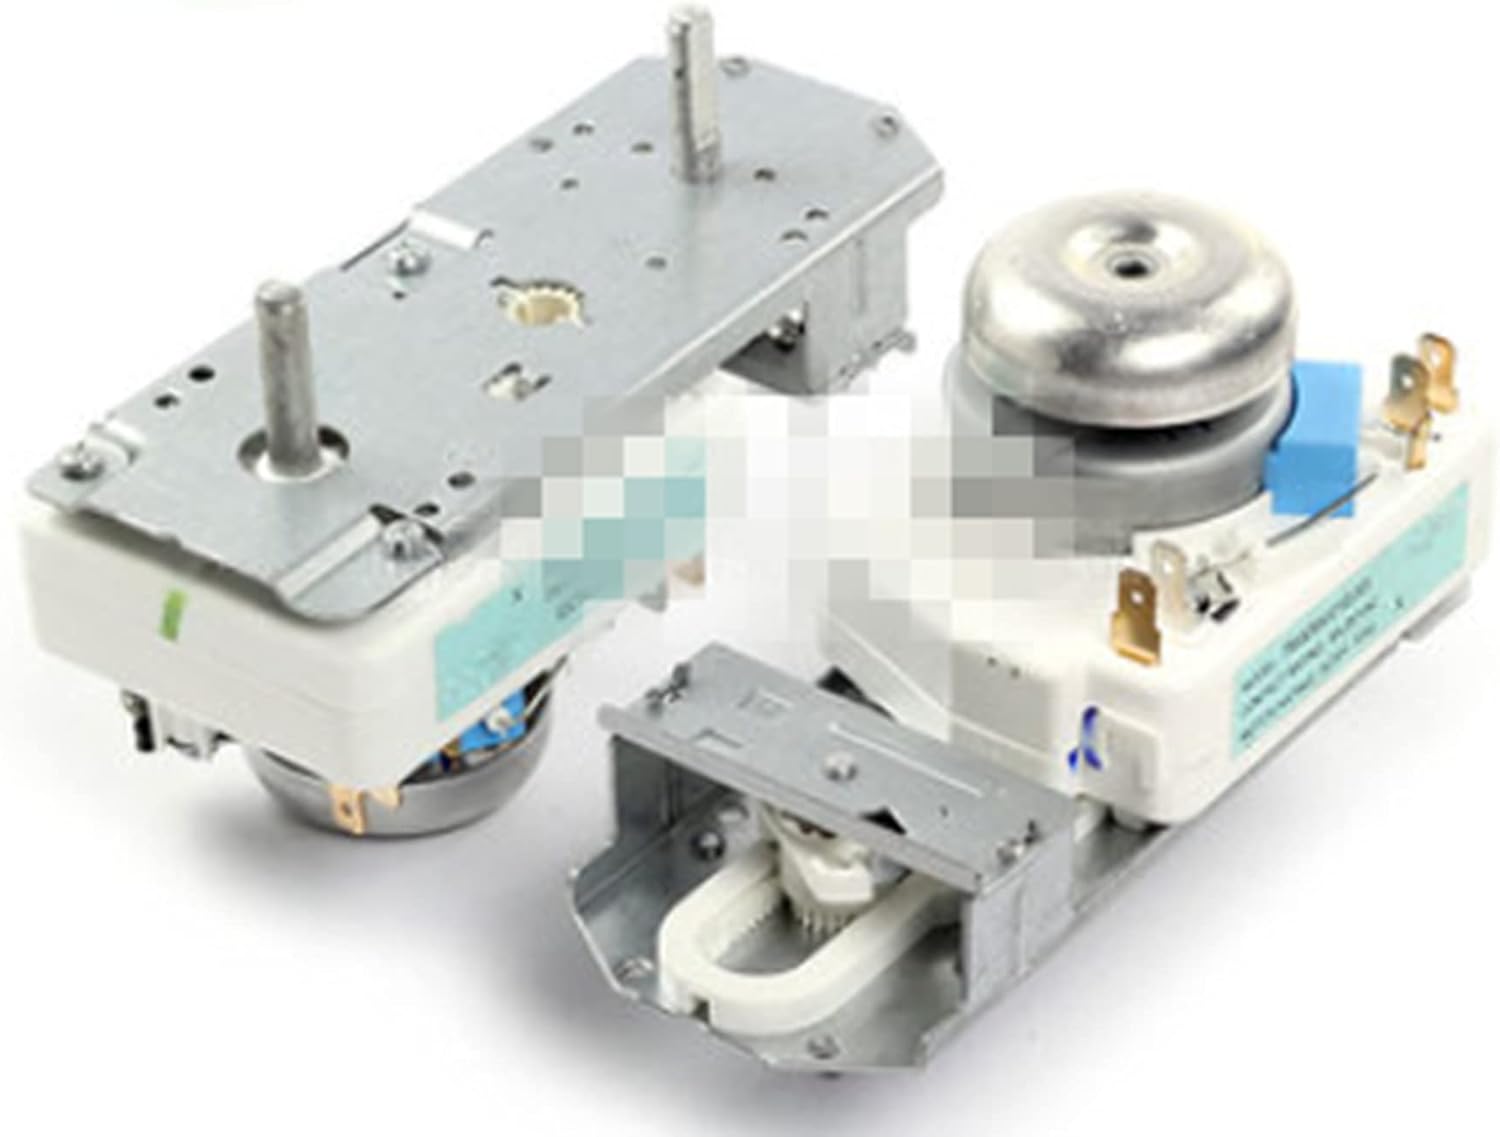
Figure 3: Multiple views of the timer, illustrating its internal mechanism and mounting bracket design.
4. Specifications
| Feature | Detail |
|---|---|
| Model | TM30MU01E |
| Contact Rating | 8A 250VAC |
| Motor Rating | AC30V 50Hz |
| Material | Polycarbonate |
| UPC | 632296876122 |
5. Installation and Setup
Replacing a microwave timer requires careful attention to detail and electrical safety. It is highly recommended that this procedure be performed by a qualified appliance repair technician.
- Disconnect Power: Unplug the microwave oven from the wall outlet. This is the most critical step.
- Access the Timer: Depending on your microwave model, you may need to remove the outer casing or control panel to access the existing timer. Refer to your microwave's service manual for specific instructions.
- Document Connections: Before disconnecting any wires, take clear photos or draw a diagram of how the wires are connected to the old timer. This will be crucial for correct re-connection.
- Remove Old Timer: Carefully disconnect all wires and unmount the old timer from its bracket.
- Install New Timer: Mount the zatagen TM30MU01E timer into the designated position. Ensure it is securely fastened.
- Connect Wires: Reconnect the wires to the new timer exactly as they were connected to the old one, using your photos or diagram as a guide. Ensure all connections are firm and secure.
- Reassemble: Carefully reassemble the microwave oven's casing or control panel.
- Test Functionality: Plug the microwave back into the power outlet. Test the timer function to ensure it operates correctly.
If you are unsure about any step, consult a professional technician.
6. Operation
The TM30MU01E timer functions as a direct replacement for your microwave's original timer. Its operation is integrated with the microwave's control panel. Typically, you will:
- Set Cooking Time: Use the microwave's control knob or buttons to select the desired cooking duration.
- Start Cooking: Press the start button on your microwave. The timer will begin counting down.
- Completion: Once the set time expires, the timer will typically trigger an audible signal (bell) and cut off power to the microwave's heating element, ending the cooking cycle.
Refer to your specific microwave oven's user manual for detailed instructions on setting and using its timer functions.
7. Maintenance
The zatagen TM30MU01E Microwave Timer is a sealed unit and requires no routine maintenance. To ensure its longevity and proper function:
- Avoid exposing the timer to excessive moisture or extreme temperatures.
- Ensure the microwave oven's interior and exterior are kept clean, preventing debris from interfering with internal components.
- Do not attempt to disassemble the timer unit, as this will void the warranty and may cause damage.
8. Troubleshooting
If you experience issues after installing the new timer, consider the following common troubleshooting steps:
- Timer Not Functioning:
- Check all wire connections to ensure they are secure and correctly matched according to your diagram.
- Verify that the microwave oven is receiving power.
- Ensure the timer knob (if applicable) is properly seated and engaging the timer shaft.
- Timer Not Counting Down or Stopping:
- This could indicate an internal fault with the timer or an issue with the microwave's control board.
- Re-check connections.
- No Power to Microwave:
- Ensure the microwave is plugged in and the circuit breaker has not tripped.
- Verify that all internal safety switches (e.g., door interlock switches) are functioning correctly.
For complex issues or if troubleshooting does not resolve the problem, it is advisable to contact a qualified appliance repair professional.
9. Warranty and Support
The zatagen TM30MU01E Microwave Timer comes with a 120-day warranty period from the date of purchase. This warranty covers defects in materials and workmanship under normal use.
For warranty claims, technical support, or further assistance, please contact the retailer or manufacturer directly. Keep your proof of purchase for warranty validation.
For general inquiries or to find more information about zatagen products, please visit the official zatagen website or contact their customer service department.