iMagic d8e1e0da-5dec-4fef-8eca-fda28eb8a286
iMagic Touch Screen Deadbolt Instruction Manual
Model: d8e1e0da-5dec-4fef-8eca-fda28eb8a286
Brand: iMagic
Product Overview
The iMagic Touch Screen Deadbolt is a keyless entry solution designed for enhanced home security and convenience. This electronic keypad door lock offers multiple access options, including user codes and traditional keys, along with an automatic locking function. It is battery-operated and features a low battery indicator for timely maintenance. The lock is suitable for wooden doors with a thickness range of 1-3/8 inches to 1-13/16 inches (35 mm-45 mm), making it ideal for various entry points such as front doors, side and back doors, and garage entry doors.

Figure 1: Front and back view of the iMagic Touch Screen Deadbolt.
Setup and Installation
The iMagic Touch Screen Deadbolt is designed for easy DIY installation. A screwdriver is the only tool required for assembly. For detailed step-by-step instructions, please refer to the official Installation Manual PDF and the provided installation video.
Important: Ensure your door meets the thickness requirements of 1-3/8 inches to 1-13/16 inches (35 mm-45 mm) before beginning installation.
Pre-Installation Checks
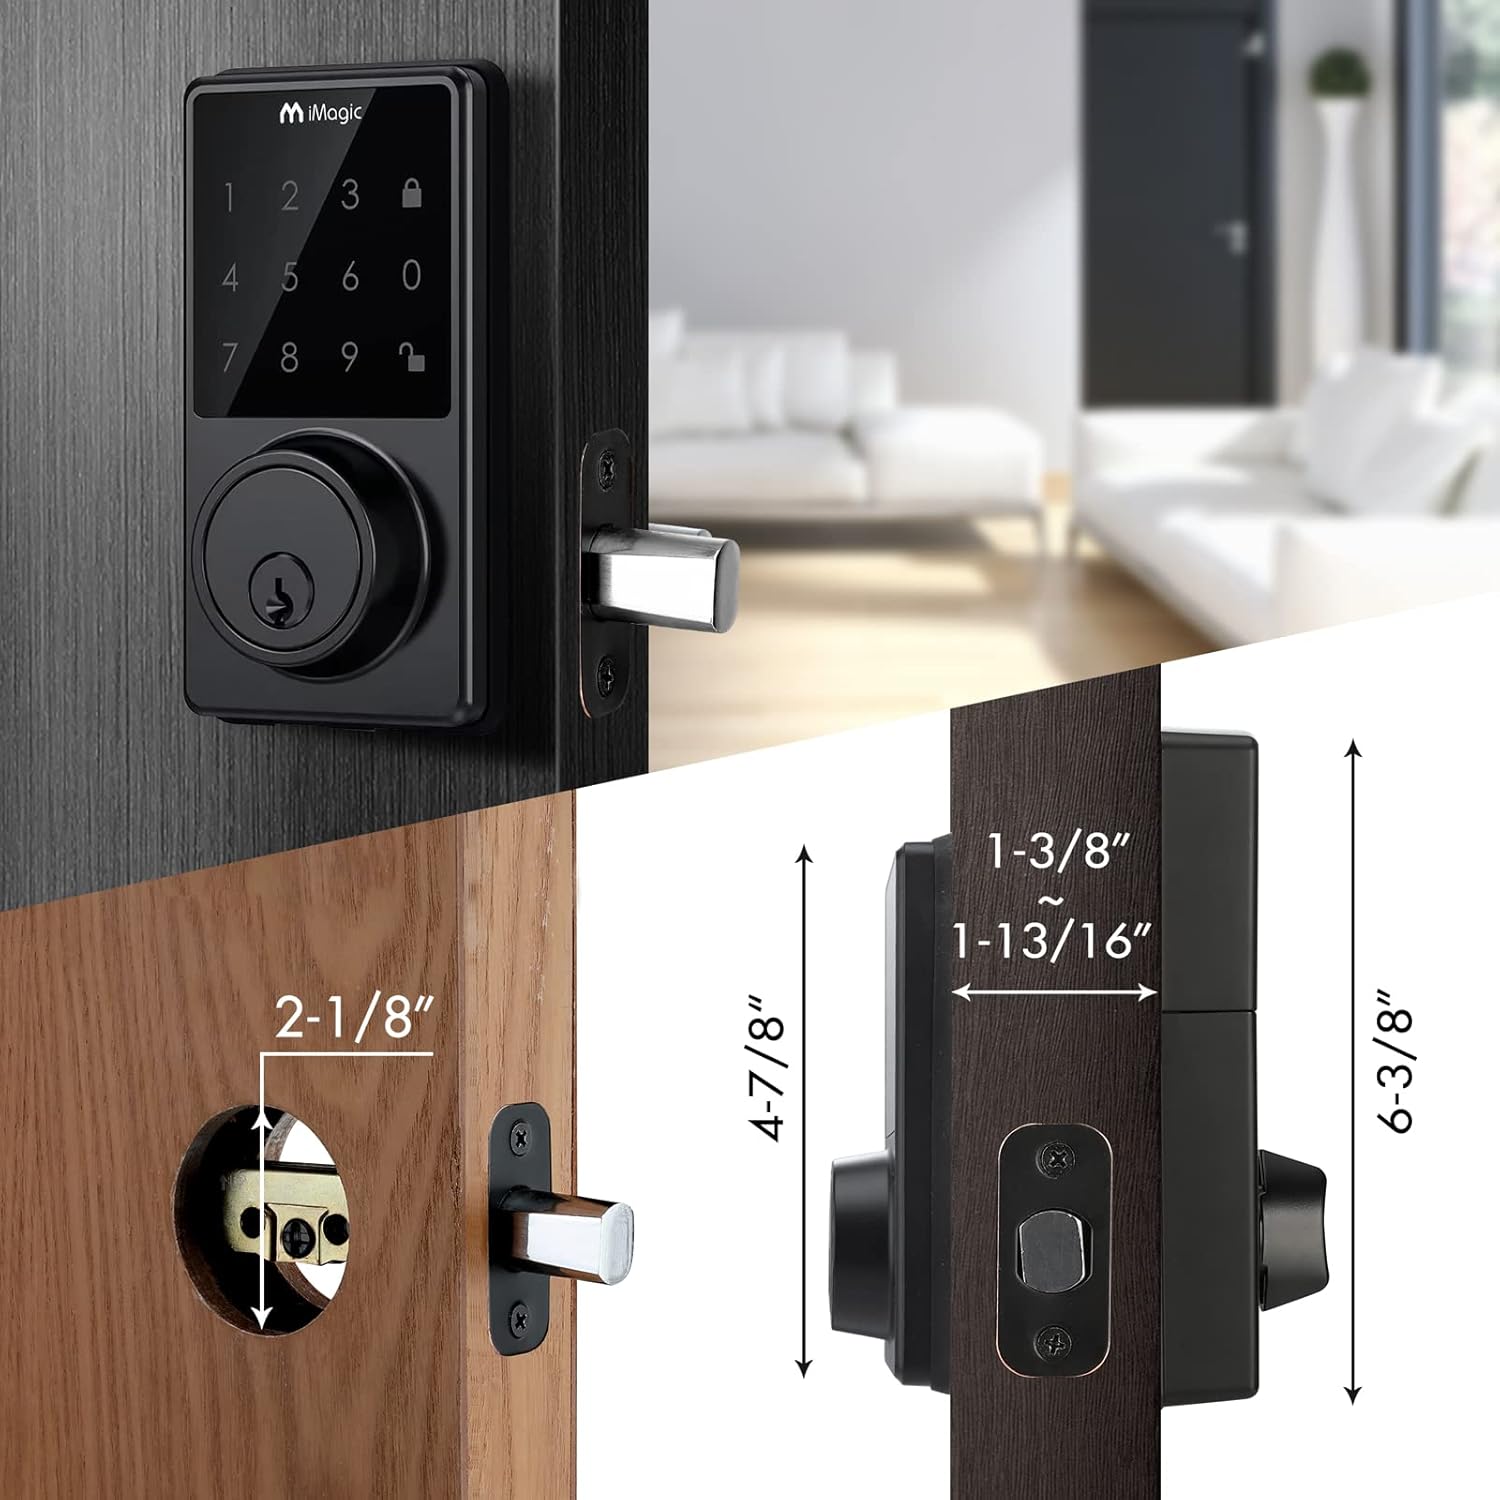
Figure 2: Diagram showing door hole dimensions and lock measurements for proper fit.
Before installation, verify that your door has the correct bore holes and backset. The lock body hole should be 2-1/8 inches in diameter, and the lock cylinder hole should be appropriately sized. The deadbolt latch requires a 1-1/8 inch by 2-1/4 inch cutout.
Installation Steps Overview
- Prepare the Door: Ensure the door is properly drilled and mortised according to the dimensions shown in the manual.
- Install the Latch: Insert the deadbolt latch into the door edge, ensuring the "UP" arrow on the latch is facing upwards. Secure it with screws.
- Attach Exterior Assembly: Insert the exterior assembly onto the door, ensuring the tailpiece passes through the deadbolt latch set in the vertical position.
- Secure Mounting Plate: Position the mounting plate on the interior side of the door, aligning it with the exterior assembly. Secure it with screws.
- Connect Wires: Carefully insert the control wire from the exterior assembly into the wire connector on the interior assembly.
- Attach Interior Assembly: Mount the interior assembly onto the mounting plate, ensuring all wires are tucked away and not pinched.
- Install Batteries: Insert 4 AA alkaline batteries into the battery compartment.
- Test Operation: Test the lock's functionality using the key and by entering a default or programmed code to ensure proper operation.

Figure 3: Illustration of inserting the exterior assembly with the tailpiece in the vertical position.
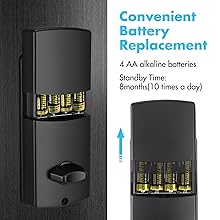
Figure 4: Diagram showing the correct orientation for installing 4 AA alkaline batteries.
Installation Video Guide
Video 1: Official iMagic Keypad Deadbolt Installation Video. This video provides a visual guide for the complete installation process, from preparing the door to testing the lock.
For a comprehensive guide, download the official installation manual: iMagic Touch Screen Deadbolt Installation Manual (PDF).
Operating Instructions
Keyless Entry and User Codes
The iMagic deadbolt supports up to 50 unique user codes, providing convenient keyless access for family members, guests, or employees. To unlock, simply enter a valid user code on the touch screen keypad.

Figure 5: The lock supports up to 50 distinct user codes for multiple users.
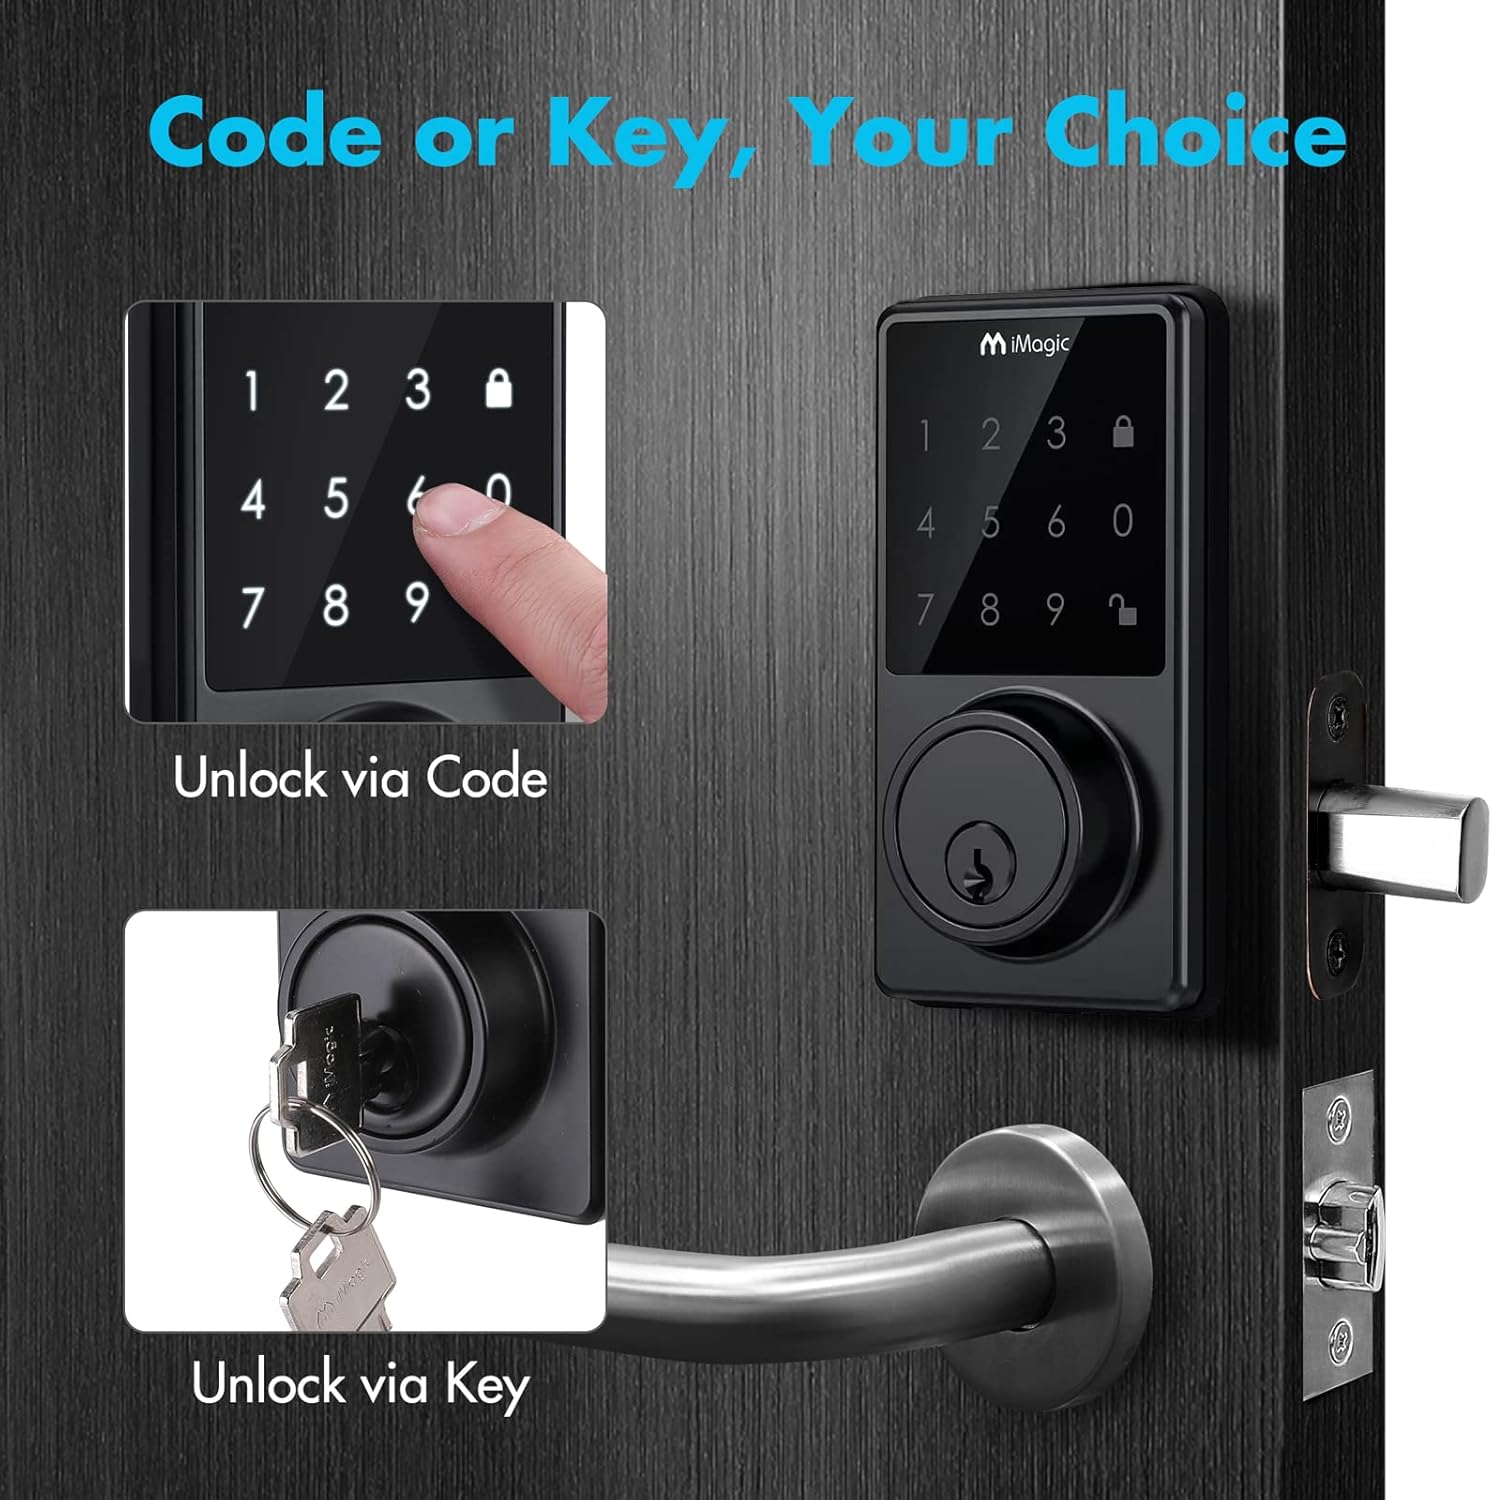
Figure 6: The lock can be unlocked using either a programmed code on the keypad or a traditional physical key.
Vague Code Function
For enhanced security, the lock features a "Vague Code" function. You can enter any sequence of up to 20 digits, as long as your correct user code is embedded within that sequence. This makes it harder for onlookers to discern your actual code.

Figure 7: Example of using a vague code where the correct code is part of a longer sequence.
Automatic Lock Function
The iMagic deadbolt can be configured to automatically lock after a set period (20-900 seconds) once it has been opened. This feature provides peace of mind, ensuring your door is always secured.

Figure 8: The lock automatically secures itself after a user-defined delay.
Sound On/Off
The keypad sound can be toggled on or off according to user preference. This allows for silent operation if desired.
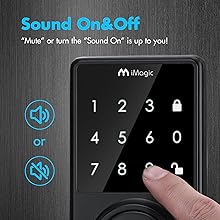
Figure 9: Visual representation of the sound on/off feature for the keypad.
Maintenance
Battery Replacement
The iMagic deadbolt is powered by 4 AA alkaline batteries, which typically last approximately 1 year. The lock is equipped with a low battery indicator. When the battery level is low, the lock will flash red 7 times and emit a beeping sound, signaling that the batteries need to be replaced.

Figure 10: The iMagic logo on the keypad will flash red to indicate low battery.
To replace batteries, remove the interior cover, replace the 4 AA batteries, and reattach the cover. Ensure correct polarity when inserting new batteries.
Troubleshooting
If you encounter issues with your iMagic Touch Screen Deadbolt, consider the following common solutions:
- Lock Not Responding: Check battery levels. Replace all 4 AA batteries if the low battery indicator is active or if the keypad is unresponsive.
- Code Not Working:
- Ensure you are entering the correct user code.
- If using the Vague Code feature, verify that the correct code is embedded within the sequence you are entering.
- Try resetting the lock to factory settings (refer to the full manual for specific steps).
- Auto-Lock Malfunction: Verify the auto-lock timer setting. Ensure it is enabled and set to your desired duration.
- Physical Key Not Working: Ensure the key is fully inserted and turned correctly. Check for any obstructions in the keyway.
- Installation Issues: Double-check all installation steps, especially the alignment of the tailpiece and the secure fastening of the mounting plate. Refer to the installation video and PDF manual for visual guidance.
For persistent issues, please refer to the comprehensive troubleshooting section in the full user manual or contact customer support.
Product Specifications
| Feature | Specification |
|---|---|
| Brand | iMagic |
| Model Number | d8e1e0da-5dec-4fef-8eca-fda28eb8a286 |
| Lock Type | Keypad |
| Special Features | Automatic Lock, Battery Indicator |
| Material | Zinc |
| Color | Black |
| Item Dimensions (L x W x H) | 8.74 x 5.16 x 3.43 inches |
| Item Weight | 2.57 pounds |
| Power Source | 4 AA batteries (included) |
| Door Thickness Compatibility | 1-3/8 inch to 1-13/16 inches (35 mm-45 mm) |
| User Code Capacity | Up to 50 codes |
| Connectivity Protocol | Wi-Fi |
| Date First Available | August 10, 2021 |
Warranty and Support
For information regarding product warranty, returns, or technical support, please refer to the official iMagic website or contact their customer service directly. The full user manual, which includes detailed warranty information and contact details, can be downloaded via the link provided in the Setup and Installation section.
You may also find additional support resources and FAQs on the iMagic Store on Amazon.
Ask a question about this manual
Ask about setup, troubleshooting, compatibility, parts, safety, or missing instructions. Manuals+ will review the question and use this page’s manual context to help answer it.