
1. Introduction
Thank you for choosing the Mudder Mini LED Flashlight. This manual provides essential information for the safe and effective use of your new flashlight. Please read it thoroughly before operation and retain it for future reference.
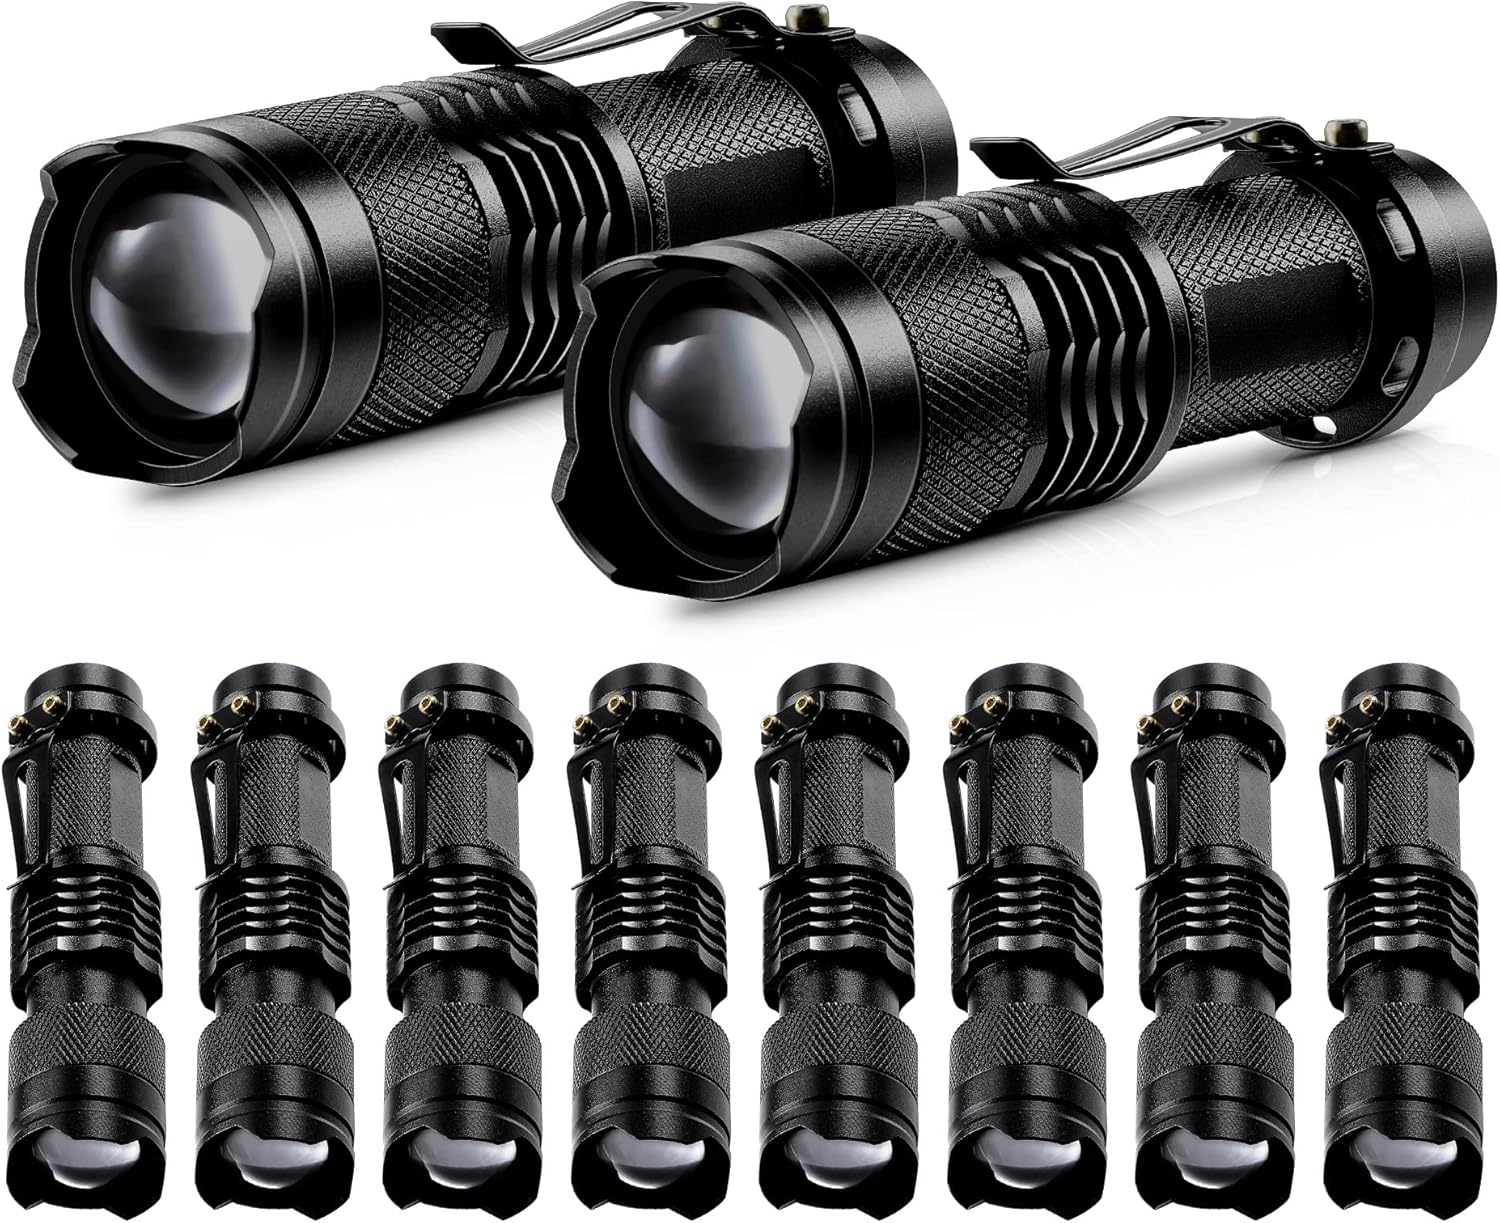
Image 1.1: A pack of ten Mudder Mini LED Flashlights, showcasing the compact design.
2. Product Components
The Mudder Mini LED Flashlight features a robust design for various applications. Familiarize yourself with its key parts:
- Convex Lens: For adjustable focus.
- Cooling Fins: Designed to dissipate heat.
- Belt Clip: For convenient portability.
- Tail Cover: Houses the power button and battery spring.
- Attack Head: The front part of the flashlight.

Image 2.1: An illustration detailing the various components of the flashlight, including the convex lens, cooling fins, belt clip, and tail cover.
3. Setup and Battery Installation
The Mudder Mini LED Flashlight requires one 3.7V battery (e.g., 14500 Lithium Ion) for operation. Batteries are not included and must be purchased separately. This flashlight is not rechargeable; the battery itself may be rechargeable, but the flashlight unit does not have a charging port.
- Unscrew the Tail Cover: Gently twist the tail cover counter-clockwise to remove it from the flashlight body.
- Insert Battery: Insert one 3.7V battery (e.g., 14500 Li-ion) into the battery compartment with the positive (+) end facing towards the flashlight head (away from the tail cover).
- Secure Tail Cover: Screw the tail cover back onto the flashlight body clockwise until it is firmly secured. Ensure it is tightened to maintain water resistance.

Image 3.1: The flashlight with its tail cap removed, showing the battery compartment ready for battery insertion.
4. Operating Instructions
4.1 Power On/Off and Mode Selection
The flashlight features three lighting modes: High, Low, and Strobe.
- To Turn On/Off: Fully press the orange button on the tail cover until it clicks.
- To Change Modes: With the flashlight on, lightly press the button (half-press) without clicking it off. Each half-press will cycle through the modes: High → Low → Strobe.
4.2 Adjustable Focus (Zoomable Design)
The flashlight's head can be adjusted to change the beam focus from a wide floodlight to a narrow spotlight.
- For Floodlight: Pull the flashlight head backward (away from the body).
- For Spotlight: Push the flashlight head forward (towards the body).
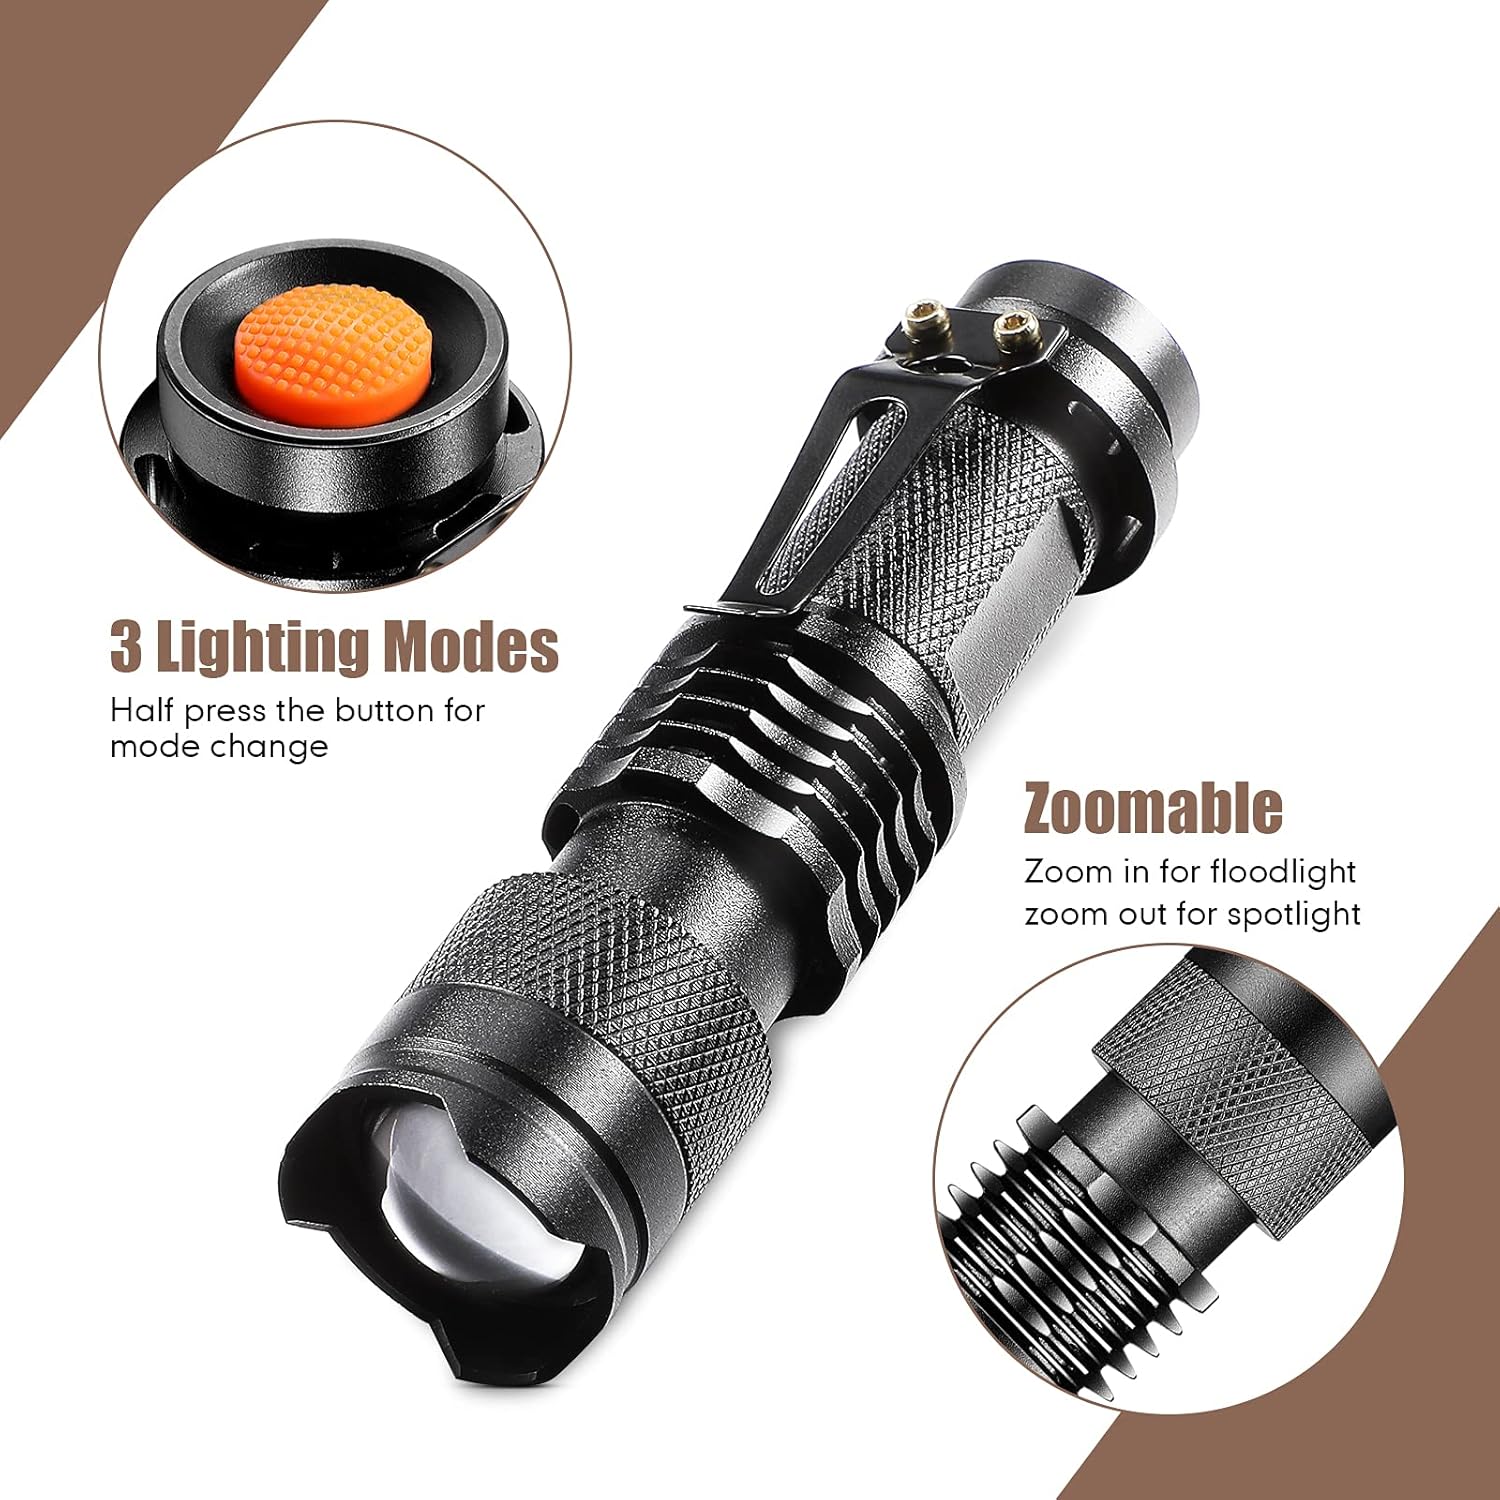
Image 4.1: An illustration demonstrating the three lighting modes (High, Low, Strobe) and the zoomable function of the flashlight head.
4.3 Using the Belt Clip
The integrated belt clip allows for convenient attachment to clothing, belts, or gear.
- Simply slide the clip over the edge of your pocket, belt, or backpack strap to secure the flashlight.

Image 4.2: A hand holding the flashlight, with an inset showing the flashlight clipped to a pocket, demonstrating its portability.
5. Maintenance
5.1 Cleaning
- Wipe the flashlight body with a soft, damp cloth.
- Do not use abrasive cleaners or solvents, as these may damage the aluminum alloy finish.
- Keep the lens clean for optimal light output. Use a lens cleaning cloth if necessary.
5.2 Battery Replacement
- Replace the 3.7V battery when the light becomes dim or fails to turn on.
- Follow the battery installation steps in Section 3.
- Always dispose of used batteries responsibly according to local regulations.
5.3 Water Resistance
The flashlight features a waterproof design, making it suitable for use in various weather conditions. However, it is not designed for submersion. Ensure the tail cover is tightly secured to maintain water resistance.

Image 5.1: The flashlight shown on a wet surface, illustrating its waterproof capability for use in diverse environments.
6. Troubleshooting
| Problem | Possible Cause | Solution |
|---|---|---|
| Flashlight does not turn on. | Battery is dead or incorrectly inserted. | Replace battery or re-insert with correct polarity. |
| Light is dim or flickers. | Low battery power. Loose tail cap. | Replace battery. Tighten the tail cap. |
| Cannot change lighting modes. | Button not half-pressed correctly. | Ensure a light, quick half-press of the tail button to cycle modes. |
| Focus adjustment is stiff. | Dirt or debris in the sliding mechanism. | Gently clean the exterior of the flashlight head. Avoid forcing the mechanism. |
7. Specifications
| Feature | Specification |
|---|---|
| Model Number | Mudder-t-5048 |
| Dimensions (L x W x H) | 3.58" x 0.98" x 0.98" (9.09 cm x 2.49 cm x 2.49 cm) |
| Weight | Approximately 0.93 Pounds (for 10 units) / 14.9 ounces (for 10 units) |
| Material | Aluminum Alloy |
| Light Source Type | LED |
| Power Source | Battery Powered (1 x 3.7V battery, not included) |
| Battery Cell Composition | Lithium Ion (e.g., 14500 type) |
| Lighting Modes | High, Low, Strobe |
| Special Features | Adjustable Focus (Zoomable), Waterproof, Sturdy Design |
| Included Components | 10 x Mini Flashlights |
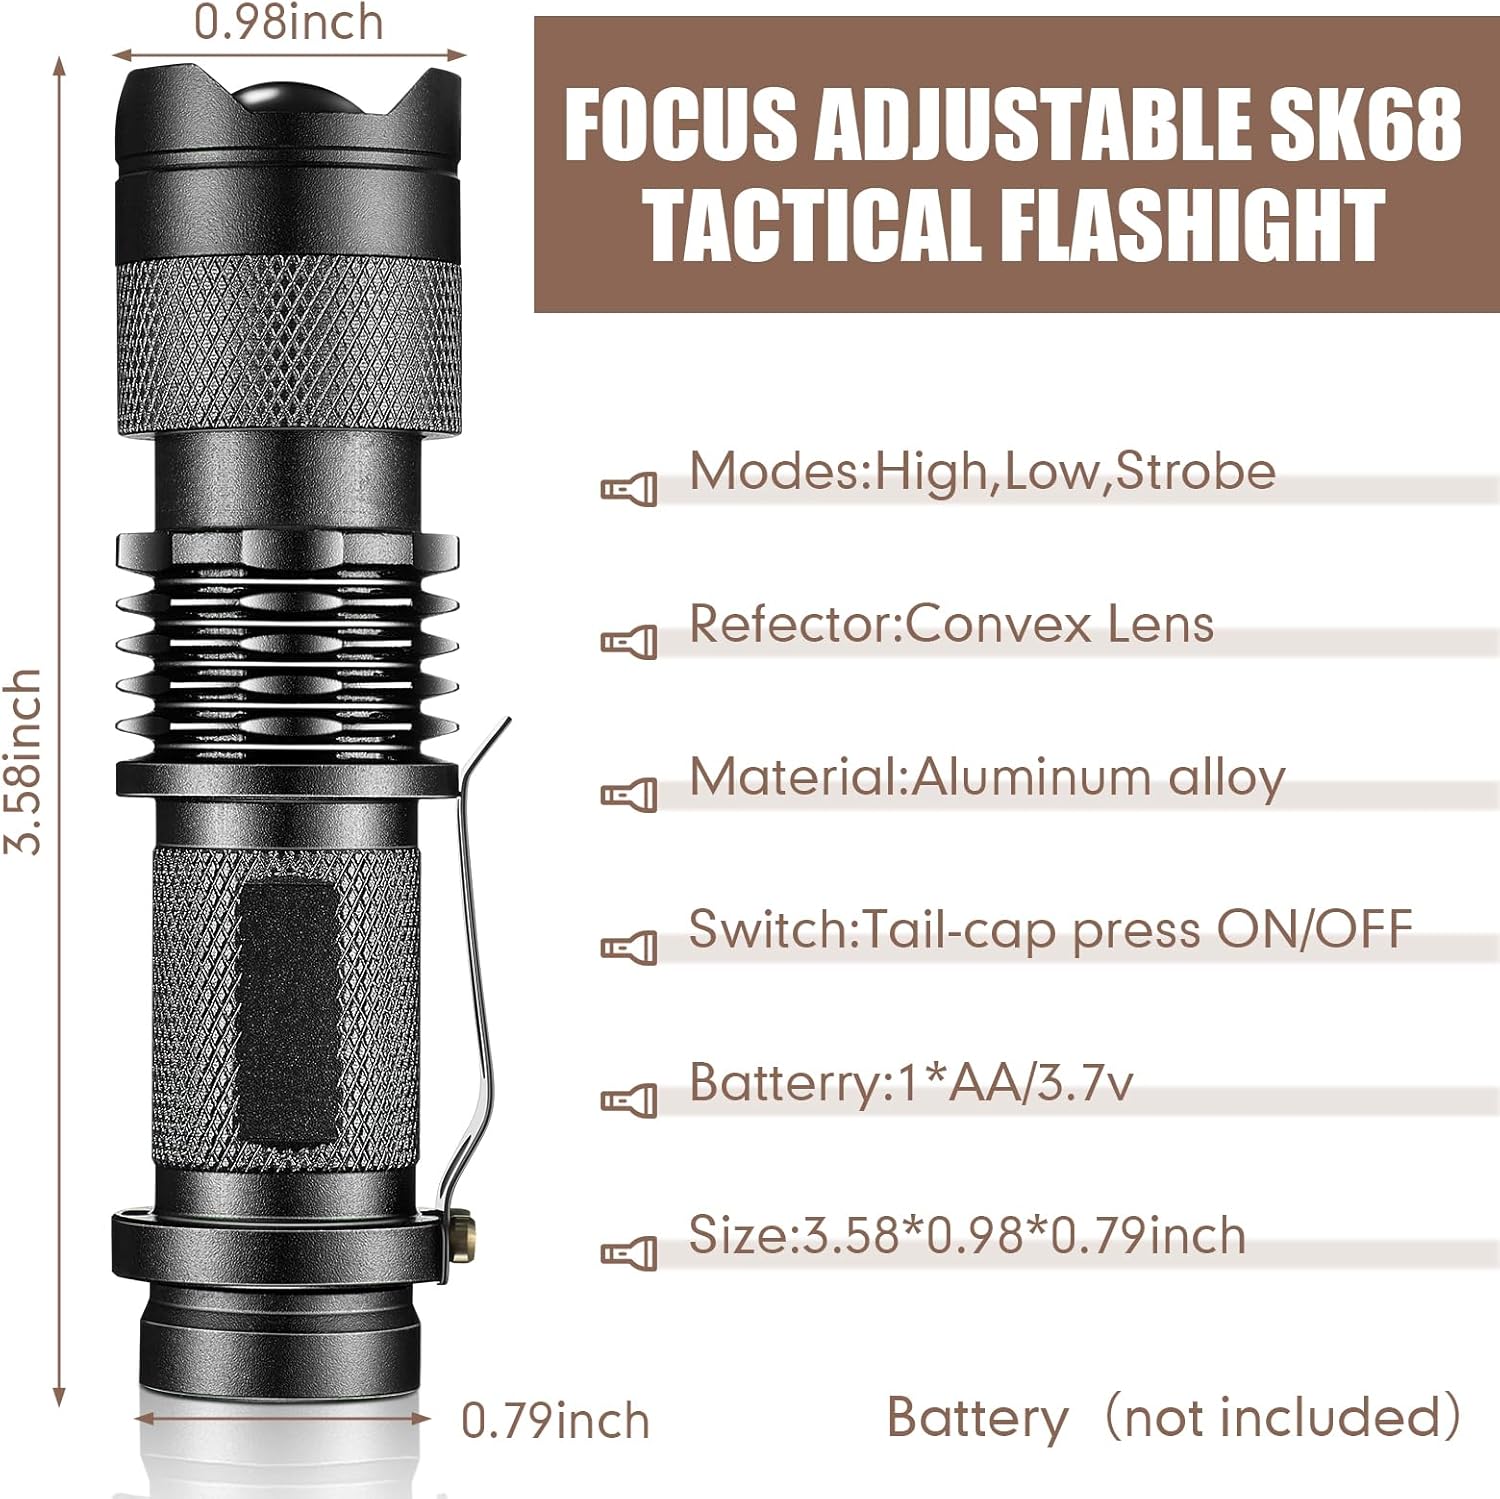
Image 7.1: A visual representation of the flashlight's dimensions and key specifications, including modes, material, and battery type.
8. Important Safety Information
- Do not look directly into the LED light when it is on, as it can cause temporary vision impairment.
- Keep out of reach of children.
- Ensure correct battery polarity during installation.
- Remove batteries if the flashlight will not be used for an extended period to prevent leakage.
- Do not mix old and new batteries, or different types of batteries.
9. Warranty and Support
Specific warranty details for the Mudder Mini LED Flashlight are not provided in this manual. For information regarding warranty, returns, or technical support, please refer to your purchase documentation or contact the retailer directly. You may also visit the official Mudder store on Amazon for general brand information: Mudder Store.