1. Product Overview
The CLSR2U 25-2 Trimmer Head is a replacement bump feed head designed for various Stihl FS series string trimmers. This durable plastic head comes pre-loaded with trimmer line and is engineered for ease of installation and reliable performance in trimming applications. It accommodates 0.080", 0.095", or 0.105" line sizes.

Image 1.1: The CLSR2U 25-2 Trimmer Head, showing the main unit, two eyelets, and two springs.
2. Safety Information
WARNING: Always prioritize safety when operating power tools.
- Always wear safety glasses, long pants, and closed-toe shoes when using a string trimmer.
- Avoid trimming near people, pets, or flammable materials to prevent injury or damage.
- Ensure the trimmer is turned off and the spark plug cap is removed before performing any maintenance or installation.
- Read and understand the safety instructions provided with your Stihl string trimmer before using this replacement head.
3. Compatibility
This 25-2 Trimmer Head is compatible with a wide range of Stihl string trimmer models. It replaces Stihl part numbers 4002 710 2108, 4002 710 2191, and 4002 710 2168.
Compatible Stihl Models:
- FS110, FS250, FS90R, FS55R, FS85, FS76
- FS100, FS106, FS108, FS100RX, FS120, FS130
- FS200, FS350, FS450, KM55, KM85, KM90, FR106
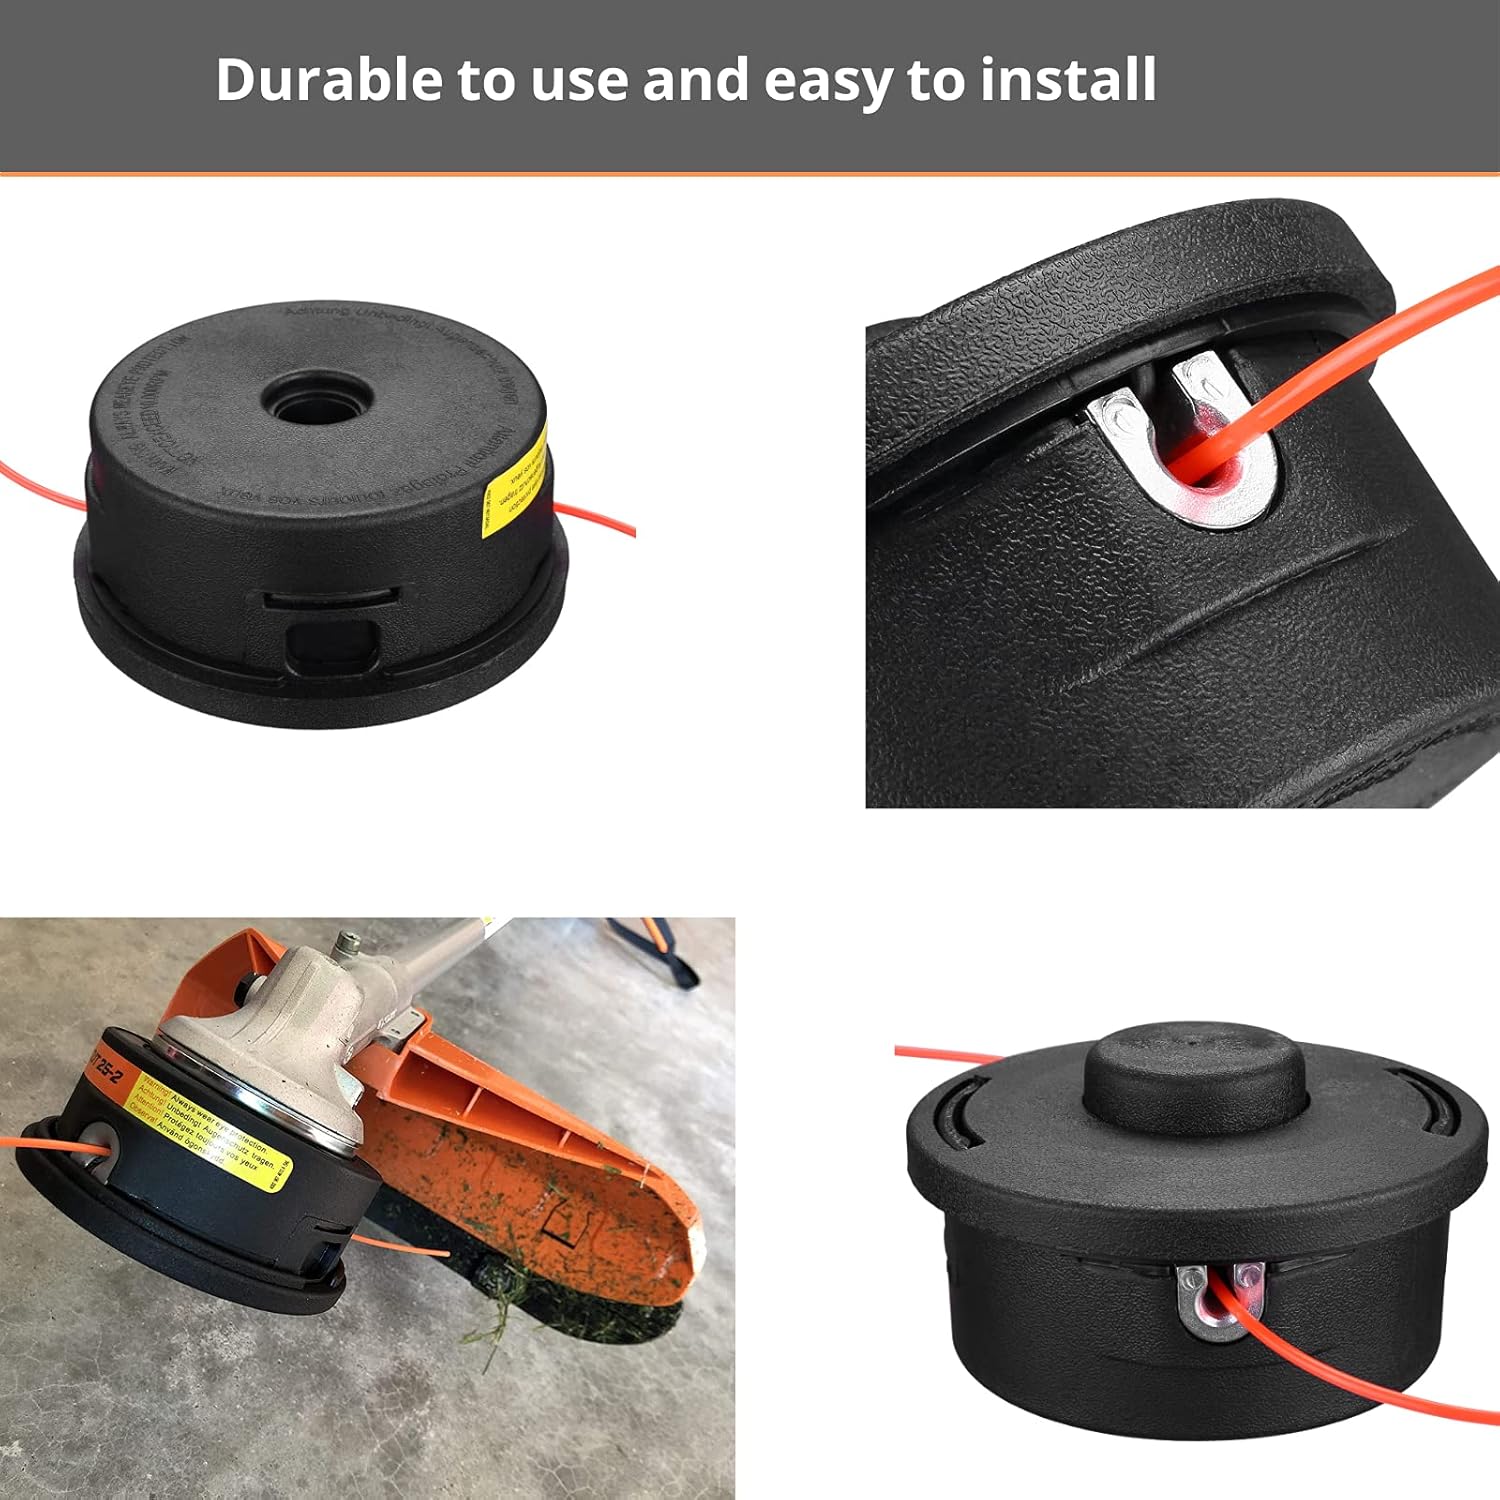
Image 3.1: Visual representation of the trimmer head and its components, including a close-up of the line eyelet and the head mounted on a trimmer.
4. Package Contents
Upon opening the package, verify that all components are present:
- 1 x 25-2 Bump Feed Trimmer Head (pre-loaded with trimmer line)
- 2 x Eyelets
- 2 x Springs
The trimmer head has an arbor size of 10mm x 1.0 LHF (Left Hand Thread).
5. Installation Instructions
Follow these steps to install the CLSR2U 25-2 Trimmer Head on your Stihl string trimmer:
- Prepare the Trimmer: Ensure the trimmer engine is off and cool. Disconnect the spark plug wire to prevent accidental starting.
- Remove Old Trimmer Head:
- Locate the locking hole on the gearhead of your trimmer. Insert a small screwdriver or pin into this hole to lock the shaft.
- Rotate the old trimmer head clockwise to loosen and remove it. Most Stihl trimmer heads have a left-hand thread.
- Install New Trimmer Head:
- Align the new CLSR2U 25-2 Trimmer Head with the threaded shaft.
- While holding the shaft locked, thread the new trimmer head onto the shaft counter-clockwise until it is securely tightened.
- Remove the locking pin/screwdriver.
- Verify Installation: Gently tug on the trimmer head to ensure it is firmly attached and does not wobble.

Image 5.1: Illustration showing the trimmer head being attached to the gearhead of a string trimmer.
6. Operating Instructions
The CLSR2U 25-2 Trimmer Head features a bump feed mechanism for line advancement.
- Starting the Trimmer: Follow your Stihl trimmer's manufacturer instructions for starting the engine.
- Advancing Trimmer Line:
- While the trimmer engine is running at operating speed, gently tap the bump knob on the bottom of the trimmer head against firm ground.
- This action will release a small amount of new trimmer line. The cutting blade on your trimmer's guard will automatically trim the line to the correct length.
- Avoid excessive force when bumping, as this can damage the head or feed too much line.
- Trimming Technique:
- Maintain a safe distance from objects and people.
- Use a sweeping motion to cut grass and weeds.
- Do not attempt to cut thick brush or small trees with the string trimmer.

Image 6.1: A close-up of the trimmer head in action, demonstrating the line extending from the head.
7. Maintenance
Regular maintenance ensures optimal performance and extends the life of your trimmer head.
- Cleaning: After each use, clean the trimmer head to remove grass clippings, dirt, and debris. This prevents buildup that can hinder line advancement.
- Line Replacement: When the pre-loaded line runs out, replace it with new trimmer line. This head accommodates 0.080", 0.095", or 0.105" diameter line. Refer to your Stihl trimmer manual for recommended line types.
- Inspecting Components: Periodically inspect the eyelets, springs, and the housing for wear or damage. Replace any worn or broken parts immediately.
- Storage: Store the trimmer head in a clean, dry place away from direct sunlight and extreme temperatures.
Replacing Trimmer Line:
- Ensure the trimmer is off and the spark plug wire is disconnected.
- Press the tabs on the side of the trimmer head and pull the cover off.
- Remove the empty spool.
- Wind new trimmer line onto the spool according to the arrows or instructions on the spool. Ensure the line is wound tightly and evenly.
- Feed the ends of the line through the eyelets on the trimmer head housing.
- Place the spool back into the housing, ensuring the springs are correctly seated.
- Reattach the cover, ensuring it clicks securely into place.

Image 7.1: A detailed view of the trimmer line properly fed through the eyelet of the trimmer head.
8. Troubleshooting
| Problem | Possible Cause | Solution |
|---|---|---|
| Line does not advance when bumped. |
|
|
| Trimmer head vibrates excessively. |
|
|
| Line breaks frequently. |
|
|
9. Specifications
| Feature | Detail |
|---|---|
| Brand | CLSR2U |
| Model Number | 25-2 |
| Compatible Line Sizes | 0.080", 0.095", 0.105" |
| Arbor Size | 10mm x 1.0 LHF |
| Material | Plastic |
| Item Weight | 13.1 ounces (0.37 Kilograms) |
| Product Dimensions | 2.8 x 4 x 4 inches |
| Replaces Part Numbers | 4002 710 2108, 4002 710 2191, 4002 710 2168 |
10. Warranty and Support
CLSR2U is committed to providing high-quality products. For any questions regarding installation, operation, or troubleshooting of your 25-2 Trimmer Head, please contact CLSR2U customer support.
While specific warranty details are not provided in this manual, please retain your proof of purchase for any warranty claims. For further assistance, visit the official CLSR2U store or contact their customer service department.
CLSR2U Brand Store: Visit CLSR2U Store on Amazon