1. Introduction
This manual provides essential information for the installation, operation, and maintenance of the AZ4U Dryer Heating Element Assembly. This replacement part is designed to restore proper heating function to compatible Samsung dryers, addressing issues such as no heat, insufficient heat, or prolonged drying times. Please read this manual thoroughly before attempting any installation or repair.
2. Safety Information
WARNING: Disconnect power to the dryer before attempting any service or repair. Failure to do so can result in serious injury or death from electrical shock.
- Always wear appropriate personal protective equipment, including gloves and eye protection.
- Ensure the work area is well-lit and clear of obstructions.
- If you are unsure about any step, consult a qualified appliance technician.
- Keep children and pets away from the work area.
3. Package Contents
The AZ4U Dryer Heating Element Assembly kit typically includes the following components:
- Dryer Heating Element (5300W)
- High-Limit Thermostat (L260-50F)
- Thermal Fuse
- Dryer Thermistor
- Installation Brackets (as pictured)
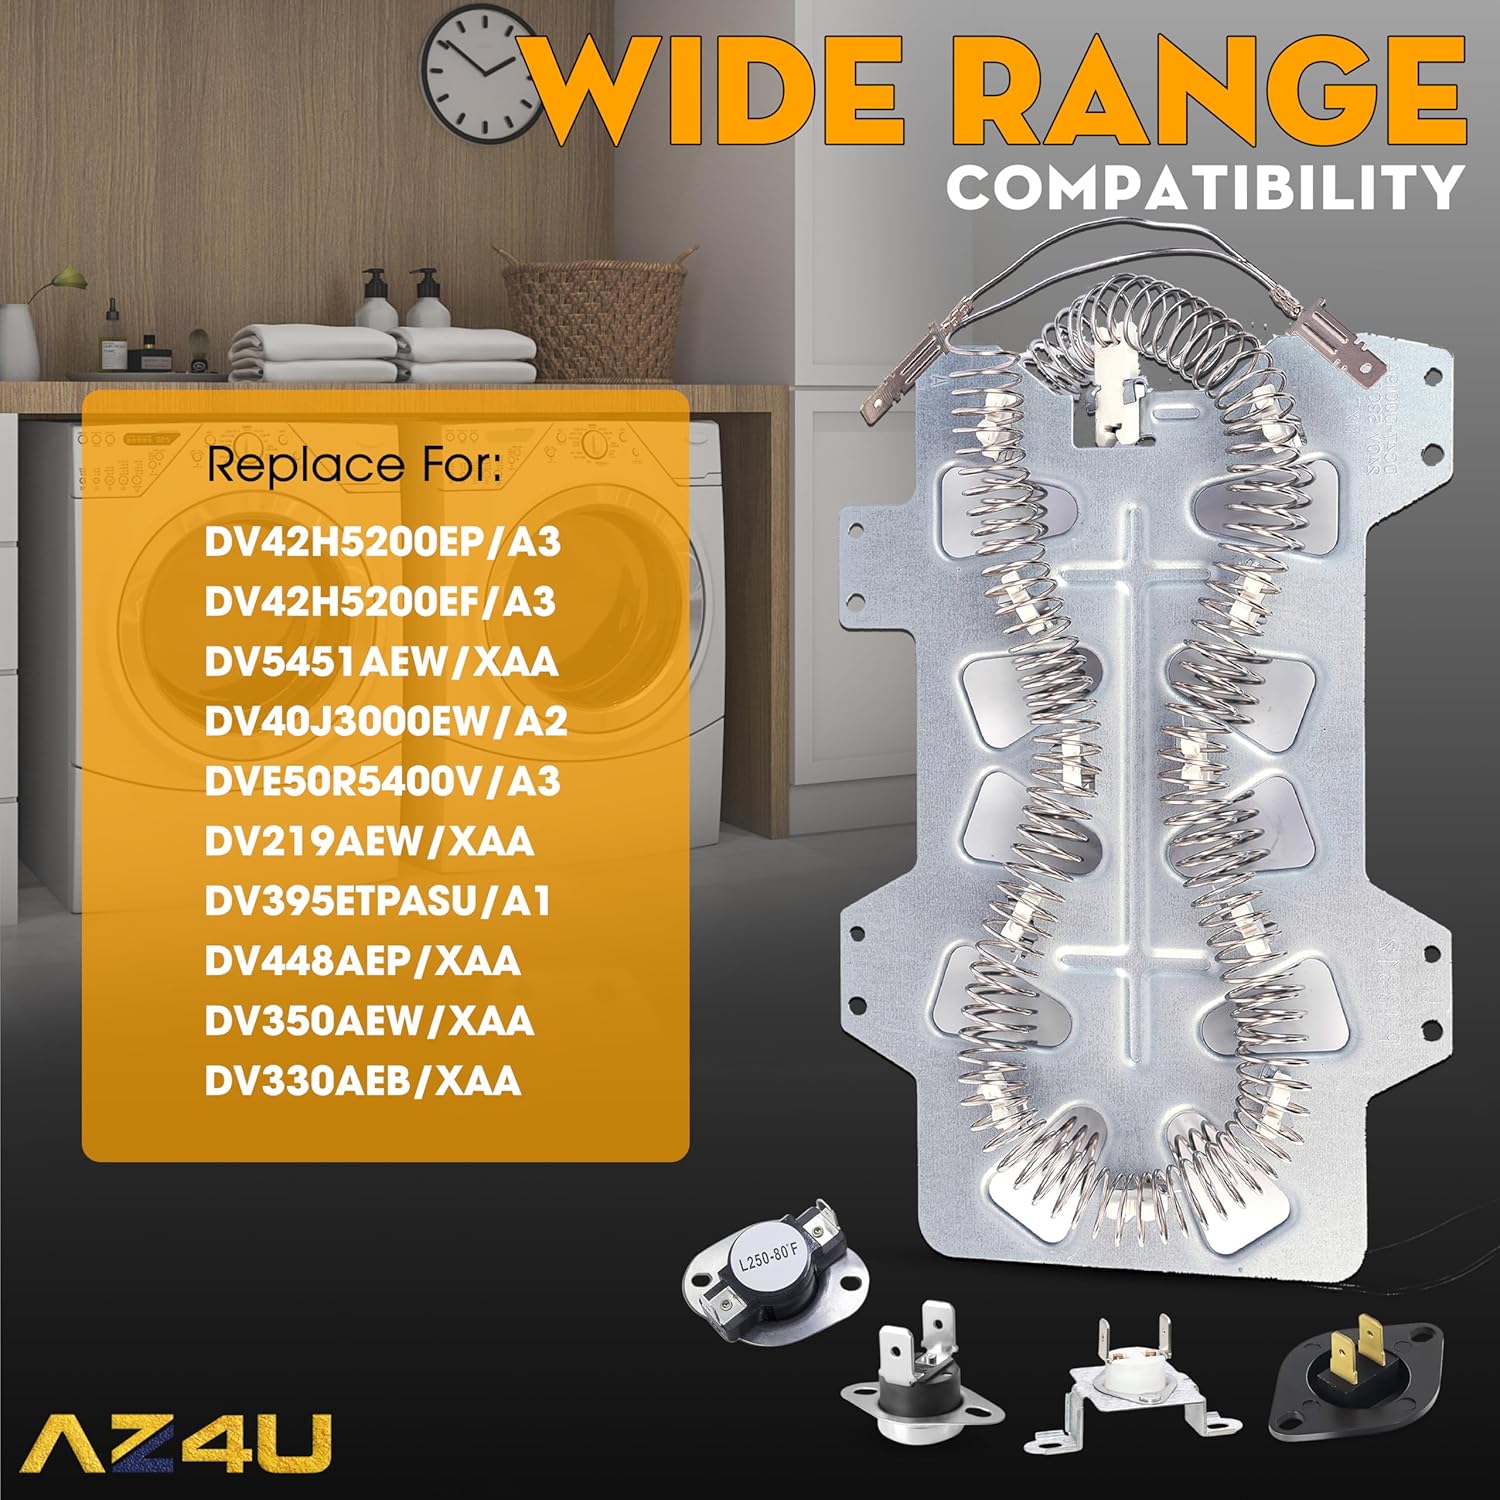
Image: Complete kit showing the heating element and various sensors.

Image: Detailed view of the high-limit thermostat, thermal fuse, and thermistor.
4. Compatibility
This heating element assembly is a replacement part compatible with a broad range of Samsung dryer models, as well as some Maytag, Amana, Whirlpool, Sears, Kenmore, Kitchen-Aid, and Roper models. It replaces popular parts including DC47-00019A, DC47-00018A, DC96-00887A, DC47-00016A, AP4201899, AP4045884, AP4201898, 35001119, 1185561, DC68-03784D-08, and ERDC47-00019A.
Key Compatible Samsung Models include:
- DV42H5200EP/A3, DV42H5200EF/A3, DV5451AEW/XAA, DV40J3000EW/A2, DVE50R5400V/A3, DV219AEW/XAA, DV395ETPASU/A1, DV448AEP/XAA, DV350AEW/XAA, DV330AEB/XAA
- DV42H5000EW/A3, DV45H7000EW/A2, DV42H5200EW/A3, DVE50M7450W/A3, DV48H7400EW/A2, DV40J3000EW, DV42H5000ES, DV331AER/XAA, DV5471AEP/XAA, DV56H9000EP/A2, DV331AEW/XAA, DV419AEW/XAA, DV50F9A6EVW/A2, DV361EWBEWR/A3, DV393ETPAWR/A1, DV407AEW/XAA, DV45H7000EP/A3, DVE50M7450W/A3, DV393ETPAWR/A1, DV42H5000EW/A3, DV48H7400EW/A2, DV363EWBEUF/A1, DV42H5200EW/A3
- DV330AEW, DV330AEW/XAA, DV337AEG/XAA, DV337AEL, DV337AEL/XAA, DV337AER/XAA, DV337AEW/XAA, DV338AEB/XAA, DV338AEW/XAA, DV350AEP/XAA, DV350AER/XAA, DV363EWBEUFA1, DV365ETBGWR, DV365ETBGWR/A3, DV36J4000EW/A3, DV393ETPARA/A1, DV393ETPAWRA1, DV393GTPARA/A1, DV395ETPARA/A1, DV395ETPASU/A1, DV395ETPAWR/A1, DV395ETPAWRA1, DV400EWHDWR/AA, DV405ETPASU/AA, DV405ETPAWR/AA, DV407AEW/XAA, DV409AER
- DV203AEW/XAA, DV209AEW/XAA, DV210AES, DV210AEW, DV210AEW/XAA, DV210AEW/XAC, DV210AEWXAA, DV218AEB/XAA, DV218AEW/XAA, DV219AEB/XAA, DV220AEW, DV220AEW/XAA, DV231AEW/XAA, DV306LEW/XAA, DV328AEG/XAA, DV328AER/XAA, DV328AEW/XAA
If you are unsure about compatibility, please contact the manufacturer for advice.

Image: Heating element with a list of compatible models.
5. Installation Instructions
Replacing a dryer heating element requires careful attention to detail. The following steps provide a general overview. For detailed, model-specific instructions, it is recommended to consult your dryer's service manual or a reputable online video tutorial.
- Disconnect Power: Unplug the dryer from the electrical outlet or turn off the circuit breaker supplying power to the dryer.
- Access the Heating Element: Depending on your dryer model, you may need to remove the back panel, front panel, or top panel to access the heating element housing.
- Remove Old Heating Element: Disconnect the wires from the old heating element and carefully remove it from its housing. Note the position and connection of all components (thermostats, thermal fuses, thermistor).
- Install New Components:
- Install the new heating element into the housing.
- Attach the new high-limit thermostat, thermal fuse, and thermistor to their respective locations, ensuring secure connections.
- Connect the wiring to the new components, matching the original configuration.
- Reassemble Dryer: Reattach any panels or parts that were removed during disassembly. Ensure all screws are tightened and panels are securely in place.
- Warm Tips for Installation:
- Do not let the nickel-chromium wire of the heating element contact the metal shell during installation.
- Ensure all connecting wires, especially those for the thermostat, are secure and not loose. This helps ensure proper function and longevity.

Image: The complete heating element assembly.
Video: Overview of the AZ4U Dryer Heating Element, highlighting its features and components. This video provides a visual guide to the product.
Video: Detailed look at the heating element and its compatibility with Samsung models like DV42H5200EP/A3 and DV42H5200EF/A3.
6. Post-Installation Check
After installation, perform the following checks to ensure proper operation:
- Plug the dryer back into the electrical outlet or restore power at the circuit breaker.
- Run a short cycle with a few damp items.
- Verify that the dryer heats up properly and that the clothes are drying efficiently.
- Listen for any unusual noises or observe any abnormal operation.
7. Maintenance
To prolong the life of your dryer and its heating element, regular maintenance is recommended:
- Clean Lint Trap: Clean the lint trap before every load to ensure proper airflow and prevent overheating.
- Inspect Venting: Periodically check and clean the dryer vent hose and external vent to prevent lint buildup, which can restrict airflow and cause the heating element to overwork or fail prematurely.
- Avoid Overloading: Do not overload the dryer, as this can strain components and lead to inefficient drying.
8. Troubleshooting Common Issues
This heating element assembly is designed to address several common dryer problems:
- Dryer Will Not Start: While often related to other components, a faulty thermal fuse (included in this kit) can prevent the dryer from starting.
- Dryer Shuts Off Too Soon: This can be caused by an overheating issue, often related to a faulty high-limit thermostat or restricted airflow.
- Takes Too Long To Dry: Insufficient heat output from a failing heating element or a malfunctioning thermistor can lead to extended drying times.
- No Heat or Not Enough Heat: The most direct symptom of a faulty heating element. This replacement kit provides a new heating coil and associated sensors to restore proper heat.

Image: Visual guide to common dryer issues addressed by this replacement part.
Video: Demonstrates the dryer heating element and its function in resolving common dryer heating problems.
9. Specifications
| Feature | Detail |
|---|---|
| Manufacturer | AZ4U |
| Part Number | DV42H5000EW/A3 DV393ETPAWR/A1 (and others) |
| Item Weight | 1.12 pounds |
| Product Dimensions | 2 x 4 x 7 inches |
| Item Model Number | dv42h5200ep/a3, dv50f9a6evw a2 |
| Material | 95% Nickel-chromium |
| Voltage | 240 Volts |
| Included Components | Heating element, high-limit thermostat, thermal fuse, thermistor, installation brackets |
10. Warranty and Support
This product comes with a 30-day warranty. For any questions regarding compatibility, installation, or product performance, please contact AZ4U customer support. We are committed to providing quality parts and support to ensure your satisfaction.
Customer Support: Available within 30 days from the date of purchase.
Video: Provides an overview of the dryer heating element thermostat and its role in dryer operation.


