Introduction
This manual provides comprehensive instructions for the installation, operation, and maintenance of your Good Earth Lighting Jordan 11-inch LED Flush Mount fixture. Please read all instructions carefully before beginning installation and retain this manual for future reference. This fixture is designed for indoor use in damp locations such as bathrooms, bedrooms, hallways, or kitchens.

Image: Good Earth Lighting Jordan 11-inch LED Flush Mount fixture in satin nickel finish.
Safety Information
WARNING: RISK OF ELECTRIC SHOCK.
- Always turn off power at the circuit breaker or fuse panel before installing or servicing the fixture.
- Consult a qualified electrician if you are unsure about the installation process.
- Ensure all electrical connections are made in accordance with local codes and ordinances.
- Do not attempt to alter the fixture in any way.
- This fixture is designed for 120V operation.
- Do not use with dimmers not specified as compatible.
Package Contents
Verify that all components are present before beginning installation:
- LED Flush Mount Fixture (with integrated LED lights)
- Diffuser
- Decorative Ring
- Mounting Bracket
- Post Caps (3)
- Wire Nuts
- Box Screws

Image: Exploded view of the fixture showing the main body, diffuser, and decorative ring.
Installation Instructions
Follow these steps for proper installation of your LED flush mount fixture:
- Turn Off Power: Before starting any electrical work, shut off power to the electrical box at the circuit breaker or fuse panel.
- Disassemble Fixture: Carefully remove the three post caps, then lift off the diffuser and the decorative ring. Set these components aside in a safe place.
- Attach Mounting Bracket: Secure the mounting bracket to the electrical box using the two provided box screws. Ensure it is firmly attached.
- Wire Connections:
- Connect the J-box ground wire (green or copper) with the fixture ground wire using a wire nut.
- Connect the black supply lead to the black fixture wire using a wire nut.
- Connect the white supply lead to the white fixture wire using a wire nut.
- Push Excess Wire: Gently push any excess wire up into the J-box.
- Mount Fixture: Lift the fixture up to the ceiling. Carefully guide the threaded tube on the fixture through the center hole of the mounting bracket.
- Secure Fixture: Secure the fixture to the electrical box by tightening down the cap nut and washer onto the threaded tube. Do not overtighten.
- Reassemble Diffuser and Ring: Align the three holes in the decorative ring with the three posts on the fixture pan. Place the diffuser inside the decorative ring.
- Secure with Post Caps: Secure the diffuser and decorative ring by screwing the three post caps back onto the posts.
- Restore Power: Restore power to the electrical box and test the fixture to ensure it is working properly.
Video: Official installation guide for the Good Earth Lighting Jordan Collection flush mount fixture. This video demonstrates the step-by-step process of mounting the light fixture to the ceiling, including wiring connections and reassembly.
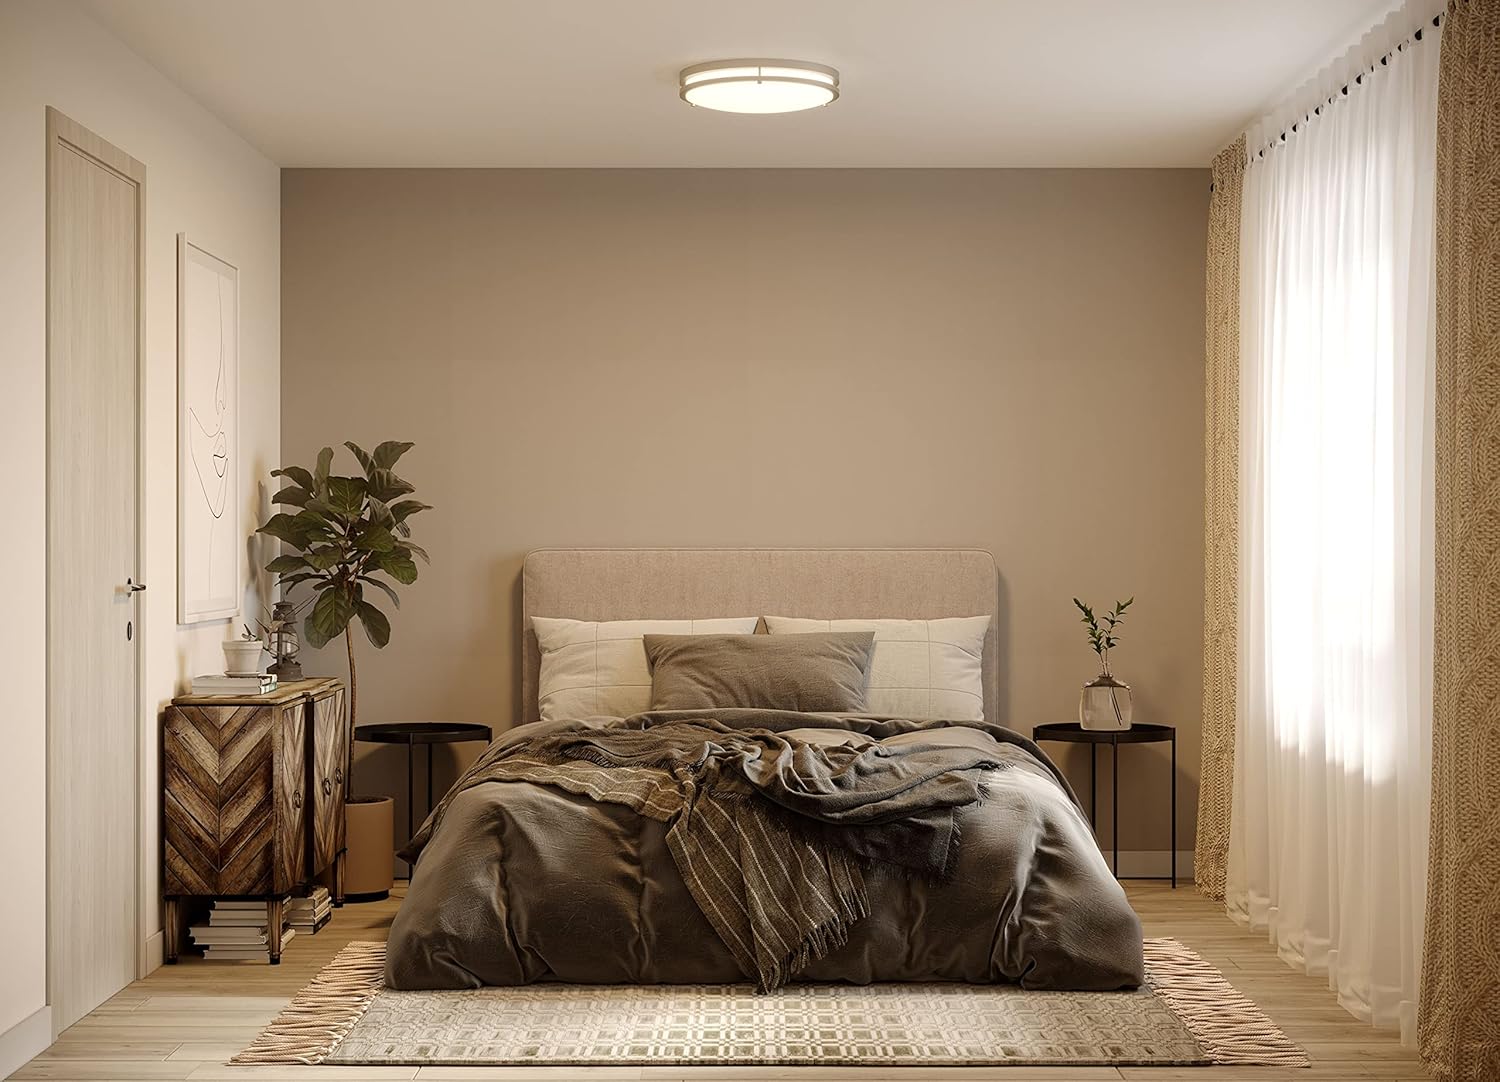
Image: The Jordan 11-inch LED Flush Mount fixture installed on a ceiling in a bedroom, providing ambient lighting.
Operating Instructions
The Good Earth Lighting Jordan 11-inch LED Flush Mount fixture is designed for simple operation.
- Power On/Off: Use a standard wall switch to turn the fixture on or off.
- Dimmable Functionality: This fixture is dimmable between 15% to 100% brightness. It is compatible with most existing and new wall forward phase electronic (TRIAC) dimmers. Compatible dimmers include Lutron Diva CL (DVWCL-153P or DVCL-153P), Lumea CL (LGCL-153P), and Toggler CL (TGCL-153P8). Note that this list is not exhaustive, and compatibility with other dimmers is not guaranteed.
Maintenance
To ensure the longevity and optimal performance of your fixture, follow these simple maintenance guidelines:
- Cleaning: Disconnect power before cleaning. Use a soft, dry, or slightly damp cloth to wipe the exterior surfaces of the fixture. Avoid using abrasive cleaners, solvents, or polishes as they may damage the finish or electrical components.
- LED Care: The integrated LED lights are designed for long-lasting performance and do not require replacement. Do not attempt to open the sealed LED module.
Troubleshooting
If your fixture is not operating correctly, refer to the following common issues and solutions:
| Problem | Possible Cause | Solution |
|---|---|---|
| Light does not turn on | No power to fixture | Check circuit breaker or fuse. Ensure wall switch is ON. |
| Light flickers or dims improperly | Incompatible dimmer switch | Ensure a compatible forward phase electronic (TRIAC) dimmer is used. Refer to the 'Operating Instructions' section for compatible models. |
| Loose wire connections | Turn off power and check all wire connections for tightness. | |
| Light output is low | Dimmer setting too low | Adjust dimmer to a higher setting. |
If the problem persists after trying these solutions, contact customer support.
Specifications
| Feature | Detail |
|---|---|
| Brand | Good Earth Lighting |
| Model Number | FL1060-NK3-11LF0 |
| Size | 11 inches |
| Finish | Satin Nickel |
| Light Source | Integrated LED |
| Brightness | 1100 Lumens |
| Color Temperature | 3000K (Bright White) |
| Wattage | 20.73 watts |
| Voltage | 120 Volts |
| Dimmable | Yes (with compatible TRIAC dimmers) |
| Rated Lamp Life | 50,000 hours |
| Certification | ETL Listed |
| Indoor/Outdoor Usage | Indoor (Damp Location Rated) |

Image: Lighting Facts label detailing light output, wattage, color accuracy, and color temperature for the fixture.
Warranty & Support
Warranty: This Good Earth Lighting fixture is covered by a 10-year limited manufacturer warranty. Please refer to the warranty documentation included with your purchase for full terms and conditions.
Customer Support: For technical assistance, replacement parts, or warranty inquiries, please contact Good Earth Lighting customer service. Contact information can typically be found on the product packaging or the official Good Earth Lighting website.