
1. Product Overview
This BISONCOOK Gas Burner and Igniter Kit is designed as a replacement part for various Masterbuilt 30-inch gas smokers. It includes a durable stainless steel gas burner and an igniter kit to restore optimal performance to your smoker.
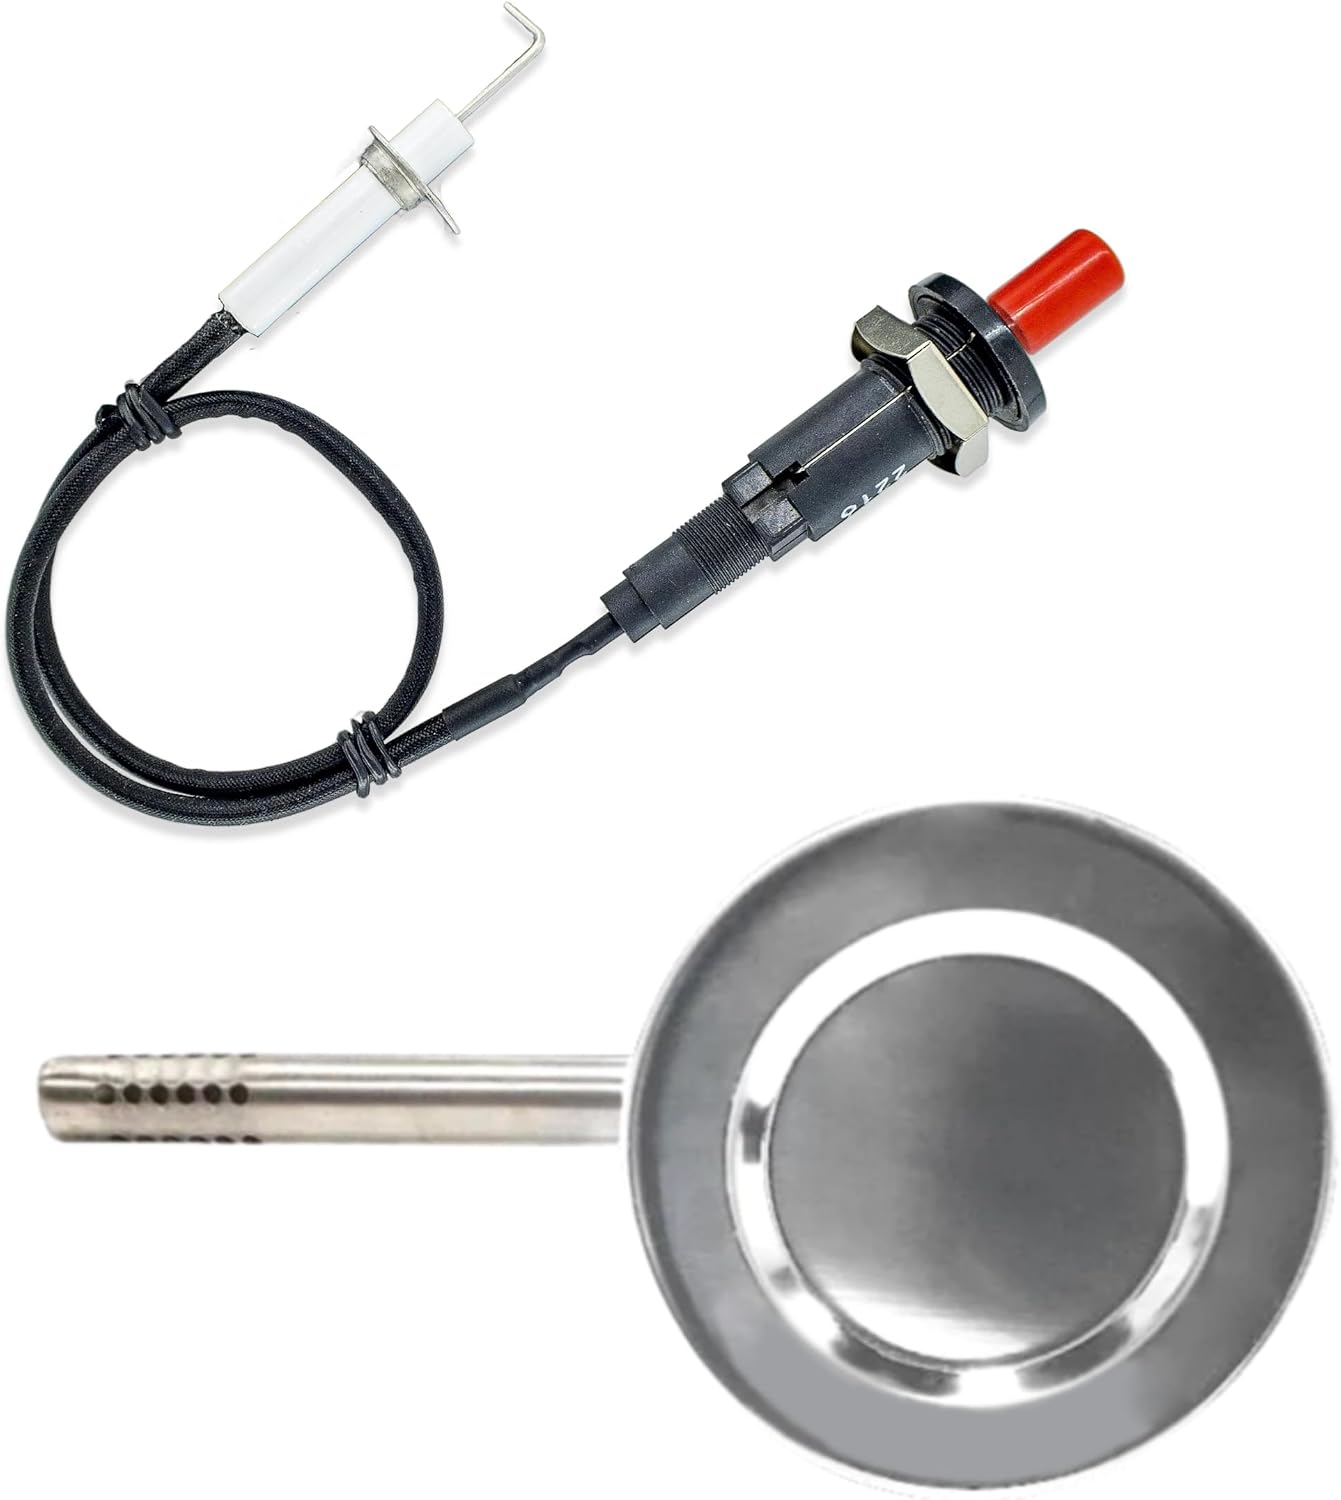
Image 1.1: Components of the BISONCOOK Gas Burner and Igniter Kit, showing the stainless steel burner and the igniter with its wire and button.
2. Compatibility
This replacement kit is compatible with a wide range of Masterbuilt 30-inch Gas Smokers. Please verify your smoker's model number against the list below to ensure compatibility.
Compatible Masterbuilt Models:
- 20050117
- 20050212
- 20050217
- 20050311
- 20050412
- 20050513
- 20050611
- 20050612
- 20050613
- 20050812
- 20050813
- 20051311
- MB20051311
- MB20052318
- MB21050813
- MB25050217 (John McLemore Signature Series 730-Sq in Black Gas Smoker)
- MB26050412
- MPS 230S PROPANE SMOKER
Replacement Part Number: 9005100011

Image 2.1: Visual guide indicating compatible and incompatible Masterbuilt smoker models for this burner replacement kit.
3. Setup and Installation
Replacing the gas burner and igniter in your Masterbuilt smoker is a straightforward process. Always ensure the smoker is cool, disconnected from the propane tank, and all gas valves are closed before beginning installation.
3.1 Safety Precautions
- Ensure the propane tank is disconnected and the gas supply is off.
- Allow the smoker to cool completely if it has been in use.
- Wear appropriate safety gear, such as gloves, if necessary.
- Keep away from children under 3 years old.
3.2 Installation Steps
- Access the Burner Area: Depending on your Masterbuilt smoker model, you may need to remove the drip pan, water pan, and cooking grates to access the burner compartment.
- Disconnect Old Igniter: Carefully disconnect the wire from the old igniter button.
- Remove Old Burner: Locate the screws securing the old burner in place. Unscrew them and carefully remove the old burner. Note its orientation for reinstallation.
- Install New Burner: Position the new BISONCOOK gas burner in the same orientation as the old one. Secure it with the provided screws.
- Install New Igniter: Replace the old igniter button with the new one. Connect the igniter wire to the new button. Ensure a secure connection.
- Reassemble Smoker: Once the burner and igniter are securely installed, reassemble any removed components (grates, pans).
- Leak Test: Before first use, perform a leak test on all gas connections using a soapy water solution. Bubbles indicate a leak.

Image 3.1: Comparison showing a dirty, old burner area (Before) and the clean, newly installed BISONCOOK burner (After) in a Masterbuilt smoker.

Image 3.2: Detailed view of the push-button igniter kit, demonstrating its function for quick and easy lighting of the fuel source.
4. Operating the Smoker (After Burner Replacement)
Once the new burner and igniter are installed, your Masterbuilt smoker should operate as intended. Refer to your original Masterbuilt smoker manual for detailed operating instructions. The BISONCOOK burner ensures efficient heat distribution for consistent smoking results.

Image 4.1: A Masterbuilt smoker in operation, showcasing the newly installed burner producing a consistent blue flame, indicating proper function.
5. Maintenance
Regular maintenance of your gas burner will extend its lifespan and ensure optimal performance of your smoker.
- Cleaning: Periodically inspect the burner for grease buildup or food debris. Clean with a wire brush or non-abrasive cleaner when the smoker is cool. Ensure air holes are clear.
- Igniter Check: Ensure the igniter electrode is clean and properly positioned to create a spark.
- Storage: If storing the smoker for an extended period, ensure the burner area is clean and dry.
6. Troubleshooting
If you encounter issues after replacing the burner, consider the following common troubleshooting steps:
| Problem | Possible Cause | Solution |
|---|---|---|
| Burner not lighting | No gas supply, igniter issue, clogged burner ports. | Check propane tank, ensure igniter wire is connected and sparking, clean burner ports. |
| Weak or yellow flame | Clogged burner ports, improper air mixture. | Clean burner ports. Ensure burner is seated correctly. |
| Gas smell | Gas leak. | Immediately turn off gas. Perform a leak test with soapy water on all connections. Tighten connections or replace faulty parts if necessary. Do not operate if a leak is detected. |
7. Specifications
- Product Type: Gas Burner and Igniter Kit
- Material: Stainless Steel (Burner)
- Power Source: Propane
- Heat Output: 15400 BTU (Burner)
- Burner Dimensions: Approximately 4 inches (diameter), 6.2 inches (length), 0.63 inches (inlet diameter)
- Item Weight: Approximately 0.26 Kilograms (9.1 ounces)
- UPC: 791107716559
- Replacement Part Number: 9005100011

Image 7.1: Detailed specifications of the stainless steel gas burner, including its BTU rating and key dimensions.
8. Warranty and Support
For any questions regarding installation, compatibility, or product performance, please contact BISONCOOK customer support. We are committed to providing assistance and ensuring your satisfaction.
Contact Information:
- Email: Refer to your purchase documentation or the seller's contact information on the platform where you purchased the product.
- Online Support: Search for installation videos on platforms like YouTube for visual guidance.
- Amazon Message: You can contact us directly via the Amazon messaging system for prompt assistance.
We aim to respond and resolve issues within 24 hours.