Introduction
This manual provides comprehensive instructions for assembling the Midwest Model Expo The Skiff (MID967) 1:12 Scale Wooden Ship Model Building Kit. The Skiff is a small utility boat, a flat-bottomed rowboat designed after a 19th-century vessel, making it an excellent project for those interested in small boat construction. This kit is designed to develop your skills and confidence in wood model ship building, step by step, towards more complex models.
The kit includes laser-cut basswood and mahogany parts, full-size rolled plans, and a detailed construction manual. Complete fittings such as Britannia Oarlocks and cordage are provided. The finished model measures approximately 8-5/8 inches in length and 3-1/8 inches in width.

Image: The completed Skiff model, as depicted on the kit box, showcasing its design and scale.
Before You Begin
Before starting assembly, ensure all kit contents are present and familiarize yourself with the construction manual. The manual combines photos, extensive explanations, assembly drawings, and parts lists to guide you through the building process.
Kit Contents Overview
The kit includes:
- Laser-cut basswood and mahogany parts for the hull, frames, transom, side planking, stem, and seats.
- Full-size rolled plans for detailed construction.
- Illustrated construction manual.
- Complete fittings set including Britannia Oarlocks and cordage.
- Materials for the oars and display stand.
Please check the parts list in your manual against the physical contents of the box to ensure nothing is missing. If any parts are missing or damaged, Model Expo offers lifetime replacements.
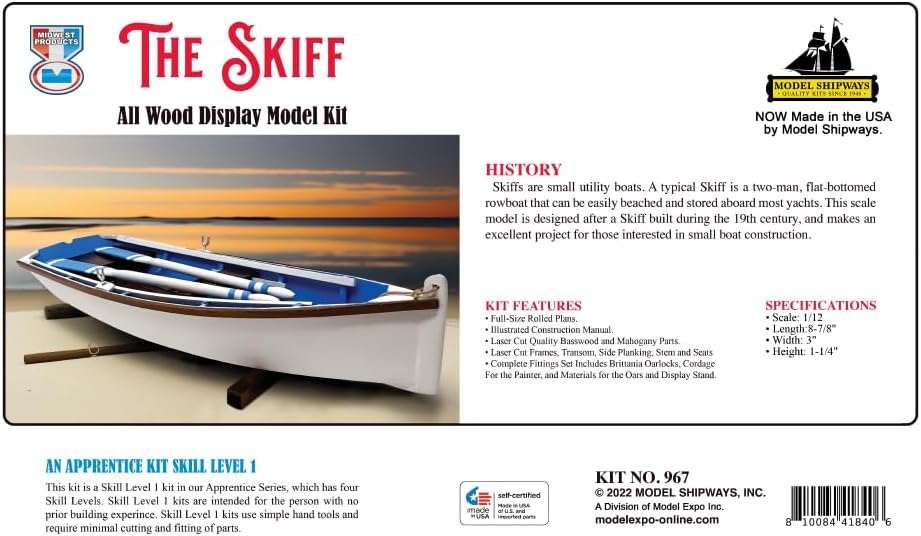
Image: An overview of the kit contents, including the manual, wooden sheets, and small parts.
Unboxing and Parts Identification
Watch this video for a visual guide to unboxing your Skiff model kit and identifying the various components.
Video: An unboxing of The Skiff model kit, demonstrating how to identify the various wooden parts and fittings included.
Assembly Instructions
Follow the steps below carefully. Refer to the provided plans and illustrations in your manual for detailed guidance. Each step is crucial for a successful build.
1. Preparing Wooden Parts
The kit includes laser-cut wooden sheets. Carefully remove each part from its sheet. Use a hobby knife or fine sandpaper to clean any small tabs or burrs left from the laser-cutting process. Ensure all edges are smooth before assembly.

Image: Laser-cut wooden parts ready for assembly.
2. Hull Assembly: Fairing and Planking
The hull assembly involves fairing the frames and attaching the bottom plank and side planks. Fairing ensures the correct curvature of the hull. Use a sanding block with 80-grit sandpaper to shape the edges of the frames and planks as indicated in the manual. Apply glue (CA adhesive is recommended) to secure parts firmly.

Image: Manual diagrams illustrating the fairing process for the hull.
3. Installing Internal Components
Once the hull is complete, install the internal components such as the floorboards, seats, and risers. These parts are also laser-cut for precise fit. Refer to the manual for exact placement and alignment.

Image: The interior of the assembled Skiff model, highlighting the floorboards and seats.
4. Finishing Touches: Oars and Fittings
Assemble the oars and attach the oarlocks. The kit includes Britannia oarlocks for a realistic finish. Secure any remaining small fittings and cordage as per the instructions.

Image: Detailed view of the oars and oarlocks on the finished model.
5. Painting and Display
The manual provides color scheme recommendations using Midwest Apprentice Boat Paint. You can choose to follow the suggested scheme or customize it to your preference. Once painted and dry, place the model on the provided display stand.

Image: The finished Skiff model displayed on its stand.
Specifications
- Model: The Skiff (MID967)
- Scale: 1:12
- Length: 8-5/8 inches
- Width: 3-1/8 inches
- Height: 1-1/4 inches
- Material: Basswood and Mahogany
- Recommended Age: Adult
- UPC: 810084410011
Maintenance
To ensure the longevity and appearance of your finished model, follow these general maintenance guidelines:
- Cleaning: Dust your model regularly with a soft, dry brush or cloth. Avoid using harsh chemicals or abrasive materials.
- Storage: Store the model in a stable environment, away from direct sunlight, extreme temperatures, and high humidity, which can cause wood warping or fading.
- Handling: Handle the model with care to prevent accidental damage to delicate parts.
Troubleshooting
Most issues during assembly can be resolved by carefully re-reading the instructions and examining the diagrams. If you encounter a problem that cannot be resolved, consider the following:
- Missing or Damaged Parts: Refer to the warranty section for information on obtaining replacement parts.
- Assembly Difficulties: Double-check the corresponding steps in the manual and on the plans. Sometimes a fresh look or a short break can help clarify the next step.
- Adhesive Issues: Ensure you are using the correct type of adhesive (e.g., CA glue) and applying it according to its instructions for proper bonding.
Warranty and Support
Lifetime Guarantee
Model Expo offers a lifetime guarantee on its kits. In case a piece gets lost or damaged during construction, we will replace it for free. This commitment ensures a smooth and enjoyable building experience.
Customer Service
Should you experience a problem with this kit or require assistance, we recommend you contact Model Expo directly. Our customer service team is available to help you with any questions or concerns.
Contact Information:
Model Expo
1155 NW 159th Dr, Miami Gardens, FL 33169
US: (800) 222-3876
Email: modelexpo@gmail.com
Model Expo has been manufacturing wood and metal kits for hobby enthusiasts since 1976, with all kits designed and made in America. Their manuals are known for combining photos, extensive explanations, assembly drawings, and parts lists in English to ensure a successful build.