1. Initial Setup
1.1 Unpacking the Printer
Carefully remove all packaging materials from the printer box. Ensure all components are present before proceeding.
- Remove the printer from its box.
- Remove all protective tapes and packing materials from the exterior and interior of the printer.
- Verify that the power cord and USB cable are included.

Figure 1.1: Canon PIXMA MG2522 printer and included cables.
1.2 Connecting the Printer
Connect the printer to a power source and your computer.
- Connect the power cord to the printer and then to a wall outlet.
- Connect the square end of the USB cable to the printer's USB port and the rectangular end to an available USB port on your computer.

Figure 1.2: USB and power connections on the printer.
1.3 Installing Ink Cartridges
Install the FINE cartridges into the printer.
- Open the printer's front cover. The cartridge holder will move to the center.
- Remove the protective tape from the ink cartridges.
- Insert the color cartridge into the left slot and the black cartridge into the right slot. Push firmly until they click into place.
- Close the front cover.
1.4 Loading Paper
Load paper into the rear paper tray.
- Open the paper support.
- Slide the paper guides to the edges.
- Load paper with the print side facing up. The printer supports plain paper, photo paper plus glossy II, photo paper glossy, and U.S. #10 envelopes.
- Adjust the paper guides to fit the paper snugly.

Figure 1.3: Loading paper into the rear paper tray.
1.5 Software Installation
Install the necessary drivers and software on your computer.
- Insert the setup CD-ROM (if included) into your computer's CD/DVD drive, or download the latest drivers from the official Canon website.
- Follow the on-screen instructions to complete the installation.
- The printer is compatible with Windows 10, 8.1, 8, 7, 7 SP1, Vista SP1, Vista SP2, XP SP3 32-bit, and Mac OS X v10.7.5 - 10.11.
2. Operating the Printer
2.1 Printing Documents
To print a document from your computer:
- Open the document you wish to print.
- Select Print from the application's File menu.
- Choose "Canon MG2522 series" as your printer.
- Adjust print settings (e.g., paper size, print quality) as needed.
- Click Print.
The printer offers approximate print speeds of 8.0 ipm for black and white, and 4.0 ipm for color documents. Maximum print resolution is 4800 x 600 dpi.
2.2 Copying Documents
To make a copy using the printer's control panel:
- Place the document face-down on the scanner glass, aligning it with the arrow mark.
- Close the document cover gently.
- Press the Black button for a black and white copy or the Color button for a color copy.
- To make multiple copies, press the desired copy button repeatedly for the number of copies required.
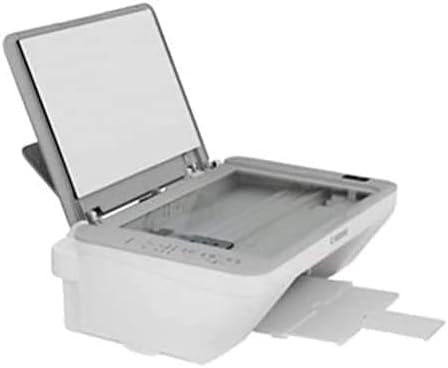
Figure 2.1: Scanner glass with document cover open.
2.3 Scanning Documents
To scan a document to your computer:
- Place the document face-down on the scanner glass.
- Open the scanning software on your computer (e.g., Canon IJ Scan Utility).
- Select the desired scan type (e.g., Photo, Document).
- Adjust scan settings as needed (e.g., resolution, color mode).
- Click Scan. The scanned image will be saved to your computer.
3. Maintenance and Care
3.1 Cleaning the Printer
Regular cleaning helps maintain print quality and extends the printer's lifespan.
- Wipe the exterior of the printer with a soft, damp, lint-free cloth.
- Clean the scanner glass regularly with a glass cleaner and a soft cloth. Avoid abrasive cleaners.
- Perform print head cleaning from the printer driver utility if print quality degrades (e.g., streaks, faded colors).
3.2 Replacing Ink Cartridges
Replace ink cartridges when they are empty or low to ensure continuous printing.
- Ensure the printer is powered on.
- Open the front cover. The cartridge holder will move to the replacement position.
- Press down on the empty cartridge to release it, then pull it out.
- Unpack the new cartridge, remove the protective tape, and insert it into the correct slot (color on left, black on right). Push until it clicks.
- Close the front cover.
3.3 Paper Jam Resolution
If a paper jam occurs, follow these steps:
- Turn off the printer and unplug the power cord.
- Gently pull out any visible jammed paper from the paper output slot or the rear tray.
- If paper is stuck inside, open the front cover and carefully remove any jammed paper.
- Ensure no torn pieces of paper remain inside the printer.
- Close all covers, plug in the power cord, and turn on the printer.
4. Troubleshooting Common Issues
This section provides solutions to common problems you may encounter.
| Problem | Possible Cause | Solution |
|---|---|---|
| Printer does not turn on. | Power cord not connected properly. | Ensure the power cord is securely connected to the printer and a working electrical outlet. |
| Printer not recognized by computer. | USB cable disconnected or drivers not installed. | Check USB cable connection. Reinstall printer drivers from the Canon website. |
| Poor print quality (streaks, faded). | Low ink, clogged print head, incorrect paper type. | Check ink levels and replace cartridges if low. Perform print head cleaning and nozzle check. Ensure correct paper type is selected in print settings. |
| Paper jam. | Paper loaded incorrectly, foreign object, excessive paper. | Refer to Section 3.3 "Paper Jam Resolution". |
| Error B200 (Print Head Error). | Print head malfunction. | Turn off the printer, unplug it, wait a few minutes, then plug it back in and turn it on. If the error persists, contact Canon support. |
5. Technical Specifications
| Feature | Detail |
|---|---|
| Printer Type | All-in-One Inkjet Printer (Print, Copy, Scan) |
| Model Series | Canon PIXMA 2522 Series |
| Model Number | MG2522 |
| Connectivity Technology | Hi-Speed USB |
| Print Speed (Black) | Approx. 8.0 ipm |
| Print Speed (Color) | Approx. 4.0 ipm |
| Print Resolution | Up to 4800 x 600 dpi |
| Supported Media Types | Plain Paper, Photo Paper Plus Glossy II, Photo Paper Glossy, U.S. #10 Envelopes |
| Supported Paper Sizes | 4 x 6, 5 x 7, Letter, Legal, U.S. #10 Envelopes |
| Paper Tray Capacity | Rear Paper Tray: 60 Sheets of Plain Paper OR 20 Sheets of 4 x 6 Glossy Photo Paper |
| Dimensions (W x D x H) | 16.8" x 12.1" x 5.8" |
| Weight | Approx. 7.6 lbs (10.6 lbs packaged) |
| OS Compatibility | Windows 10, 8.1, 8, 7, 7 SP1, Vista SP1, Vista SP2, XP SP3 32-bit; Mac OS X v10.7.5 - 10.11 |
6. Warranty and Support
6.1 Warranty Information
This Canon PIXMA MG2522 printer typically comes with a standard manufacturer's warranty. Please refer to the warranty card included in your product packaging or visit the official Canon website for specific terms, conditions, and duration of the warranty applicable in your region.
6.2 Customer Support
For technical assistance, troubleshooting beyond this manual, or service inquiries, please contact Canon customer support:
- Visit the official Canon support website: www.usa.canon.com/support
- Refer to the contact information provided in your product documentation.


