1. Important Safety Information
Always read and understand all safety warnings, instructions, illustrations, and specifications provided with this power tool. Failure to follow all instructions listed below may result in electric shock, fire, and/or serious injury.
- Work Area Safety: Keep your work area clean and well-lit. Cluttered or dark areas invite accidents. Do not operate power tools in explosive atmospheres, such as in the presence of flammable liquids, gases, or dust.
- Electrical Safety: Power tool plugs must match the outlet. Never modify the plug in any way. Do not expose power tools to rain or wet conditions. Water entering a power tool will increase the risk of electric shock.
- Personal Safety: Always wear eye protection. Use appropriate personal protective equipment such as dust masks, non-skid safety shoes, hard hats, or hearing protection for appropriate conditions. Stay alert, watch what you are doing, and use common sense when operating a power tool.
- Tool Use and Care: Do not force the power tool. Use the correct power tool for your application. Disconnect the plug from the power source before making any adjustments, changing accessories, or storing power tools.
- Accessory Safety: Ensure all accessories are correctly attached and secured before operation. Use only accessories specified for this tool.
2. Product Overview and Included Components
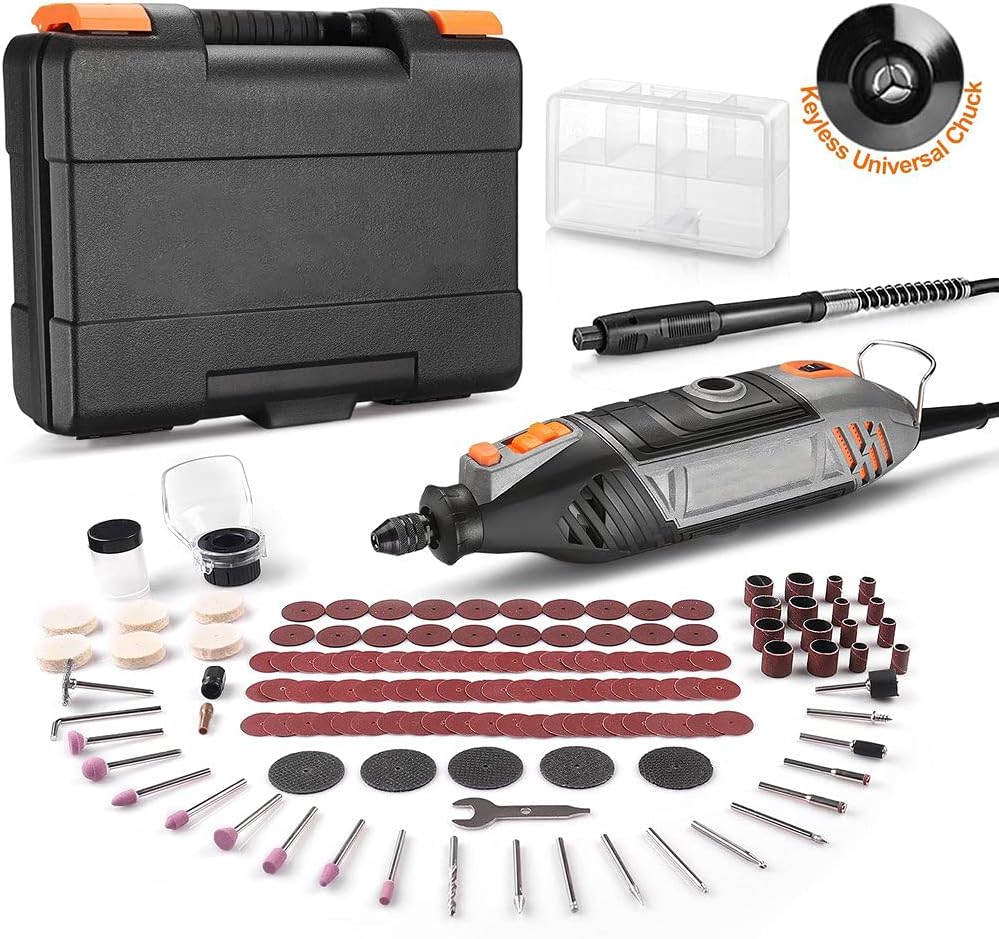
The DSF RTSL50AC Rotary Tool Kit is designed for various crafting and DIY projects, including cutting, grinding, polishing, engraving, and drilling. This section details the main components and accessories included in your kit.
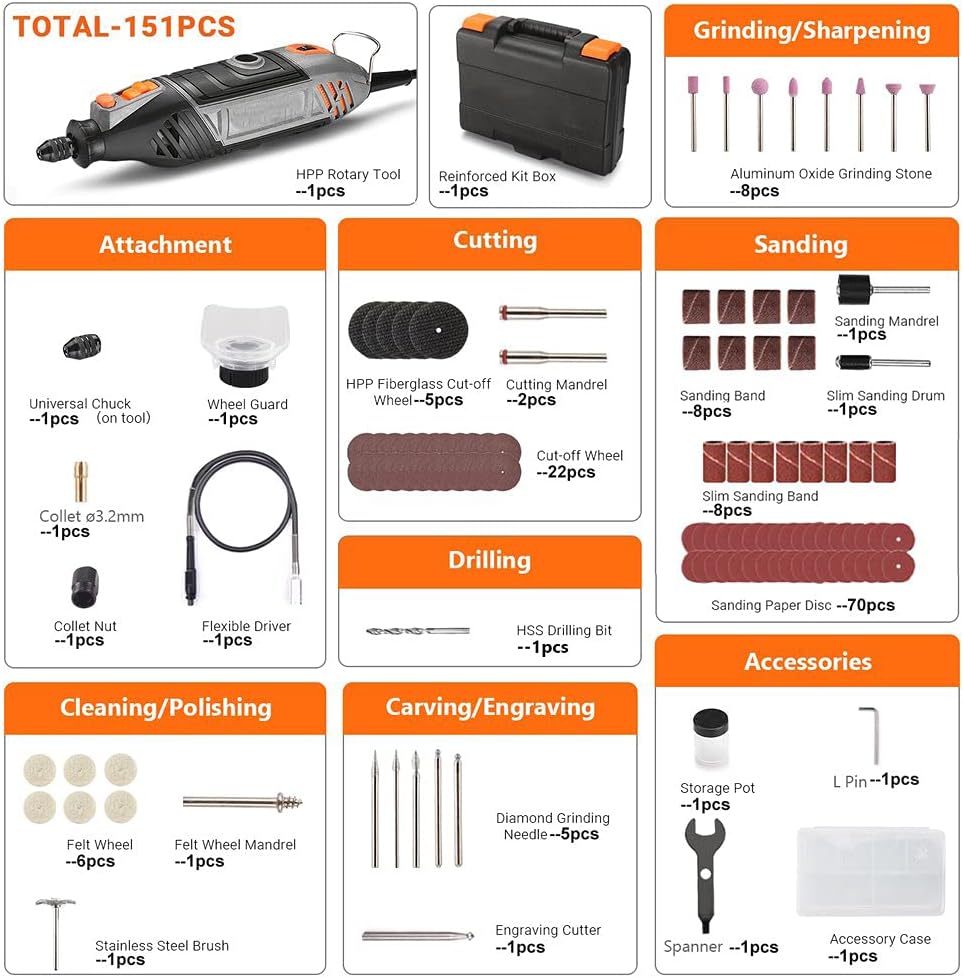
Kit Contents:
- 1 x RTSL50AC Rotary Tool
- 1 x Reinforced Kit Box
- 1 x Accessory Case
- 1 x Universal Chuck (pre-installed on tool)
- 1 x Collet (Ø3.2mm)
- 1 x Collet Nut
- 1 x Wheel Guard
- 1 x Flexible Driver (Flex Shaft)
- 8 x Aluminum Oxide Grinding Stone
- 5 x HPP Fiberglass Cut-off Wheel
- 2 x Cutting Mandrel
- 22 x Cut-off Wheel
- 1 x HSS Drilling Bit
- 8 x Sanding Band
- 1 x Sanding Mandrel
- 1 x Slim Sanding Drum
- 8 x Slim Sanding Band
- 70 x Sanding Paper Disc
- 6 x Felt Wheel
- 1 x Felt Wheel Mandrel
- 1 x Stainless Steel Brush
- 5 x Diamond Grinding Needle
- 1 x Engraving Cutter
- 1 x Storage Pot
- 1 x Spanner
- 1 x L-pin Wrench
3. Setup and Assembly
Before operating the rotary tool, ensure proper setup and accessory attachment.
3.1 Attaching Accessories
- Power Disconnection: Always ensure the tool is unplugged from the power source before changing accessories.
- Keyless Chuck: The universal keyless chuck allows for quick accessory changes without collets. To insert an accessory, press the spindle lock button, loosen the chuck by rotating it counter-clockwise, insert the accessory shank fully, and then tighten the chuck by rotating it clockwise. Release the spindle lock button.
- Collets (if applicable): For accessories requiring a collet, ensure the correct size collet (e.g., Ø3.2mm) is inserted into the collet nut, then into the tool. Insert the accessory, press the spindle lock, and tighten the collet nut with the provided spanner.
- Flexible Shaft: To attach the flexible shaft, unscrew the collet nut and collet from the main tool. Screw the flexible shaft's coupling nut onto the tool's threaded shaft until secure. Insert the desired accessory into the flexible shaft's chuck and tighten.
- Protective Shield/Wheel Guard: For cutting or grinding operations, attach the wheel guard by sliding it over the tool's head and securing it in place. Ensure it provides adequate protection for the specific task.


4. Operating Instructions
This section provides guidance on operating your rotary tool for various applications.
4.1 Power On/Off and Speed Control
- Power On: Plug the tool into a 120V AC power outlet. Press the safety switch to the 'ON' position.
- Speed Adjustment: Use the 6-level variable speed dial to select the desired RPM, ranging from 10,000 RPM to 35,000 RPM. Start with a lower speed for delicate tasks and increase as needed for harder materials or more aggressive removal.
- Power Off: Press the safety switch to the 'OFF' position and unplug the tool when not in use.
4.2 Application-Specific Guidance
- Cutting (Glass & Metal):
Use cut-off wheels for wood and metal. For stone, ceramics, or floor tiles, utilize the diamond cutting disc. Important: Always get the diamond disc wet to prolong its service life and use a protective cover (wheel guard) to ensure safety during cutting operations.
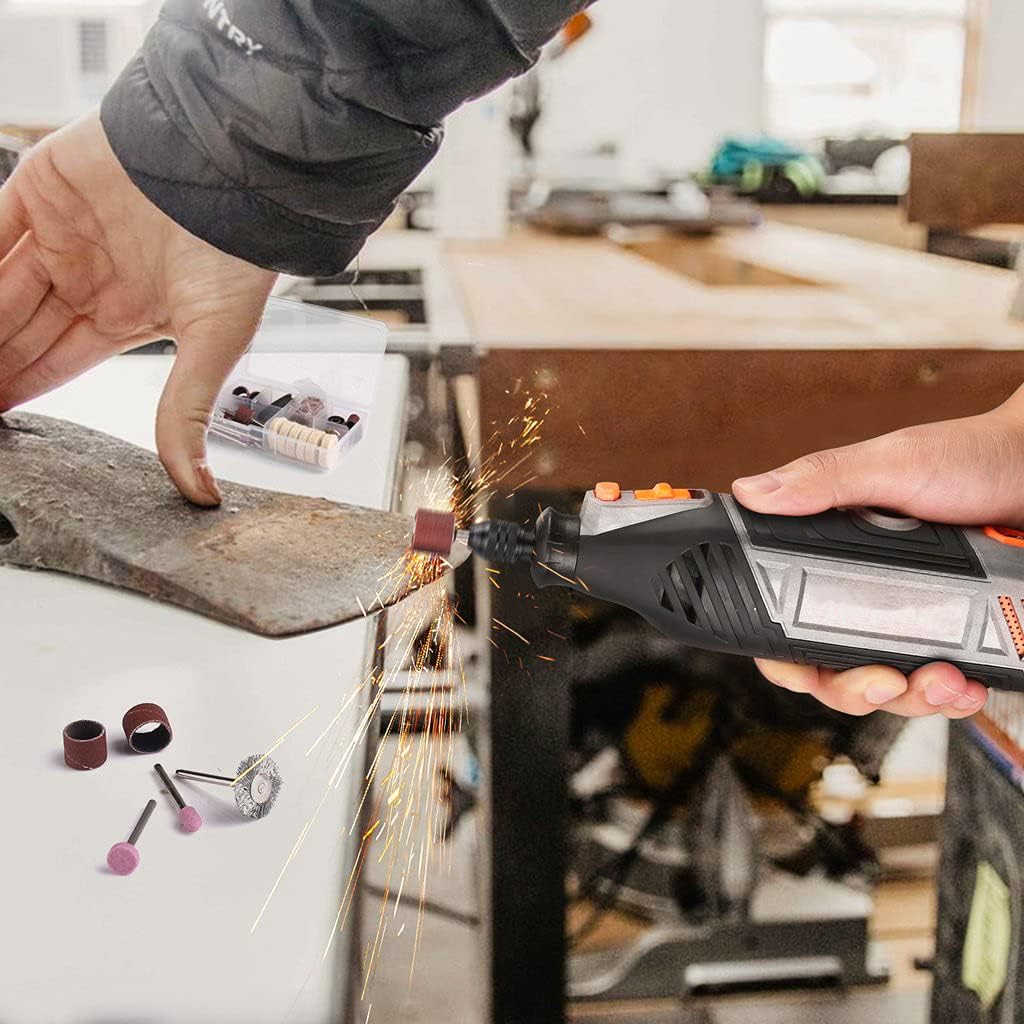
Figure 4.1: The rotary tool performing a cutting operation on a metal rod, demonstrating the use of a cutting disc and the adjustable protective guard for safety. - Sanding & Polishing:
Select abrasive stones, felt wheels, sanding drums, or sanding discs based on the material and desired finish. These accessories help smooth surfaces, remove rough spots, clean rust from steel, or strip paint from boards.
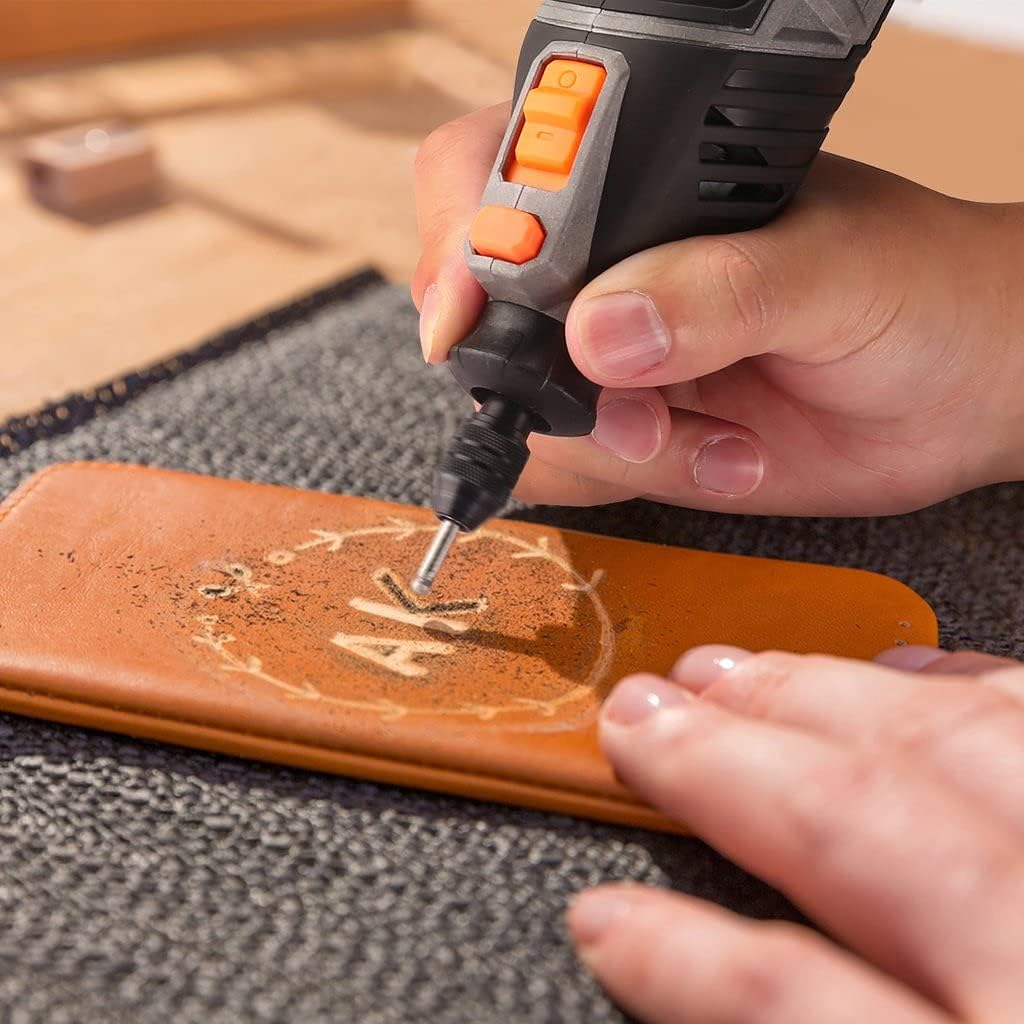
Figure 4.2: The rotary tool equipped with a sanding drum, actively sanding a wooden surface to achieve a smoother finish. 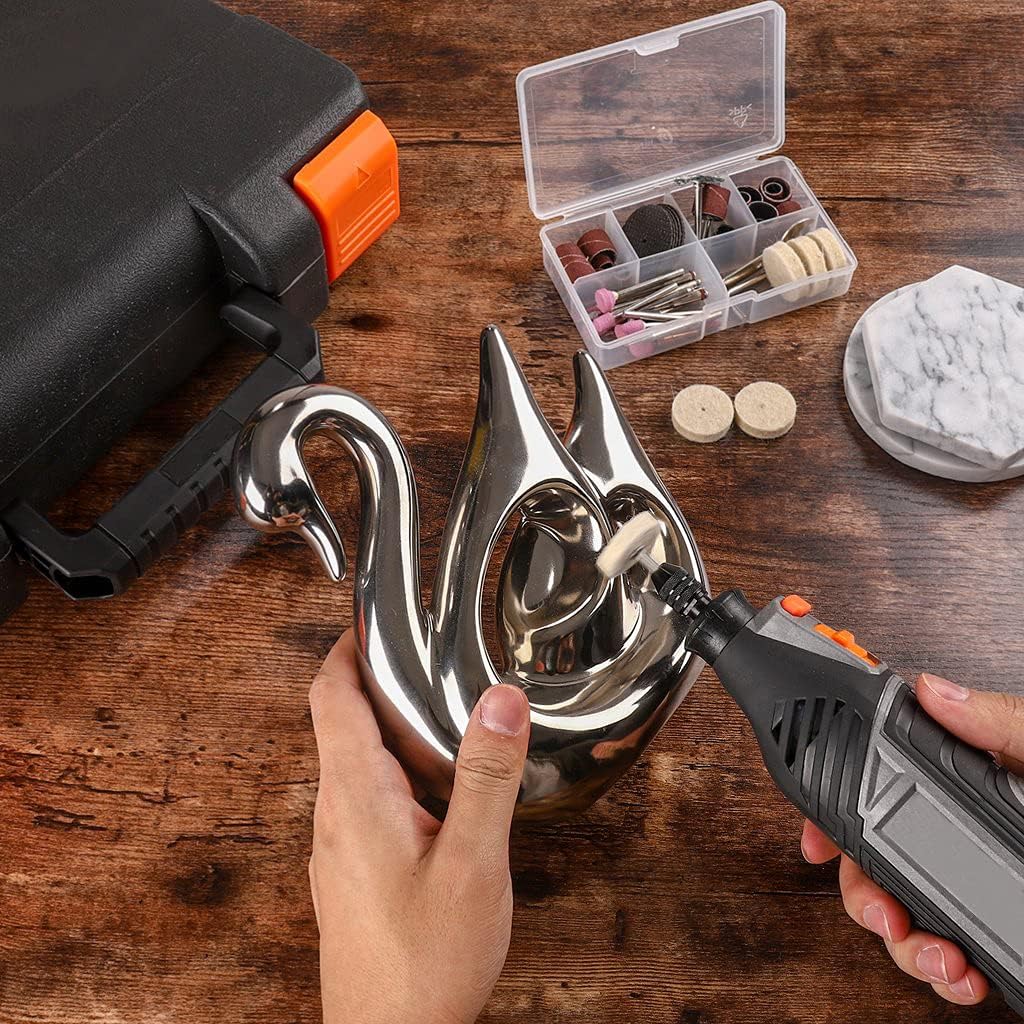
Figure 4.3: A felt wheel accessory on the rotary tool being used to polish the intricate surface of a metal swan, enhancing its shine. - Wood Carving & Routing:
Utilize multi-purpose cutting bits, diamond grinding needles, or engraving cutters for detailed work on wood and other materials. The flexible shaft attachment is particularly useful for intricate carving and engraving tasks, offering enhanced control and maneuverability.

Figure 4.4: An individual demonstrating the use of the flexible shaft attachment with the rotary tool for detailed wood carving on a bowl. 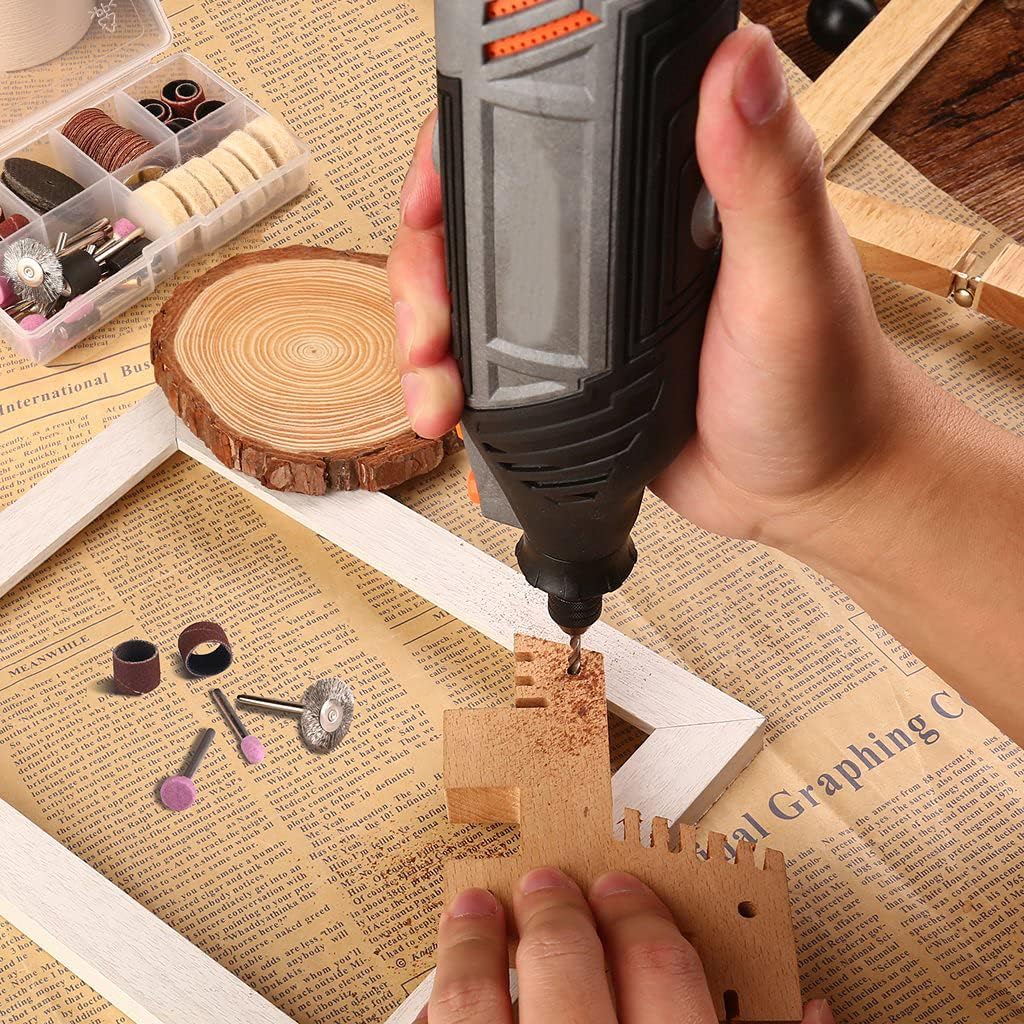
Figure 4.5: The rotary tool being used for engraving a design onto a leather surface, showcasing its precision capabilities.
5. Maintenance
Regular maintenance ensures the longevity and optimal performance of your rotary tool.
- Cleaning: After each use, unplug the tool and clean any dust or debris from the ventilation openings and around the chuck/collet area using a soft brush or compressed air. Do not use harsh chemicals or abrasive cleaners.
- Accessory Storage: Store all accessories in the provided accessory case to prevent damage and loss.
- Cord Inspection: Periodically inspect the power cord for any signs of damage. If damaged, have it repaired by a qualified technician.
- Heat Dissipation: The tool features a porous heat dissipation design. Ensure these vents remain clear of obstructions during operation to prevent overheating.
6. Troubleshooting
If you encounter issues with your rotary tool, refer to the following common troubleshooting steps.
| Problem | Possible Cause | Solution |
|---|---|---|
| Tool does not turn on | No power supply; Safety switch off; Damaged cord | Check power outlet; Ensure safety switch is ON; Inspect power cord for damage. |
| Accessory wobbles or falls out | Accessory not properly secured; Incorrect collet size | Ensure chuck/collet is tightened securely; Use correct collet for accessory shank size. |
| Tool overheats | Blocked ventilation; Excessive load | Clear ventilation openings; Reduce pressure on the tool; Allow tool to cool down. |
| Reduced performance/speed | Incorrect speed setting; Worn accessory; Motor issue | Adjust speed dial to higher setting; Replace worn accessories; Contact support if motor issue persists. |
7. Specifications
Technical specifications for the DSF RTSL50AC Rotary Tool Kit.
| Feature | Detail |
|---|---|
| Brand | DSF |
| Model Number | RTSL50AC |
| Power Source | Corded Electric |
| Voltage | 120 Volts (AC) |
| Wattage | 135 watts |
| Minimum Rotational Speed | 10,000 RPM |
| Maximum Rotational Speed | 35,000 RPM |
| Special Features | Keyless Chuck, Variable Speed |
| Color | Grey |
| Material | Metal, Stone, Plastic, Sand Paper, HPP |
| Item Package Quantity | 1 |
8. Warranty and Support
For warranty information or technical support, please refer to the contact details provided with your purchase documentation or visit the official DSF website. Keep your purchase receipt as proof of purchase for any warranty claims.