Introduction
This manual provides detailed instructions for the proper use, setup, operation, and maintenance of your MIUFLY 1296P 32GB Body Camera with Magnet Mount. Please read this manual thoroughly before using the device to ensure optimal performance and safety. Keep this manual for future reference.
Product Overview
Components and Controls
The MIUFLY 1296P 32GB Body Camera is designed for reliable video and photo capture. Familiarize yourself with the camera's components and controls:
- Front Lens: Main camera lens for video and photo recording.
- IR LEDs: Infrared lights for low-light and night vision recording.
- Status Indicators: LEDs indicating recording status, battery, and other functions.
- Power Button: To turn the camera on or off.
- Record Button: Initiates and stops video recording.
- Photo Button: Captures still images.
- Menu/Navigation Buttons: For accessing settings and navigating menus.
- USB Port: For charging and data transfer.
- HDMI Port: For connecting to external displays.
- AV Port: For audio/video output.
- Magnet Mount Interface: Connection point for the magnet mount accessory.

Image: Front view of the MIUFLY 1296P Body Camera positioned on its charging dock. The camera features a central lens, surrounding IR LEDs, and the MIUFLY logo.

Image: Top and side view of the MIUFLY 1296P Body Camera, highlighting the 32GB storage indicator, GPS label, and various ports including AV and HDMI.
Package Contents
Verify that all items are present in your package:
- MIUFLY 1296P 32GB Body Camera
- USB Cable
- Charging Dock
- Universal Metal Clip and Epaulet Clip
- User Manual (this document)
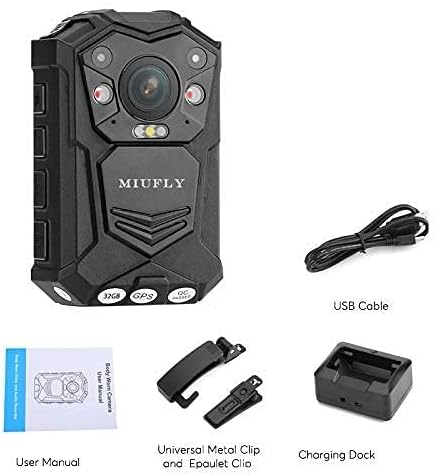
Image: An overview of the MIUFLY 1296P Body Camera package contents, including the camera, USB cable, charging dock, various clips, and the user manual.
Setup
Charging the Camera
- Connect the USB cable to the charging dock.
- Plug the other end of the USB cable into a compatible USB power adapter (not included) or a computer's USB port.
- Place the body camera into the charging dock, ensuring proper alignment with the charging pins.
- The charging indicator light on the camera or dock will illuminate, typically red for charging and green for fully charged.
- Allow approximately 3-4 hours for a full charge.
Attaching the Magnet Mount
The magnet mount provides a secure and flexible way to attach your body camera to clothing or other surfaces.
- Identify the two parts of the magnet mount: the inner plate and the outer plate.
- Attach the outer plate to the back of the body camera by sliding it into the designated slot until it clicks securely.
- Position the inner plate inside your clothing (e.g., shirt, jacket, vest) at the desired location.
- Align the camera with the outer plate on the outside of your clothing, allowing the magnets to connect and hold the camera firmly in place.

Image: The two distinct components of the MIUFLY magnet mount, labeled 'Inside' and 'Outside', designed for secure attachment of the body camera.

Image: A MIUFLY Body Camera securely attached to a safety vest using the magnet mount, demonstrating its practical application.
Operating Instructions
Power On/Off
- To Power On: Press and hold the Power button for approximately 3 seconds until the camera vibrates and the indicator lights turn on.
- To Power Off: Press and hold the Power button for approximately 3 seconds until the camera vibrates and the indicator lights turn off.
Video Recording
The camera supports 1296P video resolution.
- Ensure the camera is powered on.
- Press the Record button once to start video recording. The recording indicator light will typically flash red.
- To stop recording, press the Record button again. The camera will save the current video file.
Photo Capture
- Ensure the camera is powered on and not currently recording video.
- Press the Photo button once to capture a still image. The camera may briefly flash or make a shutter sound.
Playback and File Management
To review recorded videos and photos, connect the camera to a computer using the provided USB cable. The camera will appear as a removable disk drive, allowing you to access and transfer files. Alternatively, connect the camera to an external display via the HDMI or AV port for direct playback.
Menu Navigation and Settings
Use the Menu/Navigation buttons to access the camera's settings. Here you can adjust parameters such as video resolution, loop recording, date/time stamp, and other advanced features like anti-shake, low light mode, and time lapse.
Maintenance
Cleaning
- Wipe the camera body with a soft, dry cloth.
- For the lens, use a specialized lens cleaning cloth and solution to avoid scratches.
- Do not use harsh chemicals or abrasive cleaners.
Storage
- Store the camera in a cool, dry place away from direct sunlight and extreme temperatures.
- If storing for extended periods, ensure the battery is partially charged (around 50%) to prolong its lifespan.
Battery Care
- Avoid fully discharging the battery frequently.
- Charge the camera regularly, even if not in use, to maintain battery health.
Troubleshooting
| Problem | Possible Solution |
|---|---|
| Camera does not power on. | Ensure the battery is charged. Connect to a power source and try again. |
| Cannot record video/take photos. | Check if the internal 32GB memory is full. Transfer files to a computer to free up space. Ensure the camera is not in another mode (e.g., playback). |
| Video quality is poor. | Clean the camera lens. Check settings to ensure the highest resolution (1296P) is selected. Ensure adequate lighting or enable low light mode if necessary. |
| Camera is not recognized by computer. | Try a different USB port or cable. Ensure the camera is powered on when connected. Restart both the camera and the computer. |
| Magnet mount is not holding securely. | Ensure the inner and outer plates are correctly aligned. The thickness of the clothing may affect magnetic strength; try a thinner fabric. |
Specifications
| Feature | Detail |
|---|---|
| Brand | MIUFLY |
| Model | 1296P 32GB Body Camera |
| Video Capture Resolution | 1296p |
| Memory Storage Capacity | 32 GB (Built-in) |
| Video Capture Format | MPEG 4 |
| Special Features | Anti-Shake, Low Light, Time Lapse |
| Lens Type | Zoom |
| Zoom Type | Optical Zoom |
| Form Factor | Compact |
| ASIN | B09B4SRNJX |
Warranty and Support
This MIUFLY product is covered by a standard manufacturer's warranty. For specific warranty terms and conditions, please refer to the documentation included with your purchase or visit the official MIUFLY website. If you encounter any issues or require technical assistance, please contact MIUFLY customer support through their official channels.