Custom LED 15R1_REV0A_PI2_WL
Custom LED Blaster-X Integrated LED Tail Light for Yamaha YZF-R7 (2022-2025) Instruction Manual
Model: 15R1_REV0A_PI2_WL
Introduction
This manual provides detailed instructions for the installation, operation, and maintenance of your Custom LED Blaster-X Integrated LED Tail Light. Designed for the 2022-2025 Yamaha YZF-R7, this tail light features advanced Blaster-X technology, including Brake Alert patterns and Strobe Mode, along with Turn Alert functionality for enhanced visibility. It is a complete plug-and-play unit, directly replacing the OEM tail light without requiring modifications.

Figure 1: Custom LED Blaster-X Integrated LED Tail Light with Smoked Lens.
Safety Information
- Always disconnect the motorcycle's battery before performing any electrical work.
- Ensure all connections are secure to prevent electrical shorts or malfunctions.
- Refer to your motorcycle's service manual for specific instructions on removing and installing body panels.
- Professional installation is recommended if you are unfamiliar with motorcycle electrical systems.
Package Contents
- Custom LED Blaster-X Integrated LED Tail Light (Smoked Lens)
- OEM-compatible connectors
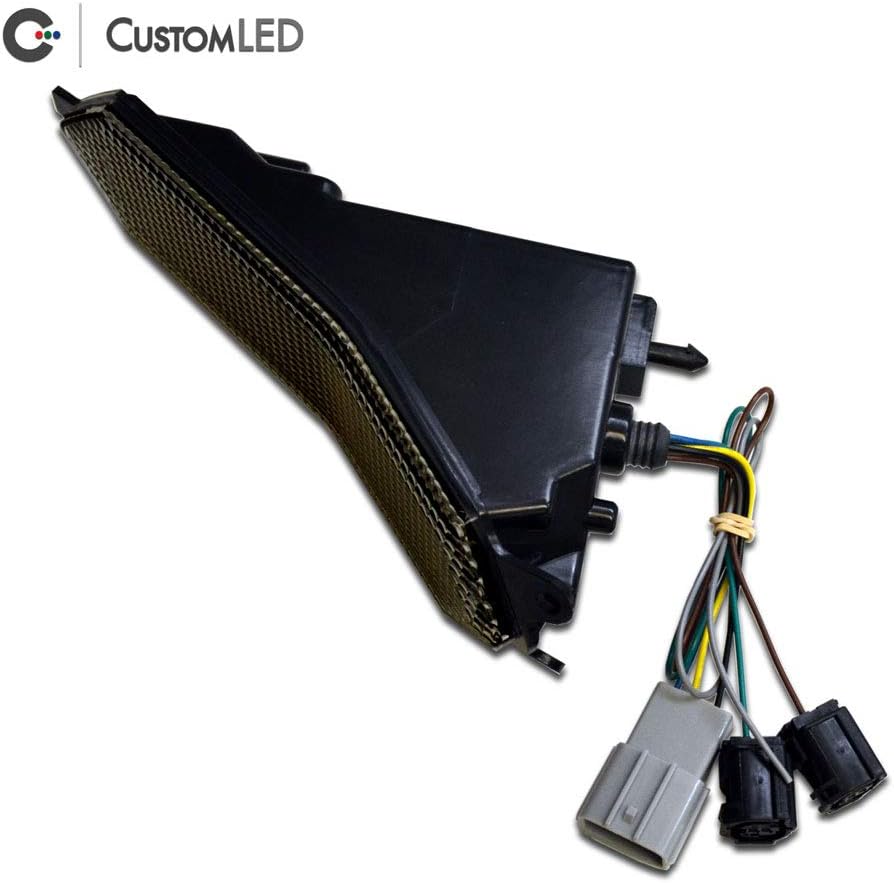
Figure 2: Rear view of the Blaster-X Tail Light, highlighting the integrated wiring and OEM-compatible connectors for direct installation.
Installation Instructions
- Preparation: Ensure the motorcycle is turned off and the battery is disconnected. Park the motorcycle on a stable surface.
- Access OEM Tail Light: Carefully remove the rear body panels and seat to gain access to the OEM tail light assembly and its wiring. Refer to your Yamaha YZF-R7 service manual for precise panel removal procedures.
- Disconnect OEM Tail Light: Locate and disconnect the electrical connectors for the OEM tail light.
- Remove OEM Tail Light: Unbolt and remove the OEM tail light assembly from the motorcycle.
- Install Blaster-X Tail Light: Position the Custom LED Blaster-X Integrated LED Tail Light in the OEM location. Secure it using the original mounting hardware.
- Connect Wiring: Connect the Blaster-X tail light's OEM-compatible connectors to the motorcycle's wiring harness. Ensure all connections are firm and properly seated.
- Test Functionality: Before reassembling the body panels, reconnect the battery and test all tail light functions: running light, brake light, and turn signals (left and right).
- Reassemble: Once all functions are verified, carefully reattach the body panels and seat.
The following video demonstrates the removal and installation process for a license plate holder on a Yamaha YZF-R7, which includes steps relevant to accessing and replacing the tail light area.
Video 1: Installation of a license plate holder on a Yamaha YZF-R7, showing the process of disassembling and reassembling the rear section of the motorcycle, which is applicable to tail light replacement.
Operating Instructions
The Blaster-X Integrated LED Tail Light operates automatically with your motorcycle's electrical system. Key features include:
- Running Light: Illuminates when the motorcycle's ignition is on.
- Brake Alert: Automatically provides one of 11 user-selectable brake modulation patterns the instant brakes are applied. This feature enhances visibility to following motorists. The patterns can be customized via the 2nd Generation Programming Interface or disabled for standard brake light operation.
- Turn Alert: For integrated turn signal operation, the tail light cycles between full intensity yellow and OFF on the side indicating a turn. This provides a clear contrast for turn signal visibility.
- Strobe Mode: Engaged by grounding a dedicated control wire, this mode produces high-frequency light pulses in alternating patterns across the tail light for emergency attention.

Figure 3: The Blaster-X Tail Light installed on a Yamaha YZF-R7, demonstrating its illuminated state with integrated turn signals.
Maintenance
- Cleaning: Clean the smoked lens with a soft cloth and mild, non-abrasive cleaner. Avoid harsh chemicals that may damage the polycarbonate lens material.
- Inspection: Periodically inspect the tail light for any signs of damage, loose connections, or wear. Ensure the lens is free from cracks or obstructions.
- Waterproof Design: The unit is designed to be waterproof, but avoid direct high-pressure water jets on the electrical connections.
Troubleshooting
| Problem | Possible Cause | Solution |
|---|---|---|
| Tail light not illuminating | Loose or disconnected wiring, blown fuse, incorrect installation. | Check all electrical connections. Inspect the motorcycle's fuse box. Verify correct installation according to instructions. |
| Turn signals not functioning correctly | Incorrect wiring, incompatible flasher relay (unlikely with CanBUS compatibility). | Ensure turn signal wires are correctly connected. The Blaster-X is CanBUS compatible, so a flasher relay change should not be necessary. |
| Brake light not activating | Brake switch malfunction, wiring issue. | Check the motorcycle's brake switches (front and rear). Inspect wiring to the brake light. |
| "Bulb-out" warnings or fast blink rate | Not applicable. | The Blaster-X is fully compatible with the CanBUS system and should not cause these issues. If they occur, consult a professional. |
Specifications
- Model: 15R1_REV0A_PI2_WL
- Compatibility: Yamaha YZF-R7 (2022, 2023, 2024, 2025)
- Lens Color: Smoked
- Lens Material: Polycarbonate
- Special Features: Blaster-X Technology (Brake Alert, Strobe Mode), Turn Alert, Waterproof, CanBUS Compatible
- Assembly Required: No (Plug and Play)
- Item Weight: Approximately 1 pound
- Package Dimensions: Approximately 9 x 5 x 3 inches
- Manufacturer: Custom LED
Warranty and Support
The Custom LED Blaster-X Integrated LED Tail Light comes with a 2-year Warranty & Satisfaction Guarantee. For technical support, warranty claims, or further assistance, please contact Custom LED directly.
Manufacturer: Custom LED
For more information, visit the Custom LED brand page.
Ask a question about this manual
Ask about setup, troubleshooting, compatibility, parts, safety, or missing instructions. Manuals+ will review the question and use this page’s manual context to help answer it.