NEWGATE KB1019LCD/COTE3
NEWGATE Centre of The Earth Digital LCD Alarm Clock Instruction Manual
Model: KB1019LCD/COTE3
Introduction
This manual provides comprehensive instructions for the setup, operation, and maintenance of your NEWGATE Centre of The Earth Digital LCD Alarm Clock. Please read these instructions carefully before use to ensure proper functionality and longevity of your device.
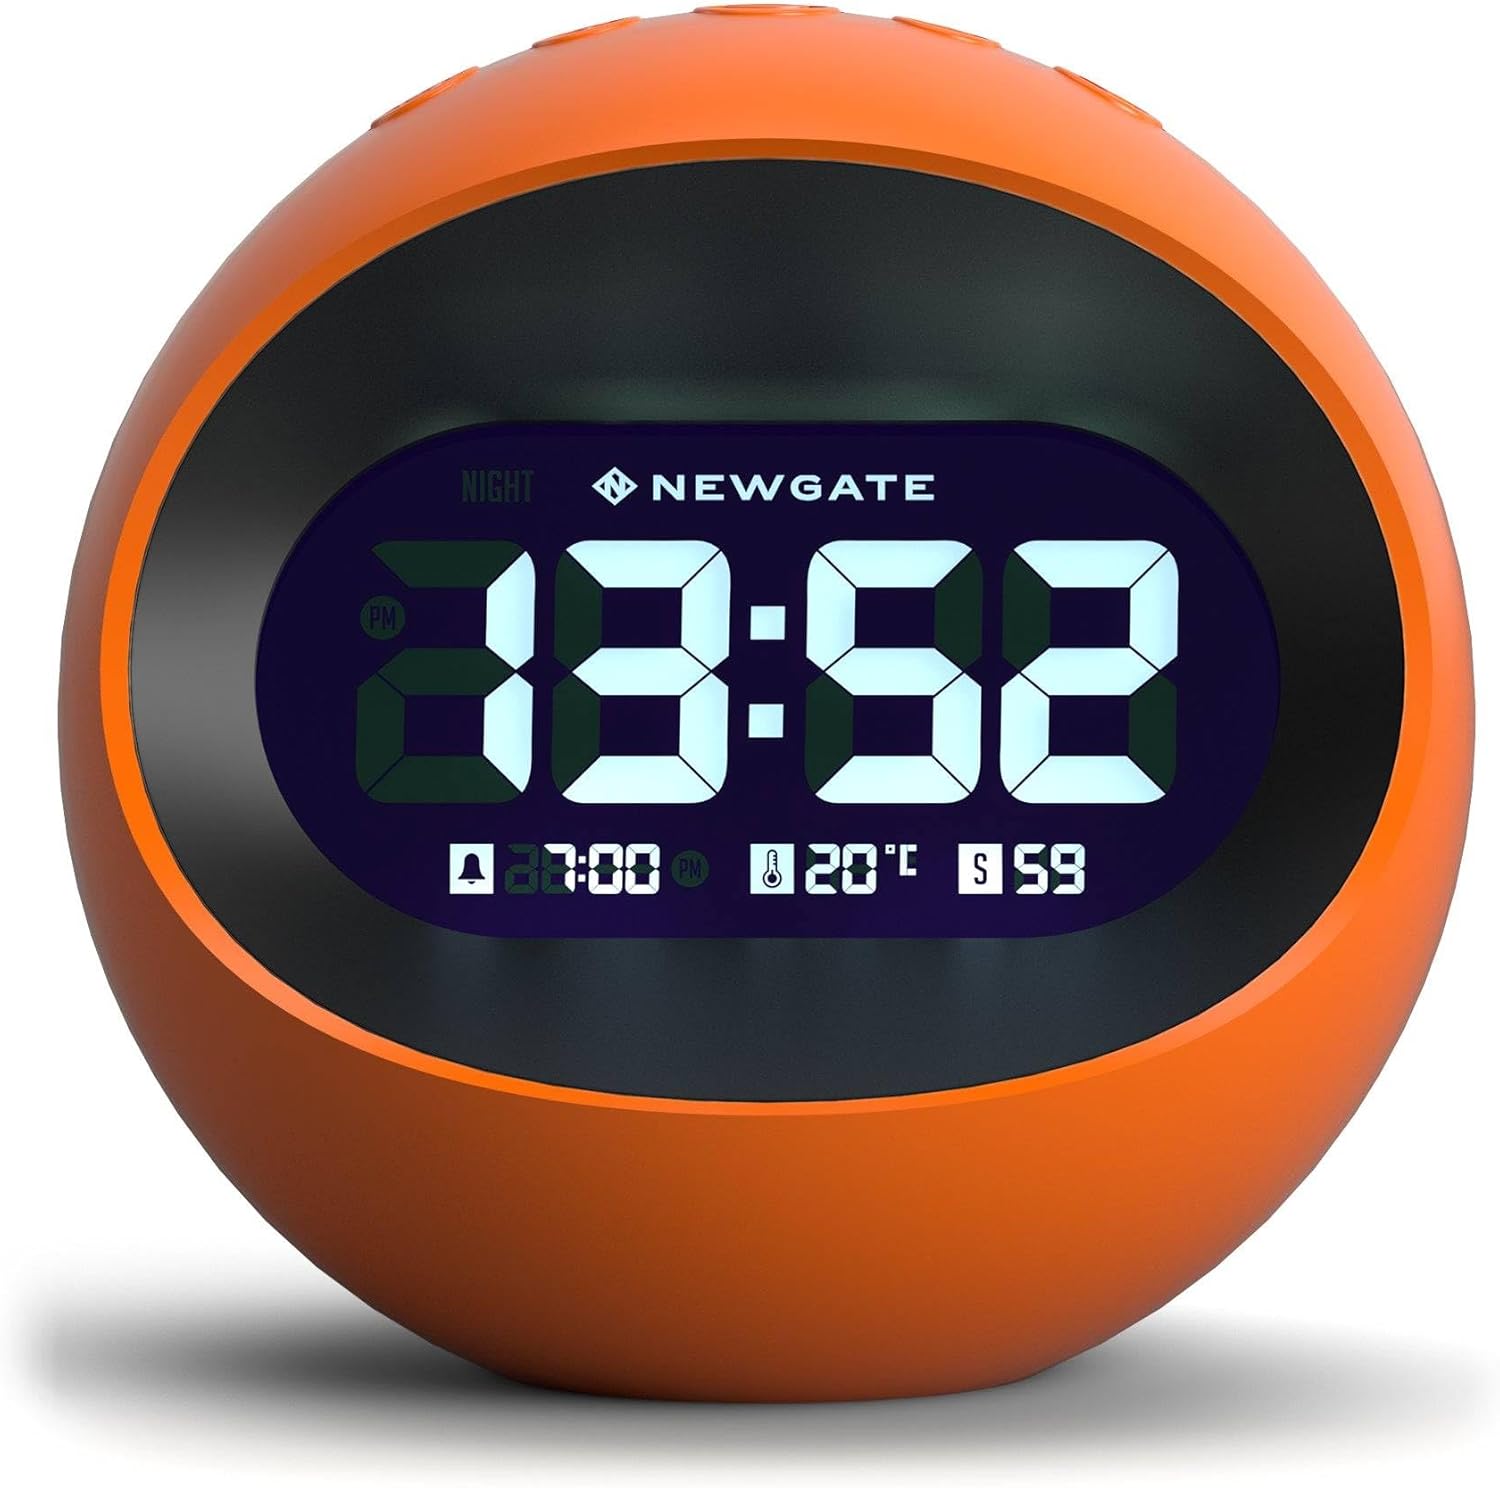
Image: Front view of the NEWGATE Centre of The Earth Digital LCD Alarm Clock, displaying the time, alarm setting, and current room temperature.
Setup
1. Power Source
The clock can be powered by the included USB cable or by 3 AAA batteries (not included). For continuous bright display, the USB cable must be connected to a power source (USB adapter not included).
- USB Power: Connect the supplied USB cable to the port at the back of the clock and to a USB power adapter (not supplied). The display will be continuously bright.
- Battery Power: Insert 3 AAA batteries (not included) into the battery compartment. Batteries retain time and alarm settings during power outages or when the USB cable is disconnected. The display will be dim when powered by batteries only. Press the Snooze button to illuminate the screen for 5 seconds.

Image: Illustration showing the difference in display brightness when the clock is powered by USB (bright) versus batteries only (dim).

Image: Rear view of the alarm clock, highlighting the USB cable connection port.
2. Initial Settings (Time, Date, Temperature)
Refer to the control buttons diagram for button identification.

Image: Top view of the alarm clock with all control buttons clearly labeled for their functions.
- Set Time:
- Press and hold the MODE/DATE button until the hour digits flash.
- Use the UP and DOWN buttons to adjust the hour.
- Press MODE/DATE again to move to minutes, then use UP and DOWN to adjust.
- Press MODE/DATE to confirm and exit time setting.
- Set Date:
- From normal time display, press MODE/DATE once to cycle to date display.
- Press and hold MODE/DATE until the year flashes.
- Use UP and DOWN buttons to adjust the year.
- Press MODE/DATE to move to month, then day, adjusting with UP and DOWN.
- Press MODE/DATE to confirm and exit date setting.
- Temperature Unit:
- In normal time display, press the DOWN button to toggle between Celsius (°C) and Fahrenheit (°F).
- 12/24 Hour Format:
- In normal time display, press the UP button to toggle between 12-hour and 24-hour time formats.
Operating Instructions
1. Setting the Alarm
- Press the ALARM button once to display the current alarm time.
- Press and hold the ALARM button until the alarm hour digits flash.
- Use the UP and DOWN buttons to adjust the alarm hour.
- Press ALARM again to move to alarm minutes, then use UP and DOWN to adjust.
- Press ALARM to confirm and activate the alarm. An alarm icon will appear on the display.
- To deactivate the alarm, press the ALARM button until the alarm icon disappears.
2. Snooze Function
When the alarm sounds, press the SNOOZE button to temporarily silence the alarm. The alarm will sound again after approximately 5 minutes. To turn off the alarm completely, press any other button.
3. Display Brightness Adjustment
The clock offers multiple brightness settings for the LCD display.
- Manual Adjustment: Press the SNOOZE button (when not alarming) to cycle through low, medium, and high brightness levels.
- Night Mode: The clock can be programmed to automatically dim the display during specific night hours. Refer to the "Night Mode" section in the troubleshooting or advanced settings if available in your specific model's firmware.

Image: The alarm clock displaying time in a dark room, demonstrating the dim brightness setting suitable for nighttime.
Maintenance
1. Cleaning
Wipe the clock with a soft, dry cloth. Do not use abrasive cleaners or solvents, as these may damage the finish or display.
2. Battery Replacement
When the display becomes consistently dim or settings are lost frequently without power interruption, it may be time to replace the AAA batteries. Open the battery compartment cover on the back of the clock, remove old batteries, and insert three new AAA batteries, observing correct polarity.
Troubleshooting
| Problem | Possible Cause | Solution |
|---|---|---|
| Display is dim or off. | Not connected to USB power, or batteries are low/dead. | Connect the USB cable to a power source for continuous bright display. Replace AAA batteries if running on battery power. Press Snooze to temporarily illuminate the screen when on battery power. |
| Alarm does not sound. | Alarm is not activated, or alarm volume is too low (not adjustable on this model). | Ensure the alarm icon is visible on the display. Re-set the alarm if necessary. The alarm volume is fixed. |
| Time/Date settings are lost. | Batteries are not installed or are depleted. | Install fresh AAA batteries to retain settings during power interruptions. |
| Buttons are unresponsive. | Temporary software glitch or low power. | Disconnect USB power and remove batteries for a few minutes, then reconnect. Ensure fresh batteries are installed. |
Specifications
- Model: KB1019LCD/COTE3
- Dimensions: 11 x 11.5 x 11 cm (4.5 x 4.5 x 4.5 inches)
- Display Type: Digital LCD
- Power Source: USB (cable included, adapter not included) or 3 x AAA batteries (not included)
- Features: Alarm, Snooze, Temperature Display (°C/°F), 12/24 Hour Format
- Material: Acrylic
- Weight: 0.16 Kilograms (5.6 ounces)

Image: Front and side views of the alarm clock with indicated dimensions in centimeters and inches.

Image: The alarm clock next to a measuring tape, illustrating its compact size.
Warranty Information
This NEWGATE product comes with a limited warranty. For specific details regarding warranty coverage and duration, please refer to the documentation included with your purchase or contact NEWGATE customer support. Keep your proof of purchase for warranty claims.
Customer Support
For further assistance, technical support, or inquiries regarding your NEWGATE Centre of The Earth Digital LCD Alarm Clock, please visit the official NEWGATE website or contact their customer service department. Contact details can typically be found on the product packaging or the brand's official online presence.