DR-WE4M416-HAP7
Instruction Manual: Dryer Push To Start Switch
Model: DR-WE4M416-HAP7 | Brand: Generic
1. Introduction
This manual provides essential information for the installation, operation, and maintenance of your new Dryer Push To Start Switch, model DR-WE4M416-HAP7. This component is a direct replacement for various dryer models, ensuring proper functionality of your appliance's start mechanism. Please read this manual thoroughly before attempting any installation or repair to ensure safety and optimal performance.
2. Safety Information
WARNING: To reduce the risk of electric shock, fire, or injury to persons, read all instructions before installing or servicing this part.
- Always disconnect power to the dryer before attempting any repairs or installations. Unplug the appliance or turn off the circuit breaker.
- Wear appropriate personal protective equipment, such as gloves and eye protection.
- If you are unsure about any step, consult a qualified appliance repair technician.
- Ensure all connections are secure and correct before restoring power.
- Keep children and pets away from the work area.
3. Product Overview
The PS3487190 Dryer Push To Start Switch (Model: DR-WE4M416-HAP7) is a critical electrical component responsible for initiating the dryer's cycle when pressed. It is designed for durability and compatibility with a wide range of dryer models.
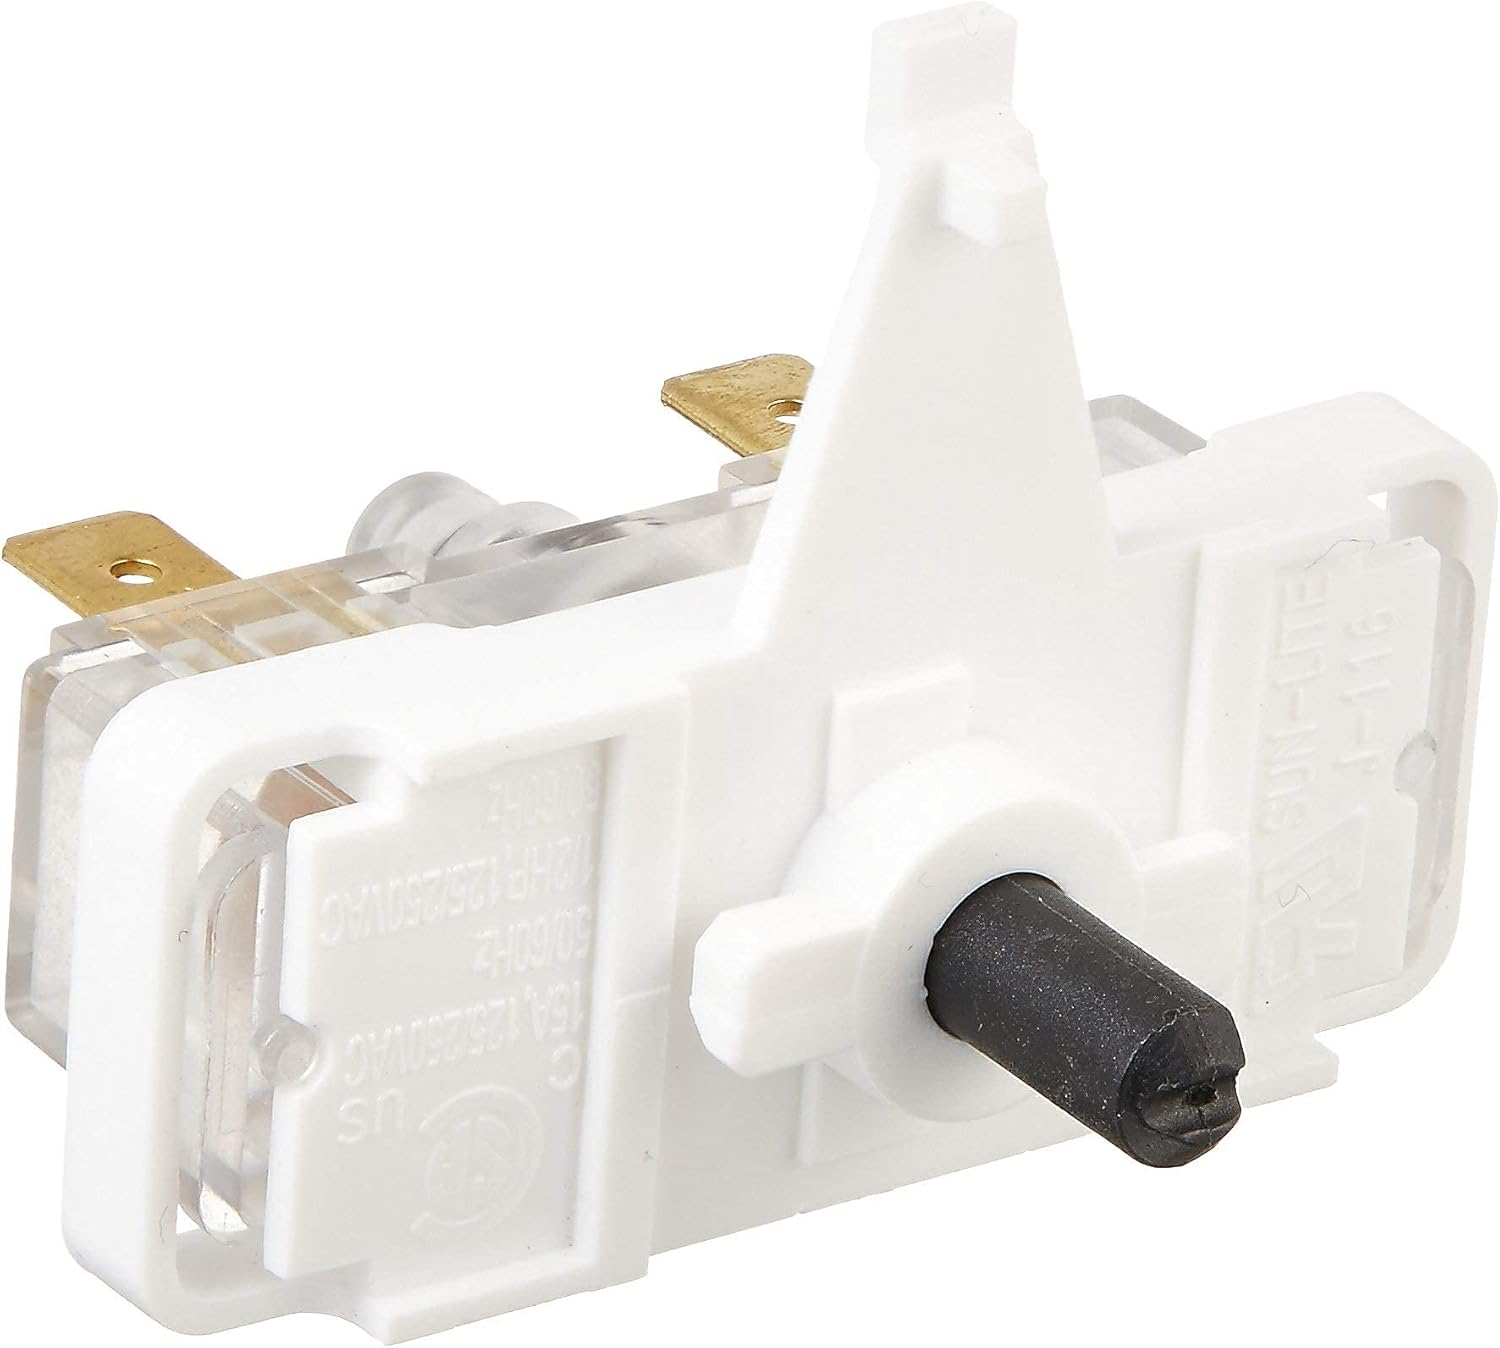
This image displays the PS3487190 Dryer Push To Start Switch. It features a white plastic body with a black push-button mechanism on one side and two brass electrical terminals extending from the clear plastic base. The switch is designed for easy installation and operation in compatible dryer models.
Compatible Models include, but are not limited to:
- GTD42GASJ0WW, GTD42GASJ1WW, GTD42GASJ2WW
- GTD45EASJ0WS, GTD45EASJ1WS, GTD45EASJ2WS
- GTD45GASJ0WS, GTD45GASJ1WS
- DSKP333EC2WW, DSKS333EC2WW, DSKS433EB3WW
- GHDP490EF0WW, GHDP490GF0WW
- GLDP280ED1WS, GLDP280GD0WS
- GRDN510EM1WS, GRDN510GM1WS
- GTD18ESSJ0WW, GTD18GSSJ0WW
- GTD33EASK0WW, GTD33GASK0WW, GTD33PASK0WW
- GTDL210ED0WW, GTDL210GD0WW
- GTDL310EM0WS, GTDL410ED0WS
- GTDN500EM1WS, GTDN500GM1WS
- GTDP180ED0WW, GTDP180GD0WW
- GTDP200EF0WS, GTDP200GF0WS
- GTDP220EF0WW, GTDP220GF0WW
- And many more models listed in the product description.
Replaces part numbers: AP4980900, WE4M367, 1811209, AH3487190, EA3487190, PS3487190, WE4M352.
4. Installation Instructions
The following steps outline a general procedure for replacing a dryer push-to-start switch. Specific dryer models may vary, so always refer to your dryer's service manual for detailed instructions.
- Disconnect Power: Unplug the dryer from the electrical outlet or turn off the circuit breaker supplying power to the dryer. Verify power is off before proceeding.
- Access the Control Panel: Depending on your dryer model, you may need to remove screws from the back of the control panel or lift the top panel to gain access to the switch.
- Locate the Old Switch: Identify the existing push-to-start switch. It is typically located behind the start button on the control panel.
- Disconnect Wiring: Carefully note the position and color of each wire connected to the old switch. It is recommended to take a photo for reference. Disconnect all wires from the old switch.
- Remove Old Switch: Unmount the old switch from its housing. This may involve unscrewing it or releasing retaining clips.
- Install New Switch: Position the new PS3487190 switch in the same location as the old one and secure it.
- Connect Wiring: Reconnect the wires to the new switch, ensuring they are attached to the correct terminals as noted in step 4. Make sure connections are firm and secure.
- Reassemble Dryer: Carefully reassemble the control panel and any other parts removed to access the switch. Ensure all screws are tightened and panels are properly aligned.
- Restore Power and Test: Plug the dryer back into the electrical outlet or turn on the circuit breaker. Press the start button to verify the dryer powers on and begins its cycle.
5. Operation
The Dryer Push To Start Switch functions as a momentary contact switch. When the start button on your dryer's control panel is pressed, it depresses this switch, completing an electrical circuit that signals the dryer to begin its cycle. Releasing the button opens the circuit, but the dryer continues to operate until the cycle is complete or manually stopped.
Ensure the dryer door is fully closed and latched before attempting to start the dryer, as most dryers have a safety interlock that prevents operation if the door is open.
6. Maintenance
The Dryer Push To Start Switch is a sealed component and generally requires no routine maintenance. However, to ensure its longevity and proper function:
- Avoid excessive force when pressing the start button.
- Keep the control panel area clean and free of dust and debris, which could potentially interfere with the button's movement.
- If the start button feels sticky or unresponsive, inspect the area around the button for obstructions.
7. Troubleshooting
If your dryer is experiencing issues related to starting, the push-to-start switch may be a factor. Here are some common symptoms and potential solutions:
| Symptom | Possible Cause | Solution |
|---|---|---|
| Dryer does not start when button is pressed. | No power to dryer, faulty door switch, faulty start switch, motor issue. | Check power supply. Ensure dryer door is fully closed. Test continuity of the start switch. If switch is faulty, replace it. |
| Start button feels loose or stuck. | Broken mounting tab, debris behind button, worn switch mechanism. | Inspect the button and switch for physical damage or obstructions. Clean the area. If damaged, replace the switch. |
| Dryer starts intermittently. | Loose wiring connection to switch, intermittent switch failure. | Check all wire connections to the switch for tightness. Test the switch for consistent operation. Replace if intermittent. |
Note: Always disconnect power before performing any troubleshooting or repairs.
8. Specifications
- Part Number: DR-WE4M416-HAP7
- Replaces: AP4980900, WE4M367, 1811209, AH3487190, EA3487190, PS3487190, WE4M352
- Voltage Rating: 125/250VAC
- Current Rating: 15A
- Frequency: 50/60Hz
- Horsepower Rating: 1/2HP
- Material: Durable plastic and metal components
- Compatibility: Wide range of GE and other dryer models (refer to Product Overview for partial list)
9. Warranty and Support
This product is typically covered by a limited manufacturer's warranty. Please refer to the product packaging or the seller's terms and conditions for specific warranty details and duration. For technical support or further assistance, please contact the retailer or the manufacturer directly using the contact information provided at the point of purchase.
Always ensure you are purchasing genuine replacement parts to maintain the safety and performance of your appliance.
Ask a question about this manual
Ask about setup, troubleshooting, compatibility, parts, safety, or missing instructions. Manuals+ will review the question and use this page’s manual context to help answer it.