1. Introduction
This manual provides detailed instructions for the installation, operation, and maintenance of your Galax Quasar GX600 Mid Tower PC Case. Please read this manual thoroughly before beginning installation to ensure proper setup and safe use of the product. Keep this manual for future reference.
2. Safety Information
Observe the following safety precautions to prevent damage to the product or injury to yourself:
- Always disconnect the power supply from the wall outlet before installing or removing any components inside the PC case.
- Handle components with care to avoid electrostatic discharge (ESD) damage. Consider using an anti-static wrist strap.
- Be cautious of sharp edges inside the case.
- Do not obstruct ventilation openings. Ensure adequate airflow around the case.
- Keep the case away from liquids and excessive humidity.
- Do not attempt to repair the case yourself. Refer to qualified service personnel.
3. Package Contents
Verify that all items are present in your package:
- Galax Quasar GX600 Mid Tower PC Case
- Accessory box (screws, standoffs, cable ties)
- User Manual (this document)
Note: Specific accessories may vary. If any items are missing or damaged, contact your retailer.
4. Product Overview
The Galax Quasar GX600 is a Mid Tower PC case designed for various ATX and Micro ATX motherboard configurations. It features a tempered glass side panel and a sleek black finish with an integrated RGB light strip on the front panel.
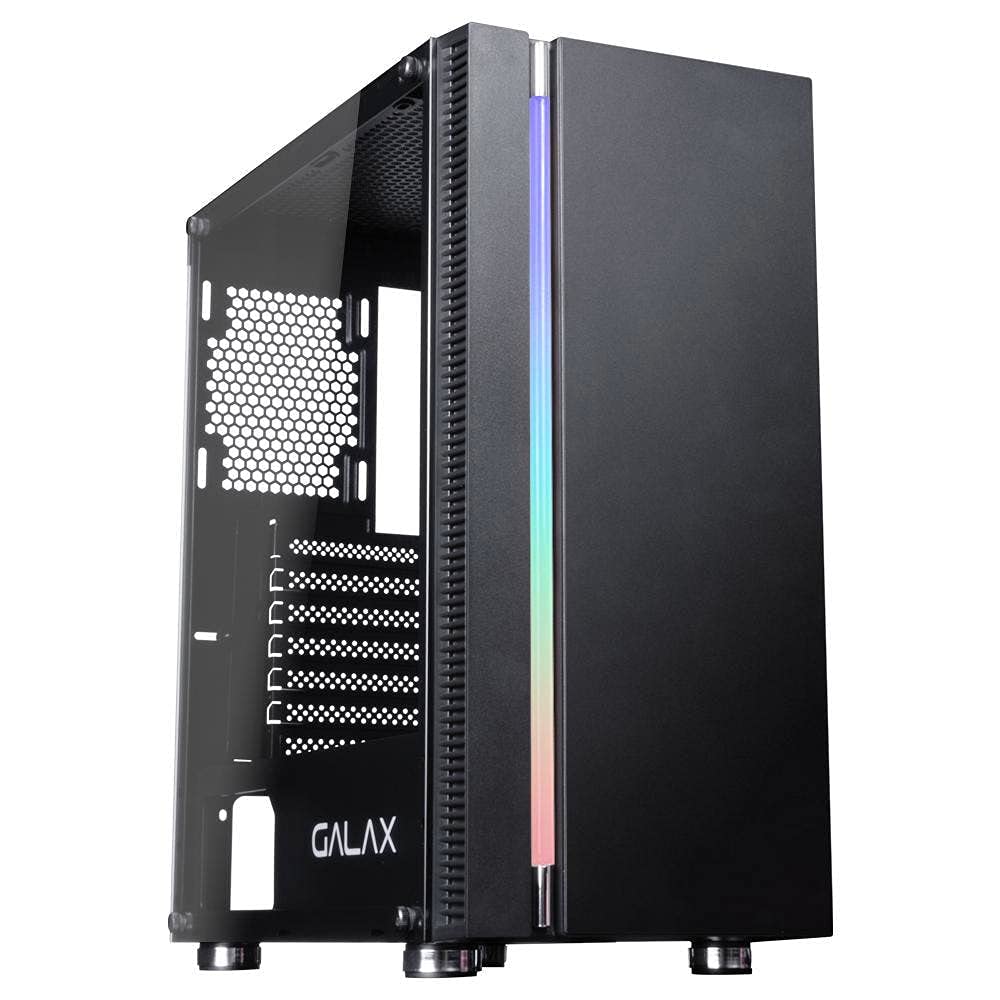
Figure 4.1: Front view of the Galax Quasar GX600 PC case, highlighting the integrated RGB light strip and minimalist design.

Figure 4.2: Angled view of the Galax Quasar GX600, illustrating the front panel design and the overall chassis form factor.

Figure 4.3: Interior view of the Galax Quasar GX600, displaying the spacious layout for motherboard installation and component mounting areas.

Figure 4.4: Rear interior view of the Galax Quasar GX600, highlighting cable routing options and the power supply shroud for a clean build.
5. Setup and Installation
Follow these steps to install your PC components into the Galax Quasar GX600 case:
- Prepare the Case:
- Place the case on a flat, stable surface.
- Remove the tempered glass side panel by unscrewing the thumb screws and carefully lifting it off. Set it aside on a soft, non-abrasive surface.
- Remove the opposite metal side panel.
- Install the Motherboard:
- Install the I/O shield into the rear opening of the case.
- Align the motherboard with the standoffs inside the case. Ensure the standoffs match your motherboard's form factor (ATX, Micro ATX).
- Secure the motherboard with the provided screws.
- Install the Power Supply (PSU):
- Position the PSU in the dedicated compartment at the bottom rear of the case.
- Secure the PSU with screws from the rear of the case.
- Install Storage Drives (HDDs/SSDs):
- Locate the drive bays or mounting points for 2.5" SSDs and 3.5" HDDs.
- Mount your drives using the appropriate screws or tool-less mechanisms if available.
- Install Expansion Cards (GPU, etc.):
- Remove the necessary PCI slot covers from the rear of the case.
- Insert your expansion card into the motherboard's PCI-E slot.
- Secure the card with a screw.
- Cable Management:
- Route all power and data cables through the cutouts behind the motherboard tray.
- Use cable ties to bundle and secure cables for improved airflow and aesthetics.
- Connect front panel cables (USB, audio, power/reset switches, RGB) to the corresponding headers on your motherboard.
- Final Assembly:
- Reattach the metal side panel.
- Carefully reattach the tempered glass side panel and secure it with the thumb screws.
6. Operating Instructions
Once all components are installed and cables are connected:
- Connect your monitor, keyboard, mouse, and other peripherals to the appropriate ports on your motherboard and graphics card.
- Connect the power cable to the PSU and then to a wall outlet.
- Flip the power switch on the PSU to the "ON" position.
- Press the power button on the front panel of the Galax Quasar GX600 case to start your computer.
- The integrated RGB light strip will illuminate upon power-on. If applicable, use your motherboard's RGB software or a dedicated controller (not included with case) to customize lighting effects.
7. Maintenance
Regular maintenance helps ensure optimal performance and longevity of your PC components:
- Dust Cleaning: Periodically clean dust filters (if present) and the interior of the case using compressed air or a soft brush. Ensure the system is powered off and unplugged before cleaning.
- Airflow: Ensure that all fan vents are clear of obstructions to maintain proper airflow and cooling.
- Cable Management: Periodically check cable routing to ensure no cables are interfering with fans or obstructing airflow.
8. Troubleshooting
If you encounter issues, consider the following common troubleshooting steps:
- No Power:
- Check if the power cable is securely connected to the PSU and the wall outlet.
- Ensure the PSU's power switch is in the "ON" position.
- Verify that the front panel power button cable is correctly connected to the motherboard's header.
- Fans Not Spinning:
- Check if all fan power cables are securely connected to the motherboard or fan controller.
- No Display:
- Ensure your monitor is connected to the graphics card (not the motherboard's integrated graphics ports, unless you are using integrated graphics).
- Reseat the graphics card in its PCI-E slot.
- Component Fit Issues:
- Refer to the specifications section for maximum component clearances (e.g., GPU length, CPU cooler height).
If problems persist, consult your component manuals or contact Galax support.
9. Specifications
The following table details the technical specifications of the Galax Quasar GX600 PC Case:
| Feature | Detail |
|---|---|
| Brand | Galax |
| Model | Quasar GX600 |
| Case Type | Mid Tower |
| Color | Black |
| Material | Tempered Glass (side panel) |
| Motherboard Compatibility | ATX, Micro ATX |
| Compatible Devices | ATX Motherboard, ATX Power Supply, Storage Units (HDD, SSD), CPU Coolers, Expansion Cards |
| Item Weight | 6.16 Kilograms |
| Manufacturer | Galax |
| ASIN | B099F11XXR |
10. Warranty and Support
The Galax Quasar GX600 PC Case comes with a 12-month warranty from the date of purchase. This warranty covers manufacturing defects and material faults under normal use.
The warranty does not cover damage caused by:
- Improper installation or use.
- Accidental damage, abuse, or neglect.
- Unauthorized modifications or repairs.
- Natural disasters or external causes.
For warranty claims or technical support, please contact your retailer or visit the official Galax website for contact information.


