1. Product Overview
The Roadanvi 10.2-inch Android Car Radio is an advanced multimedia system designed to upgrade the in-car entertainment and navigation experience for specific Honda Civic 8th Generation models. This head unit integrates modern features such as Wireless CarPlay, Android Auto, Bluetooth 5.0, GPS navigation, and a high-resolution IPS touch screen, all powered by an Octa-core processor.
Key Features:
- 10.2-inch 1280x720 IPS Touch Screen
- MTK8259 True Octa-core Processor
- 4GB RAM + 64GB ROM
- Android 10 Operating System
- Wireless Apple CarPlay & Wired Android Auto
- Built-in DSP Sound System
- Bluetooth 5.0 for hands-free calls and music streaming
- AM/FM Radio
- GPS Navigation (online and offline)
- 4G SIM Card Slot for internet connectivity
- Retains factory steering wheel controls
2. Compatibility and Package Contents
2.1 Vehicle Compatibility
This car stereo is specifically designed for the Honda Civic 8th Generation (2007-2011) models that originally came without a factory screen (OEM radio none screen version). It is a complete plug-and-play kit, including the necessary wiring harness and antenna adapters.

Image: The Roadanvi 10.2-inch Android Car Radio seamlessly integrated into a Honda Civic 8th Gen dashboard, showcasing its large display and user interface. Below are examples of compatible and incompatible factory radio setups.

Image: A visual representation of the Roadanvi head unit's front and back, along with a detailed layout of all included accessories such as cables, antennas, and the user manual.
2.2 Package Contents
Upon opening the package, verify that all the following components are present:
- Roadanvi 10.2-inch Android Head Unit
- User Manual
- Power Cable (with Canbus)
- Audio Output Cables
- CAM In Cable
- SIM Slot Cable
- Dual USB Cables
- GPS Antenna
- Microphone
- 4G Antenna
3. Setup and Installation
Installation of the Roadanvi Android Car Radio is designed to be a plug-and-play process for compatible Honda Civic 8th Gen models. However, professional installation is recommended to ensure correct wiring and functionality.
3.1 Pre-Installation Checklist
- Ensure the vehicle's ignition is off and the battery is disconnected before starting installation.
- Verify all package contents are present and undamaged.
- Familiarize yourself with your vehicle's dashboard disassembly process.
3.2 Installation Steps (General Guidance)
- Carefully remove the existing factory radio and dashboard trim. Refer to your vehicle's service manual for specific instructions.
- Connect the provided power cable harness to the vehicle's wiring. The Canbus decoder (if included and necessary for your model) should be connected as per instructions.
- Connect the audio output, CAM In, SIM slot, and USB cables to the corresponding ports on the back of the Roadanvi head unit.
- Mount the GPS antenna in a location with a clear view of the sky (e.g., on the dashboard or under the windshield).
- Mount the 4G antenna (if applicable) in a suitable location.
- Connect the external microphone for optimal call quality.
- Carefully slide the Roadanvi head unit into the dashboard opening and secure it.
- Reconnect the vehicle's battery and turn on the ignition to test the unit.
- Reassemble the dashboard trim.
Note: The unit supports retaining factory steering wheel controls. This can typically be set up via the unit's settings menu: Car Settings > Device information > SWC.
4. Operating Instructions
4.1 Basic Operation and Interface
The 10.2-inch IPS touch screen provides a responsive interface for navigating the Android operating system. The main screen typically displays widgets for music, navigation, and radio, along with quick access icons for various applications.
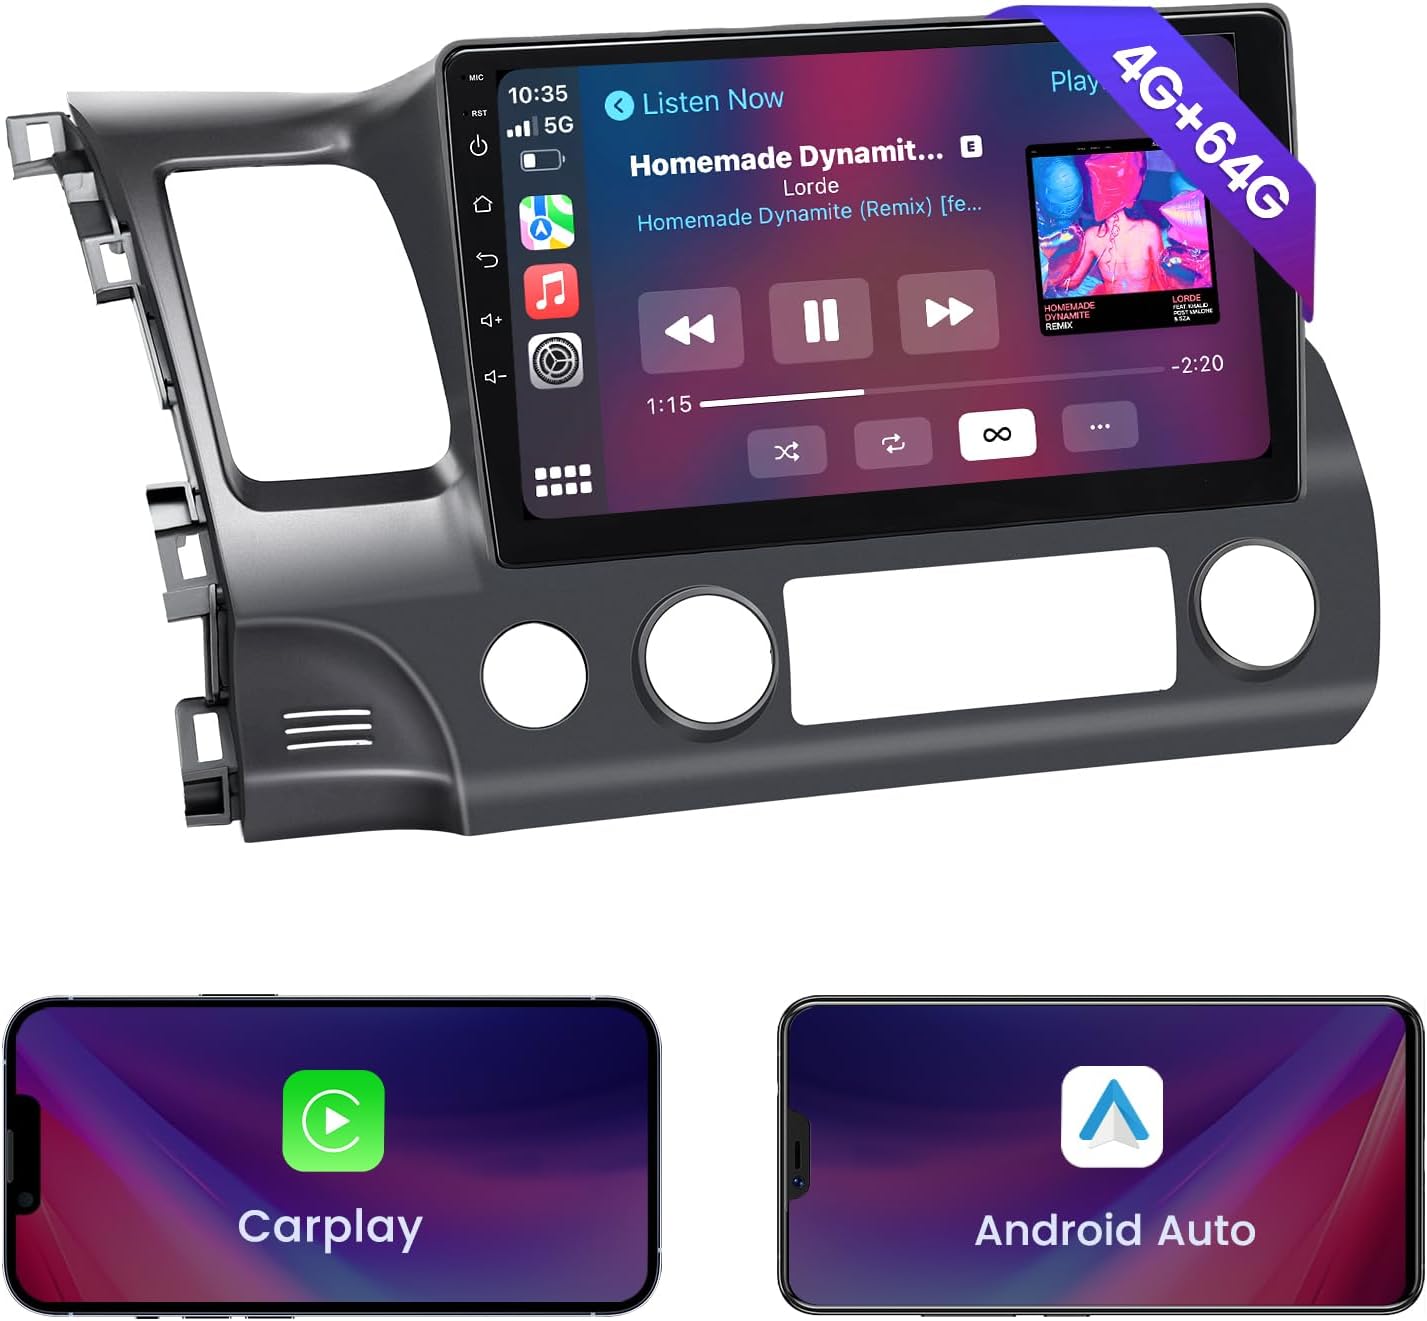
Image: The main screen of the Roadanvi head unit displaying a music player, navigation icon, and other application shortcuts, demonstrating the user-friendly interface.
4.2 Wireless Apple CarPlay & Wired Android Auto
Connect your smartphone for a safer and more integrated driving experience.
- Wireless CarPlay: For Apple iPhones, connect via Bluetooth first, then launch the "Autolink" app on the head unit.
- Wired Android Auto: For Android phones, connect via USB and launch the "Autolink" app.
Once connected, you can access phone maps, make calls, send/receive texts, and play music using voice commands (Siri/Google Assistant) or the touch screen.

Image: Demonstrates the Apple CarPlay and Android Auto interfaces running on the Roadanvi head unit, showing navigation, communication, and media playback features.
4.3 Bluetooth 5.0
Bluetooth 5.0 offers faster transmission speeds and a more stable connection for hands-free communication and audio streaming.
- Pairing: Go to the Bluetooth settings on the head unit and your phone, search for available devices, and pair with the Roadanvi unit.
- Hands-Free Calls: Make and receive calls directly from the head unit's screen or using voice commands.
- Bluetooth Music: Stream audio from your paired smartphone to the car's speakers.

Image: Displays the Bluetooth calling interface, allowing users to manage calls directly from the screen, and the AM/FM radio interface with frequency display.
4.4 Built-in DSP Sound System
The Digital Sound Processor (DSP) allows for advanced audio customization. Access the DSP settings to adjust equalizer presets, balance, fader, and other sound parameters to optimize your listening experience.
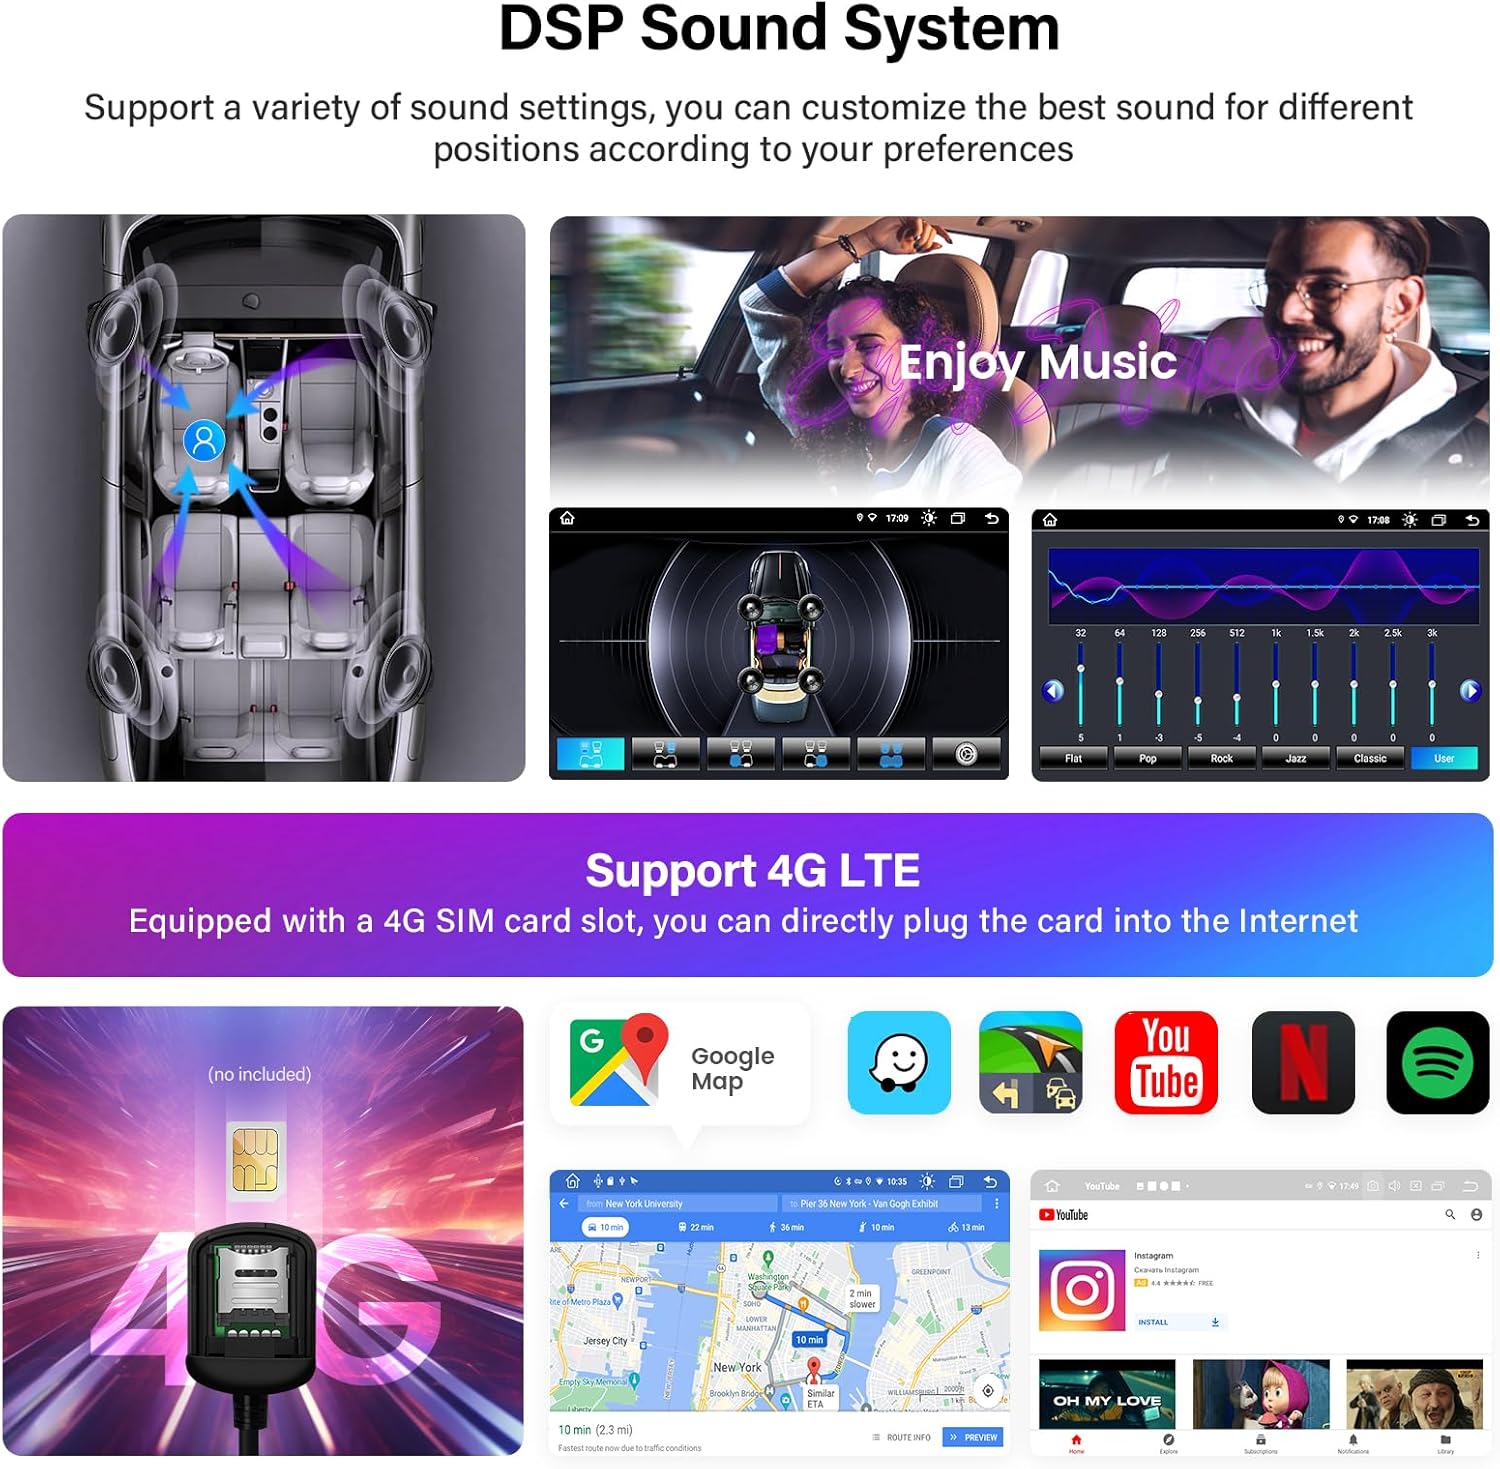
Image: Shows the DSP sound system interface with equalizer settings and a visual representation of sound distribution within the car. Also depicts the 4G LTE connectivity feature with a SIM card slot.
4.5 Navigation & 4G SIM Card Slot
The head unit supports both online and offline navigation. With the integrated 4G SIM card slot, you can insert a data-enabled SIM card (not included) to access real-time traffic updates, online maps, and other internet-dependent applications.
- Online Navigation: Use pre-installed map applications or download others from the Google Play Store.
- Offline Navigation: Download map data for your region to use navigation without an internet connection.
- 4G Connectivity: Insert a 4G SIM card into the dedicated slot to enable mobile data access for the unit.
4.6 AM/FM Radio
Access local radio stations with the built-in AM/FM tuner. The interface allows for easy station scanning, saving presets, and displaying station information (if broadcasted).
5. Specifications
| Feature | Specification |
|---|---|
| Model Name | Honda Civic Headunit (HB5338-4US) |
| Screen Size | 10.2 Inches |
| Screen Resolution | 1280x720 IPS |
| Processor | MTK8259 True Octa-core |
| RAM | 4GB |
| Internal Storage (ROM) | 64GB |
| Operating System | Android 10 |
| Bluetooth Version | 5.0 |
| Connectivity | Bluetooth, Cellular (4G), Auxiliary, Wi-Fi, USB |
| Special Features | Wireless CarPlay, Android Auto, Built-in DSP, GPS Navigation, AM/FM Radio |
| Audio Output Mode | Stereo |
| Package Dimensions | 43.46 x 30.99 x 25.4 cm |
| Weight | 3.22 kg |

Image: A visual comparison demonstrating the clarity and detail of a 1280x720P IPS screen compared to lower resolutions.

Image: An illustration highlighting the MTK 8259 Octa-core processor, along with specifications for 4GB RAM and 64GB ROM, indicating the unit's performance capabilities.
6. Maintenance
To ensure the longevity and optimal performance of your Roadanvi Android Car Radio, follow these maintenance guidelines:
- Screen Cleaning: Use a soft, lint-free cloth specifically designed for electronics to clean the touch screen. Avoid abrasive cleaners or harsh chemicals.
- Software Updates: Periodically check for and install software updates provided by Roadanvi to ensure system stability, security, and access to new features.
- Environmental Conditions: Avoid exposing the unit to extreme temperatures, direct sunlight for prolonged periods, or excessive moisture.
- Cable Connections: Ensure all cables are securely connected. Loose connections can lead to intermittent issues.
7. Troubleshooting
If you encounter issues with your Roadanvi Android Car Radio, refer to the following common troubleshooting steps:
- No Power:
- Check all power cable connections.
- Verify the vehicle's fuse for the radio is intact.
- Ensure the vehicle battery is properly connected and charged.
- No Sound:
- Check volume settings on the unit and ensure it's not muted.
- Verify speaker wire connections.
- Check audio output settings in the system menu.
- CarPlay/Android Auto Not Connecting:
- Ensure Bluetooth is enabled on your phone and paired with the unit (for Wireless CarPlay).
- For Wired Android Auto, ensure the USB cable is securely connected and is a data-transfer cable, not just charging.
- Restart both the phone and the head unit.
- Ensure the "Autolink" app is running on the head unit.
- GPS Signal Issues:
- Ensure the GPS antenna is properly installed and has a clear view of the sky.
- Check GPS settings in the unit to ensure it's enabled.
- Steering Wheel Controls Not Working:
- Verify the Canbus decoder (if applicable) is correctly connected.
- Access the SWC (Steering Wheel Control) settings in the unit's menu (Car Settings > Device information > SWC) and perform the learning function.
If problems persist after attempting these steps, please contact Roadanvi customer support for further assistance.
8. Warranty and Support
Roadanvi products typically come with a standard manufacturer's warranty. Please refer to the warranty card included in your package or visit the official Roadanvi website for detailed warranty terms and conditions.
For technical support, installation assistance, or warranty claims, please contact Roadanvi customer service through their official channels. Have your product model number (HB5338-4US) and purchase details ready when contacting support.