
1. Introduction
This manual provides detailed instructions for the safe and correct installation of your new AZH Oven Bake Heating Element. This replacement part is designed for various Frigidaire electric range models. Please read all instructions carefully before beginning the installation process.
For optimal performance and safety, it is recommended that installation be performed by a qualified technician. If you are unsure about any step, consult a professional.
2. Safety Information
- WARNING: Disconnect power to the range at the circuit breaker or fuse box before servicing to avoid electric shock.
- CAUTION: The oven interior may contain sharp edges. Wear appropriate protective gloves during installation.
- Ensure the oven has cooled completely before attempting any repairs.
- Keep children and pets away from the work area.
- Use only genuine replacement parts or approved equivalents.
3. Compatibility
This AZH bake heating element is compatible with the following Frigidaire electric range models:
- FFEF3054TSF
- FFEF3003NWA
- FEF365ASC
- FEF316BSF
- FEF366ECK
- FFEF3003RBA
- FEF354GSA
- FEF368GCB
- LFEF3017LMD
- FEFL64DSE
- And other similar Frigidaire electric range models.
Always verify the part number and visual appearance against your original element before installation.
4. Tools Required
Before you begin, ensure you have the following tools:
- Phillips head screwdriver
- Nut driver or socket set (typically 1/4" or 5/16")
- Pliers (optional, for stubborn connections)
- Work gloves
- Flashlight (optional)
5. Installation Instructions
Step 1: Prepare the Oven
- Disconnect Power: Locate your home's circuit breaker panel and turn off the breaker supplying power to your electric range. Verify power is off by attempting to turn on the oven light or controls.
- Cool Down: Ensure the oven cavity is completely cool to the touch.
- Open Oven Door: Open the oven door fully.
Step 2: Remove the Old Heating Element
- Locate Element: The bake element is typically located at the bottom of the oven cavity.
- Remove Mounting Screws: Using a Phillips head screwdriver or nut driver, remove the screws that secure the heating element to the back wall of the oven. There are usually two screws.
- Gently Pull Element: Carefully pull the element forward a few inches into the oven cavity. This will expose the electrical terminals.
- Disconnect Wires: Note the position of the wires on the terminals. Gently pull the wires off the terminals. It may be helpful to use pliers if they are tight. Do not let the wires retract into the back wall of the oven. You can use a piece of tape or a clip to secure them to prevent them from falling back.
- Remove Old Element: Once wires are disconnected, carefully remove the old heating element from the oven.

Image 1: The AZH Oven Bake Heating Element, showing its characteristic "M" or "U" shape and terminal connections at each end. This is the main component to be installed.
Step 3: Install the New Heating Element
- Connect Wires: Carefully connect the electrical wires to the terminals of the new AZH heating element. Ensure a secure connection.
- Insert Element: Gently push the new element into the oven cavity, aligning the mounting brackets with the screw holes at the back.
- Secure Element: Reinstall the mounting screws to secure the new heating element to the back wall of the oven. Do not overtighten.
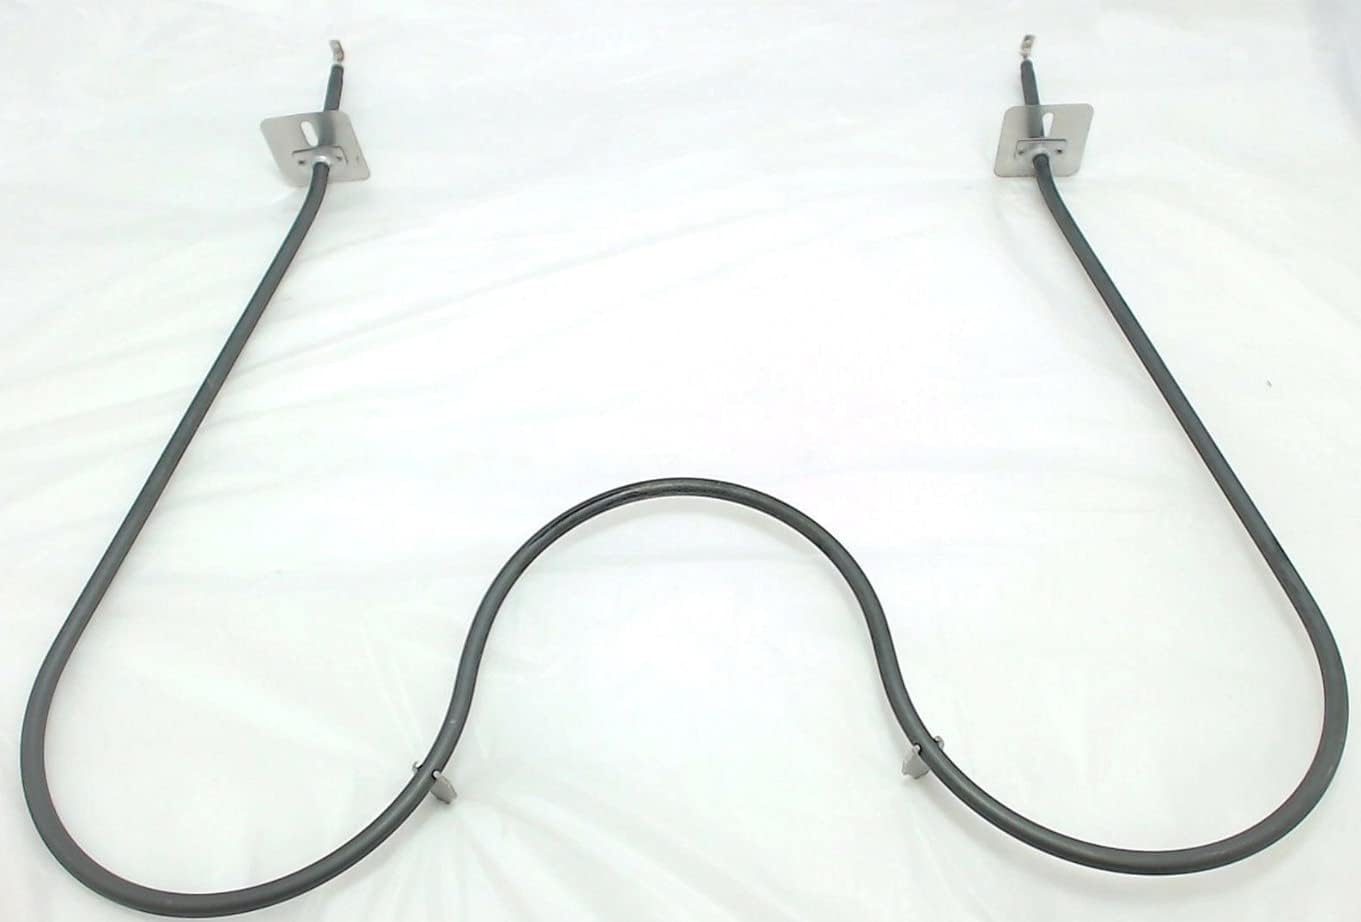
Image 2: A close-up view of one end of the heating element, highlighting the terminal connection point where electrical wires attach. This shows the flat metal bracket for mounting.
Step 4: Test the Oven
- Restore Power: Go back to your circuit breaker panel and turn the power back on to the electric range.
- Test Functionality: Set the oven to a bake cycle at a moderate temperature (e.g., 350°F or 175°C). Observe the new heating element. It should begin to glow red within a few minutes, indicating it is heating correctly.
- Monitor: Allow the oven to heat for 10-15 minutes to ensure proper operation.
6. Troubleshooting
If the new heating element does not function correctly after installation, consider the following:
- Element Not Heating:
Ensure power is fully restored to the range at the circuit breaker.
Check that the electrical wires are securely connected to the element terminals. Loose connections can prevent heating.
Verify that the element is correctly seated and the mounting screws are tightened.
- Oven Not Reaching Temperature:
Allow sufficient time for the oven to preheat. New elements may take a few cycles to fully settle.
If the issue persists, there might be other components affecting oven temperature, such as the thermostat or temperature sensor. This element replacement addresses only the heating component.
- Sparking or Burning Smell:
Immediately disconnect power to the range.
Check for any loose wires or foreign objects in the oven cavity. A slight burning smell during the first use is normal as manufacturing oils burn off, but persistent or strong smells require immediate attention.
If troubleshooting steps do not resolve the issue, it is recommended to contact a qualified appliance repair technician.
7. Specifications
| Part Type | Oven Bake Heating Element |
| Brand | AZH |
| Compatible Appliance Type | Electric Range / Oven |
| ASIN | B0995DDKFC |
| Date First Available | February 19, 2022 |
8. Support and Warranty
For technical assistance or inquiries regarding this product, please refer to the seller's contact information on the original purchase platform.
Warranty information, if applicable, is typically provided by the seller at the time of purchase. Please retain your proof of purchase for any warranty claims.
For general information about Frigidaire appliances, you may visit the official Frigidaire website: www.frigidaire.com