
Galanz GLR16FWED08
Galanz GLR16FWED08 16 Cu Ft French Door Refrigerator User Manual
Model: GLR16FWED08
1. Important Safety Information
Read all instructions before using this appliance to reduce the risk of fire, electric shock, or injury. Keep this manual for future reference.
- Electrical Safety: Ensure the refrigerator is properly grounded. Do not use extension cords.
- Flammable Materials: Do not store explosive substances or flammable materials inside the refrigerator.
- Child Safety: Supervise children near the appliance. Old refrigerators can be dangerous if children play inside.
- Ventilation: Maintain adequate ventilation around the appliance to prevent overheating.
- Servicing: Do not attempt to repair or replace any part of your refrigerator unless specifically recommended in this manual. All other servicing should be referred to a qualified technician.
2. Product Overview
The Galanz GLR16FWED08 is a 16 cubic feet French Door Refrigerator with a bottom freezer, designed for efficient food storage and preservation.
Key Features:
- Capacity: 16 cubic feet total (11 cubic feet refrigerator, 5 cubic feet freezer).
- Humidity Control Crisper Drawers: Two half-width removable crisper drawers with adjustable humidity for optimal fruit and vegetable freshness.
- Adjustable Glass Shelves: Three full-width glass shelves that slide out for easy cleaning and flexible storage.
- Bottom Freezer: Features two full-width storage drawers for organized frozen food storage.
- Electronic Temperature Control: Precise temperature management for both refrigerator and freezer compartments.
- Frost Free: Prevents ice buildup in the freezer, eliminating the need for manual defrosting.
- Energy Efficient: Utilizes a low global warming potential refrigerant and a low energy consumption compressor for quiet and efficient operation.

Figure 2.1: Front view of the Galanz GLR16FWED08 French Door Refrigerator. This image displays the appliance's overall design, featuring two upper French doors and a lower freezer drawer.

Figure 2.2: Capacity breakdown of the refrigerator and freezer compartments. The upper section, highlighted in blue, indicates 11 cubic feet for refrigeration, while the lower section, also in blue, shows 5 cubic feet for freezing.
3. Setup and Installation
3.1 Unpacking
Carefully remove all packaging materials, including foam and adhesive tape. Inspect the refrigerator for any shipping damage. Keep packaging materials until you are satisfied with the product's condition.
3.2 Location and Clearance
Place the refrigerator on a flat, stable surface away from direct sunlight and heat sources. Ensure adequate clearance around the appliance for proper ventilation and door opening. Recommended clearances are:
- Back: 2 inches (5 cm)
- Sides: 2 inches (5 cm)
- Top: 4 inches (10 cm)

Figure 3.1: Product dimensions. The image illustrates the refrigerator's height (70 inches), width (29.3 inches), and depth (28.3 inches).
3.3 Leveling the Refrigerator
The refrigerator must be level for optimal performance. Adjust the leveling feet located at the bottom front of the appliance by turning them clockwise to raise or counter-clockwise to lower. Use a level to ensure the appliance is stable and level.

Figure 3.2: Adjustable leveling foot. This image shows the rotating mechanism used to adjust the height of the refrigerator for proper leveling.
3.4 Initial Power-On
After positioning and leveling, plug the refrigerator into a dedicated 120V AC outlet. Allow the appliance to run for at least 4 hours before placing food inside to ensure it reaches the set temperatures.
4. Operating Instructions
4.1 Temperature Control
The refrigerator features an electronic temperature control panel, typically located inside the fresh food compartment. The recommended temperature range for the refrigerator is 34°F to 45°F (1°C to 7°C), and for the freezer, it is below 0°F (-18°C).
- Use the control buttons to adjust the desired temperature settings. Refer to the specific icons on your control panel for precise adjustments.
- Temperature settings may need adjustment based on ambient room temperature and frequency of door openings.
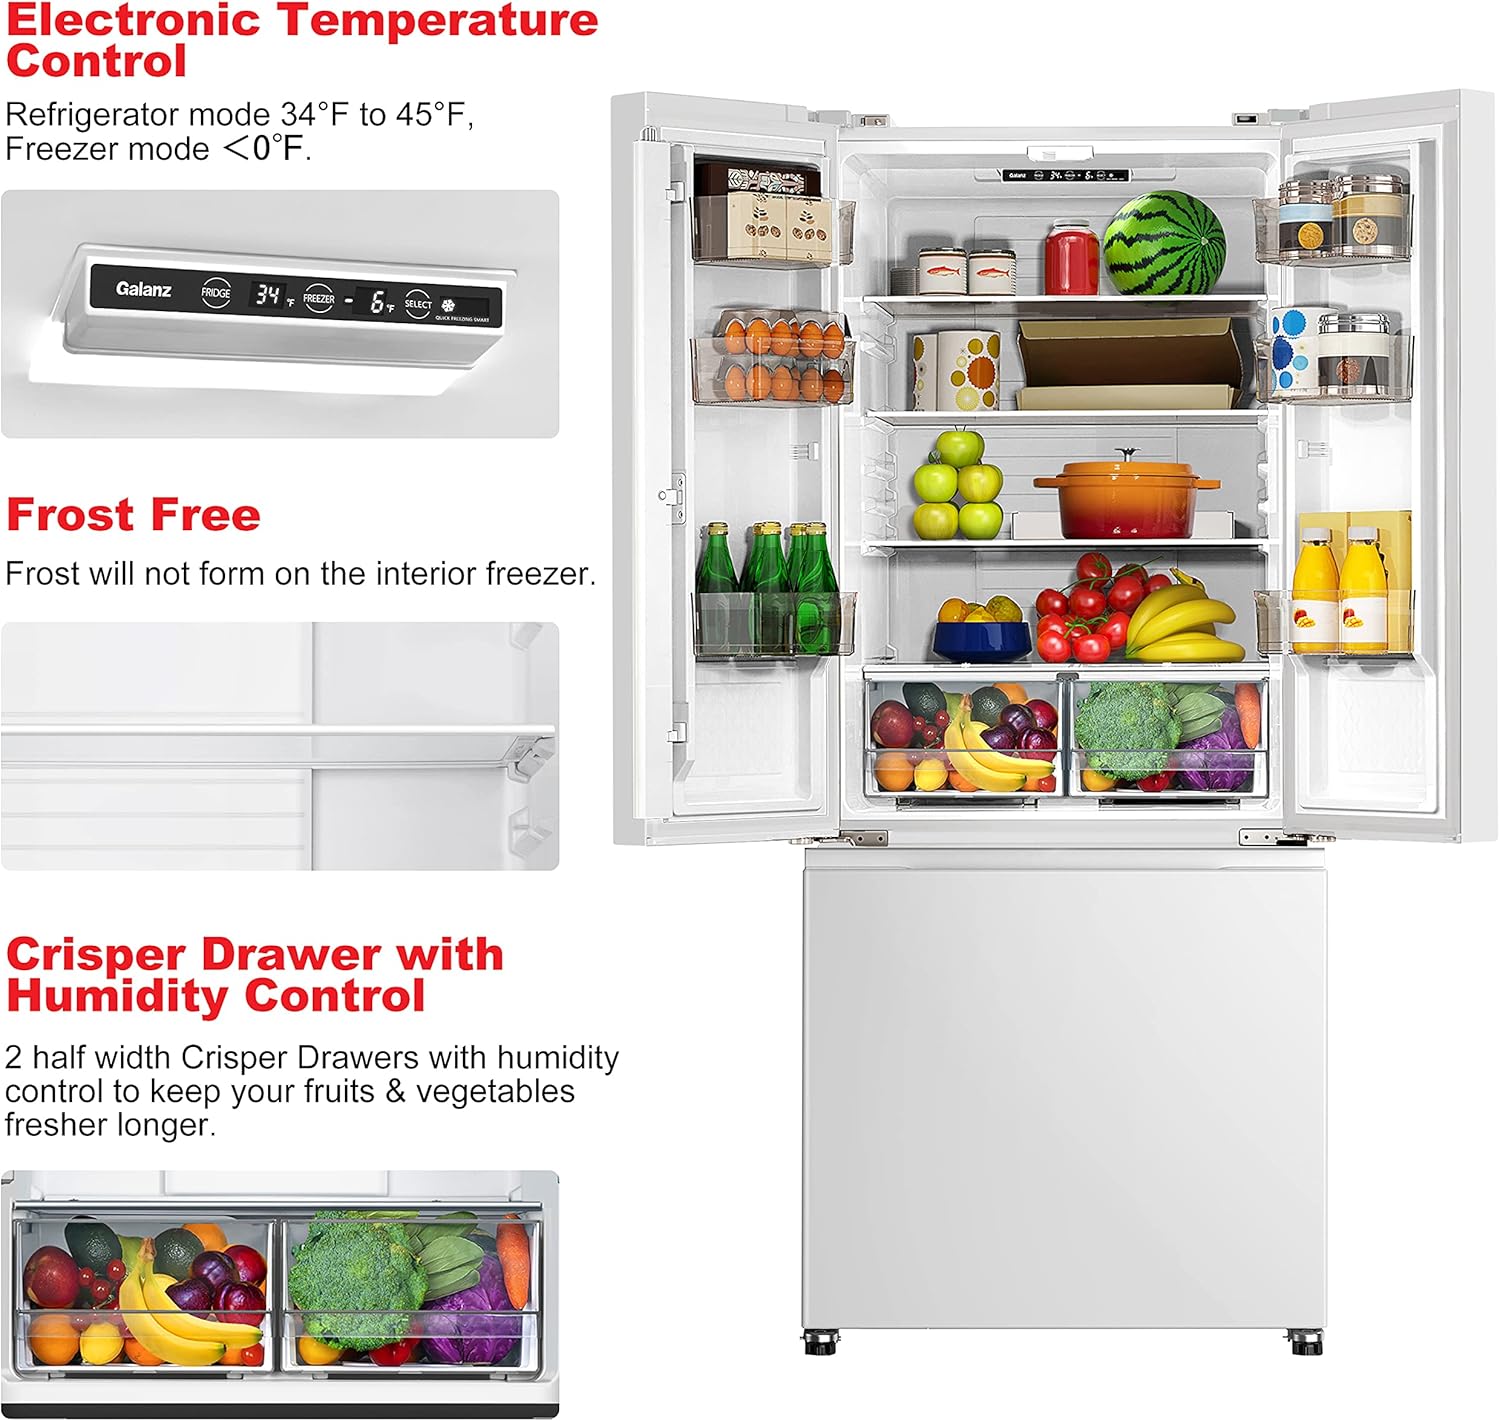
Figure 4.1: Electronic temperature control panel and internal features. This image highlights the digital display for temperature settings, the frost-free indicator, and the crisper drawers with humidity control.
4.2 Crisper Drawers with Humidity Control
The two half-width crisper drawers are designed to maintain optimal humidity levels for fruits and vegetables. Adjust the humidity slider on each drawer:
- High Humidity: For leafy greens and vegetables to prevent wilting.
- Low Humidity: For fruits and items that benefit from less moisture.
4.3 Freezer Compartment
The bottom freezer compartment features two full-width plastic drawers. These drawers can be used to organize various frozen foods, maximizing the available freezer space.

Figure 4.2: Freezer drawers and adjustable shelves. This image displays the two pull-out drawers in the bottom freezer and the flexible glass shelving in the upper refrigerator section.
5. Maintenance
5.1 Cleaning
Regular cleaning helps maintain the refrigerator's appearance and efficiency.
- Interior: Unplug the refrigerator. Wash interior surfaces with a solution of mild soap and warm water. Rinse and dry thoroughly.
- Glass Shelves: The glass shelves can be removed and wiped clean with a damp cloth. For spills, remove the shelf, wash with soap and water, rinse, and dry before returning.
- Exterior: Clean the exterior surfaces with a soft cloth and mild detergent. Avoid abrasive cleaners or solvents.
- Door Gaskets: Clean door gaskets regularly to ensure a proper seal.
5.2 Frost-Free System
This refrigerator is equipped with a frost-free system, which automatically prevents ice buildup in the freezer compartment. No manual defrosting is required.
6. Troubleshooting
Before contacting customer service, review this section for common issues and their solutions.
| Problem | Possible Cause | Solution |
|---|---|---|
| Refrigerator does not operate | Not plugged in; circuit breaker tripped; power outage. | Ensure plug is secure; reset circuit breaker; check household power. |
| Temperature is not cold enough | Door left open; frequent door openings; warm food added; temperature setting too high. | Check door seal; avoid prolonged door openings; allow warm food to cool before storing; adjust temperature setting lower. |
| Unusual noises | Refrigerator not level; items vibrating inside; normal operating sounds. | Level the refrigerator; rearrange items; gurgling/hissing sounds are normal refrigerant flow. |
| Excessive frost in freezer | Door not sealed properly; frequent door openings. | Check door gasket for obstructions; ensure door closes completely. |
7. Specifications
Technical details for the Galanz GLR16FWED08 refrigerator.
| Specification | Detail |
|---|---|
| Brand | Galanz |
| Model Info | GLR16FWED08 |
| Item Weight | 189 pounds |
| Product Dimensions (D x W x H) | 28.3 x 29.3 x 70 inches |
| Capacity | 16 Cubic Feet |
| Refrigerator Fresh Food Capacity | 11 Cubic Feet |
| Freezer Capacity | 5 Cubic Feet |
| Annual Energy Consumption | 490 Kilowatt Hours Per Year |
| Installation Type | Freestanding |
| Form Factor | French Door |
| Special Features | Low Noise |
| Color | White |
| Voltage | 120 Volts |
| Crispers/Drawers | 2 |
| Defrost System | Frost Free |
| Number Of Doors | 3 |
| Shelf Type | Glass |
| Shelves | 3 |
| Included Components | 1 X Refrigerator; 3 X Glass Shelves |
8. Warranty and Support
This product is subject to a 30-day easy return policy. For detailed warranty information, please refer to the documentation provided with your purchase or contact Galanz customer support.
Optional protection plans are available for purchase to extend coverage beyond the standard warranty period:
- 2-Year Protection Plan
- 3-Year Protection Plan
For further assistance, you may refer to the official user manual PDF: Download User Manual (PDF)
Related documentsGLR16FWED08


Ask a question about this manual
Ask about setup, troubleshooting, compatibility, parts, safety, or missing instructions. Manuals+ will review the question and use this page’s manual context to help answer it.