1. Introduction
Thank you for purchasing the SOKANY SK-201A Handheld USB Rechargeable Milk Frother and Egg Beater. This versatile appliance is designed to help you create creamy milk foam for your coffee beverages and efficiently whisk eggs for various recipes. Please read this manual carefully before use to ensure proper operation, safety, and maintenance.
2. Important Safety Instructions
To reduce the risk of fire, electric shock, or injury, always follow these basic safety precautions:
- Read all instructions before using the appliance.
- Keep the main body of the frother away from water or other liquids. Do not immerse the handle in water.
- This appliance is not intended for use by persons (including children) with reduced physical, sensory, or mental capabilities, or lack of experience and knowledge, unless they have been given supervision or instruction concerning use of the appliance by a person responsible for their safety.
- Children should be supervised to ensure that they do not play with the appliance.
- Only use the provided USB cable for charging. Do not use damaged cables or chargers.
- Do not operate the appliance if it has been damaged in any way. Contact customer support for assistance.
- Avoid contact with moving parts. Keep hands, hair, and clothing away from the whisk during operation.
- Use the appliance only for its intended purpose as described in this manual.
- Do not attempt to repair or disassemble the appliance yourself.
- Ensure the whisk head is securely attached before operation.
3. Product Overview
The SOKANY SK-201A comes with a main handheld unit, two interchangeable stainless steel whisks, and a USB charging cable.
Components:
- Main Unit (Host): Contains the motor, battery, and control buttons.
- Milk Frother Whisk: Ideal for creating foam for coffee, lattes, and cappuccinos.
- Egg Beater Whisk: Suitable for whisking eggs, cream, or light batters.
- USB Charging Cable: For recharging the internal battery.
Controls and Indicators:
- ON/OFF Button: Press to turn on/off and cycle through speeds.
- Speed Indicator Lights: Three lights indicate the current speed setting (1, 2, or 3).
- Charging Indicator Light: Shows charging status (red for charging, green for fully charged).
- Charging Port: USB port for connecting the charging cable.
- Whisk Connection Port: Where the whisk heads attach.
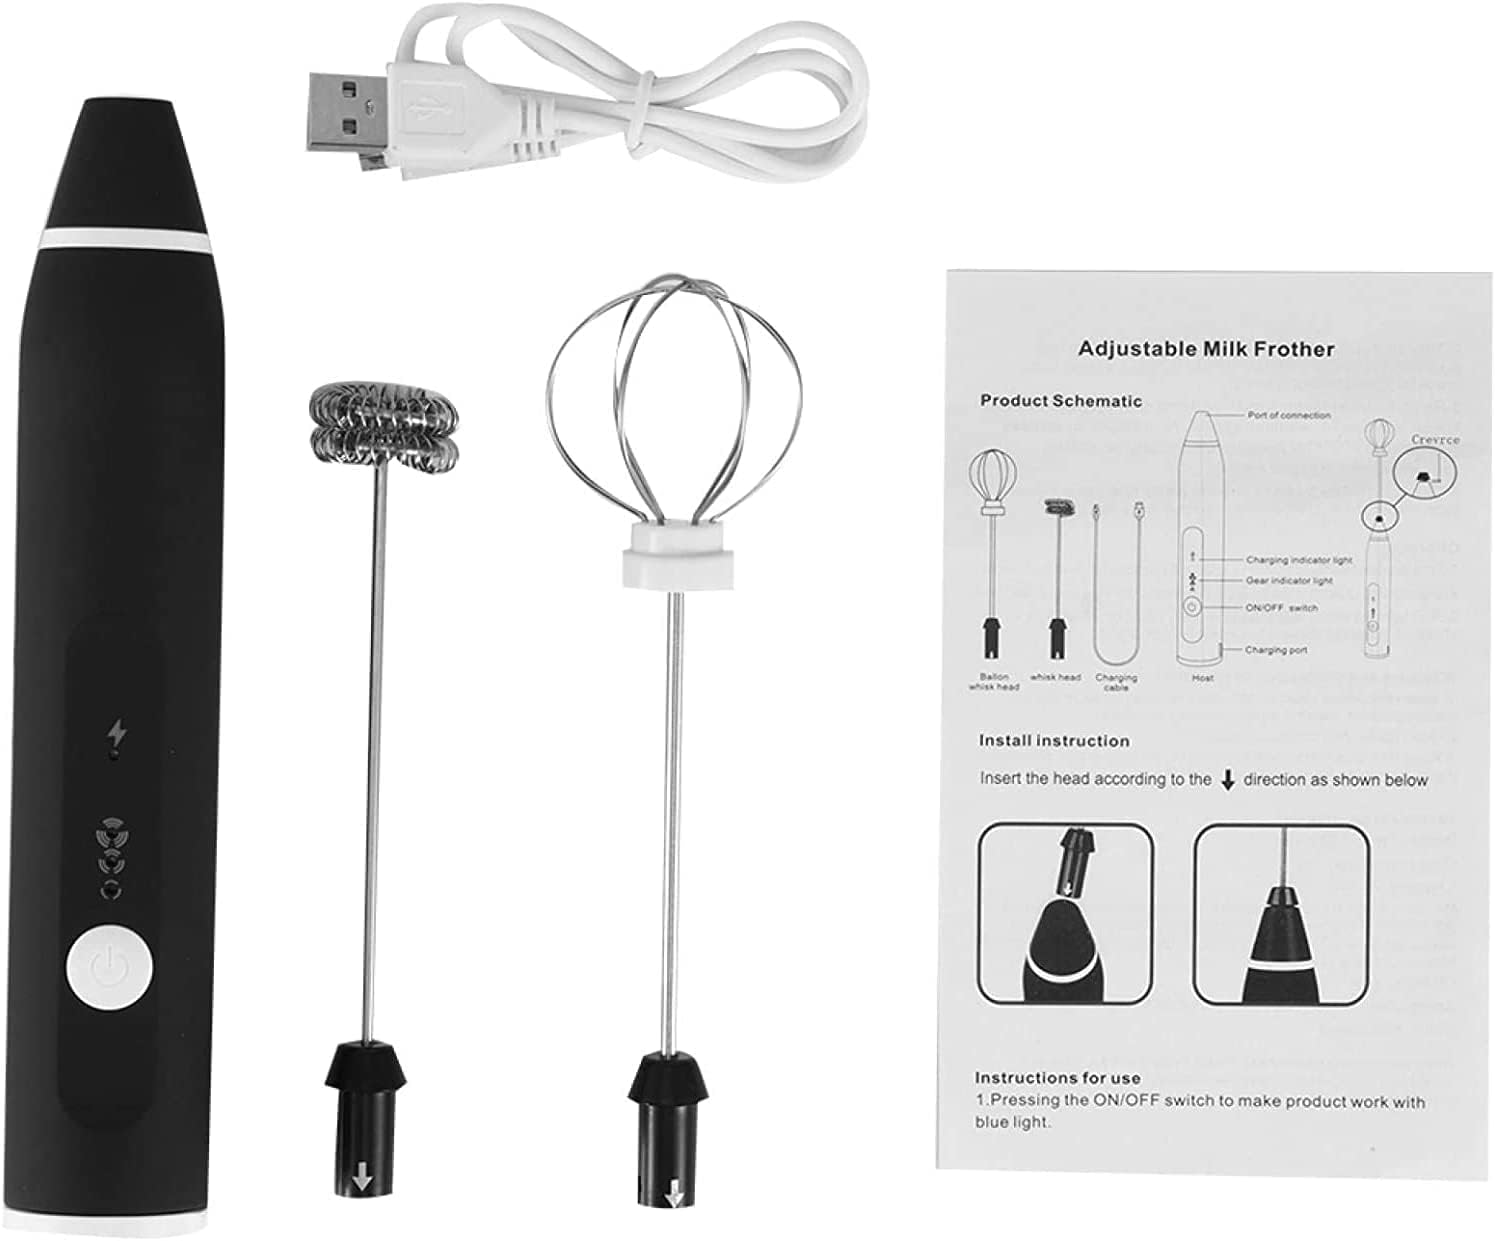
Image 3.1: Overview of the SOKANY SK-201A handheld frother, showing the main unit, two whisk attachments, USB cable, and a product schematic illustrating the parts and basic installation.

Image 3.2: Detailed diagram showing the dimensions of the frother and its whisks, along with labels for the connection port, charging indicator, speed indicator, and ON/OFF button.
4. Setup
4.1. Initial Charging
Before first use, fully charge the frother. Connect the USB charging cable to the charging port on the main unit and plug the other end into a standard USB power adapter (not included) or a computer USB port. The charging indicator light will be red while charging and turn green when fully charged. Initial charging may take 1-2 hours.
4.2. Attaching the Whisk Head
Choose the desired whisk head (milk frother or egg beater). Align the whisk head with the connection port on the main unit and push it firmly until it clicks into place. To remove, pull the whisk head straight out.
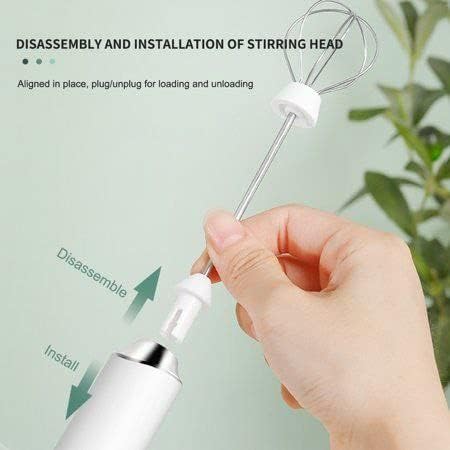
Image 4.1: Illustration demonstrating how to install and disassemble the whisk head by aligning and pushing/pulling it into the main unit.

Image 4.2: Close-up view showing the removable design of the whisk attachment, highlighting the simple plug-in and pull-out mechanism for installation and removal.
5. Operating Instructions
5.1. Power On/Off and Speed Adjustment
- Press the ON/OFF button once to turn on the frother at Speed 1 (one indicator light will illuminate).
- Press the ON/OFF button again to turn off the frother.
- To cycle through speeds, press the ON/OFF button repeatedly:
- First press: Speed 1 (one light)
- Second press: Off
- Third press: Speed 2 (two lights)
- Fourth press: Off
- Fifth press: Speed 3 (three lights)
- Sixth press: Off
5.2. Using the Milk Frother Whisk
Attach the milk frother whisk. Immerse the whisk end into milk (cold or warm, depending on desired foam). Turn on the frother and select your desired speed. Move the frother up and down gently to create foam. For best results, use a narrow, tall container and ensure the whisk is submerged but not touching the bottom.
5.3. Using the Egg Beater Whisk
Attach the egg beater whisk. Immerse the whisk end into eggs or other ingredients. Turn on the frother and select your desired speed. Whisk until the desired consistency is achieved. This whisk is also suitable for mixing sauces or light batters.
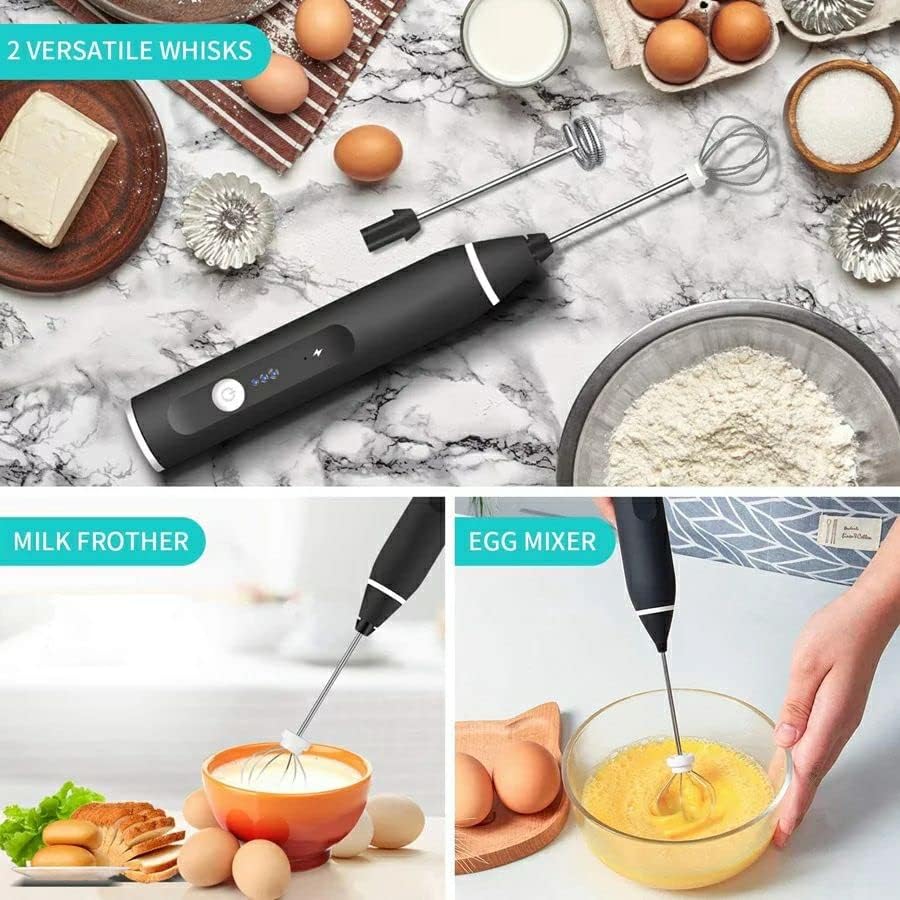
Image 5.1: The SOKANY SK-201A frother demonstrating its dual functionality: frothing milk for beverages and whisking eggs for cooking, highlighting the two versatile whisk attachments.

Image 5.2: A collage showing the frother in action: creating foam in a glass of milk, whisking eggs in a bowl, and assisting in pouring latte art, illustrating its practical applications.

Image 5.3: The SOKANY SK-201A frother with the egg whisk attachment actively mixing eggs in a clear bowl, demonstrating its effectiveness for culinary tasks.
6. Charging the Appliance
When the battery is low, the frother's performance may decrease. To charge, connect the provided USB cable to the charging port on the main unit. Plug the other end into a compatible USB power source (e.g., wall adapter, power bank, computer USB port). The charging indicator light will glow red during charging and turn green once the battery is fully charged. Disconnect the cable once charging is complete.

Image 6.1: A detailed view highlighting the two types of mixing heads and an important note regarding the charging indicator light, which glows red when charging is required.
7. Cleaning and Maintenance
Proper cleaning ensures the longevity and hygiene of your frother.
- Whisk Heads: After each use, remove the whisk head and rinse it under running water. You can use a mild dish soap and a soft brush for thorough cleaning. Ensure all food residue is removed. The whisks are hand wash only.
- Main Unit: Wipe the main unit with a damp cloth. Do not immerse the main unit in water or any other liquid.
- Drying: Ensure all parts are completely dry before reassembling or storing.
- Storage: Store the frother and its attachments in a clean, dry place away from direct sunlight and extreme temperatures.
8. Troubleshooting
| Problem | Possible Cause | Solution |
|---|---|---|
| Frother does not turn on. | Battery is depleted. | Charge the frother fully using the USB cable. |
| Weak frothing/whisking performance. | Low battery. Incorrect whisk head for task. | Ensure battery is fully charged. Use the appropriate whisk head for milk frothing or egg beating. |
| Whisk head detaches during use. | Whisk head not securely attached. | Ensure the whisk head is pushed firmly into the connection port until it clicks. |
| Charging indicator light does not turn green. | Not fully charged. Faulty cable/charger. | Allow more time for charging. Try a different USB cable or power adapter. |
9. Specifications
| Feature | Detail |
|---|---|
| Brand | SOKANY |
| Model Number | SK-201A |
| Power / Wattage | 30 watts |
| Product Dimensions | 7 x 7 x 20 cm |
| Item Weight | 210 g |
| Material | Mixed (ABS plastic handle, Stainless steel whisks) |
| Color | Black |
| Special Features | USB Rechargeable, 3-Speed Adjustable |
| Included Components | Handheld milk foam machine, 2 stainless steel whisks, USB cable |
| Product Care Instructions | Hand Wash (whisks only) |
10. Warranty and Support
For warranty information or technical support, please refer to the documentation provided at the time of purchase or contact your retailer. Keep your proof of purchase for any warranty claims.