Introduction
The Parkside Inspection Camera (Model PKI 2.8 B1) is a versatile tool designed for inspecting small hollow spaces, pipes, and hard-to-reach areas. It is ideal for various repair and maintenance tasks around the house and for automotive applications. This manual provides detailed instructions on the proper use, setup, maintenance, and troubleshooting of your inspection camera.
Package Contents
Please check that all items listed below are included in your package. If any parts are missing or damaged, please contact customer support.
- Inspection Camera Unit with 2.8" TFT-LCD Colour Display
- Flexible Gooseneck with Camera Probe (120cm length)
- Attachments: Magnetic pick-up tool, Mirror, Hook, Double hook
- 4 x AAA Batteries
- Micro-USB Cable
- Practical Plastic Storage Case

Image: The complete package contents, including the main camera unit, flexible gooseneck probe, various attachments, batteries, and USB cable, all neatly arranged.
Safety Instructions
Always observe the following safety precautions to ensure safe operation and to prevent damage to the device or injury to yourself.
- Do not attempt to disassemble or modify the device. Repairs should only be performed by qualified personnel.
- Keep the device away from extreme temperatures, direct sunlight, and high humidity.
- The camera probe and gooseneck are waterproof (IP67 certified), but the main unit is not. Do not immerse the main unit in water.
- Ensure batteries are inserted with correct polarity. Remove batteries if the device will not be used for an extended period.
- Do not use the device in explosive atmospheres or near flammable liquids or gases.
- Avoid direct eye exposure to the camera's LEDs, especially at high brightness settings.
Product Overview
Familiarize yourself with the components and controls of your Parkside Inspection Camera.

Image: A detailed view of the inspection camera's display screen and control buttons, showing the layout for operation.
- Display Screen: 2.8" TFT-LCD Colour Display.
- Power Button: Turns the device on/off.
- Zoom Button: Activates 4x digital zoom.
- Photo Capture Button: Takes a still image.
- LED Brightness Control: Adjusts the brightness of the camera's LEDs (10 settings).
- Display Brightness Control: Adjusts the brightness of the TFT-LCD display.
- Gooseneck Connector: Port for attaching the flexible camera probe.
- Micro-USB Port: For data transfer to a computer.
- Battery Compartment: Located at the bottom of the handle.
Setup
1. Battery Installation
The device requires 4 AAA batteries (included). Ensure the device is turned off before installing batteries.
- Locate the battery compartment cover at the bottom of the handle.
- Slide or unclip the cover to open the compartment.
- Insert 4 AAA batteries, observing the correct polarity (+/-) as indicated inside the compartment.
- Close the battery compartment cover securely.
2. Attaching the Camera Probe
Connect the flexible gooseneck camera probe to the main unit.
- Align the connector of the gooseneck probe with the port on top of the main unit.
- Gently push the connector in and twist the locking ring clockwise until it is secure.
- To detach, twist the locking ring counter-clockwise and pull the connector out.
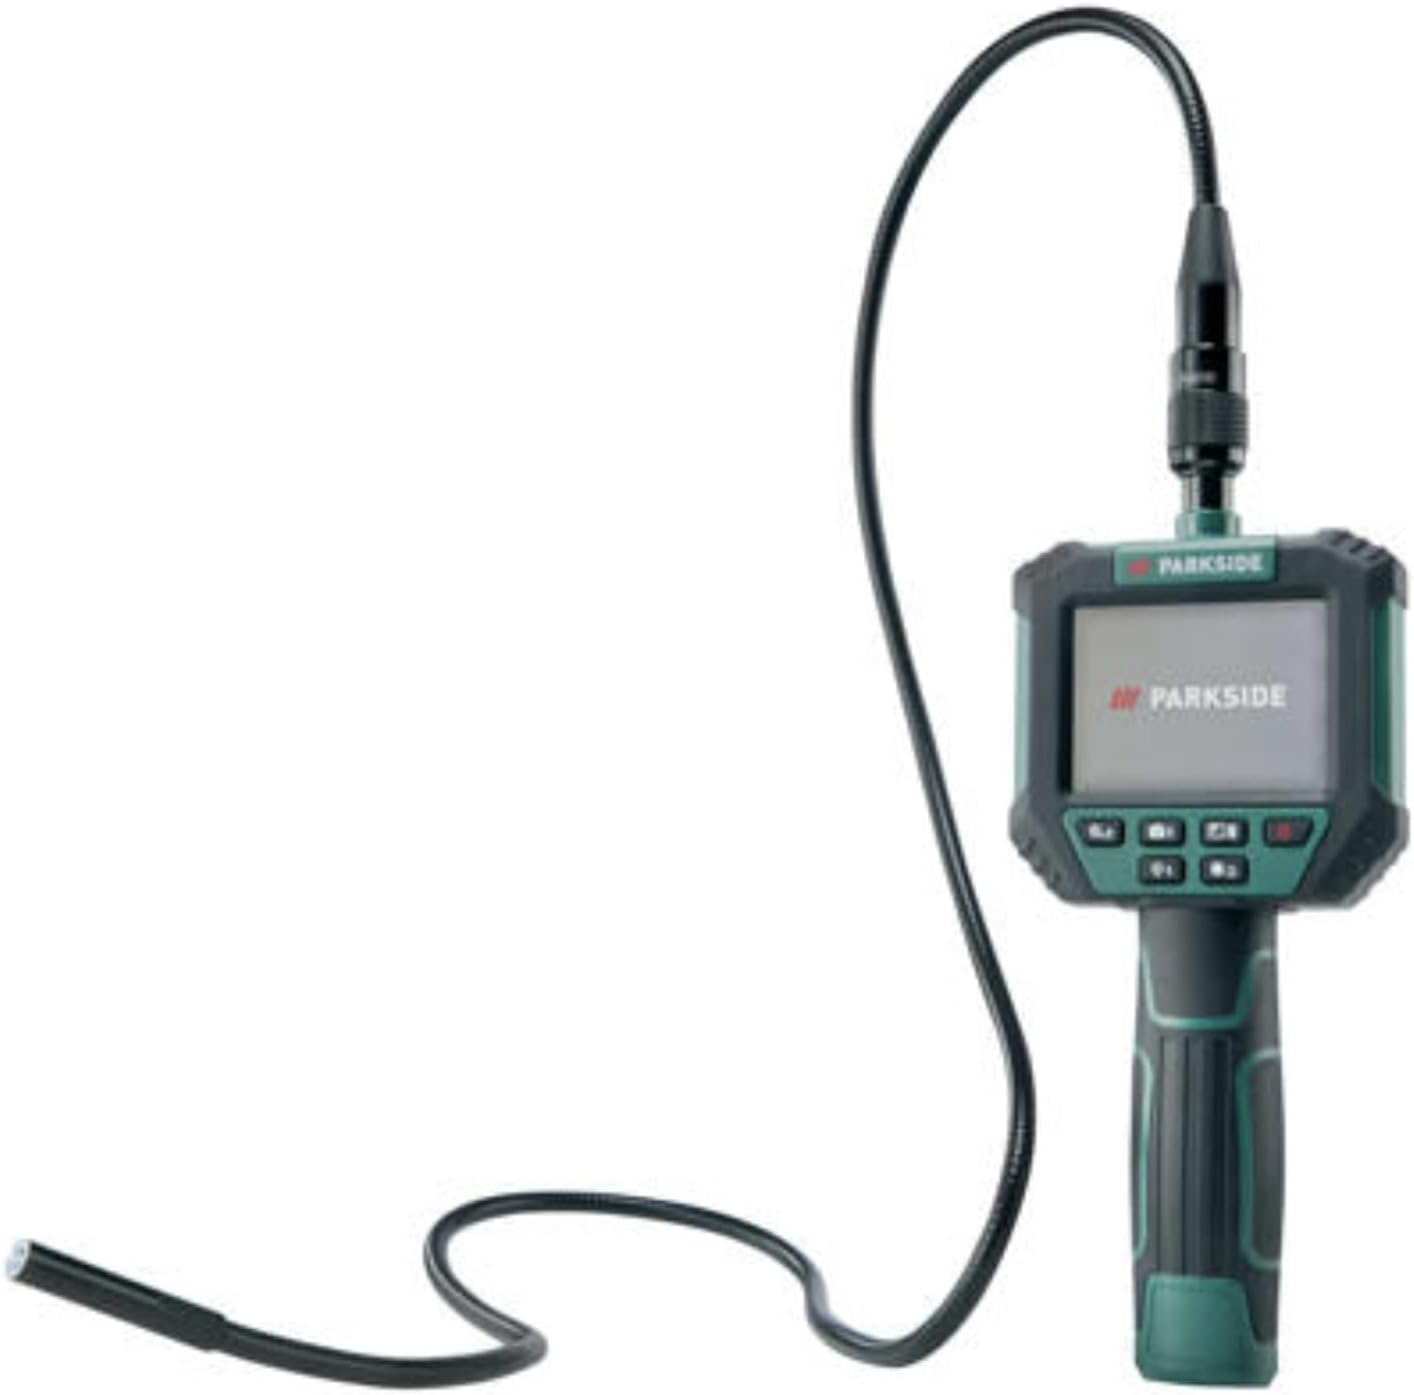
Image: The inspection camera unit with the flexible gooseneck probe fully attached and extended, ready for use.
Operating Instructions
1. Powering On/Off
- To turn on: Press and hold the Power Button until the display illuminates.
- To turn off: Press and hold the Power Button until the display turns off.
2. Adjusting LED Brightness
The camera probe features 6 white, dimmable LEDs with 10 brightness settings.
- Press the LED Brightness Control button (often marked with a light bulb icon) to cycle through the 10 brightness levels.
- The current brightness level will be indicated on the display.
3. Adjusting Display Brightness
Adjust the display brightness for optimal viewing in different lighting conditions.
- Press the Display Brightness Control button (often marked with a sun icon) to adjust the screen brightness.
4. Using the Zoom Function
The device features a 4x digital zoom.
- Press the Zoom Button to activate and cycle through the zoom levels.
5. Capturing Photos
The camera can store up to 2,000 photos on its built-in memory.
- Once the desired view is on the display, press the Photo Capture Button (often marked with a camera icon) to take a picture.
- A confirmation or brief flash on the screen may indicate a successful capture.

Image: A hand holding the inspection camera, with the flexible probe inserted into a drain, demonstrating its use in damp environments.

Image: The inspection camera being used to examine components within a car engine bay, highlighting its utility for automotive maintenance.
6. Using Attachments
The included attachments can be fitted to the camera probe for enhanced functionality.
- Mirror: For viewing objects at a 90-degree angle.
- Hook/Double Hook: For retrieving small objects.
- Magnetic Pick-up Tool: For retrieving small metallic objects.
- To attach, carefully slide the desired attachment onto the tip of the camera probe until it is secure.
Data Transfer
You can transfer captured photos from the inspection camera to a computer or tablet using the supplied Micro-USB cable.
- Ensure the inspection camera is powered on.
- Connect one end of the Micro-USB cable to the Micro-USB port on the inspection camera.
- Connect the other end of the USB cable to an available USB port on your computer or tablet.
- The device should be recognized as a removable storage device. You can then access the stored photos and copy them to your computer.
- Safely eject the device from your computer before disconnecting the cable.
Maintenance
Cleaning
- Wipe the main unit with a soft, dry cloth. Do not use abrasive cleaners or solvents.
- The camera probe and gooseneck can be wiped clean with a damp cloth. Ensure they are dry before storage.
- Clean the camera lens gently with a lens cleaning cloth to ensure clear images.
Storage
- Store the inspection camera and its accessories in the provided plastic case when not in use.
- Store in a cool, dry place, away from direct sunlight and extreme temperatures.
- Remove batteries if storing for an extended period to prevent leakage.
Troubleshooting
| Problem | Possible Cause | Solution |
|---|---|---|
| Device does not turn on. | Batteries are dead or incorrectly inserted. | Replace batteries or check polarity. |
| No image on display. | Camera probe not securely connected. | Ensure the gooseneck connector is fully inserted and locked. |
| Image is blurry or unclear. | Camera lens is dirty; insufficient lighting. | Clean the camera lens; increase LED brightness. |
| Cannot transfer photos to computer. | USB cable faulty; device not recognized. | Try a different USB port or cable; ensure device is powered on. |
| LEDs are not working. | LED brightness set to minimum; faulty connection. | Increase LED brightness; check gooseneck connection. |
Specifications
| Model Number | PKI 2.8 B1 |
| Display | 7.11cm (2.8") TFT-LCD / RGB 240 x 320 pixels |
| Camera Probe Diameter | Ø8mm |
| Gooseneck Length | 120cm |
| LEDs | 6 white, dimmable LEDs (10 brightness settings) |
| Waterproof Rating (Probe) | IP67 certified |
| Zoom Function | 4x Digital Zoom |
| Internal Memory | Stores up to 2,000 photos |
| Power Source | 4 x AAA batteries |
| Connectivity | Micro-USB port for data transfer |
| Macro Focus Range | 1-10 cm |
Warranty and Support
This Parkside Inspection Camera comes with a 3-year warranty from the date of purchase. Please retain your proof of purchase for warranty claims.
For technical support, warranty claims, or spare parts, please contact Kompernass Parkside customer service. Contact details can typically be found on the product packaging or the manufacturer's official website.
Manufacturer: Kompernass Parkside


