1. Introduction
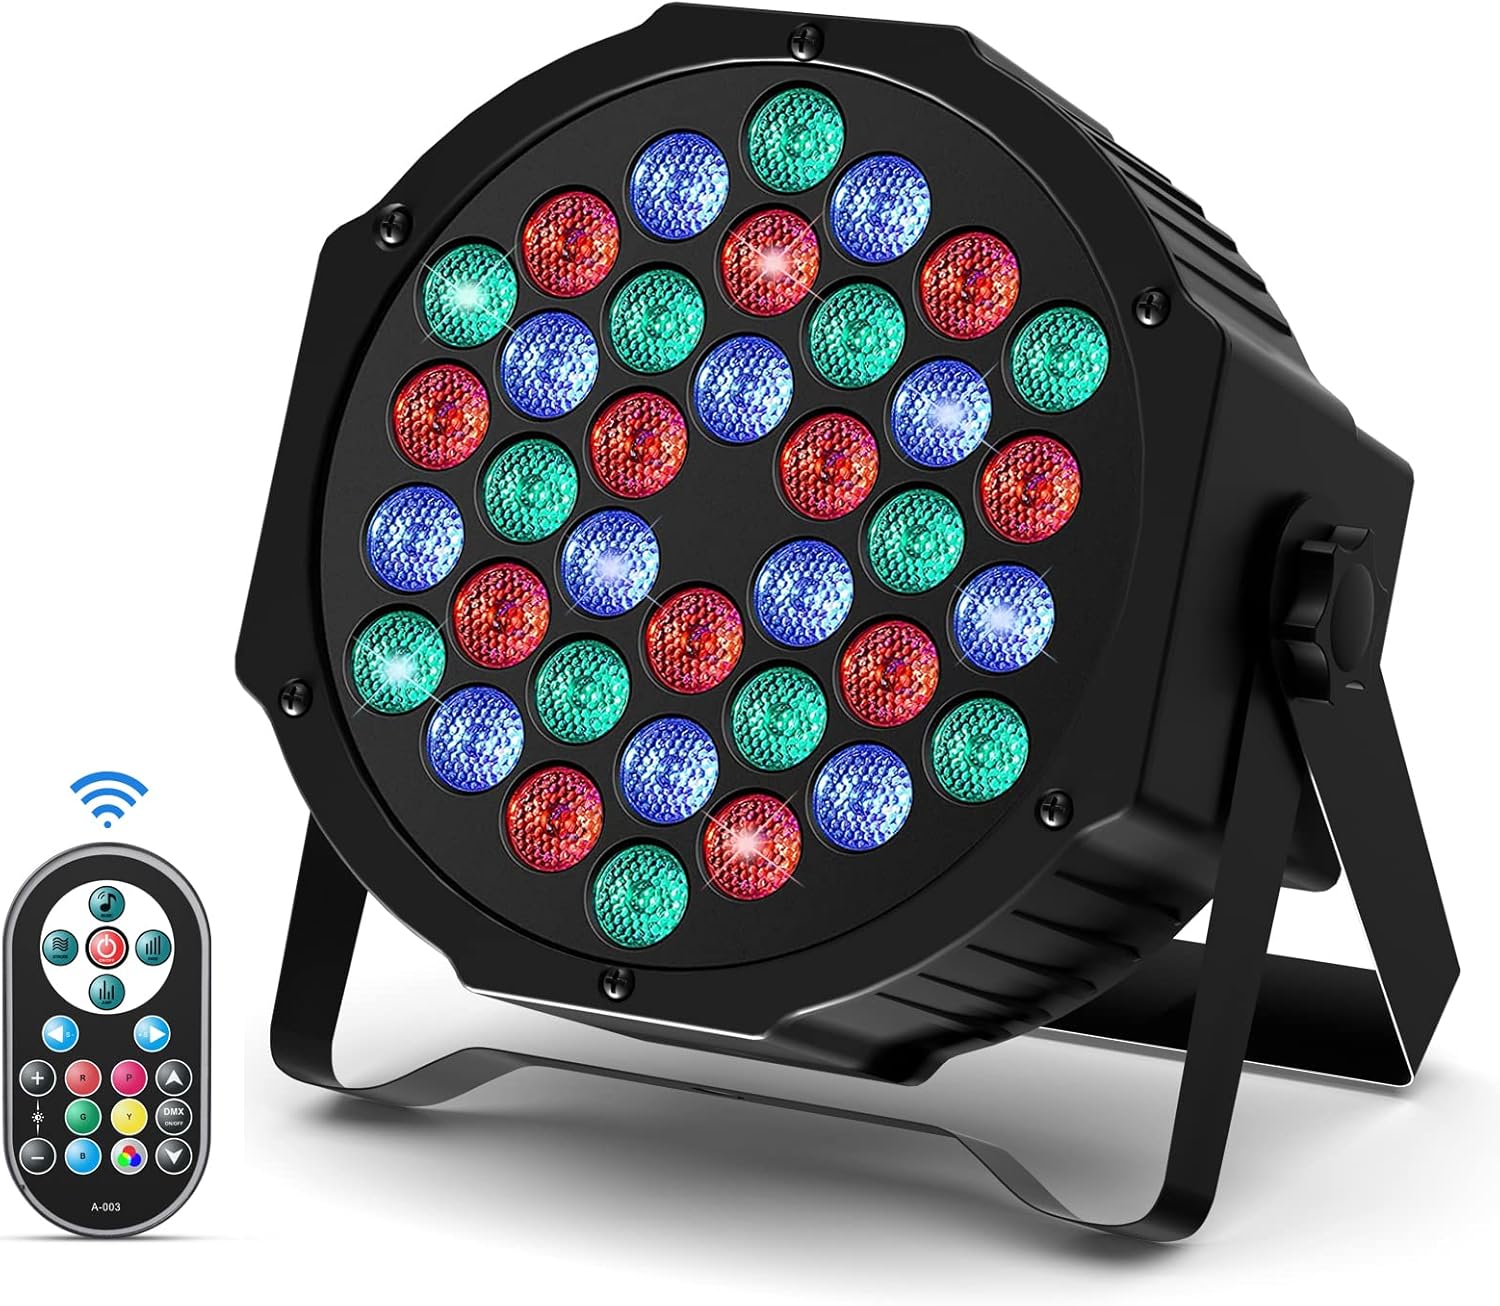
Figure 1.0: DELIBANG LED Par 36 RGBW Disco Light
Thank you for purchasing the DELIBANG LED Par 36 RGBW Disco Light. This product is designed to provide vibrant and dynamic lighting effects for various events, including parties, DJ shows, concerts, and stage performances. Please read this manual thoroughly before operation to ensure safe and optimal use of the device.
1.1 Package Contents
- 1 x LED Par 36 Stage Light
- 2 x Mounting Brackets
- 2 x Screws
- 1 x Remote Control
- 1 x User Manual (this document)
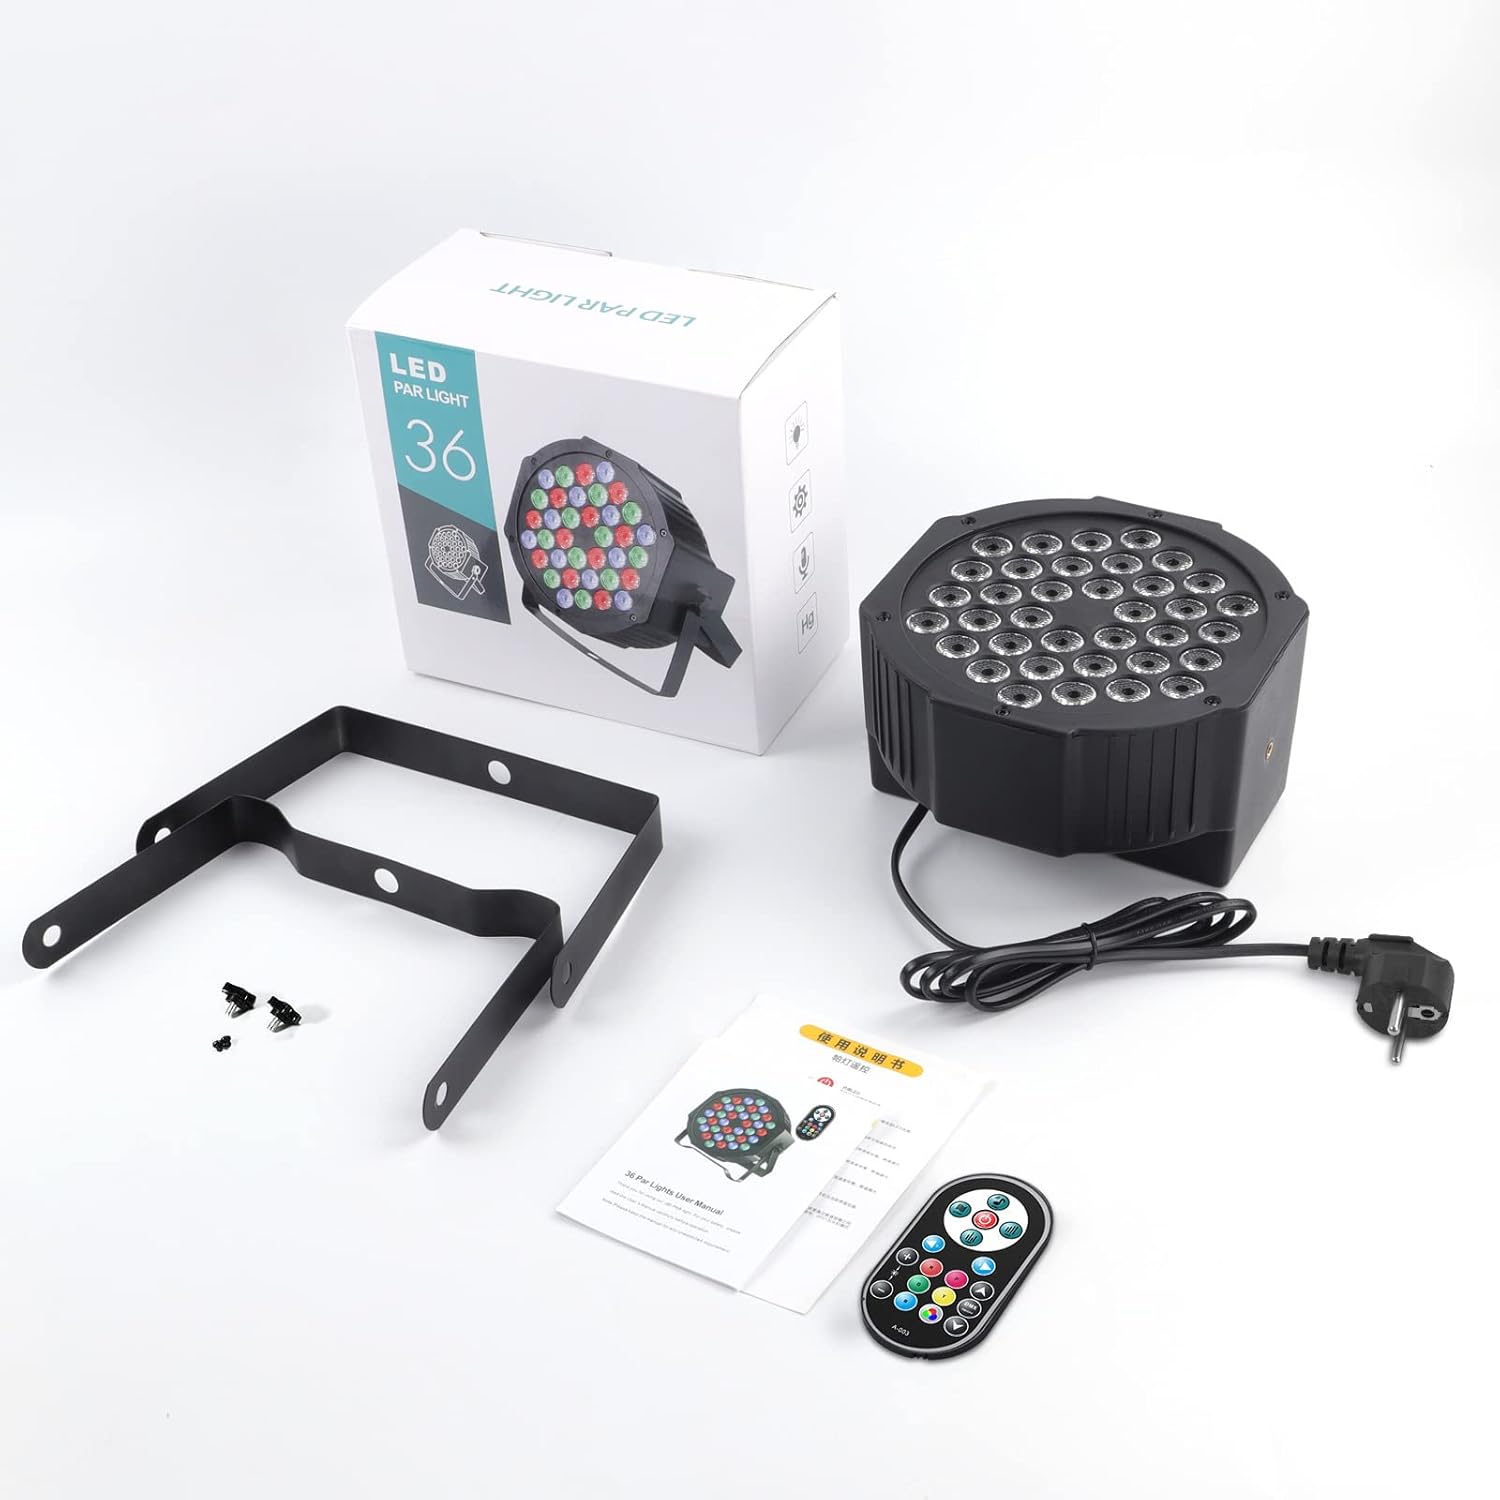
Figure 1.1: Package Contents
2. Safety Instructions
To prevent electric shock or fire, please read and follow all safety precautions carefully:
- This product is for indoor use only. Do not expose to rain or moisture.
- Ensure the power supply voltage matches the device's requirements (AC110-240V, 50/60Hz).
- Always disconnect from power before cleaning or servicing.
- Do not open the housing. There are no user-serviceable parts inside. Refer all servicing to qualified personnel.
- Avoid direct eye exposure to the light source, as it can cause eye damage.
- Ensure proper ventilation. Do not block ventilation openings.
- Mount the device securely to prevent accidental falls.
- Keep away from flammable materials.
- If the power cord is damaged, it must be replaced by the manufacturer or a qualified service agent.
3. Product Overview
3.1 Key Features
- LED Light Effect: Features 36 WRGB LED beads (12x Red, 12x Blue, 12x Green) for multi-color combined light effects, supporting static color, jumping, gradual change, and strobe.
- Multiple Control Modes: DMX512, Master-Slave, Sound Activated, Auto Operation, and Wireless Remote Control.
- Durable Design: Constructed from high-quality aluminum and PVC with built-in fans for efficient air cooling, ensuring stable performance and extended lifespan.
- Flexible Installation: Includes mounting brackets and screws for installation on walls, ceilings, or floors (uplighting).
- Long Lifespan: Low power consumption (72W) and a rated lifespan of 100,000 hours.
3.2 Components and Controls

Figure 3.1: Remote Control and Device Back Panel
| No. | Function | No. | Function |
|---|---|---|---|
| 1 | ON/OFF | 6 | Sound Activated Mode |
| 2 | Strobe Mode | 7 | Fade Mode |
| 3 | Jump Mode | 8 | Change Speed Levels (under any mode) |
| 4 | Brightness Level Adjustment | 9 | DMX Adjustment |
| 5 | Color Adjustment |
| Label | Description | Label | Description |
|---|---|---|---|
| A | DMX OUT | F | DOWN Button |
| B | DMX IN | G | ENTER Button |
| C | FAN | H | MIC (Microphone for Sound Activated Mode) |
| D | MENU Button | I | DIGITAL DISPLAY |
| E | UP Button |
4. Setup
4.1 Mounting the Light
The LED Par 36 light can be mounted in various positions using the included brackets:
- Floor Stand: Attach the brackets to the sides of the light and place it on a flat, stable surface for uplighting or general illumination.
- Wall Mount: Securely attach the brackets to a sturdy wall using appropriate screws (not included) and then attach the light. Ensure the mounting surface can support the weight of the fixture.
- Ceiling Mount: For overhead lighting, attach the brackets to a ceiling truss or beam. Always use safety cables (not included) when mounting overhead.

Figure 4.1: Product Dimensions
4.2 Power Connection
Connect the power cable to the power input port on the back of the fixture. Plug the other end into a compatible power outlet (AC110-240V, 50/60Hz).
4.3 DMX Connection (Optional)
If using DMX control, connect a DMX cable from your DMX controller's output to the DMX IN port (B) on the first fixture. For multiple fixtures, daisy-chain them by connecting the DMX OUT port (A) of the first fixture to the DMX IN port of the next, and so on.
5. Operating Modes
The DELIBANG LED Par 36 light offers several operating modes, which can be selected via the remote control or the buttons on the device's back panel.

Figure 5.1: Available Lighting Modes
5.1 Remote Control Operation
Use the included wireless remote control to easily switch between modes and adjust settings. Refer to Table 3.1 for button functions.
- Press the ON/OFF button (1) to power the unit on or off.
- Select desired mode: Strobe (2), Jump (3), Sound Activated (6), Fade (7).
- Adjust Brightness (4) or Color (5) as needed.
- Use the Speed +/- buttons (8) to control the speed of color changes or strobe effects.
- For DMX settings, use the DMX Adjustment button (9).
5.2 DMX512 Control
For professional control, connect the fixture to a DMX512 controller. Set the DMX address for each fixture using the digital display (I) and MENU (D), UP (E), DOWN (F), ENTER (G) buttons on the back panel. Consult your DMX controller's manual for specific programming instructions.
5.3 Master-Slave Mode
This mode allows multiple fixtures to synchronize without a DMX controller. Connect the DMX OUT of the "Master" unit to the DMX IN of the "Slave" unit. Set the Master unit to any desired automatic or sound-activated mode. The Slave units will then mimic the Master's behavior.
5.4 Sound Activated Mode
In this mode, the light effects react to ambient sound detected by the built-in microphone (H). The light will change patterns and colors according to the rhythm of the music. Adjust sensitivity if available via remote or menu.
5.5 Auto Mode
The fixture will cycle through pre-programmed light shows and color sequences automatically. The speed of these programs can often be adjusted using the remote control or device buttons.
6. Maintenance
6.1 Cleaning
- Regularly clean the lens and housing to maintain optimal light output and prevent overheating.
- Use a soft, lint-free cloth dampened with a mild glass cleaner. Do not use abrasive cleaners.
- Ensure the device is unplugged and cool before cleaning.
6.2 Storage
When not in use, store the fixture in a cool, dry place, away from direct sunlight and extreme temperatures. It is recommended to store it in its original packaging or a protective case.
7. Troubleshooting
| Problem | Possible Cause | Solution |
|---|---|---|
| Light does not turn on. | No power, faulty power cable, remote battery dead. | Check power connection and outlet. Replace remote battery (CR2032). Try turning on with device buttons. |
| No DMX control. | Incorrect DMX address, faulty DMX cable, DMX controller issue. | Verify DMX address setting. Check DMX cable connections. Test with another DMX cable or controller. |
| Sound Activated mode not working. | No sound detected, microphone blocked, sensitivity too low. | Ensure sufficient sound level. Check microphone (H) for obstructions. Adjust sound sensitivity if possible. |
| Remote control not responding. | Dead battery, obstruction, out of range. | Replace CR2032 battery. Ensure clear line of sight to the fixture. Move closer to the fixture. |
| Light overheats. | Poor ventilation, blocked fan. | Ensure adequate airflow around the fixture. Check if the fan (C) is clean and unobstructed. |
8. Specifications
| Feature | Detail |
|---|---|
| Brand | DELIBANG |
| Model Number | ZQ01082 |
| Power Consumption | 72 W |
| Voltage | 110V-220V AC110-240V, 50/60Hz |
| Material | Aluminum + PVC |
| Bulb Type | LED |
| Number of LEDs | 36 (12x Red, 12x Blue, 12x Green) |
| Control Modes | DMX512, Master-Slave, Sound Activated, Auto, Remote Control |
| Beam Angle | 30 (±5) degrees |
| Cooling Mode | Air Cooling |
| Lifespan | 100,000 hours |
| Dimensions (L x W x H) | 18 x 18 x 10 cm (7.1 x 7.1 x 3.9 inches) |
| Weight | 760 grams (1.68 lbs) |
| Remote Battery | 1 x CR2032 (required) |

Figure 8.1: Energy Label (For more details, visit EPREL Database)
9. Warranty & Support
This product is manufactured with high-quality materials and undergoes strict quality control. While specific warranty details are not provided in this manual, we are committed to customer satisfaction.
If you have any questions, encounter issues, or require technical assistance, please do not hesitate to contact our customer support team. We aim to respond to all inquiries within 24 hours.
Contact information for support is typically found on the product packaging or the retailer's website where the product was purchased.