1. Introduction
This instruction manual provides detailed guidance for the installation and maintenance of the Mintu Washer Suspension Rod Kit. This kit is designed to replace worn or damaged suspension rods in various washing machine models, including those from Whirlpool, Kenmore, Maytag, and others. Proper installation of these rods is crucial for maintaining the balance and stability of your washing machine during operation, reducing noise and vibration.
2. Safety Information
Before beginning any repair or installation work on your washing machine, please observe the following safety precautions:
- Disconnect Power: Always unplug the washing machine from the electrical outlet before servicing to prevent electric shock.
- Turn Off Water Supply: Close the hot and cold water supply valves to the washer to prevent water leaks.
- Wear Protective Gear: Use work gloves to protect your hands and safety glasses to protect your eyes from debris or springs.
- Heavy Appliance: Washing machines are heavy. Exercise caution when moving or tilting the appliance. Consider having assistance.
- Professional Assistance: If you are unsure about any step or uncomfortable performing the repair, consult a qualified appliance technician.
3. Product Overview and Compatibility
The Mintu Suspension Rod Kit includes four suspension rods, each equipped with springs and bushings. These components work together to support the washer tub and dampen vibrations during wash and spin cycles.

Image 3.1: Mintu Washer Suspension Rod Kit components. Each rod features a spring and various bushings for proper tub support.
This kit is compatible with a wide range of washing machine models from various brands. Key compatible models include, but are not limited to:
- Whirlpool: 7MWTW1604DM2, 7MWTW1606AW1, 7MWTW1607AW0, 7MWTW1700BQ0, 7MWTW1701DQ0, 7MWTW1702BQ0, 7MWTW1703BM0, 7MWTW1704BM0, 1CWTW4740YQ0, 2DWTW4740YQ0, 3LWTW4740YQ0, 7EWTW1300YM0, 7MWTW1501AW0, 7MWTW1601BQ0.
- Kenmore: 110.20022010, 110.20222510, 110.21102010, 110.21112010, 110.21182010, 110.21202010, 110.21292010, 110.5072010, 110.5142510, 7MKTWS300DW0.
- Maytag: 3LMVWC100YW0, 4GMVWC100YQ0, 4KMVWC100BQ0, 7MMVWC100DW0, 7MMVWC200DW0, 7MMVWC210YW0, MVWC200XW0.
- Amana: 4GNTW4400YQ0, 4GNTW4600YQ0, NTW4501XQ0, NTW4600YQ0, NTW4610YQ0, NTW4630YQ0, NTW4650YQ0, NTW4655EW1, NTW4700YQ0.
- Crosley: CAW9244BW0, CAW9244XQ0, CAW9444BW0, CAW9444XQ0.
- Inglis: ITW4600YQ0, ITW4700YQ0.
- Roper: RTW4640YQ0, RTW4740YQ0.
Please verify your specific washer model number against the compatibility list before installation.
4. Installation Instructions (Setup)
Replacing washer suspension rods typically involves accessing the washer's internal components. Follow these general steps:
- Prepare the Washer:
- Ensure the washer is completely empty.
- Disconnect the power cord from the wall outlet.
- Turn off the hot and cold water supply valves.
- Disconnect the water inlet hoses and the drain hose from the washer.
- Move the washer away from the wall to allow access.
- Access the Suspension Rods:
- Depending on your washer model, you may need to remove the top panel, the front panel, or the entire outer cabinet. Consult your specific washer's service manual for precise instructions on how to access the suspension system.
- Typically, the suspension rods are located at each corner of the washer tub, extending down to the base frame.
- Remove Old Suspension Rods:
- Carefully lift the washer tub slightly to relieve tension on the rods.
- Unclip or detach the top end of each rod from the washer frame or tub support.
- Pull the rod upwards and out of the lower support on the washer base.
- Repeat for all four rods. Note the orientation of the old rods and their components (springs, bushings) for correct reassembly.
- Install New Suspension Rods:
- Insert the bottom end of a new suspension rod into its corresponding hole in the washer base frame.
- Guide the top end of the rod into its attachment point on the washer tub or frame. Ensure the spring and all bushings are correctly seated.
- Gently push down on the tub to allow the rod to fully engage and secure its top attachment.
- Repeat this process for all four new suspension rods. Ensure all rods are securely in place and the tub is evenly supported.
- Reassemble and Test:
- Reattach any panels or the cabinet that were removed.
- Reconnect the water inlet hoses and drain hose.
- Turn on the water supply valves.
- Plug the washer back into the electrical outlet.
- Run a small, empty test cycle to check for proper operation, balance, and any leaks.

Image 4.1: Detailed view of a single suspension rod, highlighting the spring and plastic bushings.

Image 4.2: The complete set of four suspension rods from a different perspective, showing the hook mechanism at one end.
5. Operating Considerations
While suspension rods are internal components, their proper function directly impacts the washer's operation. After successful installation:
- The washer tub should move freely and return to a centered position when pushed.
- During wash and spin cycles, the machine should operate with significantly reduced vibration and noise compared to when the old rods were failing.
- Ensure laundry loads are balanced to prevent excessive strain on the suspension system and prolong the life of the new rods.
6. Maintenance
The Mintu Suspension Rod Kit is designed for durability. However, periodic inspection can help identify potential issues early:
- Annual Check: If comfortable, annually inspect the suspension rods for signs of wear, such as bent rods, cracked plastic bushings, or weakened springs.
- Listen for Noise: Pay attention to any new or unusual noises (e.g., banging, thumping) during the wash or spin cycle, which could indicate a failing suspension component.
- Balanced Loads: Always distribute laundry evenly in the washer tub to prevent uneven wear on the suspension system.
7. Troubleshooting
If you experience issues after installing the new suspension rods, consider the following:
| Problem | Possible Cause | Solution |
|---|---|---|
| Excessive vibration or banging during spin cycle |
|
|
| Washer tub sits unevenly |
|
|
| New noises (e.g., squeaking, grinding) |
|
|
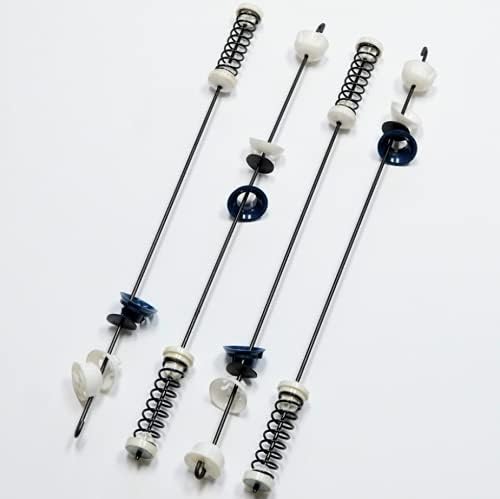
Image 7.1: Detail of the upper attachment point of a suspension rod, showing the spring and hook.
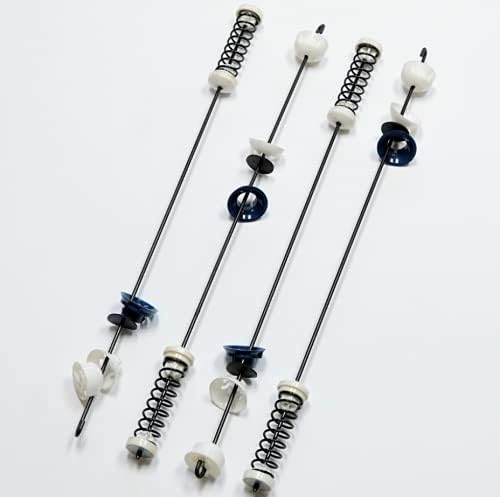
Image 7.2: Detail of the lower attachment point of a suspension rod, featuring the plastic bushing.
8. Specifications
- Manufacturer: Mintu
- Part Numbers: 7MWTW1705BQ0, 7MWTW1706BM0
- ASIN: B09927SR72
- Power Source: AC/DC (Note: This specification is provided by the manufacturer; the rods themselves are mechanical components.)
- Date First Available: July 9, 2021
9. Warranty and Support
For warranty information, technical support, or assistance with your Mintu Suspension Rod Kit, please contact the manufacturer directly. You can often find contact details on the product packaging or by visiting the official Mintu store on Amazon: