1. Introduction
Thank you for choosing the WORX MakerX 20V Mini Grinder WX741.9. This compact and versatile tool is designed for precise cutting, grinding, and sanding tasks. Featuring a brushless motor for extended life and efficiency, and compatible with the WORX PowerShare system, it offers portability and convenience for various projects. Please read this manual thoroughly before operating the tool to ensure safe and effective use.
2. Safety Instructions
Always follow basic safety precautions to reduce the risk of fire, electric shock, and personal injury when using power tools.
- Wear Eye Protection: Always wear appropriate eye protection, such as safety goggles, to shield against flying debris.
- Wear Hearing Protection: Use ear protection during extended operation to prevent hearing damage.
- Secure Workpiece: Always clamp or otherwise secure the workpiece to prevent movement during operation.
- Maintain a Firm Grip: Hold the tool firmly with both hands if possible, or with one hand if designed for single-hand operation, ensuring stable control.
- Keep Work Area Clean: Cluttered areas invite accidents. Ensure your workspace is well-lit and free of obstructions.
- Avoid Accidental Starting: Ensure the switch is in the off position before connecting to a power source or battery pack, picking up or carrying the tool.
- Use Correct Accessories: Only use accessories specifically designed and rated for this tool. Incorrect accessories can be hazardous.
- Inspect Tool Before Use: Check for damaged parts, misalignment, binding of moving parts, breakage of parts, and any other condition that may affect the tool's operation.
- Disconnect Power: Always disconnect the tool from the PowerShare hub or remove the battery pack before making any adjustments, changing accessories, or storing the tool.
3. Package Contents
Verify that all items listed below are included in your package. If any items are missing or damaged, please contact customer support.
- WORX MakerX 20V Mini Grinder WX741.9 (Bare Unit)
- (1) Cutting wheel 50 mm x 10 mm
- (1) Flap wheel sander 50mm x 10mm
- (1) Grinding wheel 50 mm x 10 mm
- (1) Hex Key
- (1) M4*10 Screw
- (1) Screw clamp M4*10
- (2) ST2.0*10 Screws

Image 3.1: The WORX MakerX Mini Grinder WX741.9 shown with its various included accessories, including cutting, grinding, and sanding wheels, a hex key, and mounting hardware.
4. Setup
4.1 Connecting to PowerShare Hub
The MakerX Mini Grinder WX741.9 is a bare unit and requires a WORX PowerShare 20V battery and MakerX hub (sold separately) for operation. Connect the grinder's cable to the output port on the MakerX hub.

Image 4.1: A user connecting the power cable of the MakerX Mini Grinder to the MakerX PowerShare hub, which provides power from a 20V battery.
4.2 Attaching Accessories (Wheels)
To attach a cutting, grinding, or sanding wheel:
- Ensure the tool is disconnected from the PowerShare hub.
- Press and hold the spindle lock button (if present) or use the hex key to loosen the retaining screw/nut.
- Place the desired wheel onto the spindle, ensuring it is seated correctly.
- Secure the wheel with the retaining screw/nut, tightening it firmly with the hex key. Do not overtighten.
- Verify the wheel is securely attached and spins freely without wobble before use.
5. Operating Instructions
Before operating, ensure you have read and understood all safety instructions. Always wear appropriate personal protective equipment (PPE).
5.1 Powering On/Off and Speed Control
Once connected to the PowerShare hub, turn on the hub. The grinder itself may have an on/off switch. The PowerShare hub typically features a variable speed dial to adjust the rotational speed of the grinder. Start at a lower speed and increase as needed for the material and task.
5.2 Cutting Operations
For cutting, use the appropriate cutting wheel. Position the wheel perpendicular to the material. Apply light, consistent pressure, allowing the tool to do the work. Avoid forcing the tool, which can lead to kickback or damage to the wheel.

Image 5.1: The MakerX Mini Grinder being used to precisely cut ceramic tiles, showcasing its suitability for detailed tasks.

Image 5.2: The MakerX Mini Grinder in action, cutting a metal pipe, illustrating its capability for metalwork.
5.3 Grinding Operations
When grinding, use the appropriate grinding wheel. Hold the tool at a slight angle to the workpiece. Move the tool smoothly across the surface to achieve an even finish. Be mindful of sparks and debris, especially when working with metal.

Image 5.3: A user performing a grinding operation with the MakerX Mini Grinder, demonstrating proper handling and safety gear.

Image 5.4: The MakerX Mini Grinder being used to remove rust from a metal garden tool, highlighting its utility for restoration and surface preparation.
5.4 Sanding Operations
For sanding, attach the flap wheel sander. Use gentle, even pressure and move the tool in a consistent pattern to avoid uneven sanding marks. This tool is ideal for fine detail sanding or preparing surfaces.
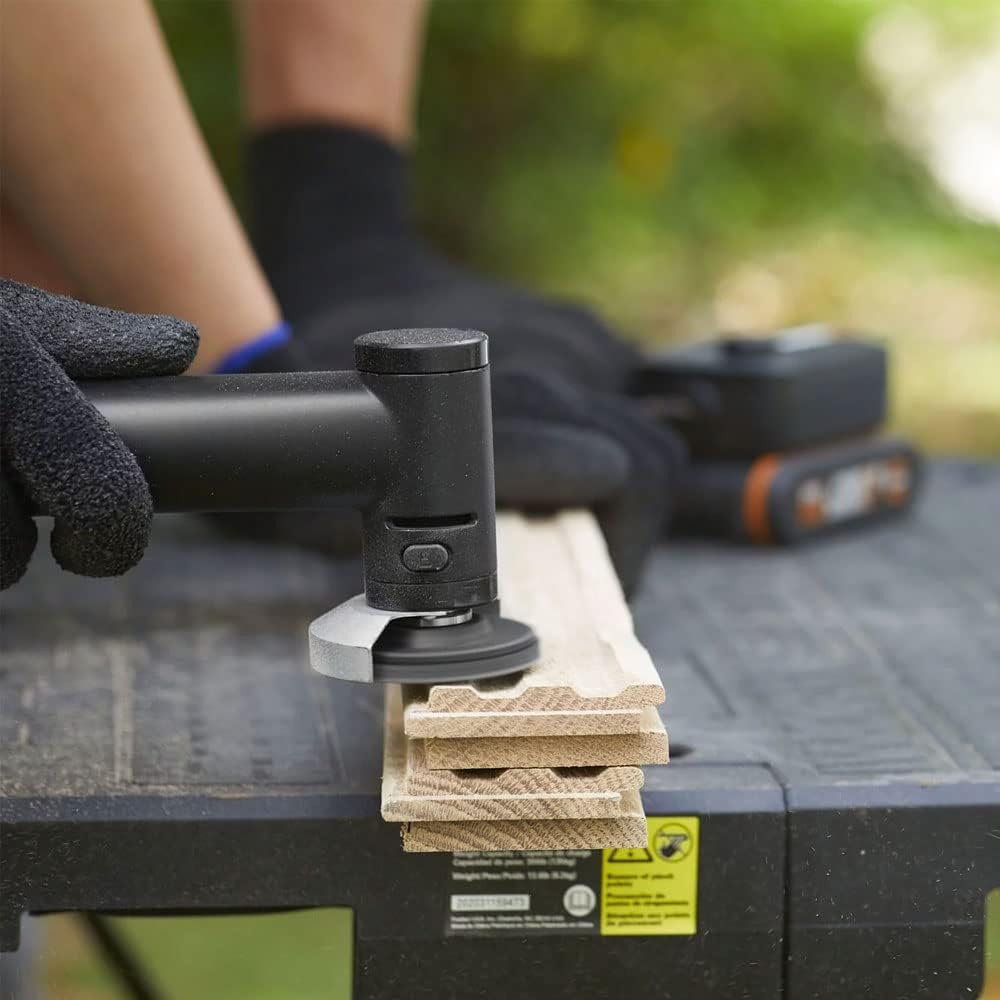
Image 5.5: The MakerX Mini Grinder equipped with a sanding attachment, being used to smooth a wooden surface.
6. Maintenance
Regular maintenance ensures optimal performance and extends the life of your tool.
- Cleaning: After each use, disconnect the tool from the power source and clean the exterior with a soft, damp cloth. Use compressed air to clear dust from ventilation openings. Do not use harsh chemicals or abrasive cleaners.
- Accessory Inspection: Regularly inspect cutting, grinding, and sanding wheels for wear, cracks, or damage. Replace worn or damaged accessories immediately.
- Storage: Store the tool and its accessories in a dry, secure place, out of reach of children.
7. Troubleshooting
If you encounter issues with your MakerX Mini Grinder, refer to the following common problems and solutions:
| Problem | Possible Cause | Solution |
|---|---|---|
| Tool does not start | Not connected to PowerShare hub; PowerShare hub not turned on; Battery discharged; Faulty connection. | Ensure grinder is securely connected to the hub. Turn on the PowerShare hub. Check battery charge level and recharge if necessary. Inspect cable and connections for damage. |
| Poor cutting/grinding/sanding performance | Worn or incorrect accessory; Insufficient speed setting; Excessive pressure. | Replace worn accessory. Ensure the correct accessory is used for the task. Adjust speed setting on the PowerShare hub. Apply lighter, consistent pressure. |
| Excessive vibration or noise | Accessory not properly seated or damaged; Loose components. | Disconnect power and re-seat the accessory. Inspect accessory for damage and replace if necessary. Check for any loose screws or parts. |
8. Specifications
Technical specifications for the WORX MakerX 20V Mini Grinder WX741.9:
- Brand: WORX
- Model Number: WX741.9
- Voltage: 20 Volts (via PowerShare hub)
- Power Source: Battery Powered (via WORX PowerShare 20V battery and MakerX hub)
- Recommended Uses: Cutting, grinding, sanding
- Color: Black/White
- Special Feature: Compact design, Brushless Motor
- Item Weight: Approximately 0.4 Kilograms (14.1 ounces)
- Maximum Rotational Speed: 24,000 RPM
- Minimum Rotational Speed: 14,000 RPM
- Product Dimensions (L x W x H): 2.83 x 1.26 x 7.4 inches
- Material: Plastic
9. Warranty and Support
For warranty information, technical support, or to purchase replacement parts and accessories, please visit the official WORX website or contact their customer service department. Keep your purchase receipt as proof of purchase for warranty claims.
WORX Customer Support: Please refer to the contact information provided with your PowerShare hub or on the official WORX website.