BLACK+DECKER AOF100-B5
BLACK+DECKER 12L Deep Fryer Instruction Manual
Model: AOF100-B5
1. Introduction
Thank you for purchasing the BLACK+DECKER 12L Deep Fryer, Model AOF100-B5. This appliance is designed to provide a versatile cooking experience, allowing you to air fry, roast, bake, and dehydrate with minimal oil. To ensure safe and optimal performance, please read this instruction manual thoroughly before first use and retain it for future reference.
Important Safety Instructions
- Always ensure the appliance is placed on a stable, heat-resistant surface, away from walls or other appliances to allow adequate ventilation.
- Do not immerse the main unit, cord, or plug in water or any other liquid.
- Keep children and pets away from the appliance during operation.
- Do not touch hot surfaces. Use oven mitts or handles.
- Unplug the appliance from the outlet when not in use and before cleaning.
- Ensure the power supply matches the appliance's requirements (220V, 50Hz).
- Do not operate the appliance with a damaged cord or plug.
- Never leave the appliance unattended during operation.
2. Product Overview
The BLACK+DECKER AOF100-B5 is a 12-liter capacity deep fryer featuring a digital control panel and various cooking accessories. Familiarize yourself with its components:

Figure 2.1: Front view of the BLACK+DECKER 12L Deep Fryer (AOF100-B5) in operation, showing the digital control panel and a basket of fries cooking.
Components:
- Main Unit: Houses the heating element and fan.
- Digital Control Panel: For setting temperature, time, and selecting cooking modes.
- Viewing Window: Allows monitoring of food during cooking.
- Cooking Chamber: The internal space where food is cooked.
- Removable Drip Tray: Collects excess oil and food particles.
- Rotisserie Basket: Ideal for fries, nuts, and other small items.
- Rotisserie Spit: For roasting whole chickens or larger cuts of meat.
- Cooking Trays/Racks: For multi-level cooking or dehydrating.
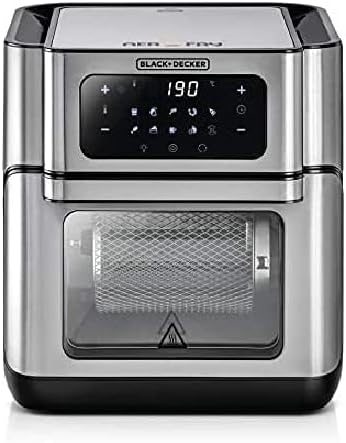
Figure 2.2: Front view of the BLACK+DECKER 12L Deep Fryer (AOF100-B5) with the digital display set to 190 degrees, showing the empty rotisserie basket.
3. Setup and First Use
3.1 Unpacking
- Carefully remove all packaging materials from the appliance and its accessories.
- Check for any damage during transit. If damaged, do not operate and contact customer service.
- Remove any promotional stickers or labels.
3.2 Placement
- Place the deep fryer on a flat, stable, and heat-resistant surface.
- Ensure there is at least 15 cm (6 inches) of clear space around the back and sides of the appliance for proper air circulation.
- Do not place the appliance near flammable materials or heat sources.
3.3 Initial Cleaning
- Before first use, wipe the exterior of the main unit with a damp cloth.
- Wash all removable accessories (rotisserie basket, spit, trays, drip tray) in warm, soapy water. Rinse thoroughly and dry completely.
- Insert the drip tray at the bottom of the cooking chamber.
3.4 Power Connection
- Plug the power cord into a grounded 220V, 50Hz electrical outlet.
- The appliance will emit a beep, and the digital display will illuminate briefly.
4. Operating Instructions
4.1 Basic Operation
- Power On: Press the power button on the digital control panel.
- Set Temperature: Use the temperature control buttons (usually '+' and '-') to adjust the desired cooking temperature. The range is typically between 80°C and 200°C.
- Set Time: Use the time control buttons to set the cooking duration. The timer can usually be set from 1 to 60 minutes, or longer for dehydration.
- Preheating: For best results, preheat the appliance for 3-5 minutes at the desired cooking temperature before adding food.
- Start Cooking: Press the start button to begin the cooking cycle.
4.2 Using Accessories
The AOF100-B5 comes with various accessories to enhance your cooking experience:

Figure 4.1: Demonstrates inserting the rotisserie basket into the cooking chamber, ideal for even cooking of items like fries.
- Rotisserie Basket:
- Place food inside the basket and secure the lid.
- Insert the rotisserie spit through the basket and secure it.
- Carefully place the rotisserie assembly into the cooking chamber, ensuring it engages with the rotisserie drive.
- Select the rotisserie function on the control panel (if available) or manually rotate the food during cooking.
- Cooking Trays/Racks:
- Place food on the trays, ensuring not to overload them.
- Slide the trays into the designated slots within the cooking chamber.
- For even cooking, rotate the position of the trays halfway through the cooking time.
- Rotisserie Spit (for whole chicken):
- Secure the chicken onto the rotisserie spit using the forks provided.
- Insert the assembly into the cooking chamber, engaging the rotisserie drive.
- Ensure the chicken clears all internal surfaces during rotation.

Figure 4.2: The deep fryer with its door open, illustrating the use of multiple cooking trays for different food items simultaneously.
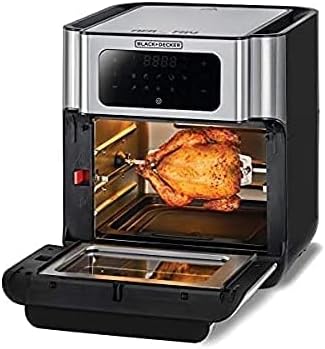
Figure 4.3: The deep fryer with its door open, showcasing a whole chicken being roasted using the rotisserie spit.
4.3 Pre-set Programs
The digital control panel may feature pre-set programs for common foods. Refer to the icons on the display for specific functions (e.g., fries, chicken, fish, steak, bake, dehydrate). Selecting a pre-set program will automatically adjust the temperature and time for optimal results. You can usually override these settings manually if desired.
5. Cooking Guide
For best results with your BLACK+DECKER Deep Fryer, consider the following tips:
- Oil Usage: Most foods require little to no oil. A light spray or toss with a tablespoon of oil can enhance crispiness.
- Food Quantity: Avoid overcrowding the cooking chamber. Cook in smaller batches for more even and crispy results.
- Shaking/Turning: For items like fries or vegetables, shake the rotisserie basket or turn items on trays halfway through cooking to ensure even browning.
- Doneness: Always ensure food is cooked to a safe internal temperature.
- Dehydration: For dehydrating fruits or vegetables, use lower temperatures (e.g., 40-60°C) for extended periods (several hours).
Note: Specific cooking times and temperatures will vary based on food type, quantity, and desired crispiness. It is recommended to consult reliable recipes or cooking charts for guidance.
6. Maintenance and Cleaning
Regular cleaning ensures the longevity and optimal performance of your deep fryer.
6.1 Before Cleaning
- Always unplug the appliance from the power outlet and allow it to cool completely before cleaning.
6.2 Cleaning the Main Unit
- Wipe the exterior with a damp cloth and mild detergent. Do not use abrasive cleaners or scouring pads.
- Clean the interior of the cooking chamber with a damp cloth and mild soap. For stubborn residue, a non-abrasive sponge can be used.
- Ensure no water enters the electrical components.
6.3 Cleaning Accessories
- The rotisserie basket, spit, cooking trays, and drip tray are generally dishwasher safe. Alternatively, wash them in warm, soapy water.
- For baked-on food, soak accessories in warm water for 10-15 minutes before cleaning.
- Rinse all accessories thoroughly and dry completely before storing or reassembling.
6.4 Storage
- Store the clean and dry appliance in a cool, dry place.
- Ensure the power cord is neatly wrapped and secured.
7. Troubleshooting
If you encounter issues with your BLACK+DECKER Deep Fryer, refer to the table below for common problems and solutions.
| Problem | Possible Cause | Solution |
|---|---|---|
| Appliance does not turn on. | Not plugged in; power outlet issue; main unit not properly closed. | Ensure plug is securely in outlet; check circuit breaker; ensure door is fully closed. |
| Food not cooked evenly. | Overcrowding; insufficient shaking/turning; incorrect temperature/time. | Cook in smaller batches; shake basket or turn food frequently; adjust temperature/time. |
| White smoke coming from appliance. | Grease residue from previous use; high-fat food cooking. | Clean the drip tray and interior thoroughly; reduce fat content of food or use less oil. |
| Food not crispy. | Too much moisture; overcrowding; not enough oil (for some foods). | Pat food dry before cooking; do not overcrowd; lightly spray with oil. |
If the problem persists after attempting these solutions, please contact BLACK+DECKER customer support.
8. Specifications
| Brand | BLACK+DECKER |
| Model Number | AOF100-B5 |
| Capacity | 12 Liters |
| Power / Wattage | 1800 Watts |
| Voltage | 220 Volts |
| Frequency | 50Hz |
| Material | Aluminum |
| Color | Silver |
| Product Dimensions (D x W x H) | 38.8 x 44.4 x 39 cm |
| Item Weight | 9.22 Kilograms |
| Special Features | Temperature Control |
9. Warranty and Support
BLACK+DECKER products are manufactured to high-quality standards. This appliance comes with a standard manufacturer's warranty against defects in materials and workmanship under normal use. Please refer to the warranty card included with your purchase for specific terms and conditions, including the warranty period and coverage details.
For technical assistance, troubleshooting beyond this manual, or to inquire about service and replacement parts, please contact BLACK+DECKER customer support. Contact information can typically be found on the product packaging or the official BLACK+DECKER website for your region.
Extended warranty options may be available from third-party providers. Please review their terms and conditions separately.
Ask a question about this manual
Ask about setup, troubleshooting, compatibility, parts, safety, or missing instructions. Manuals+ will review the question and use this page’s manual context to help answer it.