Cooler Master RR-212A-20PD-R1
Cooler Master Hyper 212 Spectrum RGB CPU Cooler User Manual
Model: RR-212A-20PD-R1
1. Introduction
This manual provides detailed instructions for the installation, operation, and maintenance of your Cooler Master Hyper 212 Spectrum RGB CPU Cooler. This product is designed to efficiently dissipate heat from your Central Processing Unit (CPU), ensuring optimal performance and stability for your computer system. Please read this manual thoroughly before installation and use.
2. Safety Information
Always observe the following safety precautions to prevent damage to the product, other components, or personal injury:
- Ensure your computer is powered off and unplugged from the wall outlet before installation or maintenance.
- Handle the cooler and CPU with care to avoid bending pins or damaging components.
- Keep out of reach of children.
- Do not attempt to modify the cooler or its components. Unauthorized modifications may void your warranty and pose safety risks.
- Use only the provided accessories and mounting hardware.
3. Package Contents
Verify that all items are present in your package. If any items are missing or damaged, please contact your retailer or Cooler Master support.
- Cooler Master Hyper 212 Spectrum RGB CPU Cooler (Heatsink and Fan assembly)
- Universal Mounting Brackets (for Intel and AMD sockets)
- Backplate
- Mounting Screws and Standoffs
- Thermal Paste
- RGB Controller (if included with specific model variant)
- User Manual (this document)
4. Setup and Installation
Before beginning installation, ensure you have a clean workspace and appropriate tools (e.g., screwdriver). Refer to your motherboard's manual for specific CPU socket information.
4.1. Pre-Installation
- Identify your CPU socket type (e.g., Intel LGA 1700, 1200, 115x, AMD AM4, AM5).
- Select the correct mounting brackets and hardware for your socket.
- Clean the CPU surface thoroughly with isopropyl alcohol to remove any old thermal paste or residue.
4.2. Installing the Backplate and Standoffs
For Intel sockets, install the universal backplate behind the motherboard, aligning the holes. For AMD sockets, you may use the existing motherboard backplate. Secure the appropriate standoffs onto the backplate/motherboard.
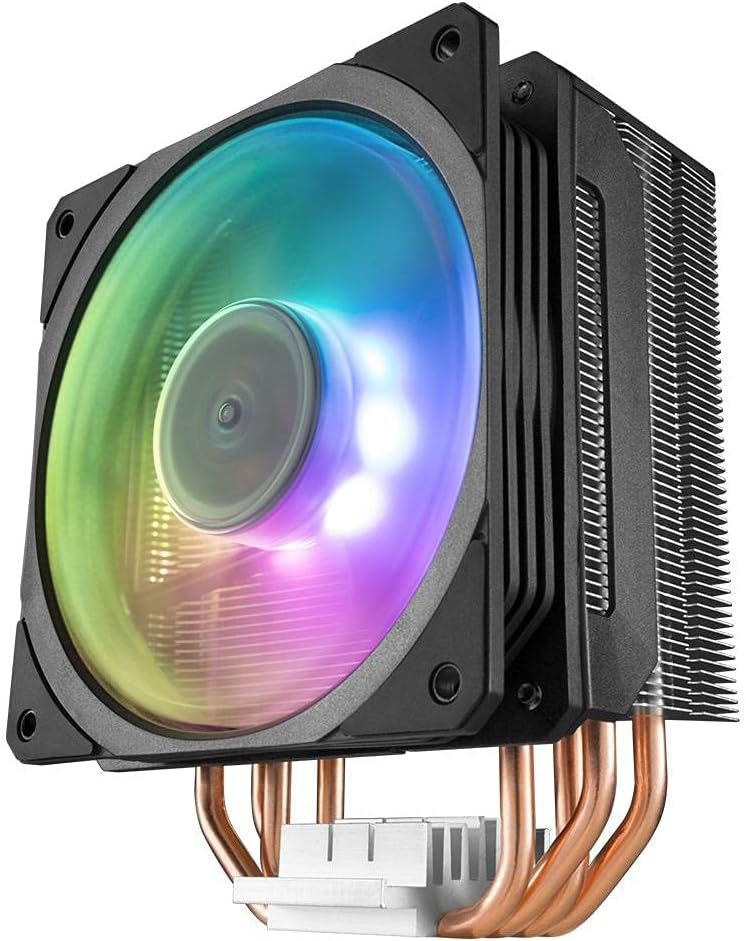
Figure 4.2.1: Bottom view of the cooler, highlighting the heat pipes and mounting base. This is where the thermal paste will be applied and the cooler will make contact with the CPU.
4.3. Applying Thermal Paste
Apply a small amount of thermal paste (pea-sized dot or thin line) to the center of the CPU's Integrated Heat Spreader (IHS). Do not spread it manually; the pressure from the cooler will distribute it evenly.
4.4. Mounting the Heatsink
- Carefully place the heatsink onto the CPU, aligning the mounting holes on the cooler's base with the standoffs.
- Attach the mounting brackets to the heatsink and secure them with the provided screws. Tighten screws in a diagonal pattern (e.g., top-left, bottom-right, top-right, bottom-left) until snug, but do not overtighten.

Figure 4.4.1: The Cooler Master Hyper 212 Spectrum RGB CPU Cooler, showcasing its overall design with the illuminated RGB fan and aluminum fin stack.
4.5. Connecting the Fan and RGB Cables
- Connect the 4-pin PWM fan cable from the cooler fan to the "CPU_FAN" header on your motherboard.
- Connect the RGB cable from the fan to an available 4-pin 12V RGB header on your motherboard or to the included RGB controller (if applicable).

Figure 4.5.1: A close-up top view of the Hyper 212 Spectrum RGB fan, illustrating the fan's design and the central Cooler Master branding.
5. Operating Instructions
Once installed, the Cooler Master Hyper 212 Spectrum RGB CPU Cooler operates automatically based on your motherboard's fan control settings and CPU temperature.
5.1. Fan Speed Control
The fan speed is controlled by the motherboard's BIOS/UEFI settings or through fan control software provided by your motherboard manufacturer. You can configure fan curves to optimize cooling performance and noise levels.
5.2. RGB Lighting Control
The RGB lighting can be controlled via your motherboard's RGB software (e.g., ASUS Aura Sync, MSI Mystic Light, Gigabyte RGB Fusion, ASRock Polychrome Sync) if connected to a compatible header. If using the included RGB controller, refer to its specific instructions for changing lighting modes and colors.
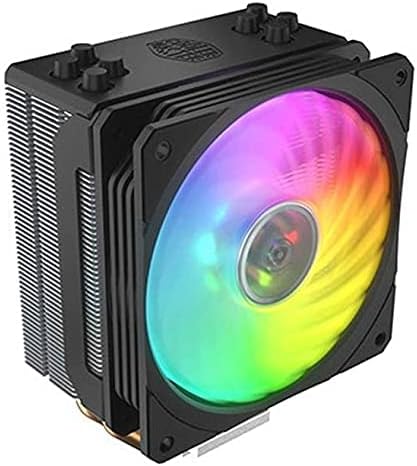
Figure 5.2.1: An angled view of the cooler, demonstrating the dynamic RGB lighting effects of the fan.
6. Maintenance
Regular maintenance ensures optimal performance and longevity of your CPU cooler.
- Dust Removal: Periodically (every 3-6 months, or more frequently in dusty environments) use compressed air to blow dust out of the heatsink fins and fan blades. Ensure the fan is held stationary while blowing to prevent over-spinning.
- Fan Inspection: Check the fan for any signs of wear, unusual noises, or obstructions.
- Thermal Paste: While not typically required frequently, if you remove the cooler for any reason, it is recommended to clean off old thermal paste and apply new thermal paste before re-mounting.
7. Troubleshooting
If you encounter issues with your Cooler Master Hyper 212 Spectrum RGB CPU Cooler, refer to the following common problems and solutions:
| Problem | Possible Cause | Solution |
|---|---|---|
| Fan not spinning or spinning slowly. | Incorrect fan header connection, BIOS settings, or faulty fan. |
|
| High CPU temperatures. | Improper cooler mounting, insufficient thermal paste, dust buildup, or incorrect fan orientation. |
|
| RGB lighting not working. | Incorrect RGB header connection, incompatible header, or software issue. |
|
8. Specifications
| Feature | Detail |
|---|---|
| Manufacturer Part Number | RR-212A-20PD-R1 |
| External Product ID | 4719512095560 |
| Brand | Cooler Master |
| External Product ID Type | EAN-13 |
| Compatibility | CPU (Universal mounting for various Intel/AMD sockets) |
| Item Weight | 11 grams (Note: This weight seems unusually low for a CPU cooler and might refer to packaging or a specific component. Actual cooler weight is typically much higher.) |
| First Available Date | July 7, 2021 |
9. Warranty and Support
Cooler Master products are backed by a limited warranty. For specific warranty terms and conditions, please refer to the warranty card included with your product or visit the official Cooler Master website.
For technical support, troubleshooting assistance, or to inquire about replacement parts, please visit the Cooler Master support portal or contact their customer service:
- Cooler Master Official Website: www.coolermaster.com
- Support Portal: Refer to the website for regional support contacts.
When contacting support, please have your product model (RR-212A-20PD-R1) and proof of purchase ready.