The CGOLDENWALL Φ1-30mm Wire Stripper is a versatile tool designed for efficiently removing insulation from vinyl-coated wires with diameters ranging from 0 to 30mm. It supports both manual operation with a hand crank and electric operation when connected to a power drill (not included), offering flexibility for various tasks. The device can be securely mounted using either screw fixation for high stability or a G-clamp for easy, portable tabletop attachment without drilling. Constructed with durable HSS steel blades, including two spare blades, it ensures long-lasting performance. This tool is ideal for home use, small workshops, and copper wire recycling, providing a cost-effective solution for wire stripping. Please note: This tool is suitable for wires with soft insulation (e.g., SV, DV, VA) and is not compatible with hard resin-coated materials such as CV high-voltage cables.
Figure 1: CGOLDENWALL Wire Stripper, a compact and portable desktop unit with dimensions of 130mm width and 140mm height.
Safety Instructions
Always wear appropriate personal protective equipment, including safety glasses and gloves, when operating the wire stripper.
Keep hands and loose clothing clear of moving parts, especially the blades and rollers, during operation.
Ensure the device is securely fixed to a stable surface using either the screw mounts or the G-clamp before use.
When using an electric drill for operation, ensure the drill is properly attached and the power is disconnected before making any adjustments or changing wires.
Do not attempt to strip wires with hard resin coatings, such as CV high-voltage cables, as this can damage the tool and pose a safety risk. This tool is designed for wires with soft, flexible insulation (e.g., SV, DV, VA).
Keep children and unauthorized personnel away from the operating area.
Store the wire stripper in a dry, secure location when not in use.
Package Contents
Verify that all items listed below are included in your package:
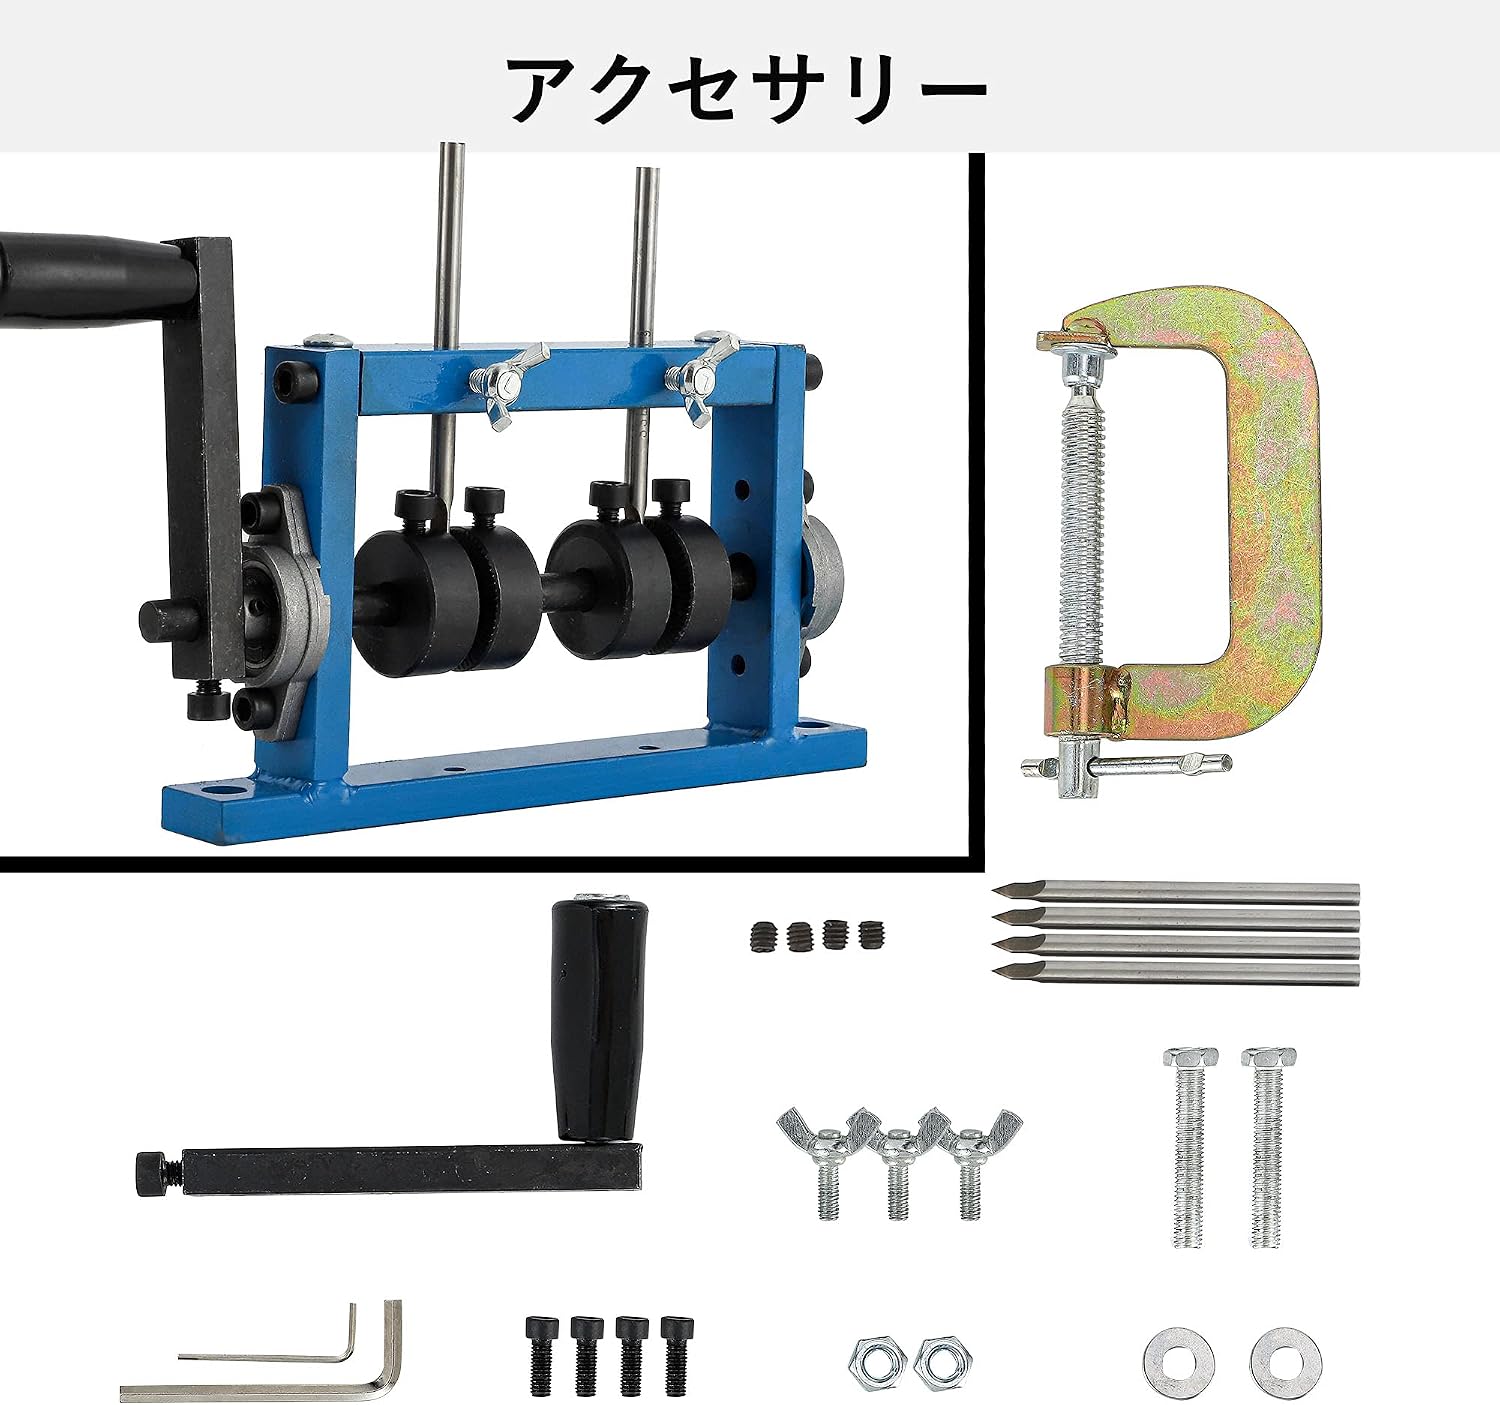
CGOLDENWALL Wire Stripper Main Unit
Hand Crank
G-Clamp (for tabletop fixing)
Spare Blades (2 pieces)
Hex Wrenches (for adjustment)
Mounting Screws and Washers (for screw fixing)
Figure 2: Included accessories for the wire stripper, featuring the main unit, hand crank, G-clamp, spare blades, and adjustment tools.
Setup Instructions
1. Mounting the Wire Stripper
The wire stripper offers two methods for secure mounting:
Screw Fixing: For maximum stability, use the provided screws and washers to permanently fix the base of the wire stripper to a workbench. This method requires drilling holes in your workbench.
G-Clamp Fixing: For temporary or portable use, attach the G-clamp to the side of a table or workbench and secure the wire stripper. This method does not require drilling.
Figure 3: The wire stripper can be secured using either the screw fixing method (left) for permanent installation or the G-clamp method (right) for temporary tabletop use.
2. Attaching the Handle or Electric Drill
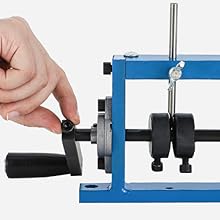
Manual Operation: Insert the hand crank into the designated shaft on the side of the machine and secure it.
Electric Operation: For faster and less strenuous operation, you can attach an electric drill (not included) to the drive shaft. Ensure the drill is securely fastened.
Figure 4: The wire stripper supports both manual operation via a hand crank and electric operation by connecting an electric drill to the drive shaft.Figure 5: Detail of an electric drill connected to the wire stripper for powered operation.
3. Adjusting Blade and Clip Height
Proper adjustment is crucial for effective and damage-free stripping:
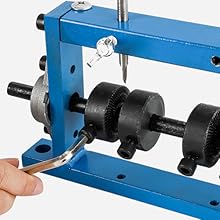
Adjusting Clip Height: Use a hex wrench to adjust the height of the wire clip until it securely holds the wire. The clip should catch the wire firmly but not deform it.
Figure 6: Adjust the clip height with a hex wrench until the clip properly engages the wire.
Adjusting Blade Height: Use the adjustment screw to set the blade height. The blade should be positioned to cut through the outer insulation layer without touching or damaging the inner conductor. For optimal results, the blade should be centered on the cable's outer layer.
Figure 7: Adjust the blade height using the screw until the blade is correctly positioned to cut the insulation.
Video 1: This video demonstrates the complete setup process, including attaching the handle, adjusting the clip and blade heights, and preparing the wire stripper for use. It shows both manual and electric stripping effects.
Operating Instructions
1. Preparing the Wire
Ensure the wire to be stripped is clean and free from debris.
Select the appropriate hole on the wire stripper for the diameter of your wire.
Insert the wire through the chosen hole, ensuring it passes between the rollers and under the blade.
Figure 8: Insert the wire into the correct hole, ensuring it is properly aligned for stripping.
2. Stripping the Wire
Manual Operation: Once the wire is in place, turn the hand crank steadily. The rollers will feed the wire through, and the blade will cut the insulation.
Electric Operation: If using an electric drill, activate the drill at a controlled speed. The drill will rotate the drive shaft, feeding the wire and stripping the insulation.
Guide the wire as it passes through the stripper to maintain a straight path.
After stripping, the insulation will separate from the copper wire.
Figure 9: The wire stripper in action, efficiently removing insulation from multiple wires.Figure 10: A cleanly stripped wire, demonstrating the tool's effectiveness in separating insulation from the conductor.
Video 3: This video demonstrates the wire stripper's capability to achieve high-precision stripping without causing damage to the core wire.
Maintenance
Blade Replacement
The wire stripper comes with two spare HSS steel blades for extended use. When the cutting performance of the installed blade diminishes, it is time for replacement:
Ensure the device is disconnected from any power source (if using an electric drill) and securely mounted.
Carefully loosen the screws holding the blade in place using the appropriate hex wrench.
Remove the old blade, exercising caution as it may still be sharp.
Insert a new blade, ensuring it is oriented correctly. Pay attention to the installation direction.
Tighten the screws to secure the new blade.
Perform a test strip on a scrap piece of wire to verify proper installation and adjustment.
Video 4: This video provides a demonstration of how to replace the blades on the wire stripper, including important considerations for installation direction.
General Care
Regularly clean the rollers and blade area to prevent buildup of insulation debris.
Lubricate moving parts periodically with a light machine oil to ensure smooth operation.
Inspect the device for any signs of wear or damage before each use. Do not operate if damaged.
Troubleshooting
Problem
Possible Cause
Solution
Wire not stripping cleanly or insulation remains
Blade height incorrect; dull blade; wire type incompatible
Adjust blade height (refer to Setup); Replace blade (refer to Maintenance); Ensure wire has soft insulation (not hard resin).
Wire not feeding through rollers
Clip height incorrect; rollers clogged; wire diameter too large/small
Adjust clip height (refer to Setup); Clean rollers; Ensure wire diameter is within Φ0-30mm range.
Wire core is damaged during stripping
Blade height too low; incorrect wire alignment
Raise blade height slightly; Ensure wire is centered and fed straight.
Difficulty turning hand crank or electric drill struggles
Wire too thick or hard; lack of lubrication; mechanical obstruction
Do not force the machine; check wire compatibility; lubricate moving parts; inspect for debris.
Specifications
Brand: CGOLDENWALL
Model: ly-4
Applicable Wire Diameter: Φ0-30mm
Operation Type: Manual / Electric (drill not included)
Blade Material: HSS Steel
Mounting Methods: Screw Fixing, G-Clamp Fixing
ASIN: B098SQXZ9G
Figure 11: Multiple views of the CGOLDENWALL Wire Stripper, highlighting its design and features.
Warranty and Support
CGOLDENWALL provides a 12-month manufacturer's warranty for this product. We are committed to ensuring your satisfaction.
If you have any questions or encounter issues with your product, please contact our customer service. We aim to respond within 24 hours.
In case of missing parts or if the instruction manual is not included, please contact us immediately for assistance. We will provide a satisfactory solution.
Ask a question about this manual
Ask about setup, troubleshooting, compatibility, parts, safety, or missing instructions. Manuals+ will review the question and use this page’s manual context to help answer it.