Introduction
This manual provides essential instructions for the safe and proper assembly, operation, and maintenance of your ATDAWN Light Up Deer Family Christmas Yard Decoration. Please read this manual thoroughly before use and retain it for future reference.
Safety Information
- For outdoor use only.
- Unplug the decoration during inclement weather conditions, such as heavy rain, snow, or strong winds.
- Keep the product away from children and flammable materials.
- Ensure all electrical connections are secure and protected from moisture.
- Do not attempt to modify or repair the product. Contact customer support for assistance.
Package Contents
Verify that all components are present before beginning assembly:
- 3 x Deer Bodies (Male, Female, Fawn)
- Pre-installed LED Light Strings
- 9 x Metal Stakes
- 8 x Plastic Cable Ties
- Screws & Nuts for assembly
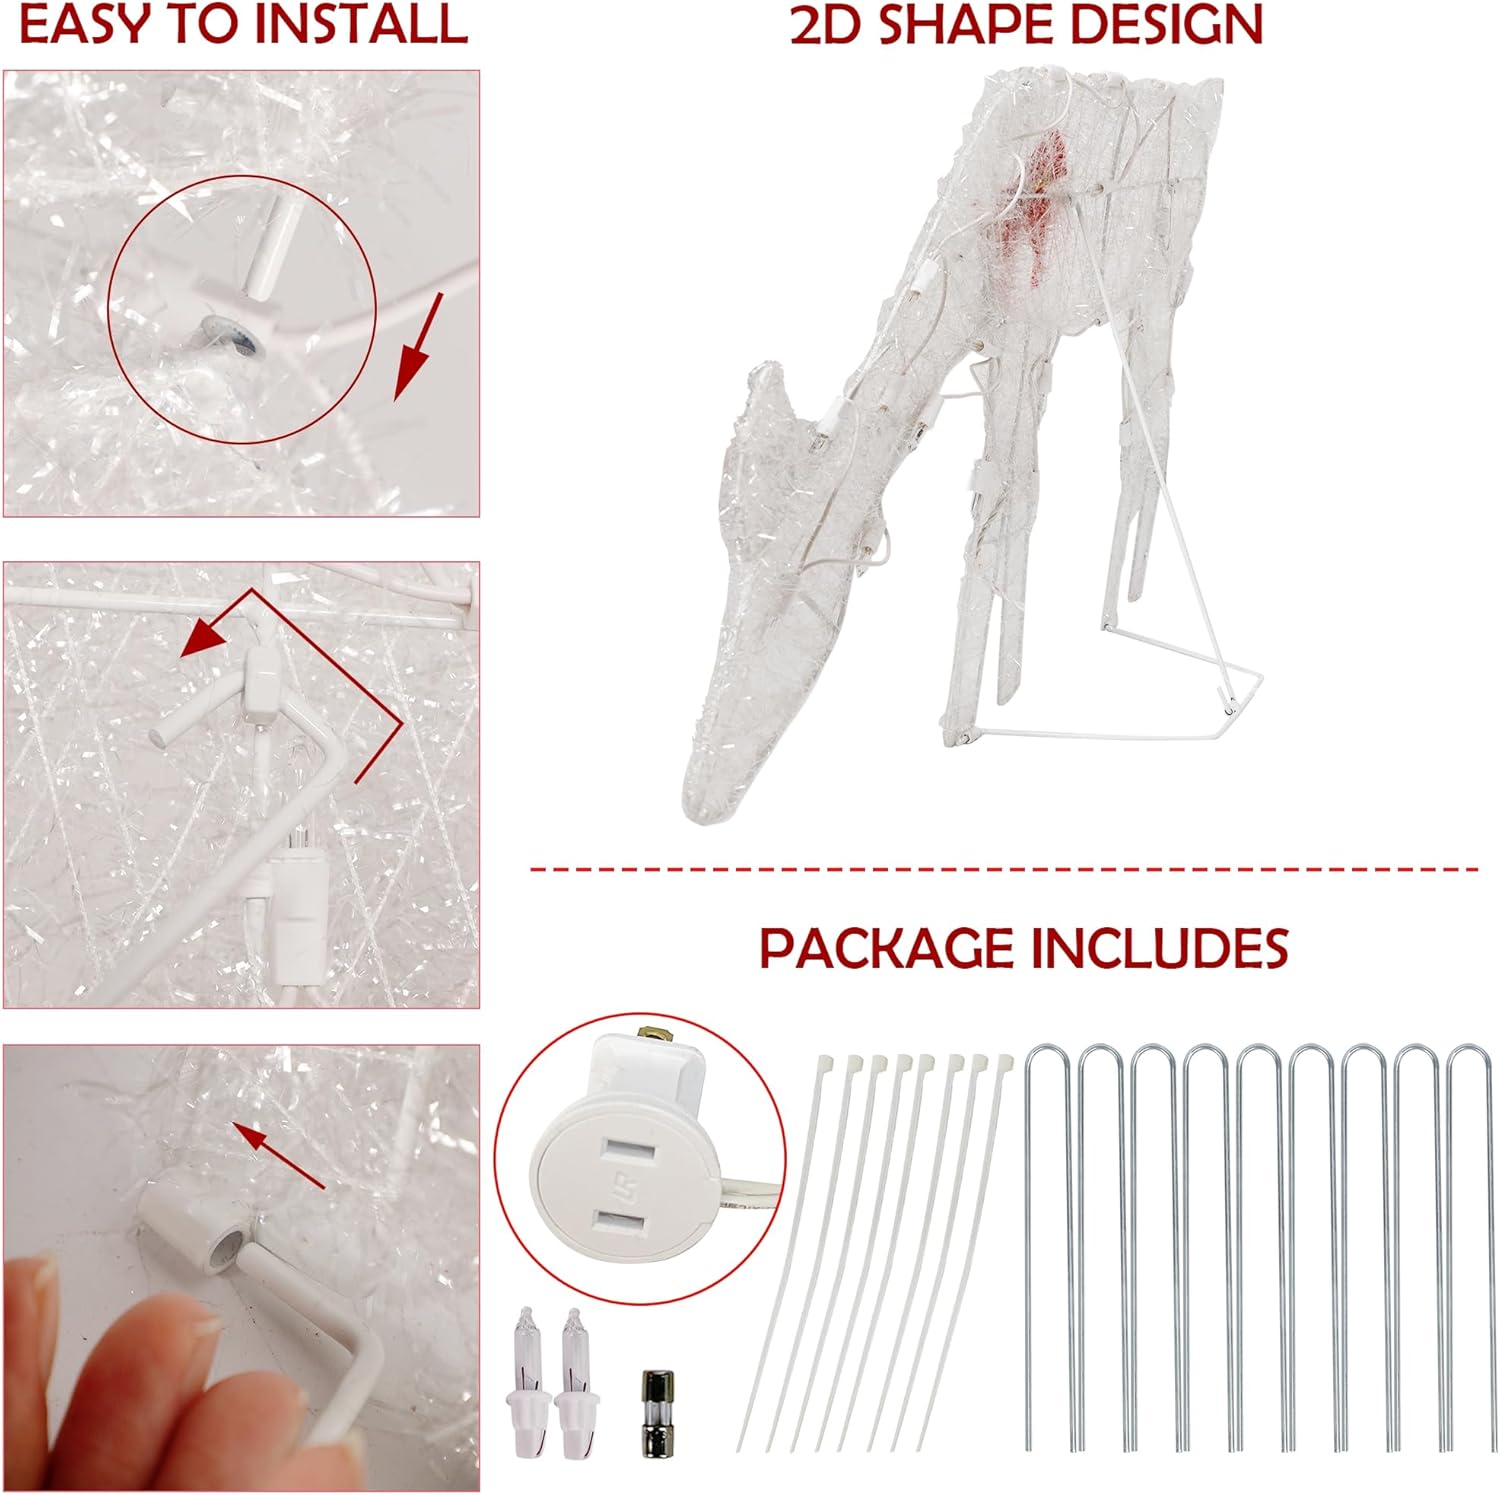
Image: Components included in the ATDAWN Light Up Deer Family set, showing the metal frames, stakes, and cable ties.
Setup Instructions
Follow these steps to assemble your deer decoration:
- Unfold the Deer: Carefully remove each deer body from the packaging. Lay each flat piece as shown in the assembly diagrams.
- Adjust the Head: For the male deer, gently adjust the head and antlers to the desired position. Ensure the pre-installed LED light strings are not pinched or damaged.
- Secure Screws: Use the provided screws and nuts to connect the body sections of each deer. Tighten them securely to ensure stability.
- Position the Reindeer: Place the assembled deer in your desired outdoor location (yard, lawn, driveway, or porch).
- Install the Stands: Insert the metal stakes into the bottom frame of each deer. Use the plastic cable ties to further secure the deer to the ground, especially in windy conditions, to prevent tipping.

Image: Visual guide demonstrating the assembly process for the deer decorations.

Image: Diagram illustrating the dimensions of the male, female, and fawn deer figures.
Assembly Video
Video: A seller-provided video demonstrating the assembly of a similar set of light-up reindeer decorations.
Operating Instructions
Once assembled and securely placed, connect the power cord to a suitable outdoor electrical outlet. The LED lights will illuminate, creating a festive display. Ensure the outlet is weather-protected.
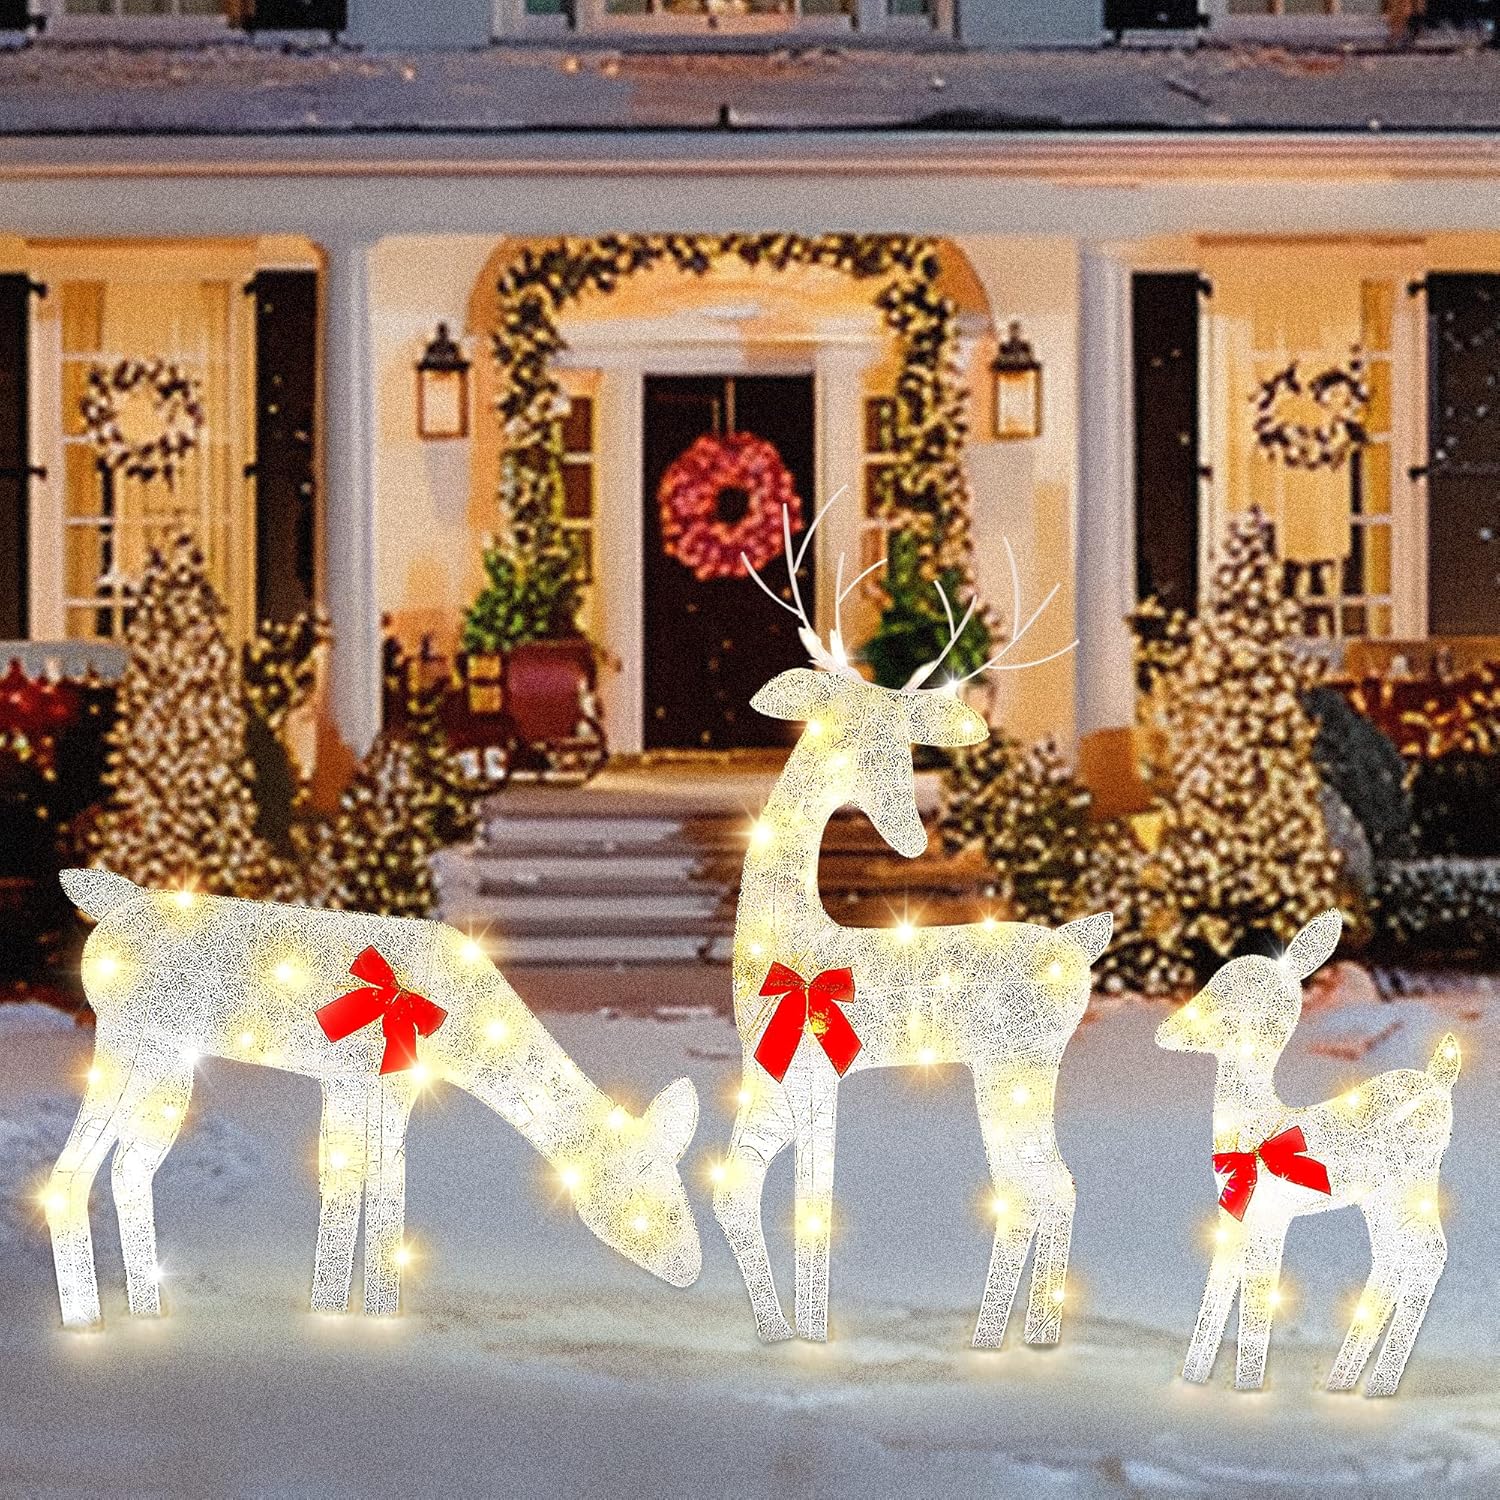
Image: The ATDAWN Light Up Deer Family decoration glowing brightly in a snowy outdoor setting.

Image: The deer family decoration enhancing an outdoor Christmas display.
Product Demonstration Video
Video: A seller-provided video showcasing the illuminated Christmas deer decorations.
Maintenance
- Cleaning: To clean, gently wipe the deer with a soft, damp cloth. Do not use harsh chemicals or abrasive cleaners.
- Storage: The 2D design allows for space-saving storage. Disassemble the deer by reversing the setup steps and store them in their original packaging or a dry, protected area to prevent damage.
- Light Replacement: If any LED lights fail, refer to the product packaging for information on replacement bulbs, if applicable.
Troubleshooting
- Lights Not Working:
- Check if the power cord is securely plugged into a working outlet.
- Inspect the entire length of the light string for any broken bulbs or loose connections.
- Ensure the power source is active.
- Decoration Instability:
- Ensure all metal stakes are fully inserted into the ground.
- Use additional plastic cable ties to secure the deer to fixed objects or additional stakes if necessary, especially in high-wind areas.
- Verify that all screws and nuts used during assembly are tightened.
Specifications
| Feature | Detail |
|---|---|
| Brand | ATDAWN |
| Model Number | TARO60W31REH |
| Light Color | Warm White |
| Number of Light Sources | 60 LEDs |
| Recommended Use | Outdoor |
| Number of Items | 3 (Male, Female, Fawn) |
| Material | Metal, Plastic, Fabric |
| Package Dimensions | 17.17 x 13.7 x 3.66 inches |
| Item Weight | 3.41 pounds |
Warranty and Support
For warranty information or technical support, please refer to the product packaging or contact the seller directly. Keep your proof of purchase for any warranty claims.