Introduction
Thank you for choosing the DKE External Desktop PC Power Switch. This manual provides detailed instructions for the proper installation, operation, and maintenance of your new external power button. Please read this manual thoroughly before use to ensure optimal performance and safety.
Product Overview
The DKE External Desktop PC Power Switch offers a convenient solution for controlling your computer's power from an easily accessible location. It features a mechanical key switch design for durability and a 2-meter long cable for flexible placement.
Key Features:
- External Desktop PC Power Control: Easily power on/off your computer without reaching for the PC tower.
- 2-Meter Long Cable: Provides ample length for flexible placement of the power button.
- Easy Installation: Simple connection to your motherboard's POWER SW and HDD LED connectors.
- Compact and Portable Design: Small footprint (2.1cm X 2.1cm / 2.5cm thickness) and lightweight.
- Magnetic Base: Allows for secure attachment to metal surfaces.
- Mechanical Key Switch: Designed for durability and a responsive feel.
Package Contents:
- 1x DKE External Desktop PC Power Switch with 2M Cable
- 1x Power SW Splitter Cable
- 1x 3M Adhesive Sticker

Image: The DKE External PC Power Switch showing the main button unit, the 2-meter cable, and the motherboard connectors (POWER SW, HDD LED+ and HDD LED-).
Setup and Installation
Before proceeding, ensure your computer is completely powered off and unplugged from the wall outlet to prevent electrical shock or damage to components.
Step 1: Accessing the Motherboard
Open your computer case to gain access to the motherboard. Locate the front panel header pins, typically found at the bottom right corner of the motherboard. Refer to your motherboard's manual for the exact location and pinout diagram.
Step 2: Connecting the Power Switch Cable
- Identify the "POWER SW" pins on your motherboard's front panel header.
- If you wish to retain the functionality of your case's original power button, use the provided Power SW splitter cable. Connect the splitter to the motherboard's "POWER SW" pins, then connect both your case's power switch cable and the DKE External Power Switch's "POWER SW" cable to the splitter.
- If you do not need the original case power button, simply connect the DKE External Power Switch's "POWER SW" cable directly to the motherboard's "POWER SW" pins.

Image: A close-up view of a motherboard's front panel header, highlighting the POWER SW and HDD LED pins where the external switch cables connect.
Step 3: Connecting the HDD LED Cable (Optional)
To enable the HDD activity indicator light on the external switch, locate the "+HDD-" (or similar) pins on your motherboard's front panel header. Connect the DKE External Power Switch's "HDD LED+" and "HDD LED-" cables to these pins. Ensure correct polarity (+ to + and - to -) for the LED to function.

Image: A visual guide illustrating the components of the DKE External PC Power Switch, including the main button, the Power SW splitter, and the individual connectors for POWER SW and HDD LED.
Step 4: Cable Management and Placement
Route the 2-meter cable from inside your PC case to your desired external location. The external power button features a magnetic base, allowing it to be securely attached to any metal surface (e.g., your PC case, a metal desk leg). For non-metal surfaces, use the included 3M adhesive sticker to secure the button's base.
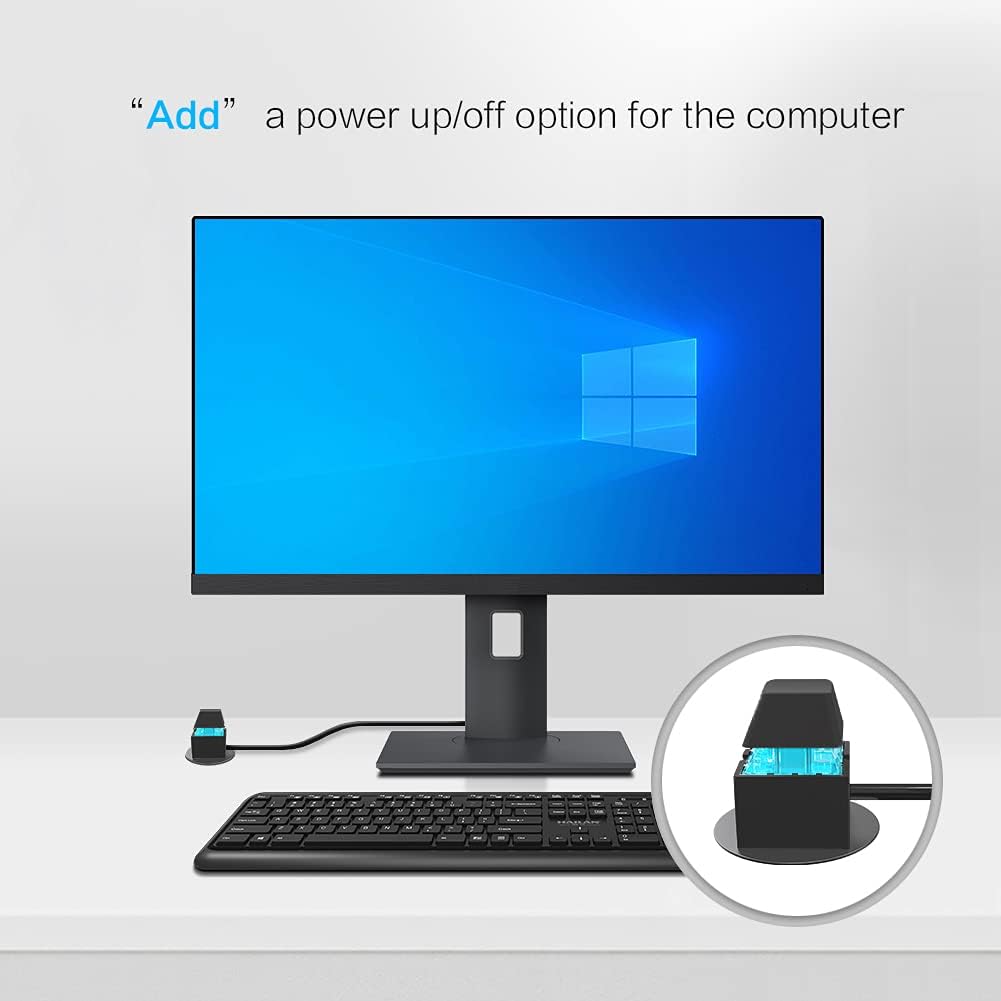
Image: The DKE External PC Power Switch positioned on a desk, demonstrating its convenient placement for easy access to power control.

Image: The DKE External PC Power Switch attached to the side of a computer case, illustrating its magnetic mounting capability.
Once all connections are made and the cable is routed, close your PC case and reconnect the power supply.
Operation
Powering On/Off:
Press the external power button firmly to power on your computer. To power off, press and hold the button for approximately 4-5 seconds until the computer shuts down. A quick press will typically initiate a sleep or hibernate state, depending on your operating system's power settings.
HDD Activity Indicator:
If the HDD LED cables were connected, the light on the external power button will illuminate when your hard drive is actively reading or writing data.
Video: A demonstration of the DKE External PC Power Switch in use, showing how to power on a desktop computer and the illuminated LED indicator.
Maintenance
The DKE External Desktop PC Power Switch requires minimal maintenance. Keep the button and cable clean and free from dust. Avoid exposing the unit to excessive moisture or extreme temperatures. Do not attempt to disassemble the unit, as this may void the warranty.
Troubleshooting
| Problem | Possible Cause | Solution |
|---|---|---|
| Computer does not power on. | Incorrect connection to motherboard. | Verify the "POWER SW" cable is correctly connected to the motherboard's "POWER SW" pins. Ensure the computer's main power supply is connected and switched on. |
| HDD LED does not light up. | Incorrect HDD LED cable connection or polarity. | Check the "HDD LED+" and "HDD LED-" connections on the motherboard. Ensure correct polarity. |
| Button feels unresponsive. | Dust or debris affecting the switch mechanism. | Gently clean around the button. If the issue persists, ensure the internal connection to the motherboard is secure. |
Specifications
- Brand: DKE
- Model: DKE-PowerSwitch-Adapter
- Cable Length: 2 Meters (approximately 6.5 feet)
- Connector Type: ATX (for motherboard front panel headers)
- Compatible Devices: Personal Computers (ATX desktop computer cases)
- Switch Type: Mechanical Key Switch
- Features: Magnetic base, optional HDD LED indicator
- Dimensions (Button): 2.1cm x 2.1cm x 2.5cm (approx.)
- Item Weight: 1.76 ounces (approx.)
Warranty and Support
DKE products are manufactured to high-quality standards. For warranty information or technical support, please refer to the contact details provided with your purchase or visit the official DKE website. Keep your proof of purchase for warranty claims.