1. Introduction
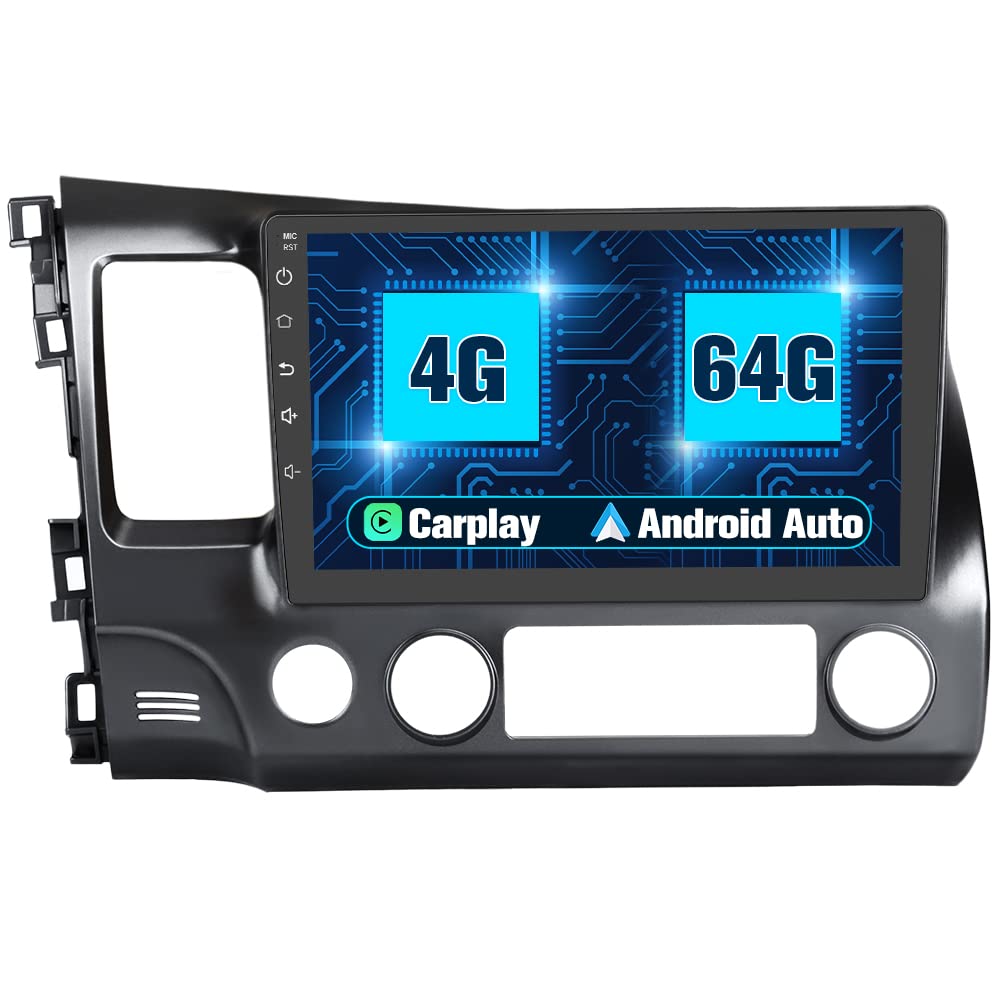
This manual provides detailed instructions for the installation, operation, and maintenance of your AWESAFE PX6 Android 10 Car Radio Stereo. This unit is specifically designed for Honda Civic models manufactured between 2006 and 2011, offering an enhanced in-car entertainment and navigation experience. Please read this manual thoroughly before installation and use to ensure proper function and safety.
2. Safety Information
- Professional Installation Recommended: Installation of car audio systems can be complex. It is highly recommended to have this unit installed by a qualified professional to prevent damage to the product or your vehicle.
- Vehicle Compatibility: Ensure this product is compatible with your specific Honda Civic model (2006-2011) before attempting installation.
- Power Disconnection: Always disconnect the vehicle's battery negative terminal before starting any electrical work to prevent short circuits and electrical damage.
- Wiring: Follow all wiring diagrams carefully. Incorrect wiring can cause malfunction, fire, or electric shock.
- Driving Safety: Do not operate the unit in a way that distracts you from driving. Always prioritize road safety.
- Ventilation: Ensure adequate ventilation around the unit to prevent overheating.
- Moisture: Keep the unit away from water and excessive moisture.
3. Package Contents
Verify that all items listed below are included in your package. If any items are missing or damaged, please contact customer support.
AWESAFE PX6 Car Radio Stereo with 10-inch display and custom installation frame for Honda Civic.

RCA Cable Set: For audio/video input and output connections.
USB Cables: Two types of USB cables for data transfer and device connectivity.
External Microphone: For improved call quality and voice commands.
GPS Module: For accurate navigation and location services.
Power Cable: Main wiring harness for connecting to vehicle's power system.
Installation Tools: Screwdriver and crowbar for panel removal.
4. Setup & Installation
This section outlines the general steps for installing the AWESAFE PX6 unit. Specific vehicle configurations may require additional steps or tools. It is recommended to consult a professional installer if you are unsure about any part of the process.
4.1 Pre-Installation Checklist
- Ensure the vehicle is turned off and the parking brake is engaged.
- Disconnect the negative terminal of the car battery.
- Gather all necessary tools (provided crowbar, screwdriver, wire cutters, electrical tape, etc.).
- Confirm compatibility with your Honda Civic (2006-2011).
4.2 Installation Steps
- Remove Existing Radio: Carefully remove the trim panels around your existing car radio using the provided crowbar tool. Disconnect the wiring harnesses and antenna cable from the old unit.
- Prepare Mounting Area: For some 2006 Honda Civic EX models, a small modification (e.g., using a dremel tool) to the plastic behind the unit might be necessary to ensure proper clearance for the new head unit.
- Connect Wiring Harness: Connect the AWESAFE power cable harness to your vehicle's wiring.
- Premium Sound Systems: If your Honda Civic has a premium sound system (often indicated by "Premium Sound" on the original radio), you may need to connect the amplifier remote wire (typically blue or blue/white) from the new unit's harness to the vehicle's amplifier turn-on wire.
- Install GPS Module: For optimal signal reception, place the GPS module in a clear area, such as the recess at the top behind the gauge cluster trim. Route the cable to the radio housing. Avoid placing it directly behind the radio.
- Connect USB Cables: Connect the provided USB cables. Note that for phone connectivity (e.g., Android Auto/CarPlay), use the 4-pin USB connector. Consider installing a flush-mount USB port for a cleaner look.
- Install External Microphone: Connect the external microphone. For best voice clarity, consider mounting it in a location like the top behind the steering wheel, rather than near the unit itself.
- Connect Rear Camera (Optional): If installing a rear camera, route its wiring from the trunk to the head unit and connect it according to the camera's instructions.
- Test Connections: Before fully reassembling, temporarily reconnect the car battery and power on the unit to test basic functions (power, audio, touch screen, GPS signal, camera input).
- Secure Airbag Light Module: If your vehicle has an airbag light module that needs to be plugged in but has no dedicated slot on the new trim, plug it in and secure it behind the unit to prevent warning lights.
- Mount New Unit: Carefully slide the AWESAFE PX6 unit into the dashboard opening, ensuring all wires are clear and not pinched. Secure it with screws or clips as per the vehicle's design.
- Reassemble Panels: Reattach all trim panels removed earlier.
Visual comparison of the Honda Civic dashboard before and after the installation of the AWESAFE PX6 Android 10 Car Radio Stereo.

The AWESAFE PX6 unit seamlessly integrated into the Honda Civic dashboard, showcasing its large display.
5. Operating Instructions
This section covers the basic operation and key features of your AWESAFE PX6 Android 10 Car Radio Stereo.
5.1 Power On/Off and Basic Navigation
- Power On: The unit will typically power on automatically when the vehicle's ignition is turned on.
- Power Off: The unit will power off when the vehicle's ignition is turned off. A long press on the power button (if available) may also turn off the screen or put the unit into standby.
- Android Interface: Navigate the Android 10 operating system using the touchscreen. Swipe, tap, and drag just like a tablet.
5.2 Apple CarPlay & Android Auto
The 4GB RAM / 64GB ROM version of this unit includes built-in Apple CarPlay and Android Auto functionality. Connect your smartphone via the 4-pin USB cable to access these features.

Apple CarPlay allows seamless integration of iPhone features like navigation, music, and messages.

Android Auto provides a simplified interface for Android phones, offering navigation, communication, and entertainment.
5.3 Bluetooth Connectivity
Pair your smartphone via Bluetooth for hands-free calling and audio streaming.
- Go to the Bluetooth settings on the head unit.
- Enable Bluetooth on your smartphone and search for available devices.
- Select the head unit's Bluetooth name (e.g., "AWESAFE") from your phone's list and pair.
- Confirm the pairing code if prompted.

The Bluetooth interface allows for hands-free calling and music playback from paired devices.
5.4 GPS Navigation
The unit comes with a built-in GPS module for navigation. You can use pre-installed maps or download your preferred navigation apps from the Google Play Store.

Utilize the GPS navigation feature for turn-by-turn directions and route planning.
5.5 Steering Wheel Controls
The unit supports integration with your vehicle's existing steering wheel controls. This allows you to manage audio, calls, and other functions without taking your hands off the wheel.
- Access the "Steering Wheel Control" settings in the unit's menu.
- Follow the on-screen instructions to program each button on your steering wheel to the desired function.
- Save the settings once configuration is complete.

The steering wheel control interface allows customization of button functions for convenience.
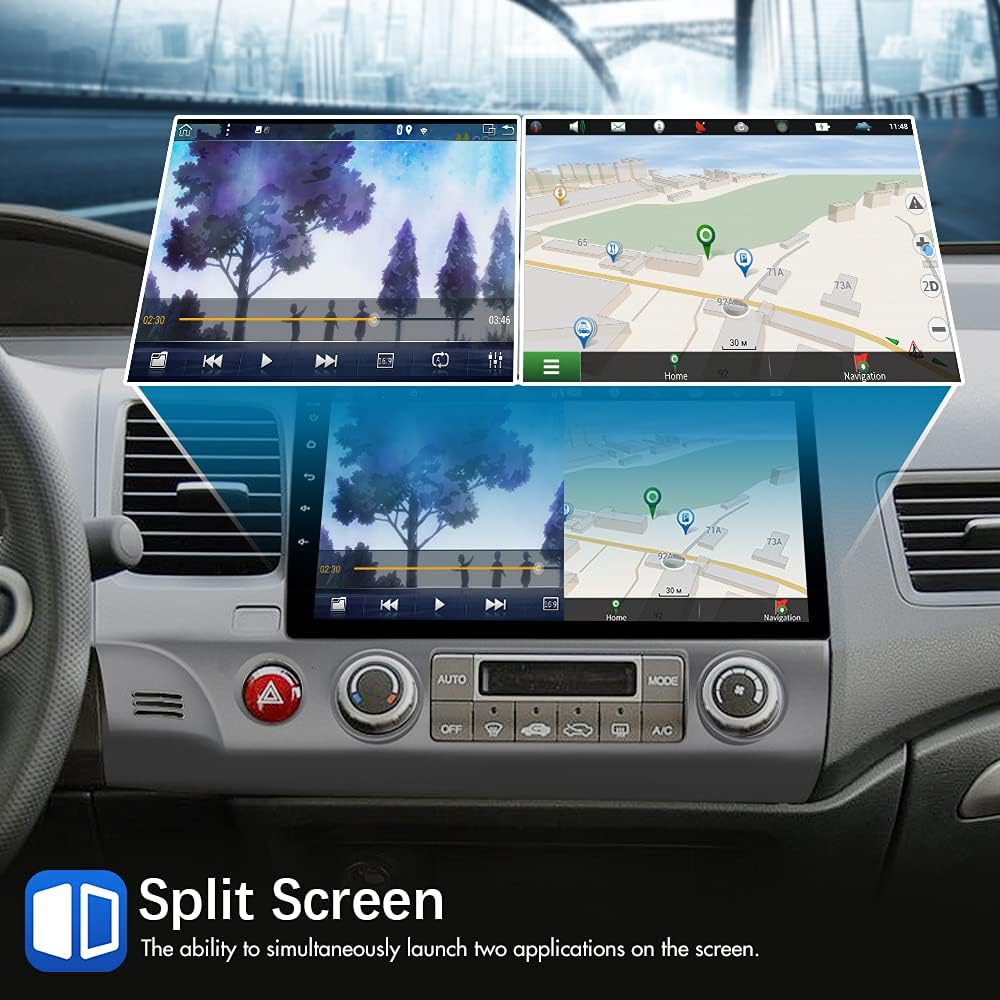
5.6 Split Screen Functionality
The split-screen feature allows you to run two applications simultaneously on the 10-inch display, such as navigation and music playback.
- Open the first application you wish to use.
- Press and hold the recent apps button (usually a square icon) or swipe up from the bottom and hold, then drag the first app to one side of the screen.
- Select the second application from the recent apps list or app drawer to fill the other half of the screen.

Example of split-screen mode, displaying navigation on one side and media playback on the other.
5.7 Digital Sound Processor (DSP)
The built-in DSP allows for advanced audio customization, including equalizer settings, sound field adjustments, and bass enhancements, to optimize your listening experience.
- Access the "DSP" or "Sound Settings" menu.
- Adjust equalizer presets (Flat, Pop, Rock, Jazz, etc.) or customize a user-defined profile.
- Experiment with other sound enhancements to suit your preferences.

The DSP interface provides detailed control over audio equalization and sound effects.
5.8 Rear Camera Input
When a compatible rear camera is connected, the display will automatically switch to the camera view when the vehicle is put into reverse gear, aiding in parking and maneuvering.

The rear camera display assists with parking by showing the area behind the vehicle with dynamic guidelines.
5.9 Full RCA Output
The unit features full RCA output, allowing you to connect external monitors, such as headrest displays, to share entertainment with rear-seat passengers.
Demonstration of the full RCA output feature, enabling video sharing to rear-seat entertainment systems.
6. Maintenance
- Screen Cleaning: Use a soft, lint-free cloth slightly dampened with water or a screen cleaner specifically designed for electronics. Do not use abrasive cleaners or solvents.
- Software Updates: Periodically check for software updates through the unit's settings or the manufacturer's website to ensure optimal performance and access to new features.
- General Cleaning: Keep the unit free from dust and debris. Use a soft brush or compressed air to clean vents and ports.
- Avoid Extreme Temperatures: Prolonged exposure to extreme heat or cold can affect the unit's performance and lifespan.
7. Troubleshooting
This section addresses common issues you might encounter. If you experience problems not covered here, please contact customer support.
| Problem | Possible Cause | Solution |
|---|---|---|
| Unit does not power on. | Loose power connection, blown fuse, vehicle battery disconnected. | Check all power connections. Inspect vehicle fuses and the unit's fuse. Ensure car battery is connected. |
| No sound or poor sound quality. | Incorrect wiring, volume too low, mute activated, amplifier issue (for premium sound systems). | Verify speaker wiring. Check volume and mute settings. If applicable, ensure amplifier remote wire is connected. Adjust DSP settings. |
| Touchscreen is unresponsive or slow. | Protective film still on screen, software glitch, excessive background apps. | Ensure all protective films are removed. Restart the unit. Close unnecessary background applications. |
| GPS signal is weak or inaccurate. | GPS antenna improperly placed or obstructed. | Relocate the GPS antenna to an area with a clear view of the sky, such as behind the gauge cluster trim. |
| Bluetooth connection issues. | Device not in pairing mode, incorrect pairing code, interference. | Ensure both devices are in pairing mode. Re-attempt pairing. Clear previous Bluetooth connections. |
| Android Auto / Apple CarPlay not working. | Incorrect USB port, phone settings, incompatible phone, 2G/32G unit version. | Ensure using the 4-pin USB connector. Check phone developer settings (e.g., USB default mode to MTP for OnePlus). Confirm you have the 4GB/64GB unit, as the 2GB/32GB version requires an external dongle. |
| Poor microphone quality. | Microphone placement, internal microphone being used instead of external. | Ensure the external microphone is connected and positioned optimally (e.g., near the driver's head). Consider replacing with a higher-quality external microphone if issues persist. |
| Radio reception is poor. | Antenna connection, weak signal in area. | Check antenna connection. Note that aftermarket units may have slightly different reception characteristics than factory radios. |
8. Specifications
| Feature | Detail |
|---|---|
| Model | AWESAFE PX6 |
| Operating System | Android 10 |
| RAM | 4GB |
| ROM (Internal Storage) | 64GB |
| Display Size | 10 inches |
| Connectivity Technology | USB, Wi-Fi, Bluetooth |
| Controller Type | Android |
| Special Features | Built-In Bluetooth, Apple CarPlay, Android Auto, GPS Navigation, DSP, Split Screen, Steering Wheel Control Support, Rear Camera Input, Full RCA Output |
| Compatible Devices | Smartphone, Speaker |
| Audio Output Mode | Speaker, Stereo |
| Number of Channels | 4 |
| Supported Internet Services | Maps (and other Android apps via Wi-Fi) |
| Item Weight | 6.98 pounds |
| Package Dimensions | 17.6 x 12 x 10 inches |
9. Warranty & Support
AWESAFE products are designed for reliability and performance. For specific warranty details, please refer to the warranty card included with your product or visit the official AWESAFE website. For technical support, troubleshooting assistance, or inquiries regarding parts and service, please contact AWESAFE customer service through the contact information provided on their official website or through your purchase platform.
When contacting support, please have your product model number (PX6) and purchase date available.


