
JJC TP-N1
JJC TP-N1 Shooting Grip and Mini Tripod User Manual
Model: TP-N1
For Nikon Z30, Z50, Z f, Z fc, Z7 II, Z6 II, COOLPIX P1000, P950, A1000, B600
Product Overview
The JJC TP-N1 Handheld Shooting Grip and Mini Tabletop Tripod is a versatile accessory designed to enhance your photography and videography experience. It features a detachable wireless remote control that replaces the Nikon ML-L7 Bluetooth Remote, offering convenient control over various camera functions. The grip can be used handheld for vlogging and selfies or deployed as a stable mini tripod for static shots.

Figure 1: JJC TP-N1 Shooting Grip and Mini Tripod with a camera.

Figure 2: Key features of the JJC TP-N1, including wireless remote control, 360° pan, 180° tilt, and 1.2kg payload capacity.
Package Contents
- JJC TP-N1 Shooting Grip with Detachable Wireless Remote
- User Manual
- Lithium Ion Battery (pre-installed in remote)
Parts Identification

Figure 3: Labeled components of the shooting grip and remote.
- 1. Camera Mount (1/4"-20 Screw): For attaching your camera.
- 2. Thumbwheel: For securely mounting and removing the camera.
- 3. Tilt Locking Button: Locks the camera's vertical tilt.
- 4. Pan Locking Button: Locks the camera's horizontal pan.
- 5. Anti-Slip Pads: Enhance grip and stability.
- 6. Shutter Release Button: Triggers image capture.
- 7. Video Recording Button: Starts and stops video recording.
- 8. Multi Selector: Navigation for menu options.
- 9. Fn1 Button: Assignable function button (Nikon Z50 and COOLPIX P950 only).
- 10. Fn2 Button: Assignable function button (Nikon Z50 and COOLPIX P950 only).
- 11. Power/Pairing Button: Turns the remote on/off and initiates Bluetooth pairing.
- 12. Zoom Button: Controls camera zoom.
- 13. OK Button: Confirms selections.
- 14. Eyelet: For attaching a wrist strap.
Setup
1. Attaching Your Camera
- Locate the 1/4"-20 screw on the top of the shooting grip.
- Align your camera's tripod socket with the screw.
- Rotate the thumbwheel (Figure 3, #2) clockwise to securely mount your camera. Ensure it is tightened firmly but do not overtighten.
- To remove the camera, rotate the thumbwheel counter-clockwise.

Figure 4: Mounting the camera using the thumbwheel for easy and safe access.
2. Pairing the Wireless Remote (Nikon Z50 Example)
The detachable remote replaces the Nikon ML-L7 Bluetooth Remote. Follow these steps to pair it with your compatible Nikon camera:
- On your Nikon camera, press the MENU button.
- Use the multi selector to navigate to the SETUP MENU (wrench icon).
- Select Wireless remote (ML-L7) options and press the OK button.
- Select Save wireless remote controller and press the OK button.
- Push the power/pairing button (Figure 3, #11) on the remote control downwards to turn it on. The button will pop up to the "ON" position automatically.
- Pairing will start for the remote control and camera. During the process, the indicator lamp on the remote control will flash quickly (approximately every 0.5 seconds).
- Once pairing is complete, the remote control and camera are connected. The Bluetooth icon will be displayed on the shooting screen of the camera.

Figure 5: Detailed pairing instructions for Nikon Z50.
Note: The Fn1 and Fn2 buttons on the remote control are compatible with Nikon Z50 and COOLPIX P950 cameras only.
Operating Instructions
Using as a Handheld Shooting Grip
Hold the grip comfortably for stable handheld shooting, ideal for vlogging, selfies, and dynamic shots.

Figure 6: Using the grip for handheld shooting.

Figure 7: Versatile usage for selfies, horizontal, and vertical shooting.
Using as a Mini Tabletop Tripod
Fold out the legs of the grip to transform it into a stable mini tripod. This is perfect for steady shots, time-lapses, or group photos.
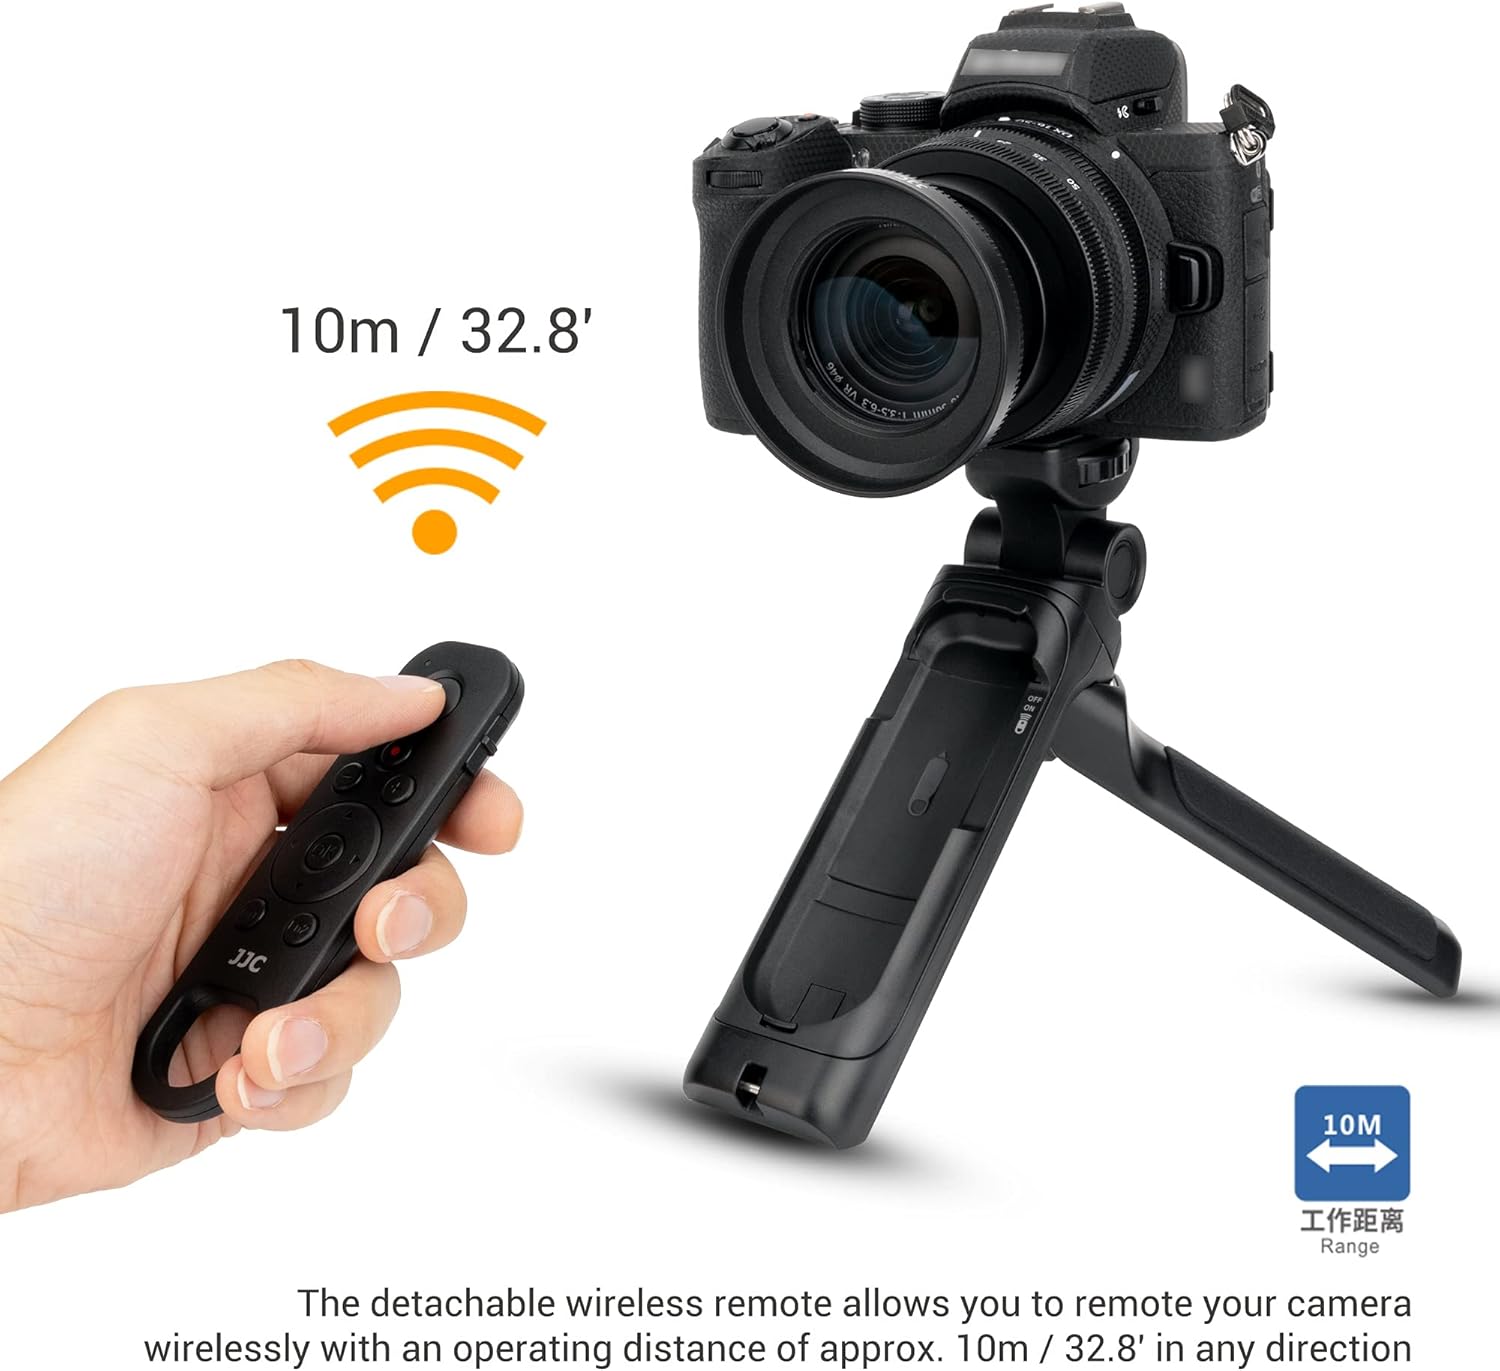
Figure 8: The grip deployed as a mini tripod.
The tripod grip enables the camera to rotate 360° left or right and tilt forward 90° and back 90°. Use the Tilt Locking Button and Pan Locking Button (Figure 3, #3 & #4) to secure your desired angle.
Remote Control Functions
Once paired, the wireless remote provides convenient control over your camera:
- Image Shooting: Press the Shutter Release Button (Figure 3, #6) to take a photo.
- Video Recording: Press the Video Recording Button (Figure 3, #7) to start or stop video recording.
- Zooming: Use the Zoom Button (Figure 3, #12) to zoom in or out.
- Manual Focus Adjusting: Use the Multi Selector (Figure 3, #8) for manual focus adjustments.
- Applications Selecting: Use the Multi Selector to navigate camera menus.
- Fn1/Fn2 Button Assigning: Assign custom functions to these buttons via your camera's menu (Nikon Z50 and COOLPIX P950 only).

Figure 9: Visual guide to remote control functions.

Figure 10: The detachable wireless remote allows control from approximately 10m (32.8 ft) in any direction.
Video 1: Demonstration of the JJC Camera Shooting Grip and its remote functions, including mounting, photo capture, video recording, and use as a tripod for stable shots.
Maintenance
- Keep the grip and remote clean by wiping with a soft, dry cloth.
- Avoid exposing the product to extreme temperatures, humidity, or direct sunlight for prolonged periods.
- Do not use harsh chemicals or abrasive cleaners.
- Store in a cool, dry place when not in use.
- Ensure the remote's battery is charged for optimal performance.
Troubleshooting
| Problem | Possible Cause | Solution |
|---|---|---|
| Remote not responding/working. |
|
|
| Camera not stable on grip/tripod. |
|
|
Specifications
| Feature | Detail |
|---|---|
| Model Number | TP-N1 |
| Brand | JJC |
| Material | Aluminum |
| Item Weight | 7 ounces (198 Grams) |
| Weight Limit | 1.2 Kilograms |
| Maximum Height (Hand Grip) | 193.5 Millimeters (7.6 inches) |
| Minimum Height (Mini Tripod) | 143.5 Millimeters (5.6 inches) |
| Tripod Head Type | Ball Heads |
| Special Feature | Adjustable, Rotatable |
| Compatible Devices | Nikon Z30, Z50, Z f, Z fc, Z7 II, Z6 II, COOLPIX P1000, P950, A1000, B600 |
| Batteries | 1 Lithium Ion battery (included) |
Figure 11: Dimensions of the grip in both handheld and tripod configurations.
Warranty and Support
JJC products are manufactured to high quality standards. For warranty information or technical support, please contact the manufacturer directly through their official website or the retailer from whom you purchased the product. Please retain your proof of purchase for warranty claims.
Related documentsTP-N1


Ask a question about this manual
Ask about setup, troubleshooting, compatibility, parts, safety, or missing instructions. Manuals+ will review the question and use this page’s manual context to help answer it.