1. Introduction
Thank you for choosing BestLuz Wireless Battery-Powered LED Strip Lights. This manual provides essential information for the safe and efficient use of your new LED strip lights. Please read it thoroughly before installation and operation, and retain it for future reference.
This product is designed to provide convenient, bright, and flexible lighting for various indoor applications such as under cabinets, shelves, counters, and closets. The 3-pack includes 1-meter (approximately 3.3 feet) strips, each powered by 3 AA batteries, emitting a neutral white light at 4000K.
2. Safety Information
- Battery Safety: Use only 3 AA batteries per strip. Do not mix old and new batteries, or different types of batteries. Ensure correct polarity (+/-). Remove batteries if the product is not used for an extended period. Dispose of used batteries responsibly.
- Installation: Ensure the installation surface is clean, dry, and smooth for optimal adhesive performance. Avoid installing near heat sources or in excessively humid environments.
- Cutting: Only cut the LED strip at designated cut marks (indicated by a scissor icon) to avoid damaging the circuit.
- Indoor Use Only: This product is designed for indoor use. Do not expose to water or outdoor elements.
- Children: Keep out of reach of children. Small parts and batteries can be a choking hazard.
3. Package Contents
- 3 x BestLuz 1-meter (3.3 ft) LED Strip Lights with integrated battery boxes
Note: 3 AA batteries per strip (total 9 AA batteries for the 3-pack) are required and not included.
4. Setup and Installation
Follow these steps for easy installation of your BestLuz LED strip lights:
- Insert Batteries: Open the battery compartment on each LED strip's battery box. Insert 3 AA batteries, ensuring correct polarity. Close the compartment securely.
- Test Functionality: Press the power button on the battery box to ensure the lights turn on.
- Measure and Plan: Determine the desired length and location for your LED strip. If necessary, the strip can be cut at the designated cut marks (indicated by a scissor icon) to fit your specific application.
- Prepare Surface: Clean the installation surface thoroughly with a dry cloth to remove any dust, dirt, or grease. Ensure the surface is completely dry before proceeding. The 3M adhesive tape works best on dry wall, wood, metal, and PVC surfaces.
- Apply Adhesive: Peel off a small portion of the protective backing from the 3M adhesive tape on the back of the LED strip. Carefully align the strip to your desired position.
- Secure the Strip: Slowly peel off the remaining protective backing while pressing the LED strip firmly onto the surface. Apply consistent pressure along the entire length of the strip to ensure a strong bond.
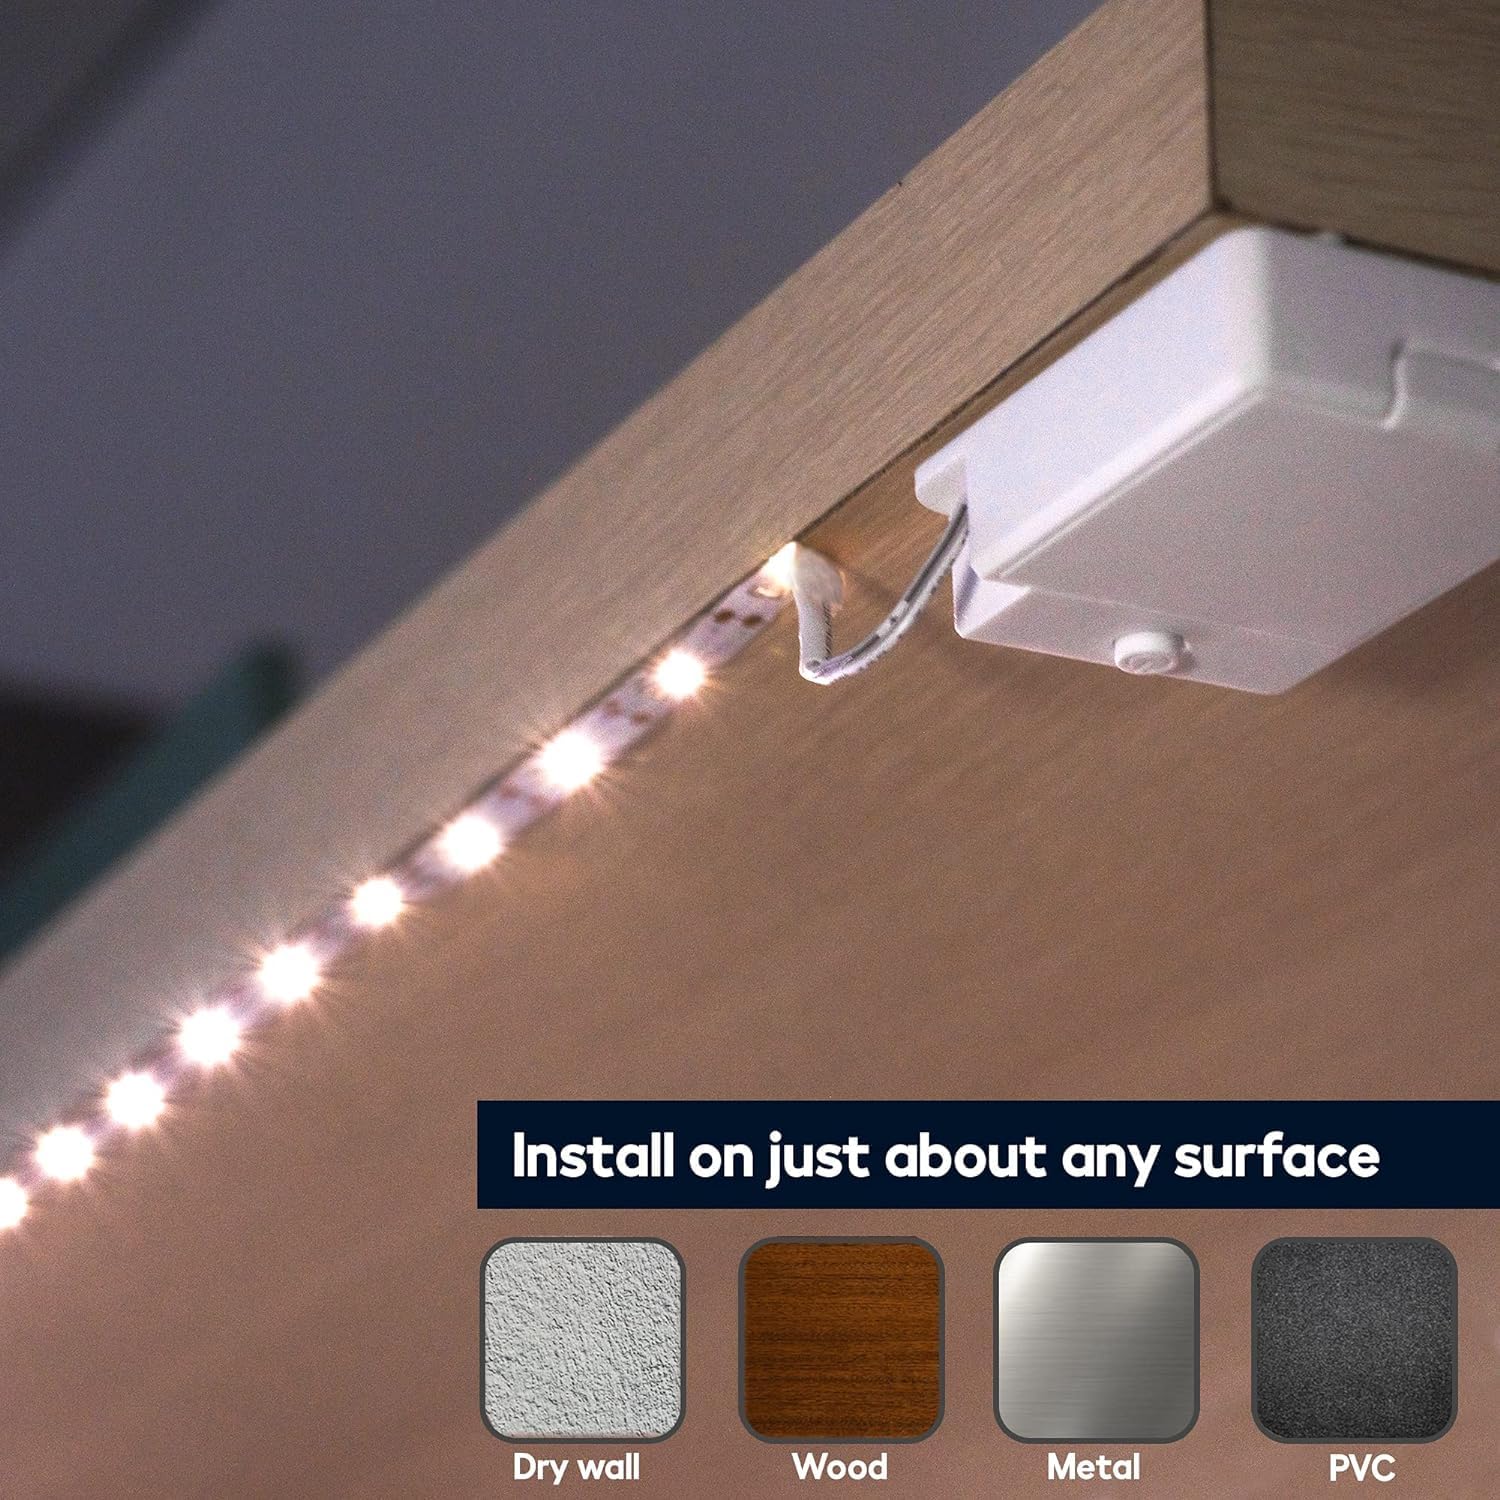
Image: The LED strip lights can be installed on various surfaces including drywall, wood, metal, and PVC.

Image: Step-by-step installation process, from battery insertion to final adhesion.

Image: Diagram illustrating the LED strip length, battery box dimensions, and designated cutting points.
5. Operation
Operating your BestLuz LED strip lights is straightforward:
- Power On/Off: Locate the small button on the battery box. Press it once to turn the LED strip lights on. Press it again to turn them off.

Image: Visual demonstration of how the LED strip lights brighten up a space, enhancing contrast and viewing pleasure.

Image: Versatile applications of the LED strip lights in different home environments.
6. Maintenance
- Battery Replacement: When the lights dim or stop working, it's time to replace the batteries. Open the battery compartment, remove the old batteries, and insert new 3 AA batteries, observing polarity.
- Cleaning: Gently wipe the LED strip and battery box with a soft, dry cloth. Do not use abrasive cleaners or immerse in water.
- Storage: If storing the lights for an extended period, remove the batteries to prevent leakage and corrosion.

Image: Important reminder to switch off the lights after use to conserve battery power.
7. Troubleshooting
- Lights not turning on:
- Check if batteries are inserted correctly with the right polarity.
- Replace with fresh AA batteries.
- Ensure the power button is pressed firmly.
- Lights are dim:
- Batteries may be low. Replace them with new ones.
- Adhesive not sticking:
- Ensure the surface was clean and dry before application.
- Apply firm, even pressure during installation.
- For rough or uneven surfaces, additional mounting solutions may be required (not included).
8. Specifications
| Feature | Detail |
|---|---|
| Brand | BestLuz |
| Model Number | BSL-003 |
| Product Dimensions (L x W x H) | 100 x 1 x 1 cm (per strip) |
| Item Weight | 150 g (total for 3 strips) |
| Power Source | Battery Powered (3 AA batteries required per strip, not included) |
| Voltage | 4.5 Volts (DC) |
| Max Wattage | 1.1 Watts |
| Light Type | LED (30 SMD LEDs per meter) |
| Luminous Flux | 110 lumens |
| Color Temperature | 4000K Neutral White |
| Color Rendering Index (CRI) | 80.00 |
| Material | Aluminum (strip), Metal (shade) |
| Installation Type | Adhesive (3M tape) |
| Special Features | Wireless, Cuttable |
| Usage | Indoor, Under Cabinet |
9. Warranty and Support
BestLuz provides a 12-month warranty for this product, covering manufacturing defects from the date of purchase. This warranty does not cover damage caused by misuse, accident, unauthorized modification, or normal wear and tear.
For technical support, warranty claims, or any questions regarding your BestLuz LED Strip Lights, please contact our customer service. Refer to your purchase documentation for contact details or visit the official BestLuz website.


