Brace Direct FrozenIce Cold Therapy Machine B097QDCMVV
Brace Direct FrozenIce Cold Therapy Machine User Manual
Model: FrozenIce Cold Therapy Machine B097QDCMVV
Brand: Brace Direct
Introduction
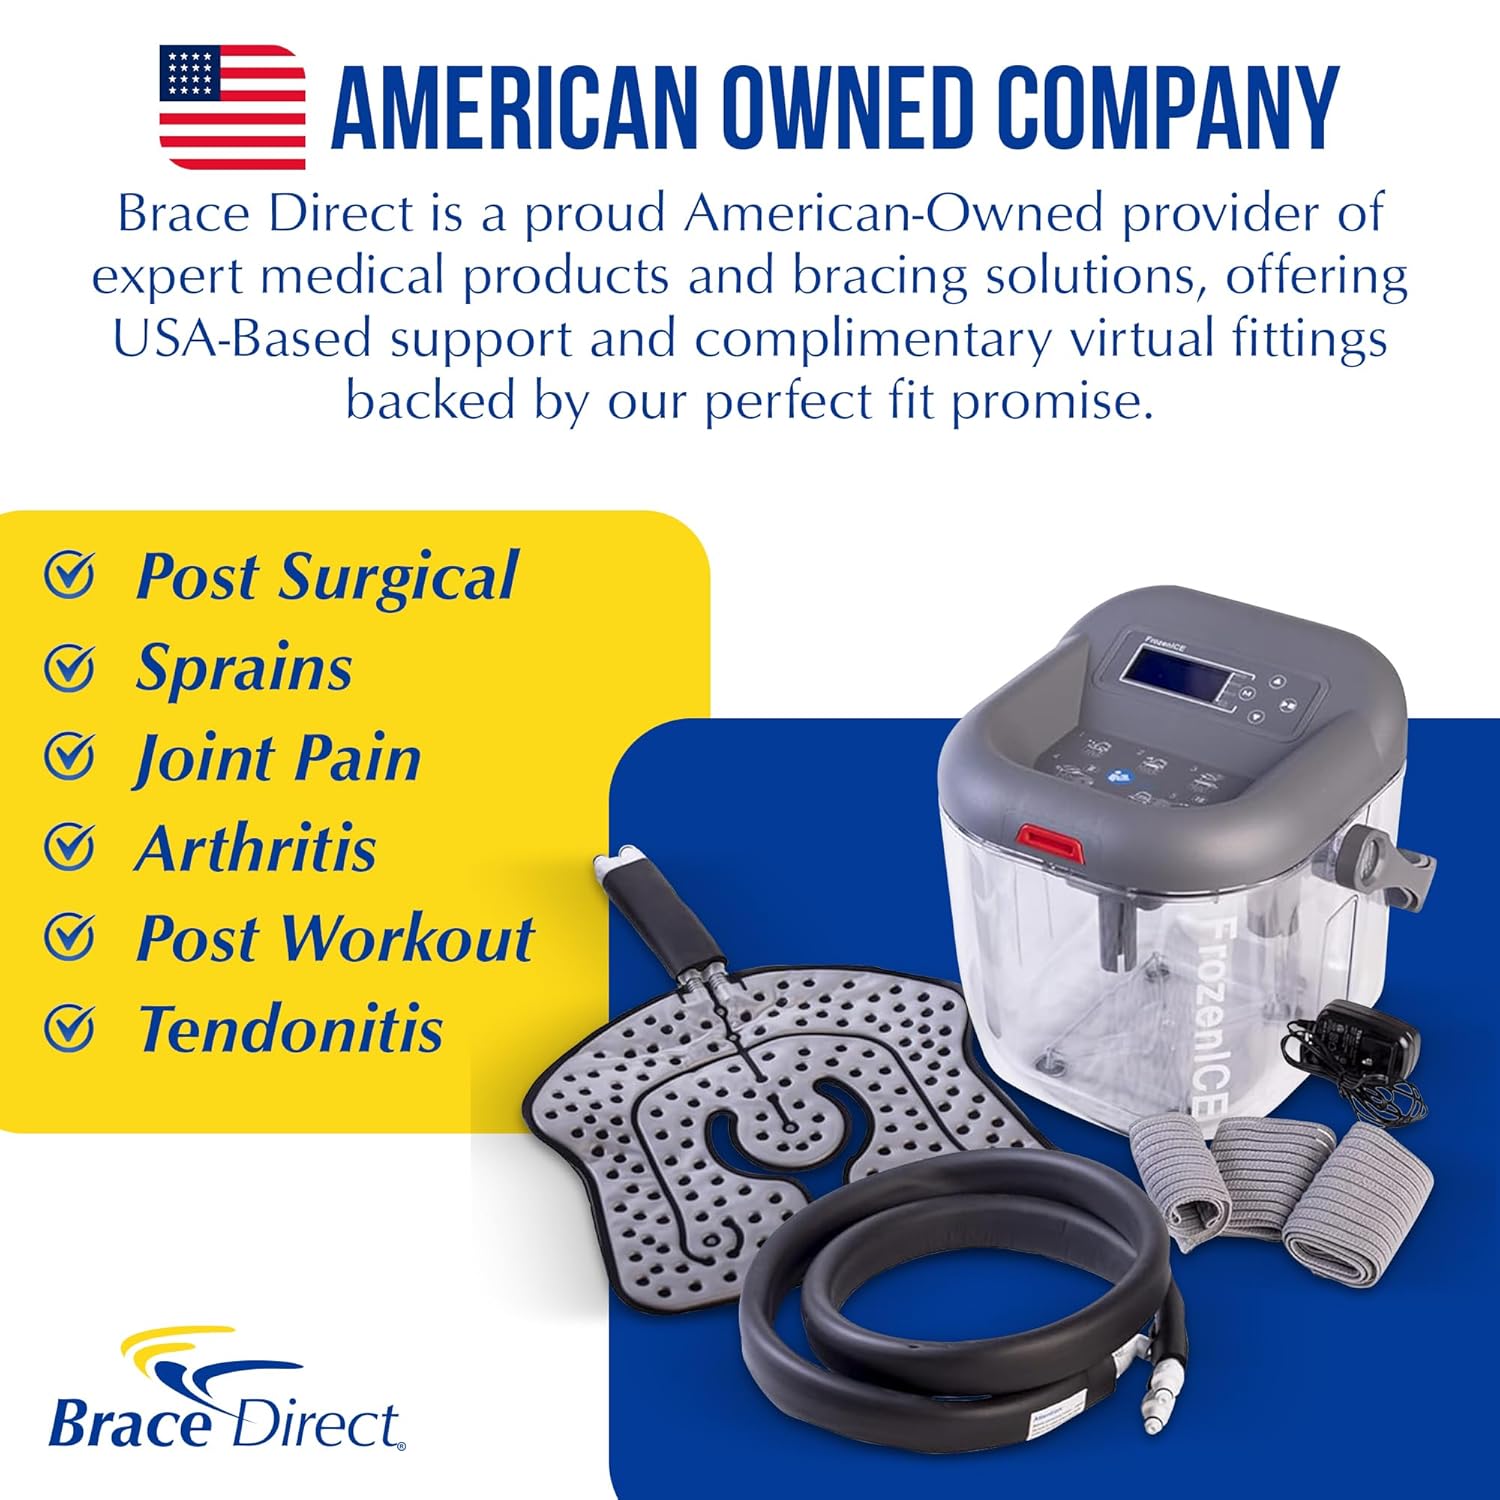
This manual provides instructions for the safe and effective use of your Brace Direct FrozenIce Cold Therapy Machine. This circulating water system is designed for cryotherapy to help reduce swelling, inflammation, and discomfort in areas such as the knee, shoulder, hip, ankle, and back, particularly for post-surgery recovery.
Please read all instructions carefully before operating the device.
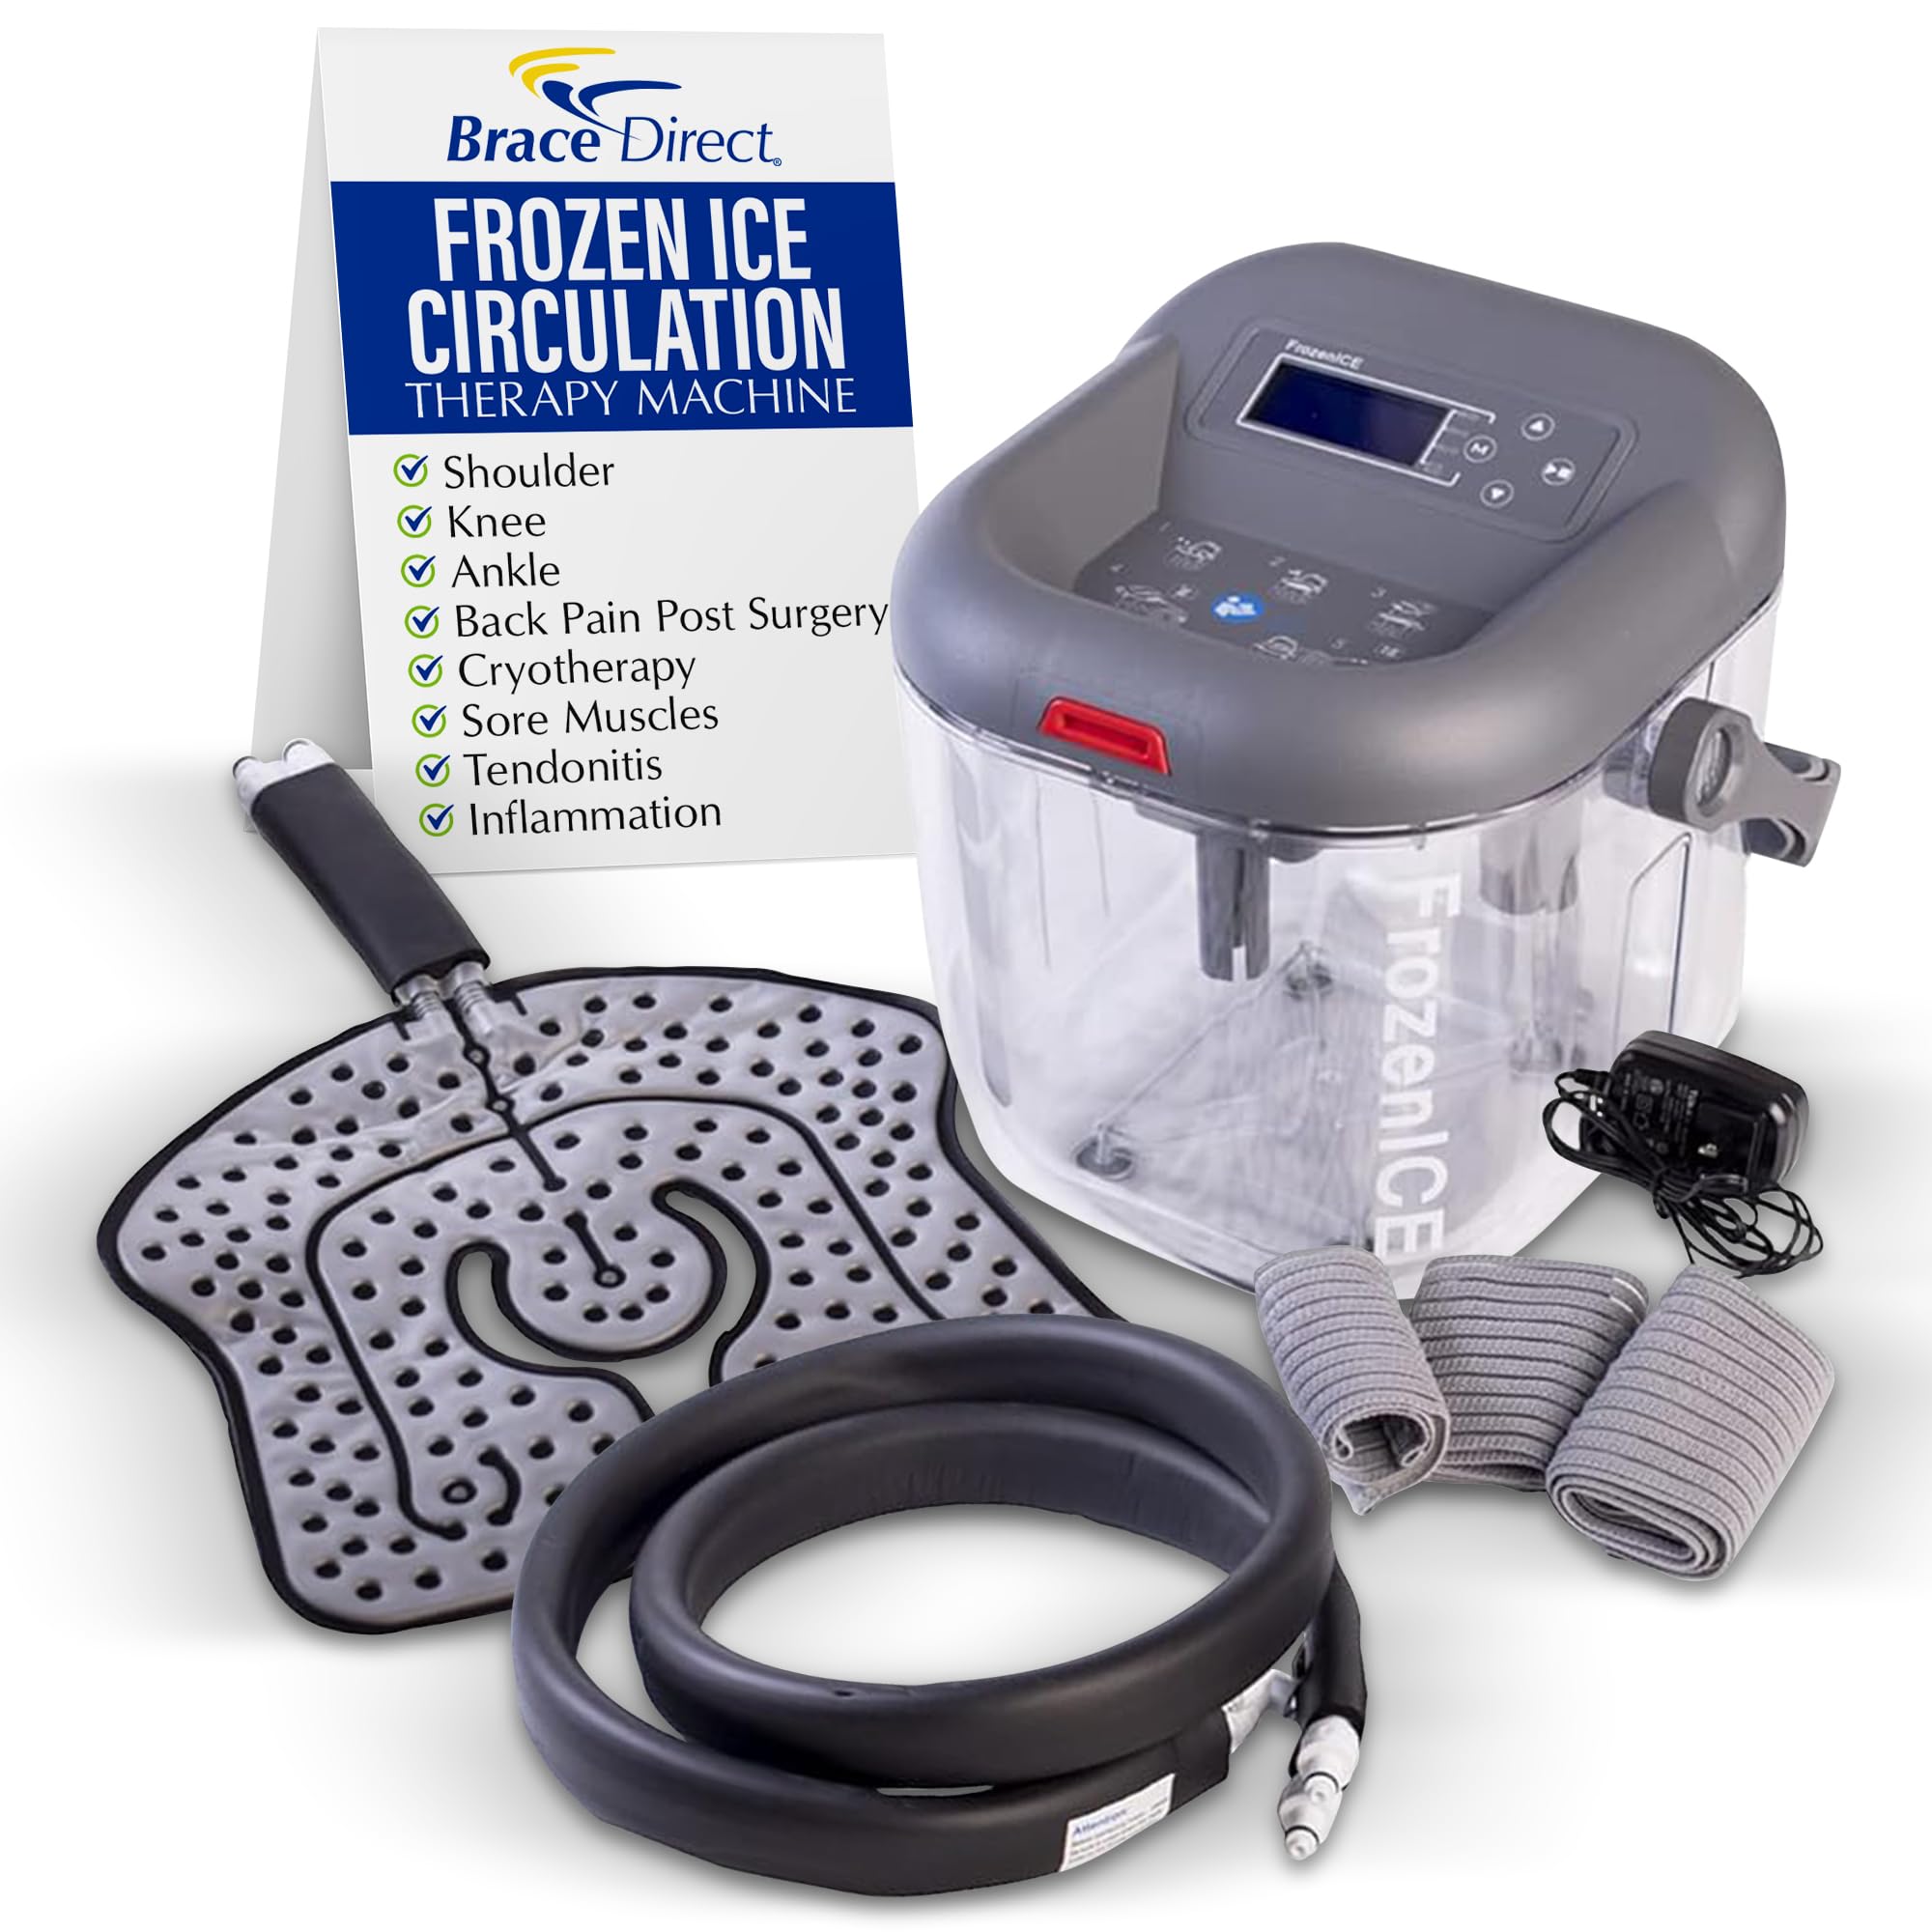
What's in the Box
- Therapy System Unit
- Universal Pad
- Thermal Tubing
- Metal Clamps
- AC Adaptor
- Essential Elastic Wraps

Setup Instructions
- **Open the Unit**: Press the red button on the lid and tilt the lid up and back to remove it from the grooves.
- **Add Ice**: Fill the reservoir with ice up to the indicated "ICE" line.
- **Add Water**: Pour cold water into the reservoir up to the "WATER" line.
- **Close the Unit**: Set the lid back into the grooves and push down until the red button snaps into place with a click.
- **Connect Thermal Tubing**: Press the metal clamps on the ports located at the back of the unit. Insert the female end of the thermal tubing into the ports until you hear a click.
- **Connect Universal Pad**: Press the metal clamps on the other end of the thermal tubing and insert the universal pad fittings until you hear a click.
- **Connect Power**: Locate the power port on the back of the unit, next to the thermal tubing. Insert the AC adapter and then plug it into a nearby power outlet.
- **Power On**: Press the power switch on to power the device.
Operating the Controls
- **Enter Setup Mode**: Press and hold the "Mode" button until you hear a beep.
- **Adjust Flow Rate**: When "LPM" (Liters Per Minute) is flashing on the screen, use the Up or Down arrow buttons to adjust the desired flow rate.
- **Adjust Treatment Time**: Press the "Mode" button again to transition to treatment time settings. Use the Up or Down arrow buttons to select the desired treatment duration.
- **Exit Setup**: Press the "Mode" button once more to exit setup mode.
- **Start/Pause Treatment**: Press the "Start/Pause" button to begin therapy. This button can also be used to pause therapy at any time.

Applying the Universal Pad
Ensure the pad and tubing are straightened to prevent kinks that could impede water circulation. The plastic side of the pad should face your body, and the gray side should face away.
General Application Steps:
- Place the universal pad directly on the affected body part.
- Use the provided elastic wraps to secure the pad firmly but comfortably in place. Ensure the wraps do not restrict circulation or cause discomfort.
Specific Applications:
- **Knee**: Position the pad around the knee joint. Use the elastic wraps to secure it, ensuring full coverage of the affected area.
- **Shoulder**: Place the pad over the shoulder. Use the medium elastic wrap to secure it around the body and the smaller wrap for the arm cuff portion.
- **Hip/Back**: Position the pad over the hip or lower back area. Use the longest elastic wrap to secure it around the torso.
- **Ankle**: Center the pad on top of the foot with the thermal tubing at the top. Wrap the pad around both sides of the ankle. Use the medium-sized wrap to create a figure-eight pattern and secure with Velcro.


Maintenance
- **Draining**: After each use, or when changing ice/water, ensure the unit is powered off. Disconnect the tubing and carefully drain any remaining water from the reservoir and the pad.
- **Cleaning**: Clean the reservoir and pad with mild soap and water. Rinse thoroughly and allow all components to air dry completely before storage. Do not use harsh chemicals or abrasive cleaners.
- **Storage**: Store the unit and all accessories in a clean, dry place away from direct sunlight and extreme temperatures. Ensure tubing is not kinked during storage.
- **Regular Inspection**: Periodically inspect the tubing and pad for any signs of wear, cracks, or damage. Replace components if necessary.
Troubleshooting
| Problem | Possible Cause | Solution |
|---|---|---|
| No water circulation | Power not connected; unit not powered on; tubing kinked; insufficient water/ice. | Ensure AC adapter is plugged in and unit is switched on. Check for kinks in tubing. Verify ice and water levels are above minimum. |
| Water leaking from connections | Tubing not securely connected; damaged O-rings or connectors. | Ensure all quick-connect fittings are fully engaged and clicked into place. Inspect O-rings for damage and replace if necessary. |
| Therapy not cold enough | Insufficient ice; ice has melted; water not cold enough. | Add more ice to the reservoir. Replace melted ice with fresh ice. Ensure water added is cold. |
| Unit not turning on | Power cable disconnected; power switch off; faulty power outlet. | Check power cable connection. Ensure power switch is in the 'on' position. Try a different power outlet. |
Specifications
- **Package Dimensions**: 14.25 x 12 x 12 inches
- **Item Weight**: 9.23 pounds
- **Manufacturer**: Brace Direct
- **ASIN**: B097QDCMVV
- **Date First Available**: June 22, 2021
- **Age Range (Description)**: Adult
- **Number of Items**: 1
- **Unit Count**: 1.0 Count
- **Special Feature**: Adjustable
Warranty and Support
Brace Direct offers a 1-Year Warranty on every product for lasting confidence. As an American-owned company, Brace Direct is dedicated to providing USA-based support.
For assistance with proper pad setup, sizing, and placement, Brace Direct offers free video consultations with a fitting specialist. For more information or to schedule a consultation, please visit the official Brace Direct store or contact customer support.
If you are unhappy for any reason, you may visit brace.direct to return the product and receive a full refund, as part of their Perfect Fit Promise.