1. Introduction
The HP 935 Creator Wireless Mouse is designed for business and creative professionals, offering versatile connectivity, customizable controls, and an ergonomic design for extended comfort. This manual provides essential information for setting up, operating, maintaining, and troubleshooting your device.
2. What's in the Box
- HP 935 Creator Wireless Mouse
- Nano Dongle (USB Type A receiver)
- USB-C Charging Cable
3. Setup
3.1. Charging the Mouse
Before initial use, ensure your mouse is fully charged. Connect the provided USB-C charging cable to the USB-C port on the front of the mouse and to a powered USB port on your computer or a wall adapter.
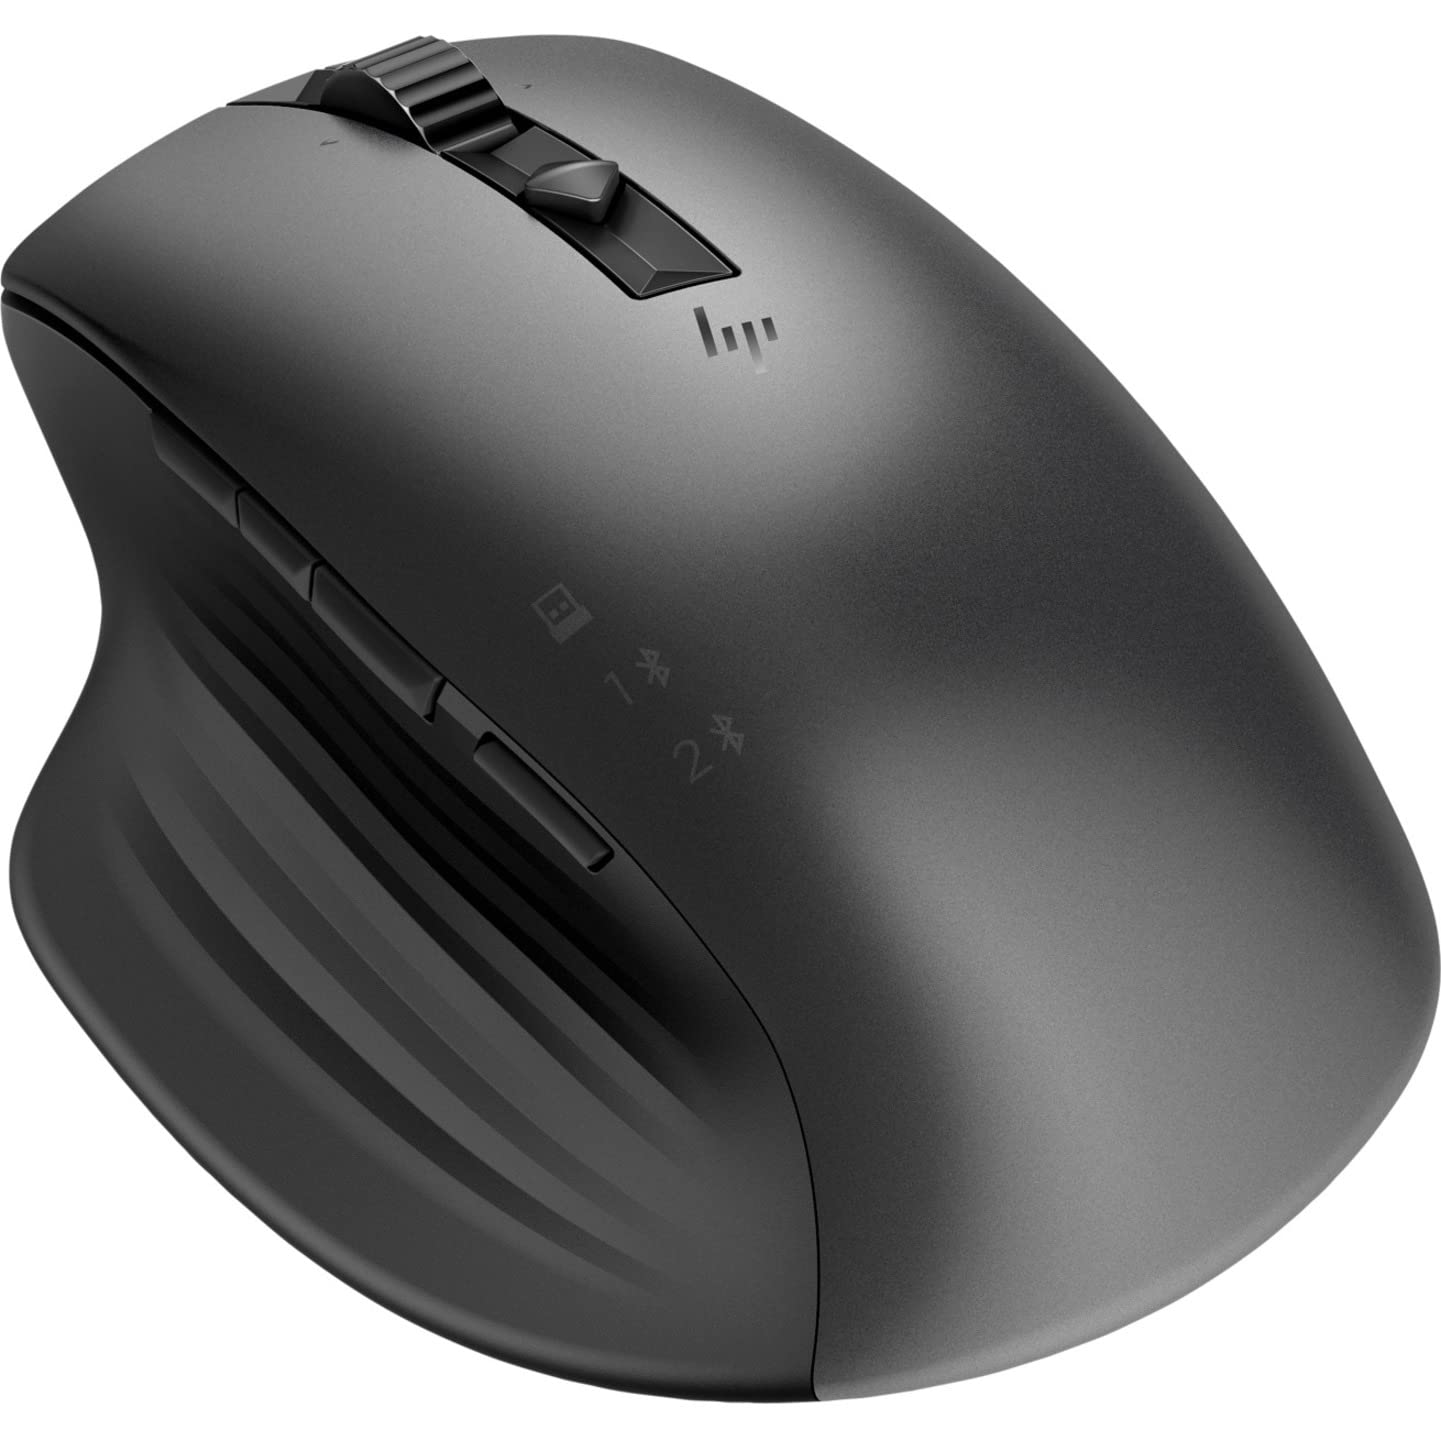
Image: Side view of the HP 935 Creator Wireless Mouse, highlighting the USB-C charging port located at the front.

Image: Top-down view of the HP 935 Creator Wireless Mouse with a USB-C cable connected to its charging port.
3.2. Powering On/Off
Locate the power switch on the bottom of the mouse. Slide the switch to the 'ON' position to power on the device.

Image: Bottom view of the HP 935 Creator Wireless Mouse, showing the optical sensor and the power switch.
3.3. Connecting to Your Device
The HP 935 Creator Wireless Mouse offers two connectivity options: Bluetooth and a 2.4 GHz wireless connection via the Nano Dongle.
3.3.1. Bluetooth Connection
- Ensure the mouse is powered on.
- Press and hold the Bluetooth pairing button (often located on the bottom or side of the mouse, indicated by a Bluetooth icon) until the indicator light begins to flash, signifying pairing mode.
- On your computer or device, navigate to Bluetooth settings and select "HP 935 Creator Mouse" from the list of available devices to pair.
3.3.2. 2.4 GHz Wireless Connection (via Nano Dongle)
- Locate the Nano Dongle, typically stored within the mouse itself or included separately in the packaging.
- Insert the Nano Dongle into an available USB Type-A port on your computer.
- The mouse should automatically connect to your computer. If not, ensure the mouse is powered on and try re-inserting the dongle.
4. Operating the Mouse
The HP 935 Creator Wireless Mouse features 7 buttons, all of which are programmable, and a versatile scroll wheel.

Image: Top-down view of the HP 935 Creator Wireless Mouse, displaying the left and right click buttons, scroll wheel, and additional programmable buttons.
4.1. Buttons and Controls
- Left and Right Click Buttons: Standard mouse functions.
- Scroll Wheel: Provides hyper-fast scrolling for quick navigation through documents and web pages. It also supports horizontal scrolling.
- Scroll Mode Button: A dedicated button near the scroll wheel allows you to switch between hyper-fast (free-spinning) and mechanical (ratchet) scroll modes.
- Programmable Buttons: The mouse features 7 programmable buttons, including the side buttons and potentially the scroll wheel click. These can be customized using HP's software (available for download from the official HP support website) to perform specific actions, macros, or application-specific functions.

Image: Side view of the HP 935 Creator Wireless Mouse, highlighting the ergonomically placed side buttons.
4.2. Ergonomics
The mouse is designed with an ambidextrous form factor to provide comfort for both left and right-handed users during prolonged use.

Image: Ergonomic side view of the HP 935 Creator Wireless Mouse, showcasing its contoured shape for comfortable grip.
5. Maintenance
5.1. Cleaning
To clean your mouse, power it off and gently wipe the surface with a soft, lint-free cloth. For stubborn dirt, slightly dampen the cloth with water or a mild cleaning solution. Avoid using harsh chemicals or abrasive materials that could damage the surface or internal components.
5.2. Battery Care
The mouse features a built-in rechargeable battery. To maximize battery lifespan, avoid fully discharging the battery frequently. Charge the mouse when the battery indicator suggests low power.
6. Troubleshooting
6.1. Mouse Not Responding
- Ensure the mouse is powered on.
- Check battery level and charge if necessary.
- For 2.4 GHz connection: Ensure the Nano Dongle is securely plugged into a USB port. Try a different USB port.
- For Bluetooth connection: Verify Bluetooth is enabled on your device and the mouse is paired. Try re-pairing the mouse.
- Restart your computer.
6.2. Erratic Cursor Movement
- Clean the optical sensor on the bottom of the mouse.
- Ensure you are using the mouse on a suitable surface. Avoid highly reflective or transparent surfaces.
- Check for any obstructions between the mouse and the receiver (for 2.4 GHz) or your device (for Bluetooth).
7. Specifications
| Feature | Detail |
|---|---|
| Brand | HP |
| Model Name | 935 Creator Wireless Mouse |
| Model Number | 1D0K8UT#ABA |
| Connectivity Technology | Wireless (Bluetooth, USB Type A 2.4 GHz) |
| Total Number of Buttons | 7 |
| Number of Programmable Buttons | 7 |
| Scroller Type | Scroll Wheel (Hyper-fast and Mechanical modes) |
| Power Source | Battery Powered (Rechargeable via USB-C) |
| Wireless Range | Up to 10 meters (33 feet) |
| Compatible Devices | Notebook, Chromebook, Workstation, Mobile Workstation, Mac, PC |
| Hand Orientation | Ambidextrous |
| Color | Black |
8. Warranty and Support
8.1. Warranty Information
This HP 935 Creator Wireless Mouse comes with a 1-year manufacturer's warranty. Please retain your proof of purchase for warranty claims.
8.2. Customer Support
For further assistance, technical support, or to download the latest drivers and customization software, please visit the official HP support website: