1. Introduction
This manual provides essential information for the proper installation, operation, and maintenance of the HDI Small Vibratory Plate Compactor Rubber Isolator Shock Mount. This product is designed as a direct replacement for Stanley Hydraulic P/N 30167 and is compatible with various vibratory plate compactor models, including Stanley Hydraulic HS6000, HS6019, HS6100, HSX6, HS8000, HS11000, HSX11, Bobcat PCF64, Doosan, and LORD J-14056-4. Adhering to these instructions will ensure optimal performance and extend the lifespan of the isolator.
2. Safety Information
Always prioritize safety when working with heavy machinery and replacement parts. Failure to follow safety guidelines can result in serious injury or equipment damage.
- Personal Protective Equipment (PPE): Always wear appropriate PPE, including safety glasses, gloves, and sturdy footwear, when handling or installing the isolator.
- Equipment Shutdown: Ensure the vibratory plate compactor is completely shut down, de-energized, and secured against accidental startup before beginning any installation or maintenance.
- Stable Work Environment: Work on a stable, level surface. Use appropriate lifting equipment if necessary to support heavy components.
- Consult Machine Manual: Refer to the original equipment manufacturer's (OEM) manual for specific safety procedures and torque specifications related to your vibratory plate compactor model.
- Professional Installation: If you are unsure about any installation steps, consult a qualified technician.
3. Product Overview
The HDI Rubber Isolator Shock Mount is designed to absorb vibrations and shocks generated by vibratory plate compactors, protecting the machine's frame and operator from excessive stress. This component is crucial for maintaining equipment integrity and operator comfort.
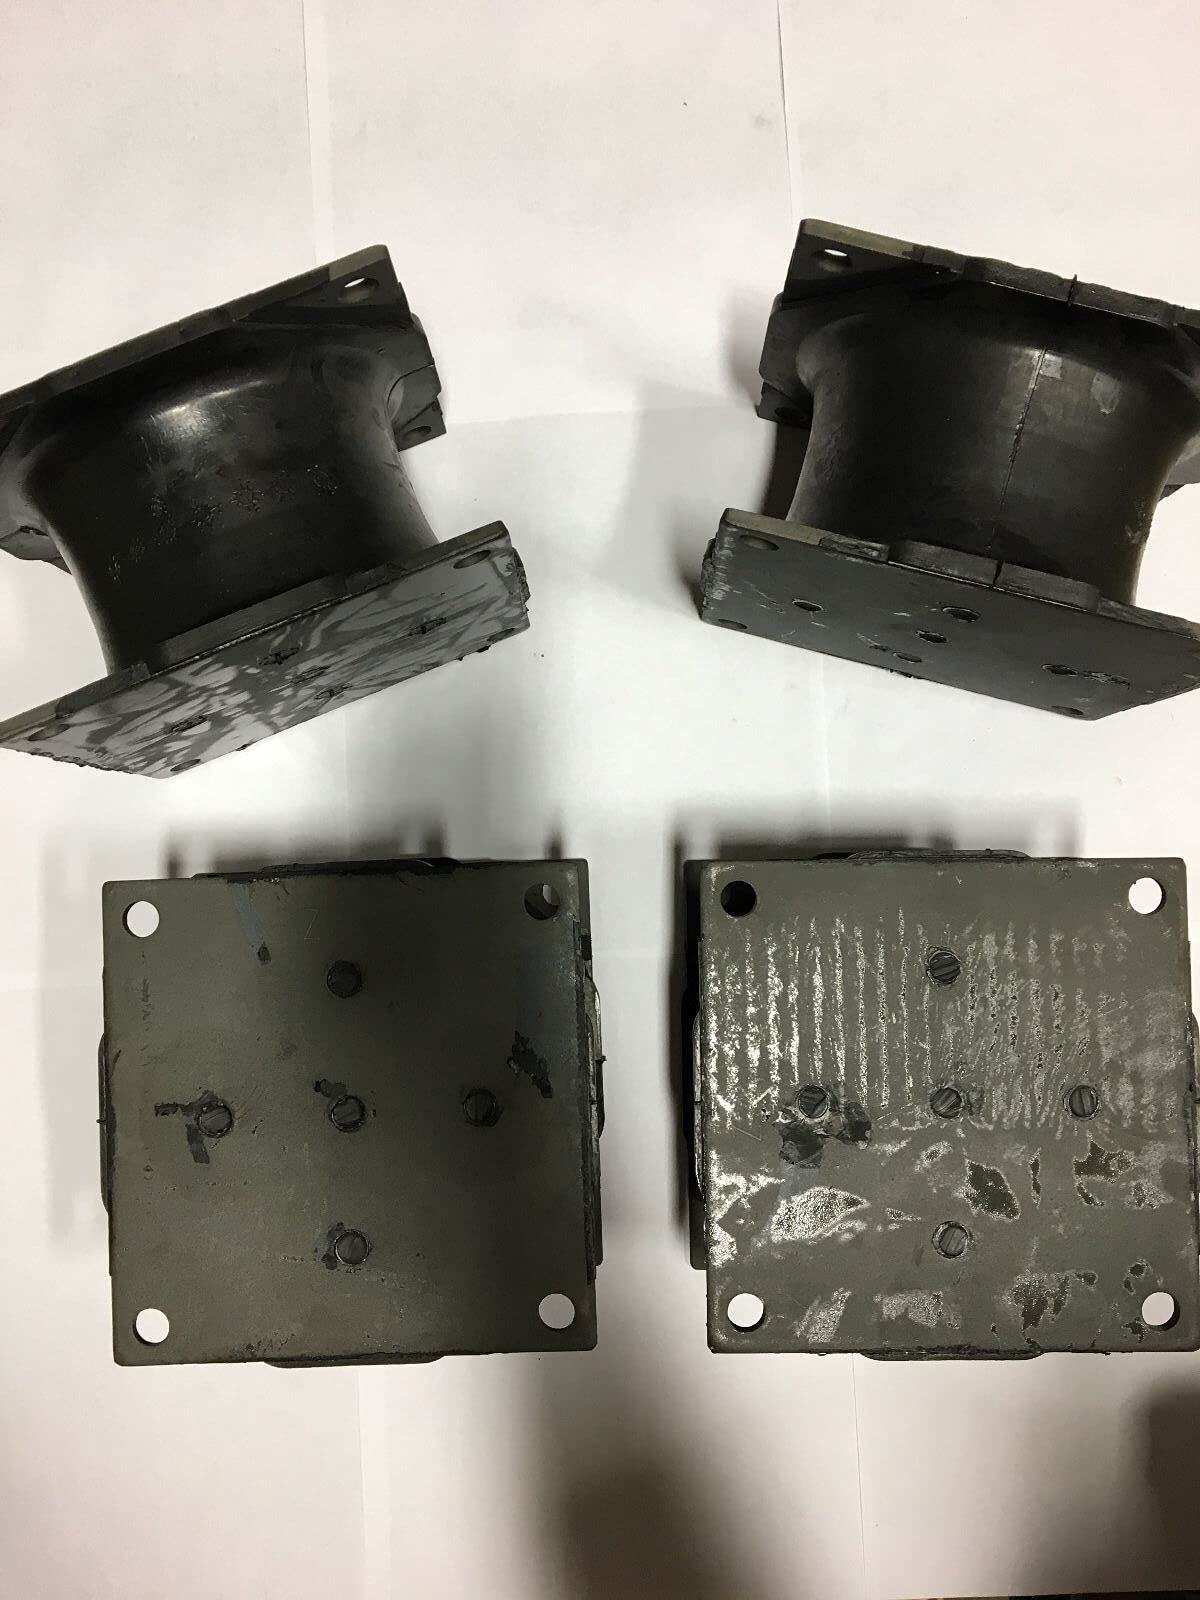
Figure 1: Top view of the HDI rubber isolator shock mount. This image displays the overall structure, including the upper and lower metal plates and the central rubber dampening component.
Key Features:
- Direct replacement for Stanley Hydraulic P/N 30167.
- Constructed with durable rubber and metal plates for effective vibration dampening.
- Designed for small vibratory plate compactors.
4. Setup and Installation
Proper installation is critical for the performance and longevity of the rubber isolator. Follow these steps carefully.
- Prepare the Compactor:
- Ensure the vibratory plate compactor is turned off, cooled down, and disconnected from any power source.
- Position the compactor on a stable, flat surface.
- Access the Old Isolator:
- Identify the existing rubber isolator(s) that need replacement. These are typically located between the engine/vibrator assembly and the compactor's base plate.
- Depending on your compactor model, you may need to remove covers or other components to gain access.
- Remove the Old Isolator:
- Using appropriate wrenches or sockets, carefully unbolt the old isolator from both the upper and lower mounting points.
- Note the orientation of the old isolator before removal to ensure the new one is installed correctly.
- Remove any remaining hardware or debris from the mounting surfaces.
- Install the New Isolator:
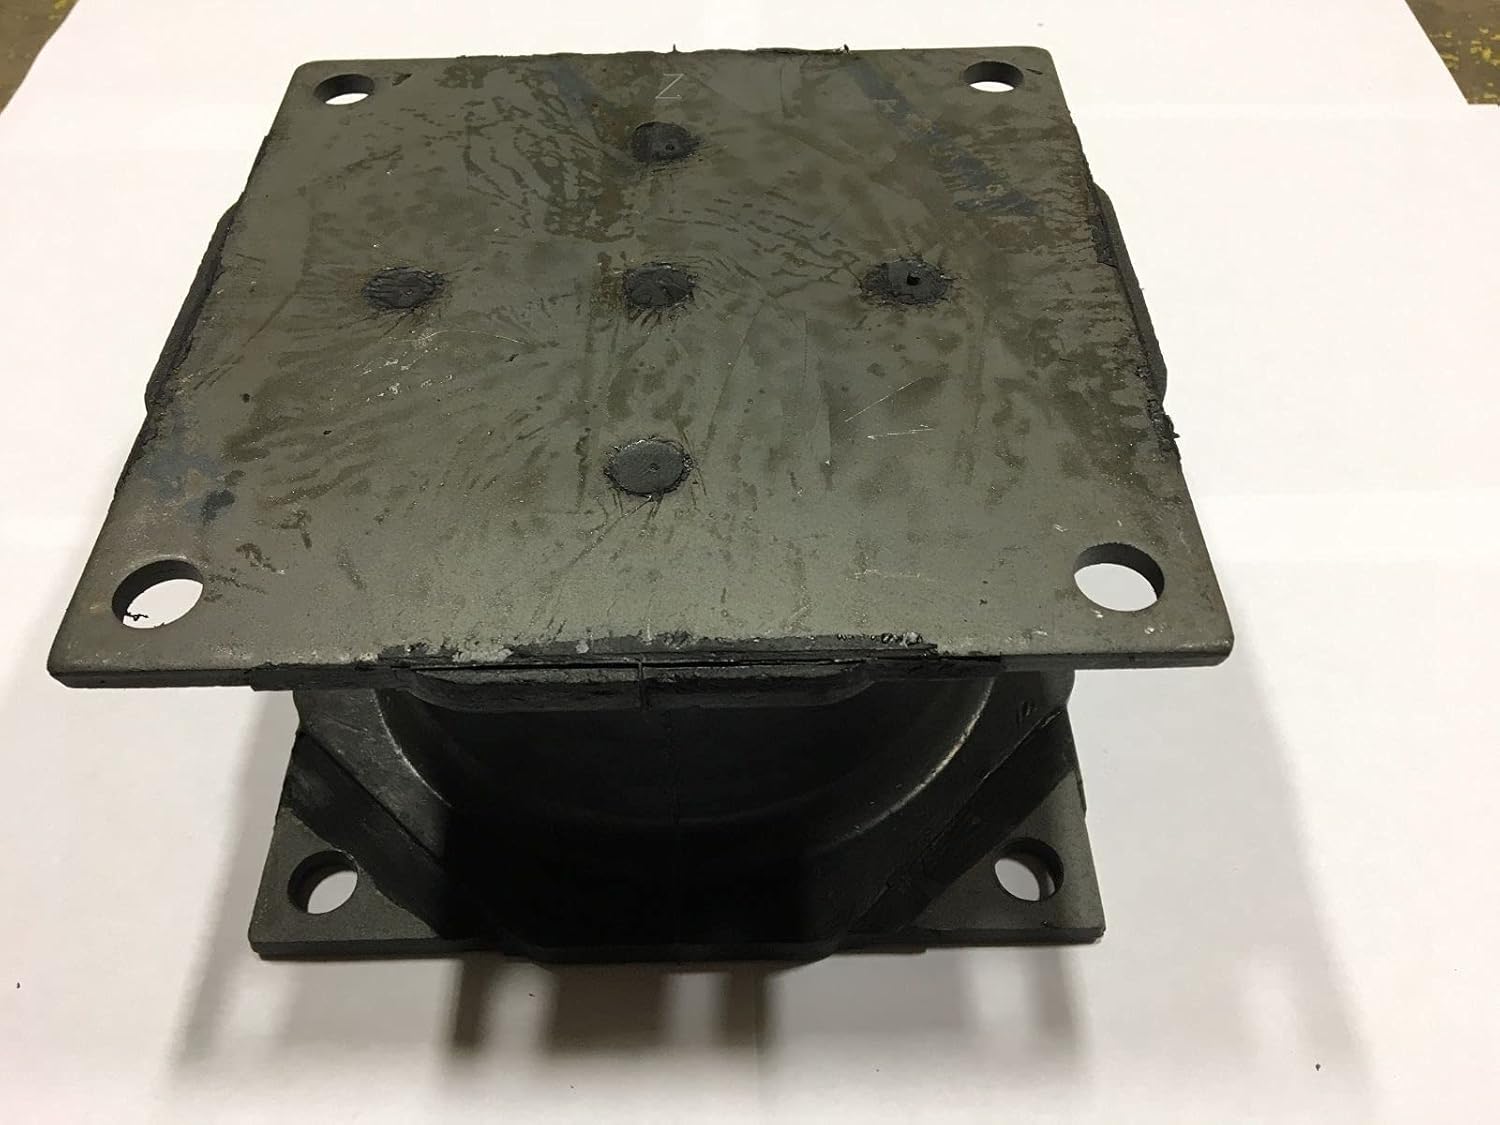
Figure 2: Side view of the HDI rubber isolator. This image highlights the robust rubber section designed for shock absorption and the pre-drilled bolt holes on the metal plates.
- Position the new HDI rubber isolator in the correct orientation, matching the original setup.
- Align the bolt holes on the isolator with the mounting points on the compactor.
- Insert the bolts and hand-tighten them.
- Once all bolts are in place, progressively tighten them to the torque specifications provided in your compactor's OEM manual. Do not overtighten.
- Reassemble and Test:
- Reattach any covers or components that were removed for access.
- Perform a visual inspection to ensure all connections are secure and there are no loose parts.
- Start the compactor and observe its operation. Listen for unusual noises or excessive vibration.
5. Operating Considerations
While the isolator itself does not have operational controls, its function is integral to the compactor's performance. After installation, ensure the compactor operates smoothly with reduced vibration transferred to the frame and operator handles. If excessive vibration persists, refer to the troubleshooting section.
6. Maintenance
Regular inspection of the rubber isolator shock mounts is essential for preventing equipment damage and ensuring safe operation.
- Visual Inspection: Periodically inspect the rubber isolators for signs of wear, cracking, tearing, or deformation. Check for any separation of the rubber from the metal plates.
- Hardware Check: Ensure all mounting bolts are tight and secure. Loose bolts can lead to increased vibration and premature isolator failure.
- Environmental Factors: Protect the isolators from prolonged exposure to harsh chemicals, extreme temperatures, or direct sunlight, which can degrade rubber over time.
- Replacement: Replace isolators immediately if any significant damage or wear is observed. Worn isolators compromise the compactor's performance and can lead to further mechanical issues.

Figure 3: Bottom view of the HDI rubber isolator. This perspective shows the underside of the lower mounting plate and the robust connection to the rubber element.
7. Troubleshooting
If you encounter issues after installing the new isolator, consider the following:
- Excessive Vibration:
- Check if all isolators (if multiple are used) have been replaced and are in good condition.
- Verify that all mounting bolts are tightened to the correct torque specifications.
- Ensure the isolator is installed in the correct orientation.
- Inspect other compactor components for wear or damage that might contribute to vibration (e.g., engine mounts, vibrator bearings).
- Unusual Noises:
- Confirm that no parts are rubbing against the isolator or other components.
- Check for loose hardware.
If troubleshooting steps do not resolve the issue, consult a qualified service technician or contact HDI customer support.
8. Specifications
The following specifications apply to the HDI Small Vibratory Plate Compactor Rubber Isolator Shock Mount:
| Measurement | Value |
|---|---|
| Overall Length (Plate) | 6-3/4 inches (17.15 cm) |
| Overall Width (Plate) | 6-3/4 inches (17.15 cm) |
| Overall Height | 3-7/8 inches (9.84 cm) |
| Rubber Thickness | 3-1/2 inches (8.89 cm) |
| Center Hole to Center Hole | 5-3/4 inches (14.61 cm) |
| Replacement Part Number | Stanley Hydraulic P/N 30167 |
| Approximate Weight (per unit) | 9.25 lbs (4.2 kg) |
| Quantity per Pack | 4 |
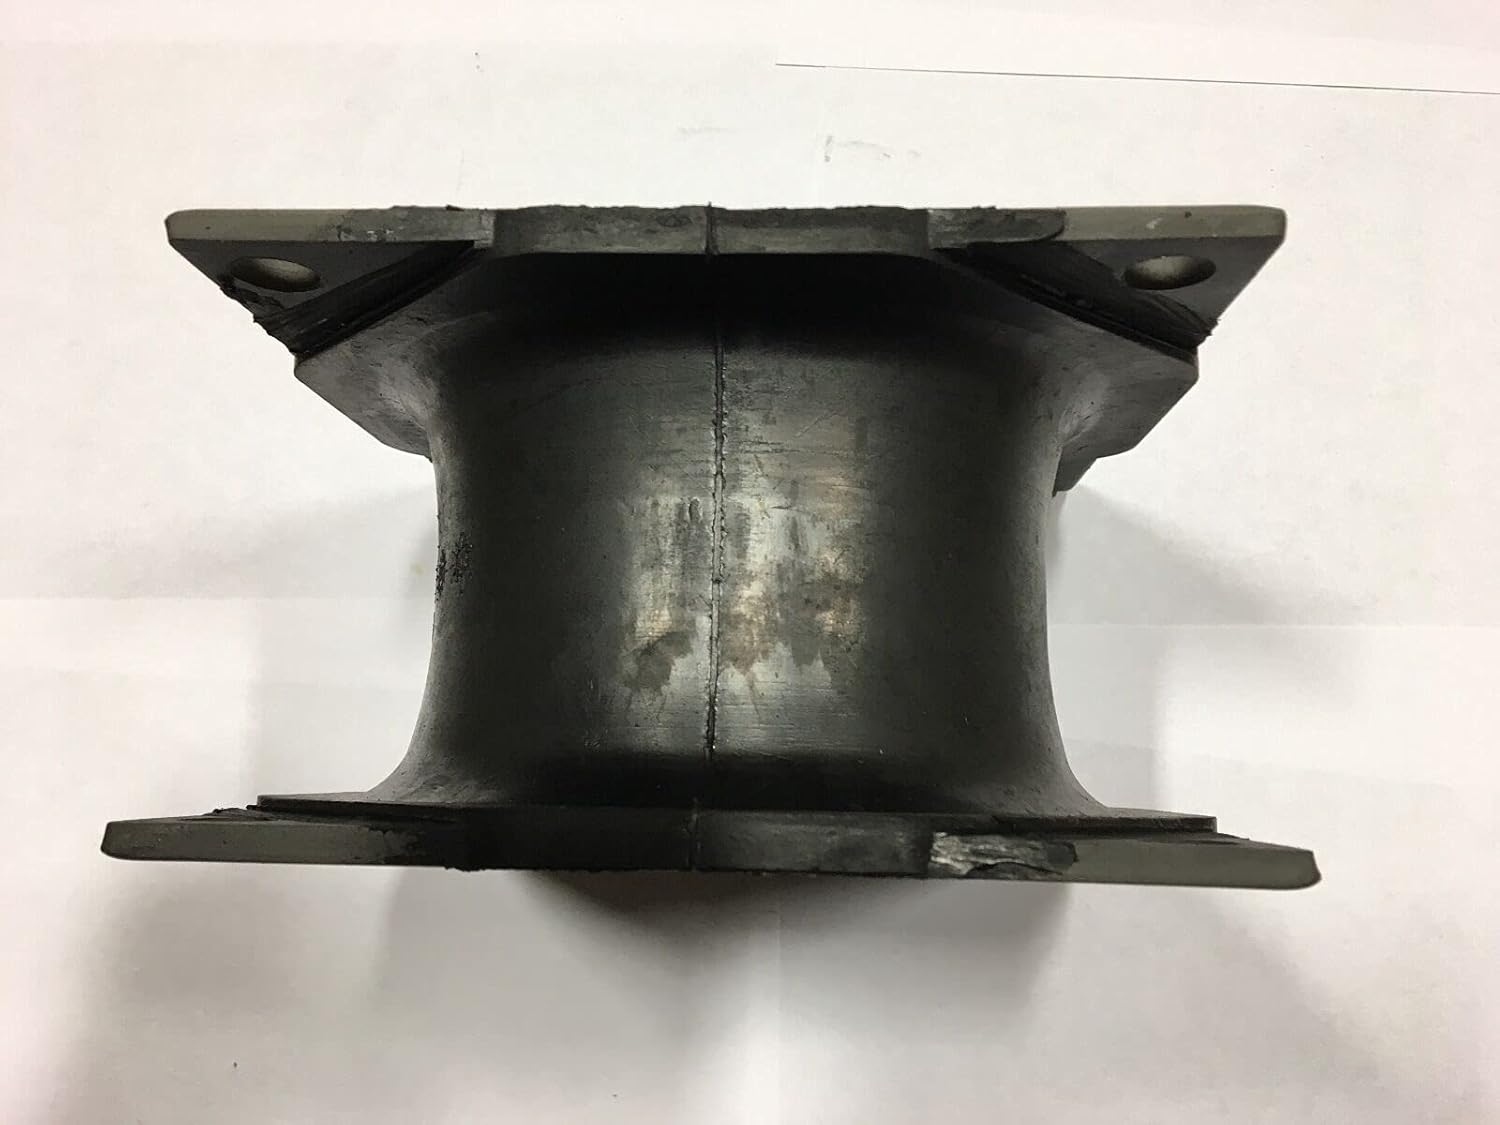
Figure 4: Profile view of the HDI rubber isolator. This image provides a clear view of the rubber's thickness and its integration with the metal plates, essential for understanding its dampening capabilities.
9. Warranty and Support
For warranty information or technical support regarding your HDI Rubber Isolator Shock Mount, please refer to the original purchase documentation or contact HDI customer service directly. Keep your proof of purchase for any warranty claims.
For further assistance, please visit the HDI Brand Store on Amazon or contact your authorized dealer.