
MELCAM B096WWPTJ4
MELCAM 4K Camcorder User Manual
Model: B096WWPTJ4
Introduction
This user manual provides detailed instructions for the MELCAM 4K Camcorder, Model B096WWPTJ4. Designed for capturing high-quality video and photos, this camcorder features 4K Ultra HD resolution, a 48MP sensor, Wi-Fi connectivity, and various advanced functions to enhance your recording experience. Please read this manual thoroughly before operating the device to ensure proper use and optimal performance.
What's Included
Verify that all items listed below are present in your package:
- MELCAM 4K Camcorder
- External Microphone
- Handheld Stabilizer
- Lens Hood
- 2.4G Remote Control
- USB Charging Cable
- HDMI Cable
- USB Adapter
- 2 x Rechargeable Lithium Batteries
- Battery Charger (External)
- DV Bag
- User Manual (for Camera)
- User Manual (for Microphone)
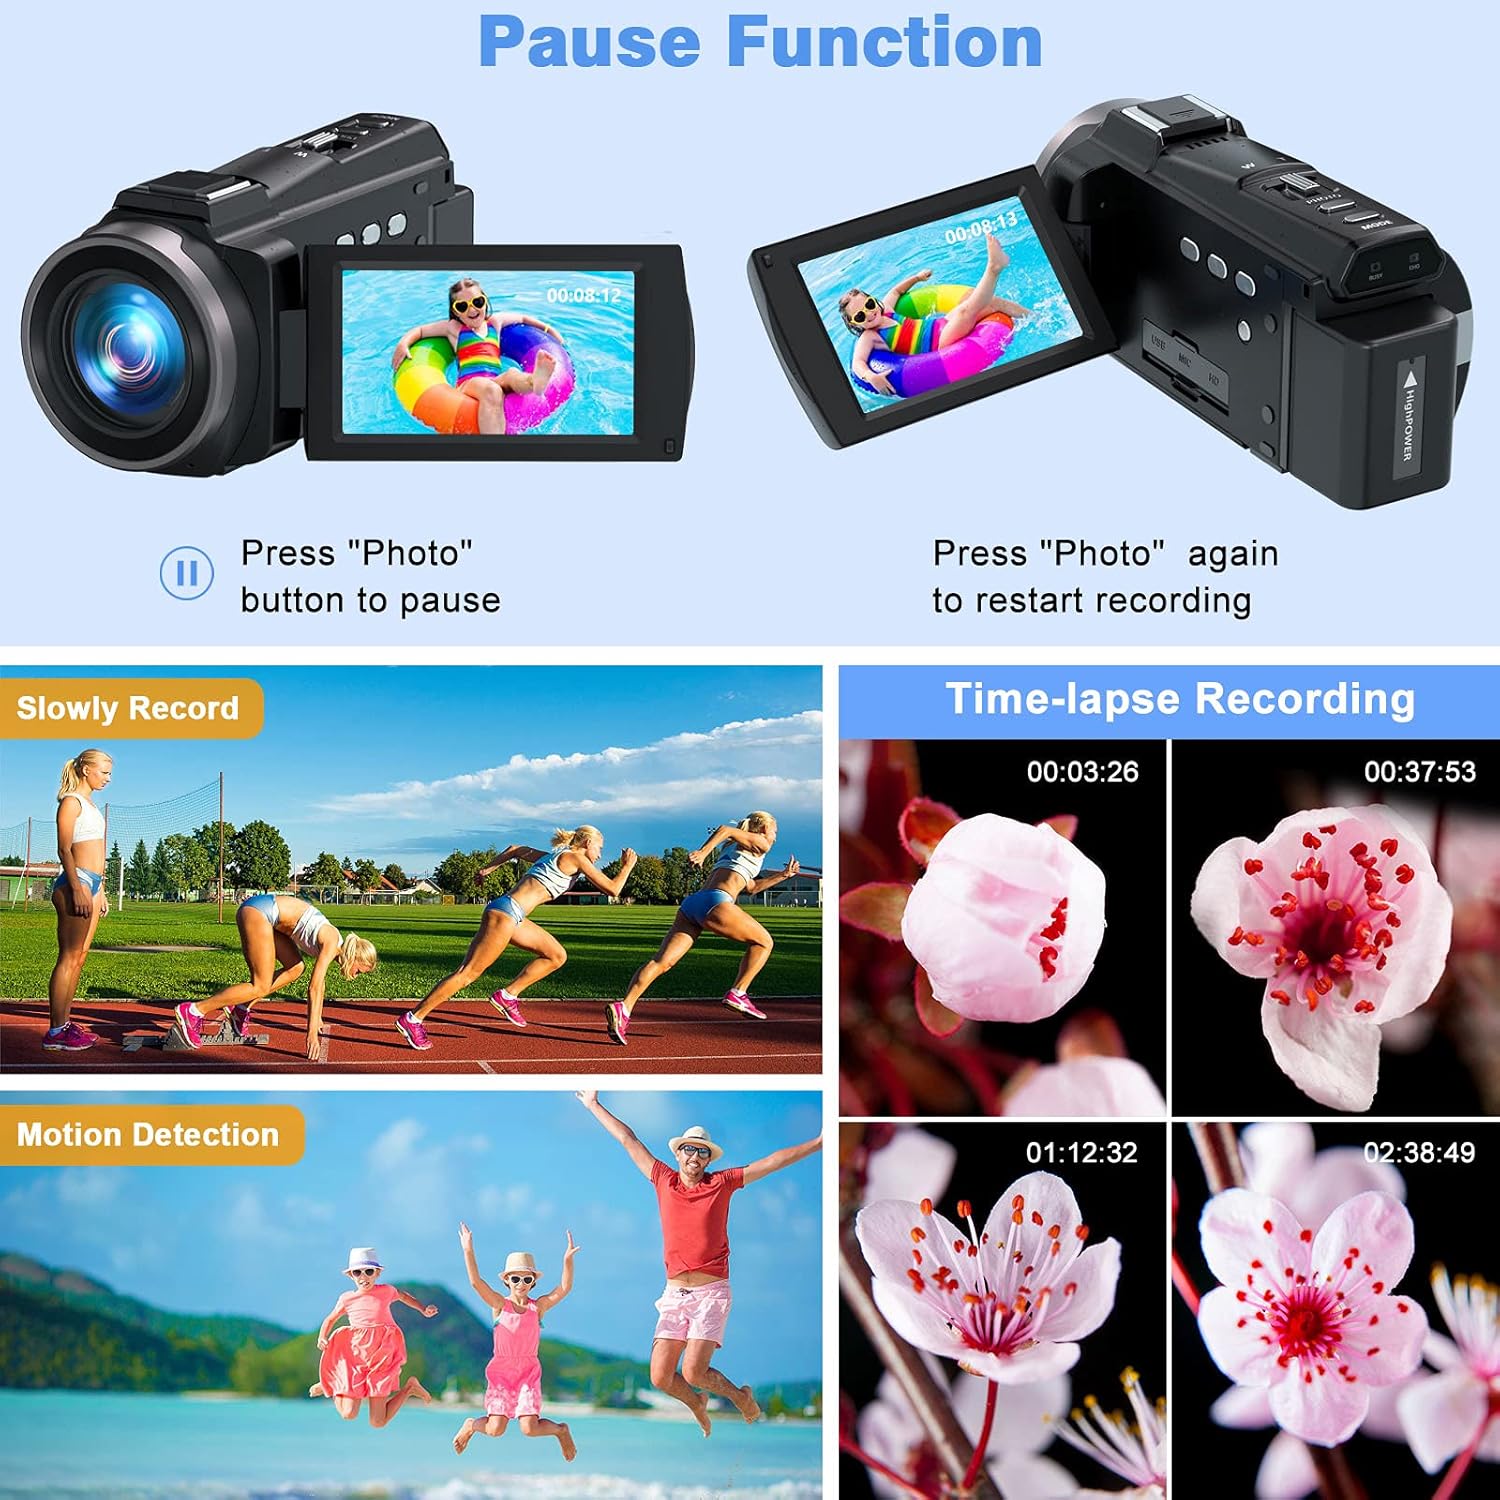
Figure 1: All components included with the MELCAM 4K Camcorder.
Setup
1. Battery Installation and Charging
The camcorder uses rechargeable lithium batteries. Ensure batteries are fully charged before first use.
- Insert a charged battery into the battery compartment of the camcorder.
- To charge the battery, you can either charge it directly in the camcorder using the USB charging cable and adapter, or use the provided external battery charger.

Figure 2: The camcorder with its external battery charger and remote control.

Figure 3: Battery charging using the external charger.
2. SD Card Installation
The camcorder supports 4-128 GB Class 10 SD cards (not included). For optimal performance, format the SD card using the camcorder before first use.
- Locate the SD card slot on the camcorder.
- Insert the SD card with the metal contacts facing the correct direction until it clicks into place.
- To format, navigate to the 'Settings' menu on the camcorder and select 'Format SD Card'.
3. Attaching External Microphone
The external stereo microphone enhances audio quality, providing clearer and brighter sound.
- Slide the external microphone onto the hot shoe mount on top of the camcorder.
- Connect the microphone's audio cable to the microphone input port on the camcorder.
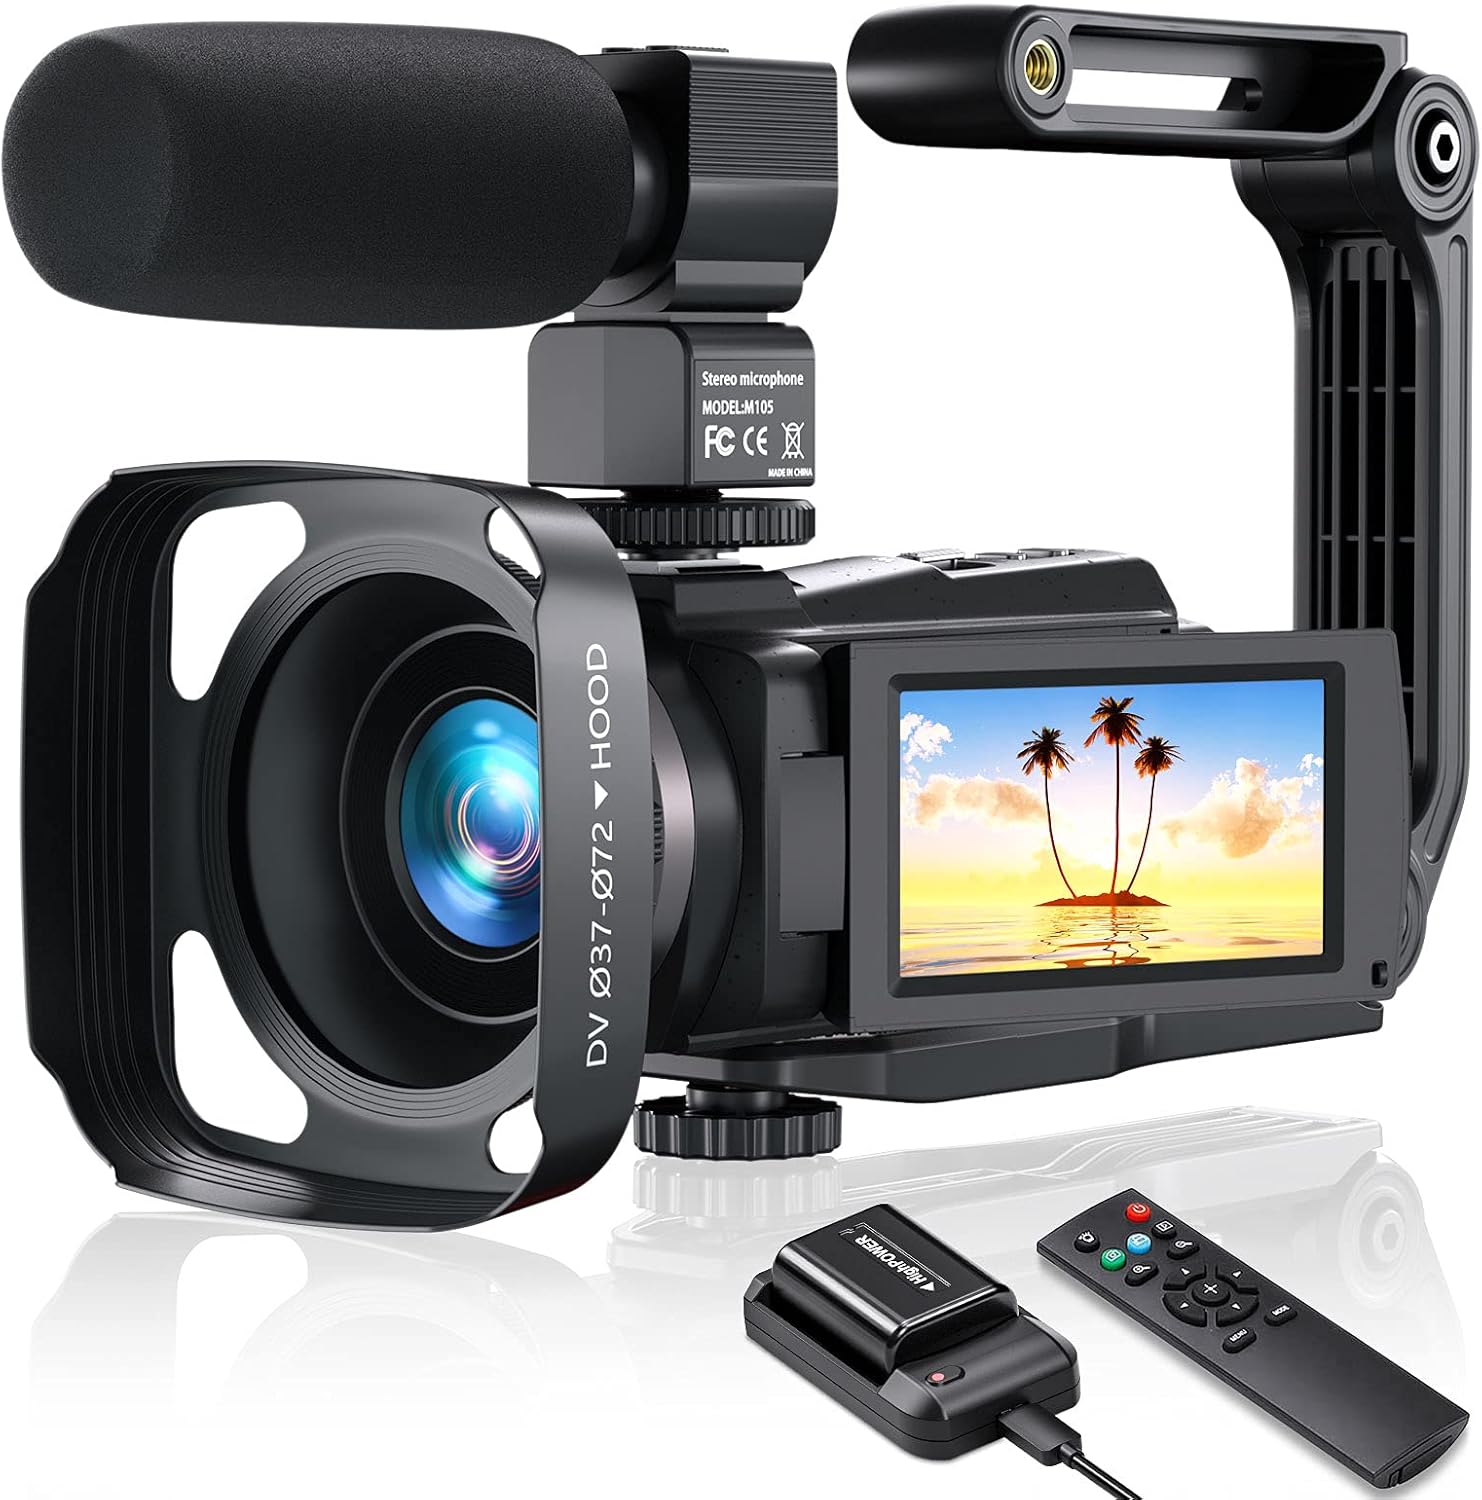
Figure 4: Camcorder with external microphone and handheld stabilizer attached.
4. Attaching Handheld Stabilizer
The foldable handheld stabilizer helps reduce camera shake for smoother video recording.
- Attach the base of the handheld stabilizer to the tripod mount screw hole at the bottom of the camcorder.
- Adjust the stabilizer to a comfortable position for stable grip.

Figure 5: Handheld stabilizer in use, providing a stable grip.
5. Attaching Lens Hood
The lens hood helps to reduce glare and lens flare, improving image contrast and quality.
- Align the lens hood with the front of the camcorder lens.
- Twist gently to secure it in place.

Figure 6: Visual comparison demonstrating the effect of using the lens hood.
Operating Instructions
1. Power On/Off
- Open the IPS touch screen display. The camcorder will automatically power on.
- To power off, close the IPS touch screen display or press and hold the 'POWER/DOWN' button.

Figure 7: The 3-inch IPS touch screen can rotate 270 degrees for versatile viewing.
2. Recording Videos and Taking Photos
The camcorder supports 4K video recording at 60 frames per second (FPS) and 48 Megapixel still images.
- Press the 'MODE' button to select between 'Normal Record' (video) or 'Normal Picture' (photo) modes.
- To start recording video, press the 'Record' button. Press again to stop.
- To take a photo, press the 'Photo' button.
- Adjust resolution settings (e.g., 4K 60 FPS for video, 48MP for photos) via the 'MENU/WIFI' button.

Figure 8: The camcorder supports 4K UHD at 60FPS and 48MP photos.
3. Special Recording Features
- IR Night Vision: Activate IR Night Vision mode for clear recording in low-light or dark conditions. This mode records in black and white.
- Time-Lapse Recording: Capture events over a long period and condense them into a short video.
- Slow Motion: Record video at a higher frame rate to play back in slow motion.
- Loop Recording: Continuously record video, overwriting the oldest files when the memory card is full.
- Motion Detection: The camcorder will automatically start recording when motion is detected in the frame.
- Pause Function: Press the 'Photo' button during recording to pause, and press again to resume recording without creating a new file.

Figure 9: IR Night Vision provides clear black and white footage in dark environments.

Figure 10: Various recording modes including Pause, Slow Motion, Motion Detection, and Time-Lapse.
4. Wi-Fi Connectivity
Connect the camcorder to your smartphone or tablet via Wi-Fi to control recording, view live footage, and transfer files.
- Download the dedicated app (refer to the camera's user manual for app name).
- On the camcorder, press the 'MENU/WIFI' button to activate Wi-Fi mode. The Wi-Fi name and password will appear on the screen.
- On your smart device, connect to the camcorder's Wi-Fi network using the provided password.
- Open the app to control the camcorder.
Figure 11: Wi-Fi connectivity allows remote control and file transfer via a smartphone app.
5. Using the Remote Control
The 2.4G remote control allows for convenient operation from a distance (up to 60 feet, 360° control range).
- Point the remote control towards the camcorder.
- Use the buttons on the remote to start/stop recording, take photos, zoom, and navigate menus.

Figure 12: The 2.4G remote control provides convenient operation from a distance.
6. Connecting to External Devices
- HDMI Output: Connect the camcorder to a TV or monitor using the provided HDMI cable to view your recordings on a larger screen.
- Webcam Function: Connect the camcorder to a computer via USB to use it as a webcam for live streaming or video calls.
- MSDC (Mass Storage Device Class): Connect to a computer via USB to transfer files directly from the SD card.
Figure 13: The camcorder supports HDMI output, webcam functionality, and direct file transfer to a computer.
Maintenance
- Keep the camcorder and accessories clean and free from dust. Use a soft, dry cloth for cleaning.
- Avoid exposing the camcorder to extreme temperatures, humidity, or direct sunlight for prolonged periods.
- Store the camcorder in the provided DV bag when not in use to protect it from scratches and impacts.
- Remove batteries if the camcorder will not be used for an extended period.
Troubleshooting
| Problem | Possible Cause | Solution |
|---|---|---|
| Camcorder does not power on. | Battery is not charged or not inserted correctly. | Ensure battery is fully charged and correctly inserted. Try using the second battery. |
| Cannot record video/take photos. | SD card is full, not inserted, or not formatted. | Insert an SD card, ensure it's formatted, or delete old files to free up space. |
| Poor video/audio quality. | Low light, dirty lens, microphone not connected, or external interference. | Clean the lens. Ensure microphone is securely connected. Use IR Night Vision in low light. Avoid shooting in very dark conditions without IR. |
| Wi-Fi connection issues. | Incorrect password, app not installed, or distance too far. | Verify Wi-Fi password. Ensure the correct app is installed. Stay within the recommended Wi-Fi range. |
| No user manual available online. | This is a common user concern. | Refer to the physical user manuals included in the package for detailed instructions. This digital manual provides a comprehensive overview. |
Specifications
| Feature | Detail |
|---|---|
| Brand | MELCAM |
| Video Capture Resolution | 4K (UHD) |
| Screen Size | 3 Inches (8 cm diagonal) |
| Connectivity Technology | Infrared, Wi-Fi |
| Camcorder Type | Video Camera |
| Lens Type | Zoom |
| Form Factor | Handheld, Rotating |
| Batteries Included | Yes (2 Lithium Ion batteries required, included) |
| Shooting Modes | Night, Time-Lapse, Slow Motion, Loop Recording, Motion Detection |
| Item Weight | 2.07 pounds |
| First Available Date | June 9, 2021 |
Warranty and Support
For warranty information and technical support, please refer to the documentation included with your product or contact MELCAM customer service directly. Keep your purchase receipt as proof of purchase for any warranty claims.
Ask a question about this manual
Ask about setup, troubleshooting, compatibility, parts, safety, or missing instructions. Manuals+ will review the question and use this page’s manual context to help answer it.