Introduction
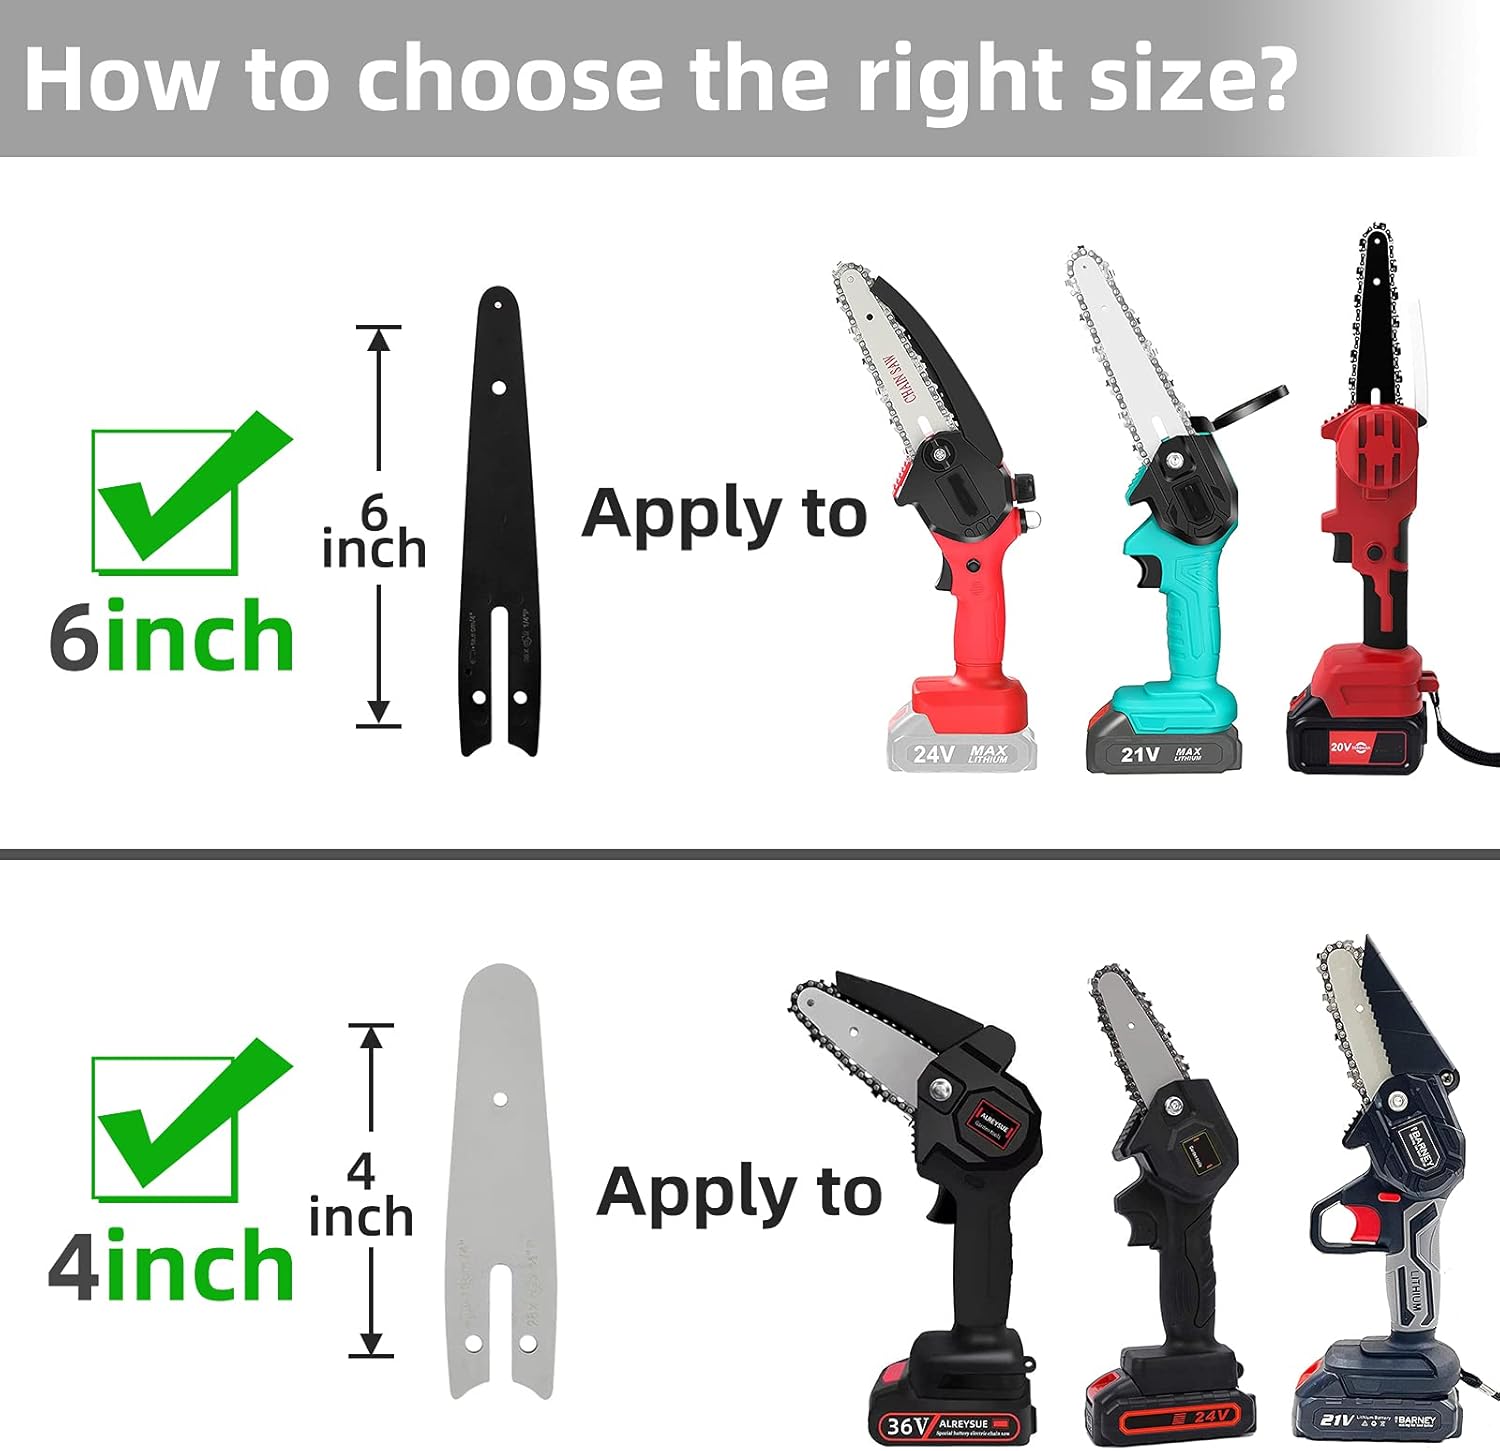
This manual provides essential information for the proper installation, operation, and maintenance of your Fifchall 6 Inch Mini Chainsaw Chains. These replacement chains are designed for 6-inch mini chainsaws with 37 drive links, a 1/4"LP pitch, and a .043" gauge. Adhering to these instructions will help ensure safe and efficient use of your chainsaw chain.
Safety Information
Always prioritize safety when working with chainsaws. Failure to follow safety guidelines can result in serious injury. Before installing or operating the chainsaw chain, ensure you have read and understood the safety instructions provided with your chainsaw unit.
- Wear appropriate personal protective equipment (PPE), including safety glasses, gloves, and sturdy footwear.
- Ensure the chainsaw is powered off and the battery is removed (for cordless models) before performing any maintenance or chain replacement.
- Inspect the chain and chainsaw for any damage before each use. Do not use damaged equipment.
- Keep bystanders, especially children and pets, at a safe distance from the work area.
- Maintain a firm grip on the chainsaw with both hands during operation.
- Be aware of kickback potential and take precautions to avoid it.
Package Contents
Your package includes the following items:
- 2 x Fifchall 6 Inch Mini Chainsaw Chains (37 Drive Links, 1/4"LP Pitch, .043" Gauge)
Note: The chainsaw unit and guide bar are not included with this product.
Setup and Installation
Follow these steps to correctly install the replacement chain on your 6-inch mini chainsaw. Always ensure the chainsaw is powered off and the battery is removed before beginning installation.
- Remove the Side Panel: Locate and remove the side panel of your mini chainsaw, typically secured by a screw or latch.
- Position the Chain: Carefully place the new chain onto the guide bar, paying close attention to the cutting direction. The sharp edges of the chain teeth should face the direction of rotation (away from the chainsaw body at the top of the bar).
- Install Guide Plate and Chain: Align the chain with the sprocket and the groove of the guide bar. Ensure the drive links fit correctly into the sprocket teeth.
- Attach Upper Cover Plate: Place the upper cover plate back onto the chainsaw, ensuring all components are properly seated.
- Adjust Chain Tightness: Using a suitable tool (often a screwdriver or tensioning knob), adjust the chain tension. The chain should be snug against the guide bar but still able to be pulled freely by hand. It should not sag excessively or be overly tight.
- Secure Side Panel: Reattach and tighten the side panel securely.

Operating Instructions
Once the chain is correctly installed and tensioned, your mini chainsaw is ready for operation. Always refer to your chainsaw's specific operating manual for detailed instructions.
- Before starting, ensure the chain is properly lubricated.
- Hold the chainsaw firmly with both hands.
- Engage the safety switch and start the chainsaw.
- Allow the chain to reach full speed before making contact with the material to be cut.
- Apply steady, even pressure. Do not force the chain through the material.
- For wood branch cutting, the pointed teeth design helps the chainsaw grip branches for more efficient cutting.

Maintenance
Regular maintenance of your chainsaw chain is crucial for optimal performance and longevity. Chains are consumable items and will require replacement over time.
- Cleaning: After each use, clean the chain and guide bar to remove sawdust, sap, and debris.
- Lubrication: Ensure your chainsaw's automatic oiler is functioning correctly, or manually lubricate the chain and guide bar as per your chainsaw's instructions.
- Sharpening: While these chains are designed for durability, regular sharpening will maintain cutting efficiency. Use appropriate sharpening tools and techniques for 1/4"LP pitch chains.
- Inspection: Periodically inspect the chain for dullness, damage, or excessive wear. Replace the chain if teeth are broken, cracked, or severely worn.
- Storage: Store replacement chains in a dry, clean place to prevent rust and damage.

Troubleshooting
Here are some common issues and their potential solutions:
| Problem | Possible Cause | Solution |
|---|---|---|
| Chain not cutting efficiently | Dull chain, incorrect chain direction, improper tension | Sharpen the chain, check chain installation direction, adjust chain tension |
| Chain comes off the guide bar | Loose chain tension, worn guide bar, incorrect chain size | Adjust chain tension, inspect guide bar for wear, ensure correct chain size for your chainsaw |
| Excessive smoke during cutting | Dull chain, insufficient lubrication, forcing the cut | Sharpen or replace chain, check oiler and lubrication, reduce cutting pressure |
Specifications
The Fifchall 6 Inch Mini Chainsaw Chain features the following specifications:
- Chain Type: Chisel
- Item Length: 6 Inches
- Drive Link Count: 37
- Pitch: 1/4"LP (0.25 Inches)
- Gauge: .043"
- Material: High temperature quenched alloy
- Model Number: 6" 37DL 1/4"LP .043"2pcs
- UPC: 765071345626


Warranty and Support
Fifchall offers a 45-Day Refund Service for this product. If you have any questions or concerns regarding your Fifchall 6 Inch Mini Chainsaw Chain, please contact Fifchall customer support. For returns, the standard return policy allows for returns within 30 days for a refund or replacement.
Before contacting support or initiating a return, please ensure you have verified the size, gauge, pitch, and drive links of your chains to confirm compatibility.


