1. Introduction
This manual provides comprehensive instructions for the setup, operation, maintenance, and troubleshooting of your Spartan POS IP Phone 8841 with multiplatform firmware. Please read this manual thoroughly before using the device to ensure proper functionality and to prevent damage.
2. Safety Information
- Use only the power adapter supplied with the phone.
- Do not expose the phone to water or excessive humidity.
- Avoid placing the phone near heat sources or in direct sunlight.
- Do not attempt to open or repair the phone yourself. Refer to qualified service personnel.
- Ensure proper ventilation around the device.
3. Package Contents
Verify that your package contains the following items:
- Spartan POS IP Phone 8841 unit
- Handset and handset cord
- Ethernet cable
- Power adapter (if not using Power over Ethernet - PoE)
- Desk stand
4. Product Overview
The Spartan POS IP Phone 8841 is designed for clear voice communication and enhanced productivity in a professional environment. It features a high-resolution display, programmable line keys, and intuitive navigation.
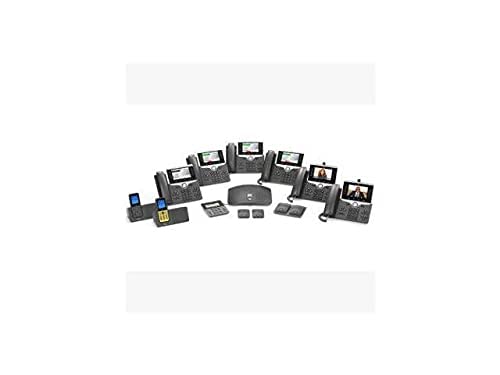
Figure 1: An array of Spartan POS IP Phones, including the 8841 model, along with various accessories such as expansion modules, headsets, and a central conference unit, demonstrating a complete office communication setup.
4.1 Key Components
- Display Screen: Shows call information, menus, and status.
- Line Keys: Programmable buttons for lines, speed dials, or features.
- Soft Keys: Context-sensitive buttons below the display.
- Navigation Cluster: For menu navigation and selection.
- Volume Button: Adjusts handset, headset, or speaker volume.
- Speakerphone Button: Toggles speakerphone on/off.
- Headset Button: Activates headset mode.
- Mute Button: Mutes the microphone.
5. Setup
5.1 Connecting the Phone
- Attach the Desk Stand: Align the stand with the slots on the back of the phone and snap it into place.
- Connect the Handset: Plug one end of the coiled handset cord into the handset and the other end into the handset port on the phone base.
- Connect to Network: Plug one end of the Ethernet cable into the network port (labeled SW or LAN) on the back of the phone and the other end into a network switch or router.
- Connect Power:
- If using PoE: The phone will power on automatically once connected to a PoE-enabled network port.
- If not using PoE: Connect the power adapter to the power port (labeled DC 48V) on the phone and then plug it into an electrical outlet.
- The phone will begin its startup sequence.
5.2 Initial Configuration
Upon first boot, the phone may automatically retrieve configuration from your network's VoIP server. If manual configuration is required, follow the on-screen prompts or consult your network administrator for specific settings such as:
- IP Address settings (DHCP or Static)
- SIP Server Address
- User ID and Password
6. Operating Instructions
6.1 Making Calls
- Lift the handset, press the speakerphone button, or press a line key.
- Dial the desired number.
- Press the Dial soft key or wait for the call to connect automatically.
6.2 Receiving Calls
- When the phone rings, lift the handset, press the speakerphone button, or press the flashing line key.
- To decline a call, press the Decline soft key.
6.3 Call Features
- Hold: During an active call, press the Hold soft key. Press it again to resume.
- Transfer: During an active call, press the Transfer soft key, dial the new number, and then press Transfer again.
- Conference: During an active call, press the Conference soft key, dial the new participant's number, and then press Conference again to join all parties.
- Voicemail: Press the Messages button (envelope icon) and follow the audio prompts.
6.4 Navigation
Use the navigation cluster (up, down, left, right arrows, and Select button) to browse menus and select options on the display screen.
7. Maintenance
7.1 Cleaning
To clean the phone, use a soft, dry, anti-static cloth. Do not use liquid cleaners or aerosol sprays directly on the phone. For stubborn marks, slightly dampen the cloth with water, ensuring no moisture enters openings.
7.2 Firmware Updates
Firmware updates are typically managed by your network administrator. Do not attempt to manually update firmware unless instructed to do so by your administrator, as incorrect procedures can lead to device malfunction.
8. Troubleshooting
| Problem | Possible Cause | Solution |
|---|---|---|
| Phone does not power on | No power connection; Faulty power adapter/PoE | Check power cable/PoE connection; Try a different outlet/PoE port. |
| No dial tone | Network cable disconnected; Incorrect network settings | Ensure Ethernet cable is securely connected; Verify network settings with administrator. |
| Cannot make/receive calls | Network connectivity issue; SIP registration failure | Check network status; Contact your VoIP service provider or administrator. |
| Poor audio quality | Network congestion; Faulty handset/headset | Check network bandwidth; Try a different handset/headset. |
9. Specifications
- Model: 8841
- Manufacturer: Spartan POS
- Connectivity: Ethernet (PoE capable)
- Display: High-resolution graphical display
- Audio: Wideband audio support
- Date First Available: December 16, 2022
10. Warranty and Support
For warranty information and technical support, please refer to the documentation provided at the time of purchase or contact your vendor or network administrator. Specific warranty terms may vary by region and reseller.