1. Introduction
This user manual provides detailed instructions for the installation, operation, and maintenance of the NICOLIE HW-557 1209 Digital Display High Precision Thermostat Module. This intelligent temperature control board is designed for precise temperature regulation in various applications, featuring a digital display for easy monitoring and configuration.
2. Safety Information
- Always disconnect power before performing any wiring or maintenance.
- Ensure correct voltage and polarity are applied to the module to prevent damage.
- Do not expose the module to moisture, extreme temperatures, or corrosive environments.
- Installation should be performed by qualified personnel to ensure safety and proper function.
- Keep out of reach of children.
3. Product Overview
The NICOLIE HW-557 1209 is a compact and precise temperature control module. It integrates a digital display, control buttons, and a relay for switching external loads based on temperature readings from a connected probe.
Key Features:
- 100% complete machine patch and wave soldering for stable performance.
- Built-in central processor chip (MCU) for intelligent and low-power operation.
- Automatic power-off memory setting (integrated EEPROM storage).
- High control accuracy of 0.1 degrees Celsius.
Component Identification:
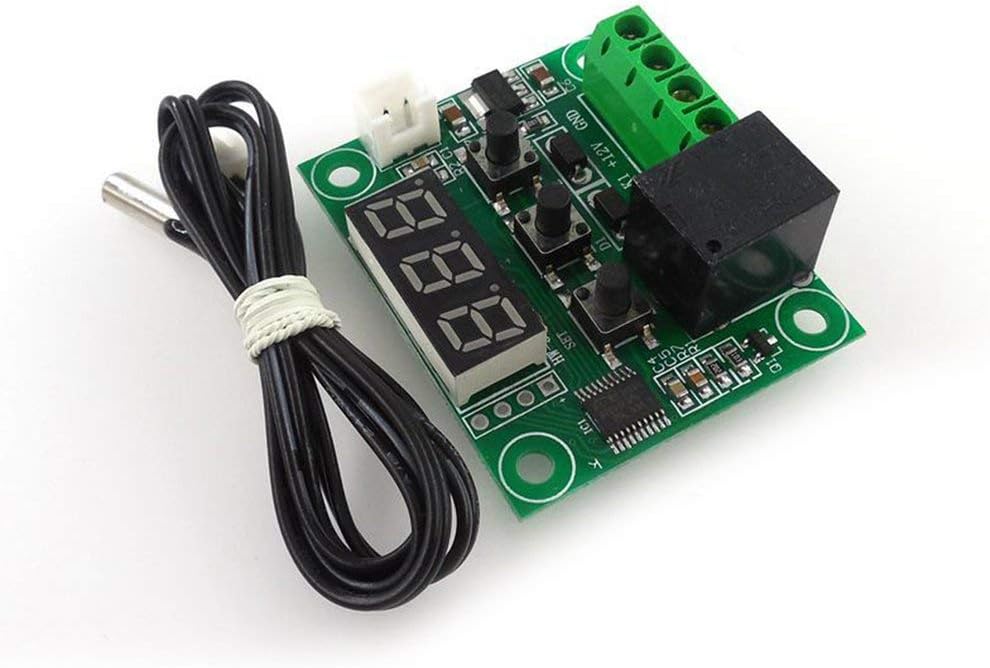


4. Setup and Wiring
Before connecting the module, ensure all power sources are disconnected. Refer to the labels on the terminal blocks for correct wiring.
Wiring Diagram (Conceptual):
- Power Input: Connect a 12V DC power supply to the designated terminals (e.g., +12V and GND).
- Load Output: Connect the device to be controlled (e.g., heating element, cooling fan) to the relay output terminals (K0, K1). The relay acts as a switch.
- Temperature Probe: Connect the NTC temperature sensor probe to the dedicated sensor input terminals (e.g., T1, T2 or similar, typically a 2-pin connector).
Note: Specific terminal labels may vary slightly. Always verify with the markings on your module.
5. Operating Instructions
Once wired and powered, the module's digital display will show the current temperature. The three buttons (SET, +, -) are used for configuration.
Setting the Temperature:
- Press the SET button once. The display will flash, indicating it's in setting mode.
- Use the + and - buttons to adjust the desired temperature setpoint.
- Press SET again to confirm and save the setting, or wait a few seconds for it to automatically save and exit.
Advanced Settings (if applicable):
Some modules allow access to advanced parameters (e.g., heating/cooling mode, hysteresis, temperature calibration) by long-pressing the SET button. Refer to specific product documentation or online resources for detailed parameter codes and their functions if needed.
The module will automatically activate or deactivate the relay based on the set temperature and the current temperature reading, maintaining the desired environment with 0.1°C precision.
6. Maintenance
- Keep the module clean and free from dust. Use a soft, dry cloth for cleaning.
- Ensure proper ventilation around the module to prevent overheating.
- Regularly inspect wiring connections for looseness or corrosion.
- Do not attempt to repair the module yourself if it is damaged. Contact qualified service personnel.
7. Troubleshooting
| Problem | Possible Cause | Solution |
|---|---|---|
| Display is blank | No power, incorrect wiring, faulty module. | Check power supply (12V DC). Verify wiring connections. If problem persists, module may be faulty. |
| Incorrect temperature reading | Faulty sensor, sensor not connected properly, sensor placed incorrectly. | Ensure sensor is securely connected. Check sensor for damage. Reposition sensor for accurate ambient reading. |
| Relay not switching | Temperature not reaching setpoint, faulty relay, incorrect wiring of load. | Verify setpoint and current temperature. Check load wiring. Test relay functionality if possible. |
| Module resets frequently | Unstable power supply, electromagnetic interference. | Ensure stable 12V DC power supply. Isolate module from strong electromagnetic fields. |
8. Specifications
| Parameter | Value |
|---|---|
| Manufacturer | NICOLIE |
| Model | HW-557 1209 |
| ASIN | B09657QN6Z |
| Display Type | LCD (Digital Segment Display) |
| Control Accuracy | 0.1 degrees Celsius |
| Color | Blue (Display) |
| Dimensions (approx.) | 48.5mm x 40mm (1.9in x 1.57in) |
| Power Supply | 12V DC (typical, based on common modules of this type) |
9. Warranty and Support
For warranty information and technical support, please refer to the product packaging or contact the manufacturer, NICOLIE, directly through their official channels. Keep your purchase receipt for warranty claims.