1. Introduction
Thank you for choosing the HOMCOM Adjustable Telescopic Folding Sawhorses. This manual provides essential information for the safe assembly, operation, and maintenance of your new sawhorses. Please read it thoroughly before use and retain it for future reference.
These sawhorses are designed for versatile use, suitable for various professional and DIY tasks. Their height-adjustable and foldable design ensures convenience for both work and storage.

Image 1.1: HOMCOM Adjustable Telescopic Folding Sawhorses
2. Safety Information
Always follow these safety guidelines to prevent injury or damage to the product:
- Read All Instructions: Ensure you understand all assembly and operating instructions before using the sawhorses.
- Weight Capacity: The maximum load capacity for the pair of sawhorses is approximately 200 kg (440 lbs). Do not exceed this weight limit. Distribute weight evenly across both sawhorses.
- Stable Surface: Always place the sawhorses on a flat, stable, and level surface to prevent tipping.
- Secure Locking Pins: Ensure all height adjustment locking pins are fully engaged and secure before placing any load on the sawhorses.
- Inspect Before Use: Before each use, check for any loose bolts, damaged parts, or signs of wear. Do not use if damaged.
- Children and Pets: Keep children and pets away from the work area when sawhorses are in use.
- Proper Storage: Store sawhorses in a dry, secure location when not in use.
3. Package Contents
Please verify that all components are present and undamaged before beginning assembly. If any parts are missing or damaged, contact customer service.
- 2 x Sawhorse Frames (main components)
- 2 x Adjustable Upper Support Bars
- 4 x Telescopic Leg Extensions
- 2 x Crossbars
- 4 x Safety Locking Pins with chains
- Assorted Nuts, Bolts, and Washers for assembly
- Instruction Manual
4. Assembly Instructions
Assembly requires basic tools (not included), such as a wrench and possibly a rubber mallet. It is recommended to assemble on a clean, flat surface.
- Unpack Components: Carefully remove all parts from the packaging. Lay them out and compare them with the package contents list.
- Attach Crossbars: Connect the two crossbars between the main sawhorse frame legs using the provided bolts, nuts, and washers. Ensure they are securely fastened but do not overtighten initially.
- Install Telescopic Leg Extensions: Slide the telescopic leg extensions into the lower part of the main sawhorse frame legs.
- Secure Upper Support Bars: Attach the adjustable upper support bars to the top of the main sawhorse frame. Use the provided bolts and nuts, ensuring a secure connection.
- Insert Locking Pins: Once the upper support bars are in place, insert the safety locking pins through the designated holes to secure the telescopic components.
- Final Tightening: Once all components are loosely assembled, carefully tighten all nuts and bolts. Ensure all connections are firm and stable.

Image 4.1: Detail of Upper Support Bar Connection

Image 4.2: Securing a Telescopic Leg with a Locking Pin
5. Operating Instructions
5.1 Unfolding the Sawhorses
- Place the folded sawhorse on a flat surface.
- Gently pull the legs apart until the sawhorse is fully extended and stable.
- Ensure all joints are properly aligned and the sawhorse stands firmly on all four feet.
5.2 Adjusting Height
The sawhorses feature 5 height adjustment levels, ranging from 80 cm to 130 cm.
- Remove the safety locking pin from the telescopic leg extension.
- Carefully slide the inner leg up or down to the desired height.
- Align the hole in the inner leg with the corresponding hole in the outer leg for your chosen height.
- Re-insert the safety locking pin through both holes and ensure it is fully engaged.
- Repeat for all four legs on both sawhorses to ensure an even working surface.

Image 5.1: Height Adjustment Mechanism
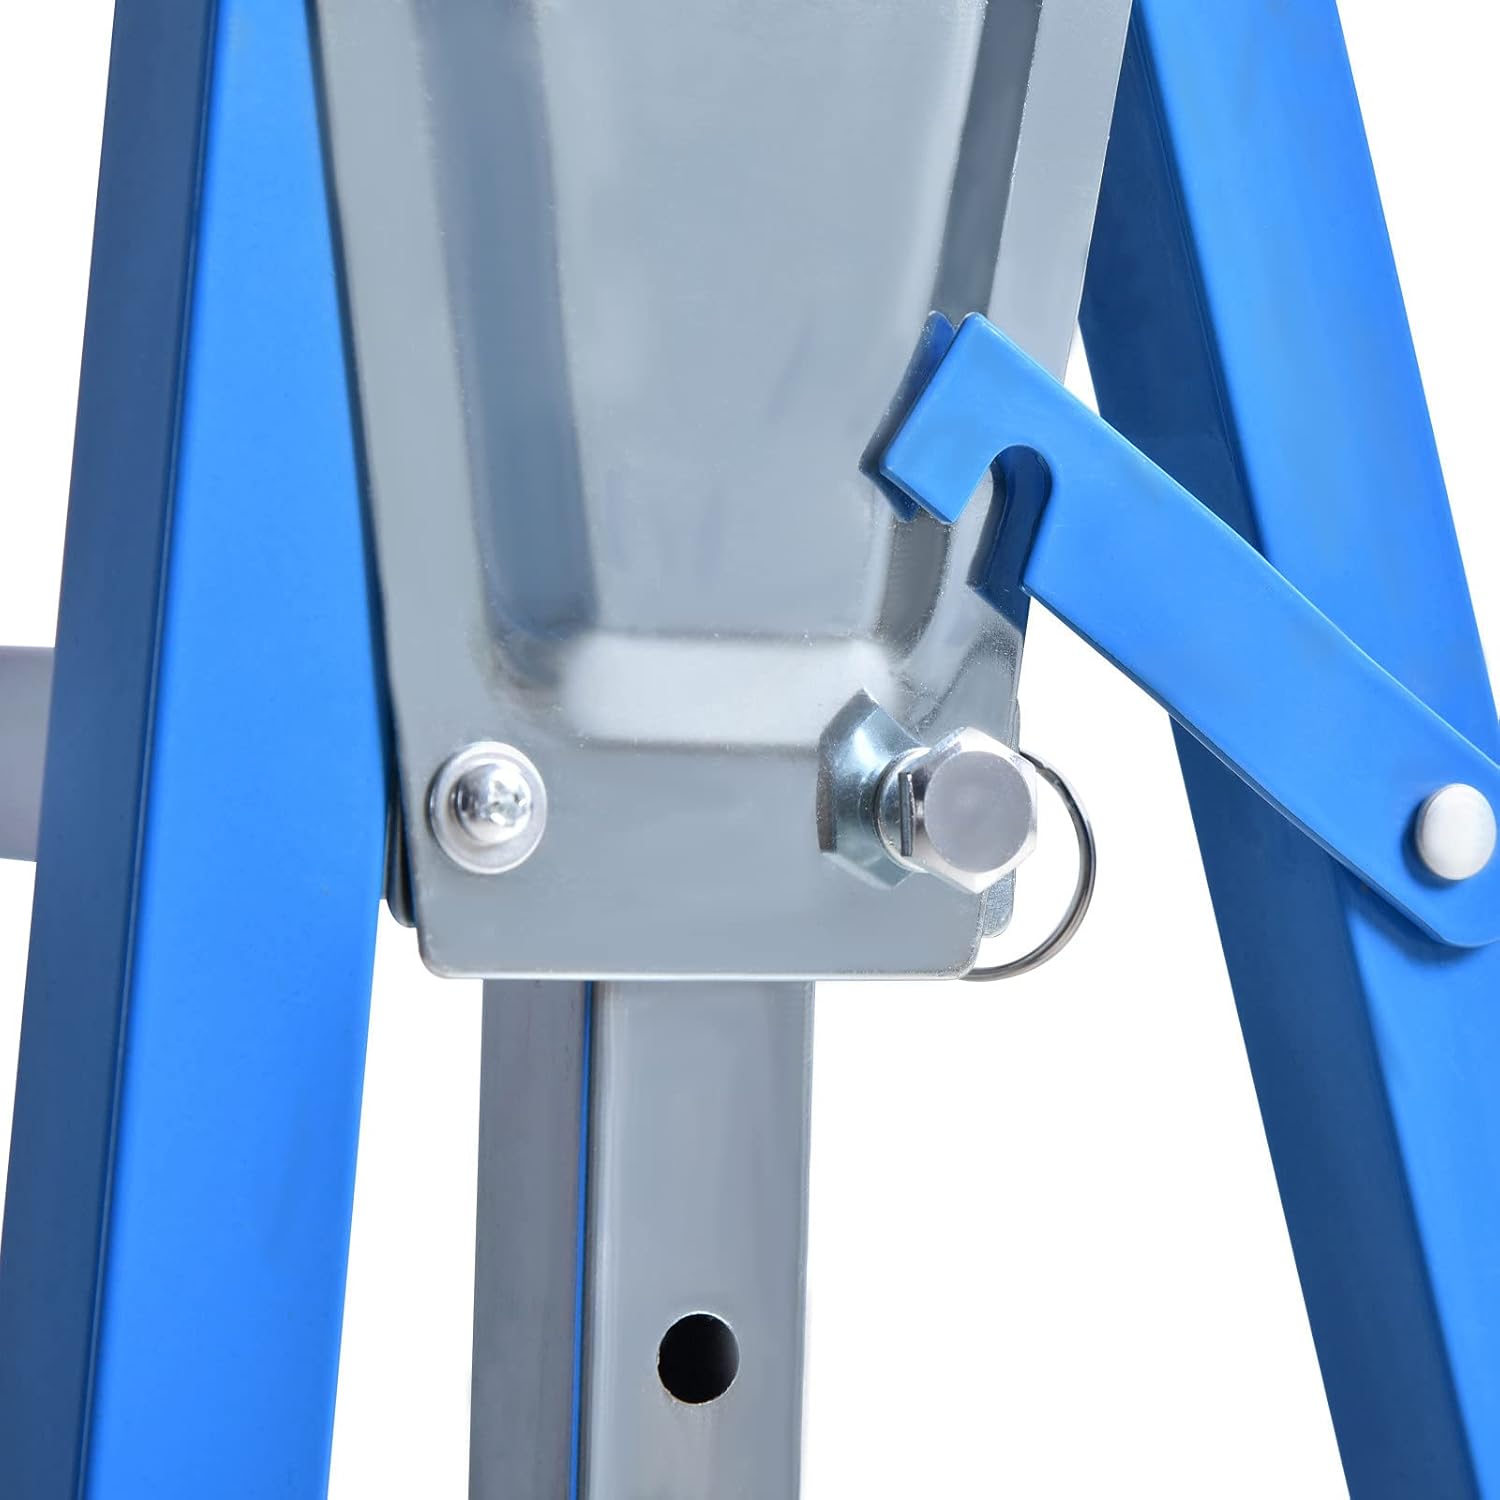
Image 5.2: Safety Locking Pin Detail
5.3 Using the Sawhorses
Once assembled and adjusted, place your workpiece or plank across the two sawhorses. Ensure the load is evenly distributed and does not exceed the maximum weight capacity of 200 kg for the pair.

Image 5.3: Sawhorses in Use
6. Care and Maintenance
6.1 Cleaning
Wipe down the sawhorses with a damp cloth to remove dust, dirt, or debris. For stubborn grime, a mild soap solution can be used. Dry thoroughly to prevent rust.
6.2 Storage
The sawhorses are designed to be foldable for compact storage.
- Remove any load from the sawhorses.
- If adjusted, lower the height to the minimum setting (80 cm) and secure the pins.
- Fold the legs inwards until the sawhorse is compact.
- Store in a dry, cool place away from direct sunlight and moisture.

Image 6.1: Folding for Storage
6.3 Inspection
Regularly inspect all bolts, nuts, and moving parts for tightness and wear. Tighten any loose fasteners. If any part is damaged or excessively worn, discontinue use and replace the part or the entire unit if necessary.
7. Troubleshooting
| Problem | Possible Cause | Solution |
|---|---|---|
| Sawhorse is unstable or wobbly. | Not on a level surface; loose fasteners; legs not fully extended/locked. | Move to a level surface. Check and tighten all bolts and nuts. Ensure all locking pins are fully engaged. |
| Difficulty adjusting height. | Debris in telescopic mechanism; bent leg; locking pin stuck. | Clean the telescopic parts. Ensure no load is on the sawhorse. Check for any physical obstructions or damage. Do not force adjustment. |
| Parts missing during assembly. | Packaging error; lost during transit. | Refer to the 'Package Contents' section. Contact customer service with your model number and purchase details for replacement parts. |
8. Specifications
- Brand: HOMCOM
- Model Number: B40-015BU0531
- Color: Blue
- Material: Q195 Steel
- Product Dimensions (L x W x H): 68 x 58 x 80 cm (minimum height)
- Adjustable Height Range: 80 cm - 130 cm (5 levels)
- Item Weight: 9 kg (per sawhorse, total 18 kg for the pair)
- Maximum Load Capacity: 200 kg (440 lbs) for the pair
- Usage: Indoor and Outdoor

Image 8.1: Product Dimensions

Image 8.2: Robust Steel Frame Design
9. Warranty and Support
For warranty information, please refer to the terms and conditions provided at the point of purchase or contact your retailer. For technical support or inquiries regarding spare parts, please contact HOMCOM customer service. Please have your model number (B40-015BU0531) and purchase date ready.