1. Product Overview
The STANLEY FatMax SVK400 Kit is a comprehensive power tool set designed for various DIY and professional tasks. This kit includes a Rotary Hammer (SFMCH900), an Angle Grinder (SFMCG400), a Percussion Drill (SFMCD711), an Impact Driver (SFMCF800), two 18V 2.0Ah V20 Lithium-Ion Batteries, a V20 Rapid Charger, and a 3-in-1 Caddy for convenient storage and transport.
Kit Components:
- STANLEY FatMax SFMCH900 Rotary Hammer: Powerful brushless motor for drilling and chiseling.
- STANLEY FatMax SFMCG400 Angle Grinder: High-performance motor for cutting and grinding applications.
- STANLEY FatMax SFMCD711 Percussion Drill: Two-speed motor with hammer function for versatile drilling.
- STANLEY FatMax SFMCF800 Impact Driver: Variable speed motor for efficient fastening.
- 2x STANLEY FatMax V20 18V 2.0Ah Batteries: Lithium-Ion batteries for extended runtime.
- STANLEY FatMax V20 Rapid Charger: For quick charging of V20 batteries.
- STANLEY 3-in-1 Caddy: Modular storage system for tools and accessories.
Individual Tool Overview with Images:
STANLEY FatMax SFMCH900 Rotary Hammer

This image shows the STANLEY FatMax SFMCH900 Rotary Hammer, a powerful tool with a yellow and black design, featuring a side handle for improved control. It is designed for drilling into masonry and concrete with its SDS Plus chuck.
The SFMCH900 Rotary Hammer features a powerful brushless motor, offering three modes: rotation, percussion, and chiseling. It delivers 2.0 J of impact energy, a rotation speed of 1500 r.p.m, and an impact rate of 5500 i.p.m. It uses an SDS Plus tool holder and is suitable for drilling up to 40 mm in wood, 13 mm in metal, and 30 mm in masonry.
STANLEY FatMax SFMCG400 Angle Grinder
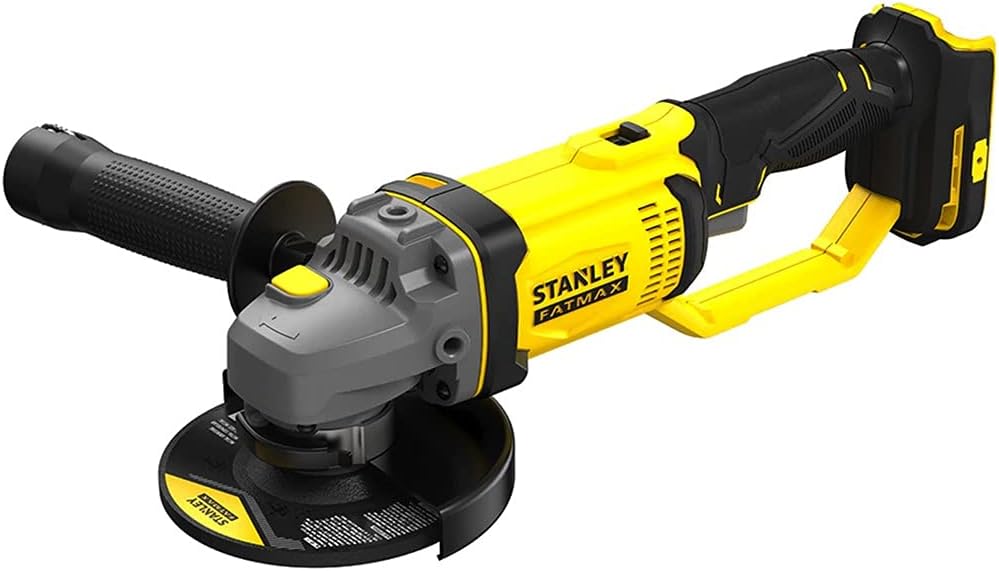
This image displays the STANLEY FatMax SFMCG400 Angle Grinder, characterized by its yellow and black casing, a side handle, and a protective guard around the grinding disc area. It is used for cutting, grinding, and polishing various materials.
The SFMCG400 Angle Grinder is equipped with a high-performance motor and a trigger lock for enhanced safety during operation. It achieves a rotation speed of 9000 r.p.m and accommodates discs with a diameter of 165 mm. The spindle head diameter is 14 mm.
STANLEY FatMax SFMCD711 Percussion Drill

This image shows the STANLEY FatMax SFMCD711 Percussion Drill, a compact and ergonomic tool in yellow and black. It features a keyless chuck and a mode selector for drilling and hammer drilling functions.
The SFMCD711 Percussion Drill features a powerful two-speed motor and 22 torque settings, providing a maximum torque of 50 Nm. It operates at speeds of 0-350 / 1500 r.p.m and an impact rate of 0-5950 / 25500 i.p.m. It has a 13 mm tool holder.
STANLEY FatMax SFMCF800 Impact Driver

This image depicts the STANLEY FatMax SFMCF800 Impact Driver, a compact tool with a yellow and black finish, designed for driving screws and fasteners with high torque. It features a hexagonal chuck for quick bit changes.
The SFMCF800 Impact Driver is equipped with a powerful variable speed motor, delivering a maximum torque of 165 Nm. It operates at a rotation speed of 2800 r.p.m and an impact rate of 3100 i.p.m. It features a 6.35 mm (1/4") hexagonal attachment.
STANLEY FatMax V20 18V 2.0Ah Lithium-Ion Battery

This image shows the STANLEY FatMax V20 18V 2.0Ah Lithium-Ion Battery, a yellow and black battery pack with the V20 and Lithium Ion 2.0Ah branding visible. It powers the cordless tools in the kit.
The kit includes two STANLEY FatMax V20 18V 2.0Ah Lithium-Ion batteries, providing reliable power and extended runtime for your tools. These batteries are part of the V20 system, ensuring compatibility with other STANLEY V20 tools.
STANLEY FatMax V20 Rapid Charger
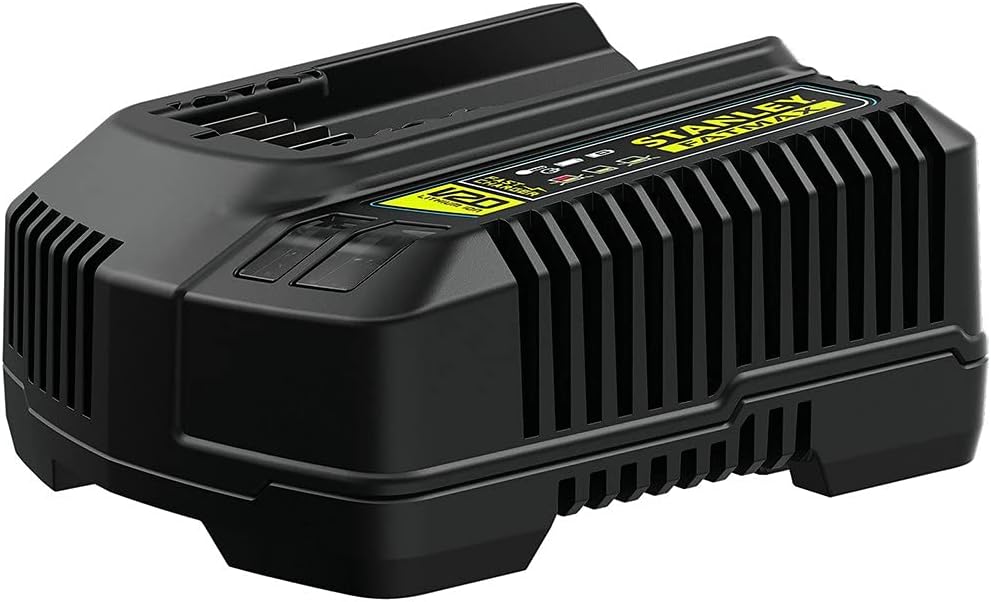
This image displays the STANLEY FatMax V20 Rapid Charger, a black unit with ventilation slots and the STANLEY FatMax branding. It is designed to quickly recharge the V20 Lithium-Ion batteries.
The STANLEY FatMax V20 Rapid Charger is included to ensure quick and efficient charging of your V20 Lithium-Ion batteries, minimizing downtime and keeping your tools ready for use.
STANLEY 3-in-1 Caddy

This image shows the STANLEY 3-in-1 Caddy, a black modular storage system with yellow latches and a retractable handle, designed for transporting and organizing the tools and accessories in the kit.
The STANLEY 3-in-1 Caddy provides a robust and modular solution for storing and transporting your tools and accessories, keeping them organized and protected.
2. General Safety Information
Always read and understand all safety warnings, instructions, illustrations, and specifications provided with these power tools. Failure to follow all instructions listed below may result in electric shock, fire, and/or serious injury.
Work Area Safety:
- Keep the work area clean and well-lit. Cluttered or dark areas invite accidents.
- Do not operate power tools in explosive atmospheres, such as in the presence of flammable liquids, gases, or dust.
- Keep children and bystanders away while operating a power tool. Distractions can cause you to lose control.
Electrical Safety:
- Power tool plugs must match the outlet. Never modify the plug in any way.
- Avoid body contact with earthed or grounded surfaces, such as pipes, radiators, ranges, and refrigerators.
- Do not expose power tools to rain or wet conditions. Water entering a power tool will increase the risk of electric shock.
Personal Safety:
- Always wear eye protection. Use appropriate personal protective equipment such as dust masks, non-skid safety shoes, hard hats, or hearing protection.
- Stay alert, watch what you are doing, and use common sense when operating a power tool.
- Prevent unintentional starting. Ensure the switch is in the off-position before connecting to battery pack, picking up or carrying the tool.
Power Tool Use and Care:
- Do not force the power tool. Use the correct power tool for your application.
- Do not use the power tool if the switch does not turn it on and off.
- Disconnect the battery pack from the power tool before making any adjustments, changing accessories, or storing power tools.
- Store idle power tools out of the reach of children and do not allow persons unfamiliar with the power tool or these instructions to operate the power tool.
Battery Tool Use and Care:
- Recharge only with the charger specified by the manufacturer.
- Use power tools only with specifically designated battery packs.
- When battery pack is not in use, keep it away from other metal objects.
3. Setup Instructions
3.1. Battery Charging
- Connect the STANLEY FatMax V20 Rapid Charger to a standard power outlet.
- Slide the V20 Lithium-Ion Battery into the charger until it clicks into place.
- Observe the indicator lights on the charger. A solid green light typically indicates a full charge.
- Once fully charged, remove the battery from the charger.
Note: Always charge batteries in a well-ventilated area and avoid extreme temperatures.
3.2. Battery Installation and Removal
- To install: Align the battery with the tool's battery port and slide it in until it locks securely.
- To remove: Press the battery release button (usually located on the battery itself or the tool) and slide the battery out.
3.3. Attaching Accessories (General Guidelines)
Always ensure the battery is removed from the tool before attaching or changing accessories.
- Rotary Hammer (SFMCH900): Insert SDS Plus drill bits directly into the chuck until they click. Rotate to ensure it's locked. To remove, pull back the chuck collar and pull out the bit. Attach the side handle by rotating it onto the tool's collar and tightening.
- Angle Grinder (SFMCG400): Press the spindle lock button. Use the provided wrench to loosen the flange nut. Place the grinding or cutting disc onto the spindle, ensuring it's correctly seated. Tighten the flange nut securely. Adjust the guard for optimal protection. Attach the side handle into one of the threaded holes.
- Percussion Drill (SFMCD711): Open the keyless chuck jaws by rotating the front collar. Insert the drill bit into the chuck. Tighten the chuck by hand until the bit is secure. For stubborn bits, use the chuck key if provided, or grip firmly and twist.
- Impact Driver (SFMCF800): Pull back the collar of the hexagonal chuck. Insert the 1/4" hex shank bit. Release the collar to lock the bit in place. Pull on the bit to ensure it is securely fastened.
4. Operating Instructions
Before operating any tool, ensure you have read the safety information and the battery is fully charged and correctly installed.
4.1. STANLEY FatMax SFMCH900 Rotary Hammer
- Mode Selection: Use the mode selector switch to choose between drilling (rotation only), hammer drilling (rotation with percussion), or chiseling (percussion only, for light breaking work).
- Starting the Tool: Press the trigger switch. The speed is variable depending on trigger pressure.
- Operation: Apply firm, steady pressure. Allow the tool to do the work. Do not force it. For hammer drilling, ensure the bit is sharp and suitable for the material.
4.2. STANLEY FatMax SFMCG400 Angle Grinder
- Starting the Tool: Press the trigger switch. Some models may have a lock-on button for continuous operation.
- Operation: Hold the grinder firmly with both hands. Position the disc at a slight angle to the workpiece for grinding. For cutting, use the edge of the disc and maintain a straight line. Always direct sparks away from yourself and others.
- Safety: Ensure the guard is correctly positioned. Never use a damaged or incorrect disc.
4.3. STANLEY FatMax SFMCD711 Percussion Drill
- Mode Selection: Use the selector switch to choose between drilling (for wood, metal, plastic) and hammer drilling (for masonry).
- Torque Settings: Adjust the torque collar to the desired setting. Lower settings are for driving screws, higher settings for drilling. The drill setting bypasses the clutch for maximum power.
- Speed Selection: Use the gear selector switch (usually 1 or 2) for low speed/high torque or high speed/low torque.
- Starting the Tool: Press the trigger switch. Speed is variable.
- Operation: Apply steady pressure. For hammer drilling, allow the percussion action to work.
4.4. STANLEY FatMax SFMCF800 Impact Driver
- Starting the Tool: Press the trigger switch. The speed is variable based on trigger pressure.
- Operation: Position the bit firmly into the screw head. Apply forward pressure and press the trigger. The impact mechanism will engage automatically when resistance is met, driving the fastener efficiently.
- Reverse: Use the forward/reverse selector switch to change rotation direction for removing screws.
5. Maintenance
Regular maintenance ensures the longevity and optimal performance of your STANLEY FatMax tools. Always disconnect the battery before performing any maintenance.
5.1. Cleaning
- Wipe down tools with a clean, damp cloth. Do not use harsh chemicals or abrasive cleaners.
- Keep ventilation openings clear of dust and debris. Use compressed air if necessary.
- Clean the chucks and accessory holders regularly to ensure smooth operation and secure gripping.
5.2. Storage
- Store tools and batteries in a cool, dry place, away from direct sunlight and extreme temperatures.
- Ensure batteries are partially charged (around 50%) before long-term storage.
- Utilize the STANLEY 3-in-1 Caddy for organized and protected storage.
5.3. Battery Care
- Do not store batteries in a discharged state. Recharge them promptly after use.
- Avoid exposing batteries to water or extreme heat.
- If a battery is damaged or no longer holds a charge, dispose of it responsibly according to local regulations.
6. Troubleshooting
This section addresses common issues you might encounter with your STANLEY FatMax tools.
| Problem | Possible Cause | Solution |
|---|---|---|
| Tool does not start. | Battery not charged or improperly installed. | Ensure battery is fully charged and securely inserted. |
| Reduced power or runtime. | Battery charge is low or battery is old/damaged. | Recharge battery. If issue persists, consider replacing the battery. |
| Drill bit/accessory slips in chuck. | Chuck not tightened sufficiently or bit shank is dirty/damaged. | Ensure chuck is fully tightened. Clean or replace the bit. |
| Angle grinder disc wobbles or vibrates excessively. | Disc improperly installed, damaged, or incorrect type. | Check disc installation. Replace with a new, correct disc if necessary. |
| Rotary hammer not hammering. | Tool in drill-only mode or internal mechanism issue. | Check mode selector. If still not working, contact support. |
For issues not listed here, or if solutions do not resolve the problem, please contact customer support.
7. Technical Specifications
General Kit Specifications:
- Brand: STANLEY FatMax
- Model: SVK400
- Voltage: 18V
- Battery Type: Lithium-Ion (V20)
- Battery Capacity: 2.0 Ah
- Power Source: Battery
STANLEY FatMax SFMCH900 Rotary Hammer:
- Motor: Brushless
- Modes: Rotation, Percussion, Chiseling
- Impact Energy: 2.0 J
- Rotation Speed: 1500 r.p.m (max)
- Impact Rate: 5500 i.p.m (max)
- Tool Holder: SDS Plus
- Drilling Capacity (Wood): Ø 40 mm (max)
- Drilling Capacity (Metal): Ø 13 mm (max)
- Drilling Capacity (Masonry): Ø 30 mm (max)
STANLEY FatMax SFMCG400 Angle Grinder:
- Rotation Speed: 9000 r.p.m (max)
- Disc Diameter: Ø 165 mm
- Spindle Thread: Ø 14 mm
STANLEY FatMax SFMCD711 Percussion Drill:
- Motor: 2-speed
- Torque Settings: 22 positions
- Max Torque: 50 Nm
- Rotation Speed: 0 - 350 / 1500 r.p.m
- Impact Rate: 0 - 5950 / 25500 i.p.m
- Tool Holder: 13 mm Chuck
STANLEY FatMax SFMCF800 Impact Driver:
- Max Torque: 165 Nm
- Rotation Speed: 2800 r.p.m (max)
- Impact Rate: 3100 i.p.m (max)
- Attachment: Hexagonal 6.35 mm (1/4")
8. Warranty and Support
8.1. Warranty Information
STANLEY FatMax products are manufactured to high-quality standards and are guaranteed for a specific period from the date of purchase against manufacturing defects. Please refer to the warranty card included with your product or visit the official STANLEY website for detailed warranty terms and conditions specific to your region. Keep your proof of purchase for warranty claims.
8.2. Customer Support
For technical assistance, spare parts, or service, please contact STANLEY customer support. You can typically find contact information (phone numbers, email, or online support portals) on the official STANLEY website or on the packaging of your product. When contacting support, please have your product model number (SVK400) and serial number (if applicable) ready.
Online Resources: For additional information, FAQs, and product registration, visit the official STANLEY website.