1. Introduction
Thank you for choosing the Pichler Glow Plug Heater, Model 15047. This device, also known as Glow Power, is designed to provide efficient and reliable heating for glow plugs in methanol engines. It ensures easy engine starting, smooth operation, and improved throttle response. Please read this manual thoroughly before use to ensure proper installation and operation.
2. Safety Instructions
- Always ensure correct polarity when connecting the glow plug heater to a power source. Incorrect connections can damage the device or the power source.
- Do not expose the device to moisture or extreme temperatures.
- Keep the device away from flammable materials, especially when in operation, as glow plugs generate heat.
- This product is intended for users aged 15 years and older. Adult supervision is recommended for younger users.
- Disconnect the power supply before performing any maintenance or adjustments.
- Do not attempt to modify or disassemble the device. Refer all servicing to qualified personnel.
3. Package Contents
Please check the package for the following items:
- Pichler Glow Plug Heater (Model 15047)
- Separate Push Button with Status Light
Note: Additional power sources (e.g., receiver battery, supplementary battery) are not included and must be purchased separately.
4. Product Overview
The Pichler Glow Plug Heater (Glow Power) is an essential accessory for methanol engines, providing controlled heating to the glow plug. This ensures optimal engine performance, especially during startup and at low speeds.
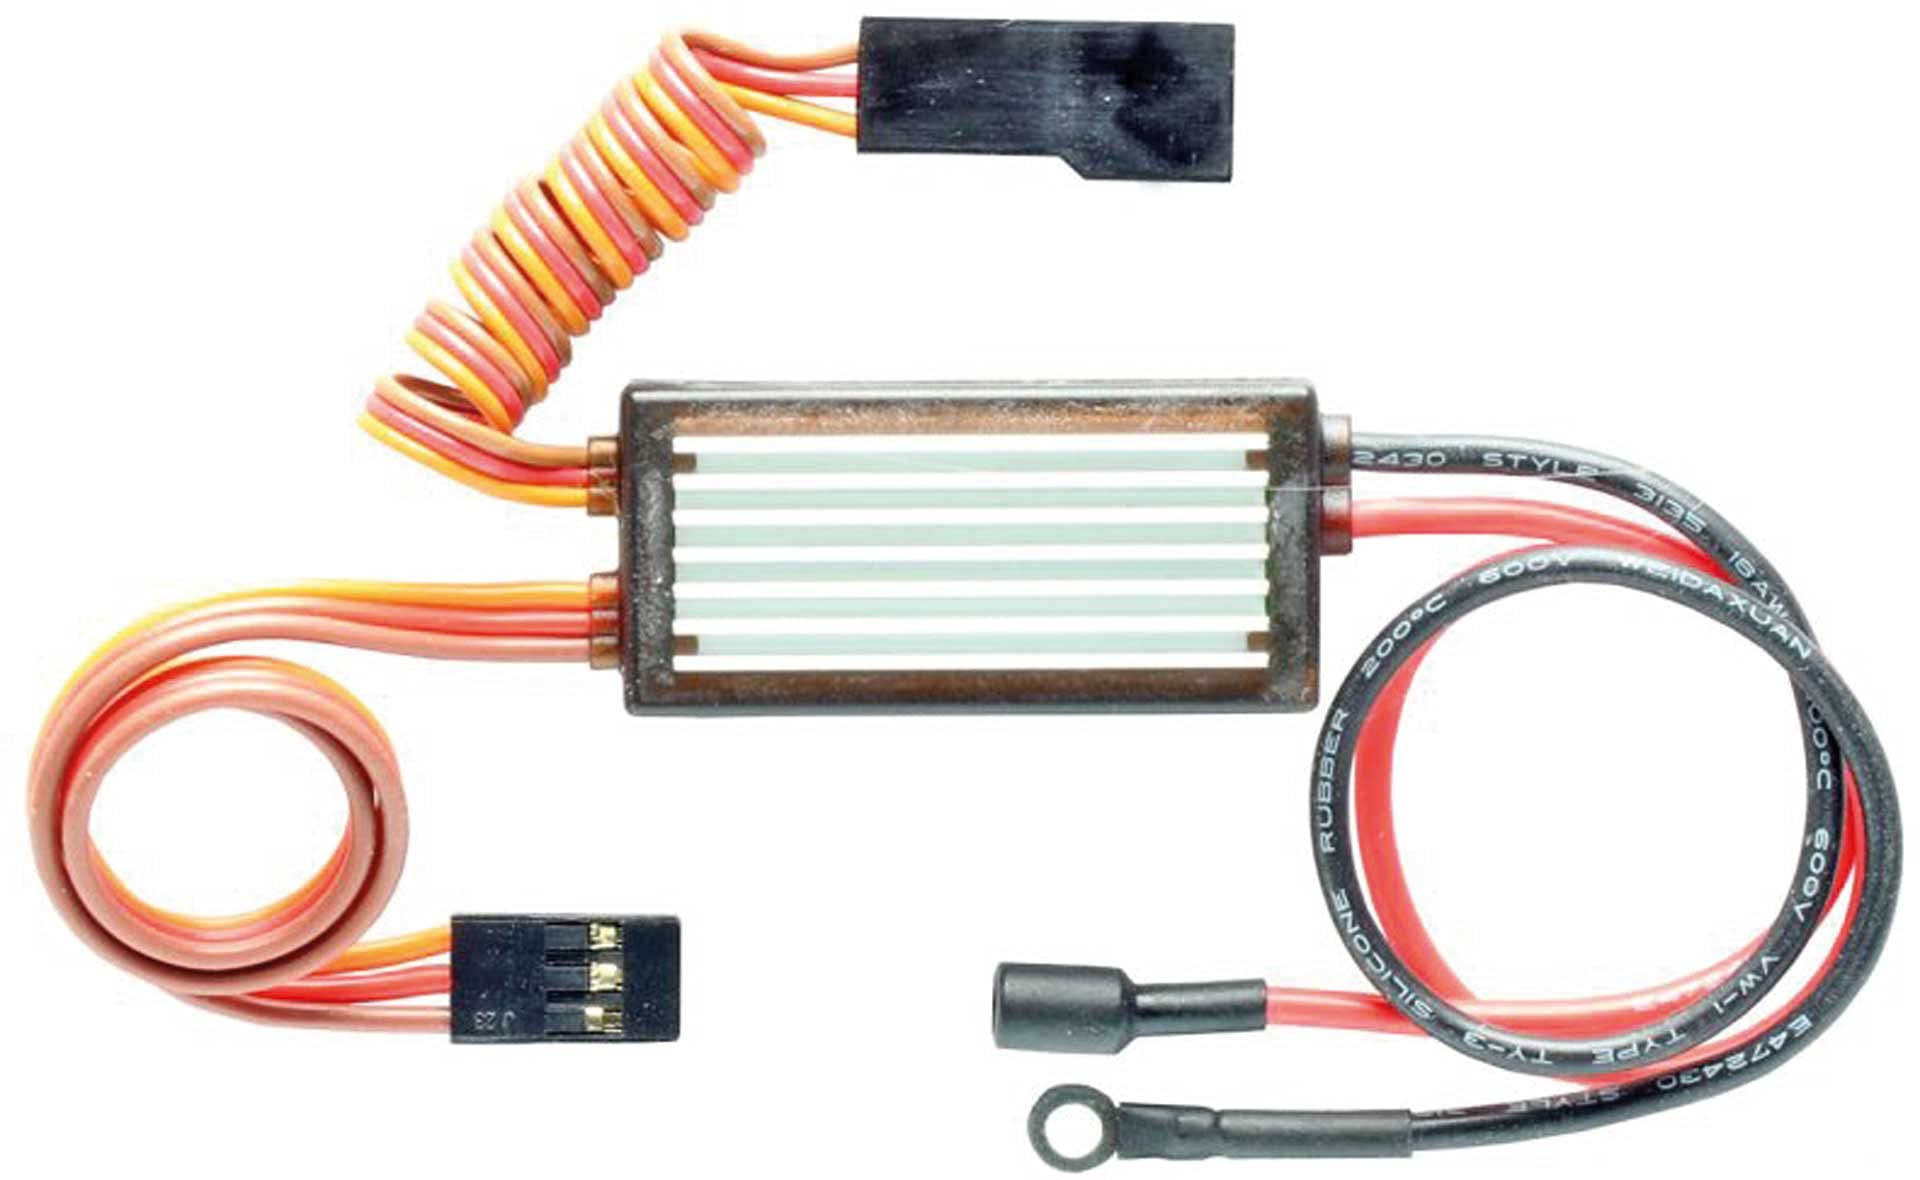
Figure 1: Pichler Glow Plug Heater (Model 15047). This image shows the compact design of the glow plug heater, which is used to provide controlled heating to glow plugs in methanol engines for improved starting and performance.
Key Features:
- Easy Engine Start: Provides optimal glow plug temperature for quick ignition.
- Smooth Engine Operation: Maintains consistent glow plug heat for reliable performance, even at low RPMs.
- Improved Throttle Response: Contributes to better engine responsiveness.
- Reduced Nitromethane Requirement: Allows for a lower nitromethane content in the fuel.
- Flexible Control: Can be controlled via the receiver or manually using the included push button.
5. Setup
The Glow Plug Heater offers several connection options:
- Direct Connection to Receiver Power:
Connect the glow plug heater directly to the receiver's power supply. This method utilizes the existing power source of your model.
- Via Receiver with Supplementary Battery:
Connect the glow plug heater to the receiver, and use an additional, dedicated battery to power the heater. This provides a separate power source for the glow plug, reducing load on the receiver battery.
- Standalone with Push Button and Supplementary Battery:
For applications without a receiver, or for manual control, connect the glow plug heater directly to a supplementary battery. Use the included separate push button to activate and deactivate the heating function. The push button includes a status light to indicate operation.
Ensure all connections are secure and observe correct polarity to prevent damage.
6. Operating Instructions
Activation:
- If connected via the receiver, activate the glow plug heater through your model's control system.
- If using the standalone setup, press the separate push button to activate the heating. The status light on the button will illuminate.
Voltage Output:
- During the engine starting phase, the glow plug heater provides a voltage output of 1.4 V.
- Once the engine is running, the voltage stabilizes to 0.8 V for continuous operation.
Deactivation:
- Deactivate the glow plug heater via your model's control system or by pressing the push button again. The status light will turn off.
7. Maintenance
- Keep the device clean and free from dirt, dust, and fuel residues. Use a soft, dry cloth for cleaning.
- Regularly inspect all cables and connections for signs of wear or damage. Replace any damaged components immediately.
- Store the glow plug heater in a dry, cool place when not in use.
- Ensure the glow plug itself is in good condition and free from carbon buildup for optimal performance.
8. Troubleshooting
| Problem | Possible Cause | Solution |
|---|---|---|
| Glow plug not heating | No power supply; Incorrect connection; Faulty glow plug; Damaged heater unit | Check battery charge and connections; Verify polarity; Test with a new glow plug; Contact support if unit is damaged |
| Engine difficult to start | Insufficient glow plug heat; Engine tuning issues; Fuel quality | Ensure glow plug heater is active and functioning; Check engine tuning; Use fresh, appropriate fuel |
| Status light not illuminating | No power to push button; Faulty push button | Check battery connection to push button; Replace push button if necessary |
9. Specifications
| Feature | Detail |
|---|---|
| Model Number | 15047 |
| Input Voltage | 7.4 - 12.6 V |
| Output Voltage (Start Phase) | 1.4 V |
| Output Voltage (Operating Phase) | 0.8 V |
| Glow Time (approx.) | 120 minutes (with 1800mAh - 7.4V LiPo battery) |
| Dimensions (L x W x H) | 42 x 20 x 6 mm |
| Weight (incl. cable) | 22 g |
| Minimum Age | 15 years |
10. Warranty & Support
Specific warranty information for the Pichler Glow Plug Heater Model 15047 is not provided in this manual. Please refer to the retailer or manufacturer's website for detailed warranty terms and conditions.
For technical support or inquiries, please contact your point of purchase or the official Pichler customer service channels.