Important Safeguards
When using your iron, basic safety precautions should always be followed, including:
- Read all instructions before use.
- To protect against risk of electric shock, do not immerse the iron in water or other liquids.
- Always turn the iron OFF before plugging or unplugging from the electrical outlet.
- Never yank cord to disconnect from outlet; instead, grasp plug and pull to disconnect.
- Do not allow cord to touch hot surfaces. Let iron cool completely before putting away.
- Always disconnect iron from electrical outlet when filling with water or emptying, and when not in use.
- Do not operate iron with a damaged cord or if the iron has been dropped or damaged.
- This appliance is not intended for use by persons (including children) with reduced physical, sensory or mental capabilities, or lack of experience and knowledge, unless they have been given supervision or instruction concerning use of the appliance by a person responsible for their safety.
- Children should be supervised to ensure that they do not play with the appliance.
- The iron must be used and rested on a stable surface.
- When placing the iron on its stand, ensure that the surface on which the stand is placed is stable.
- Do not leave the iron unattended while it is connected or on an ironing board.
- The filling aperture must not be opened during use.
- The iron is not to be used if it has been dropped, if there are visible signs of damage or if it is leaking.
SAVE THESE INSTRUCTIONS.
Product Overview
Familiarize yourself with the components of your BLACK+DECKER Easy Steam Iron.

Image: Angled view of the BLACK+DECKER Easy Steam Iron, highlighting its compact design and lime green accents.
- Spray Nozzle
- Water Fill Opening
- Steam/Dry Selector
- Spray Button
- Burst of Steam Button
- Temperature Control Dial
- Power Indicator Light
- Heel Rest
- Non-Stick Soleplate
- Water Tank (visible through transparent body)

Image: Top view of the iron, showing the temperature control dial, steam/dry selector, spray button, and burst of steam button.
Setup
Before First Use
- Remove any labels, tags, or stickers from the iron body and soleplate.
- It is recommended to operate the iron on an old piece of fabric for a few minutes to remove any manufacturing residue.
Filling the Water Tank
- Ensure the iron is unplugged from the electrical outlet.
- Hold the iron with the soleplate facing down.
- Open the water fill opening cover.
- Using a clean measuring cup, carefully pour tap water into the water fill opening until the "MAX" fill line is reached. Do not overfill.
- Close the water fill opening cover securely.

Image: Side view of the iron showing the water fill opening, indicating where to add water to the tank.
Operating Instructions
Temperature Settings
The temperature control dial allows you to select the appropriate heat setting for different fabric types. Refer to the fabric guide on the iron or garment care labels.
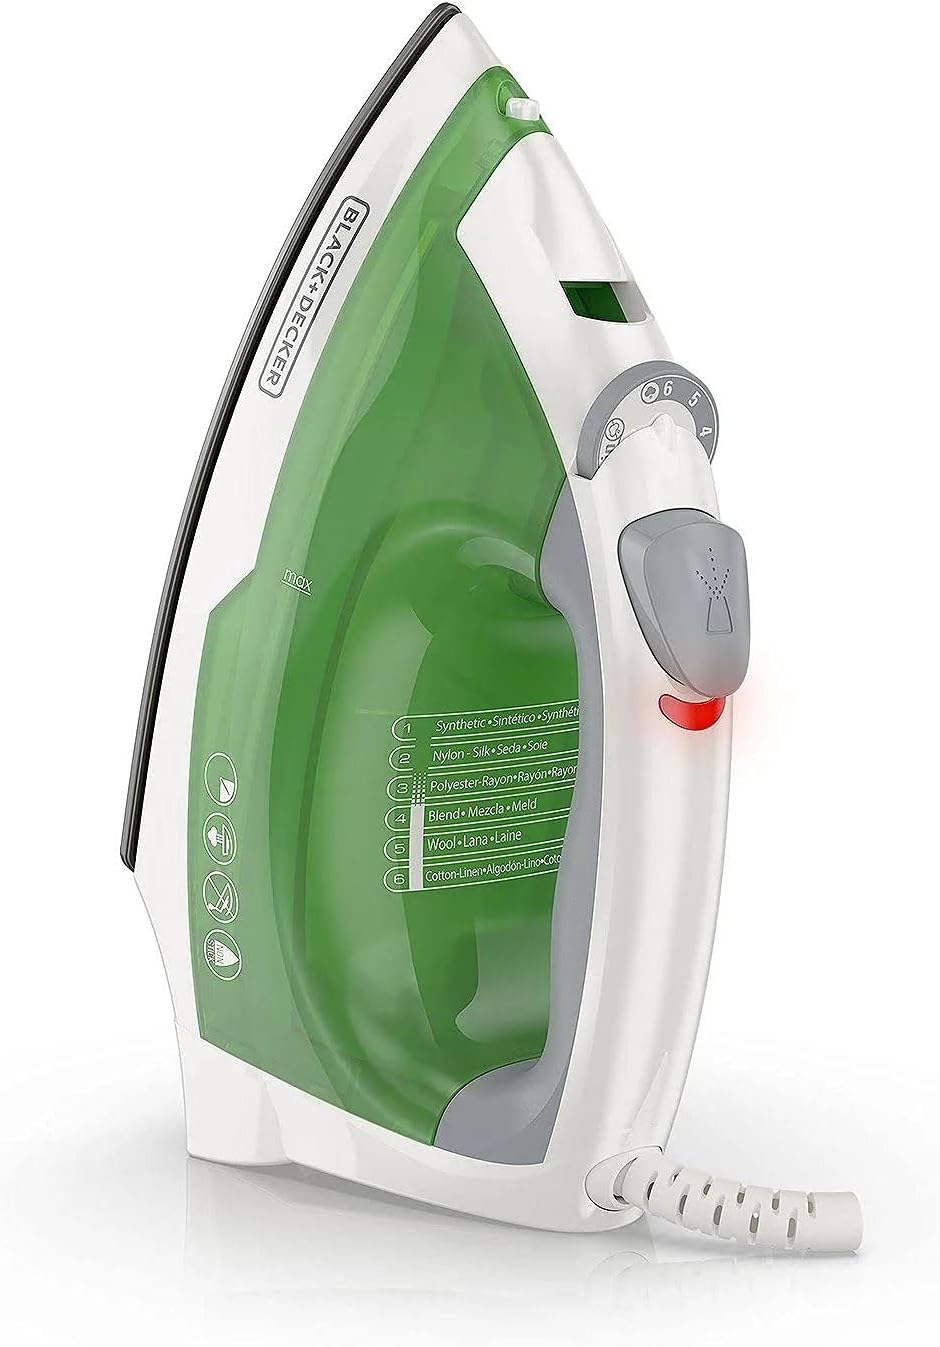
Image: Side view of the iron, clearly showing the temperature control dial with fabric type indicators.
- Synthetic/Nylon: Low heat
- Silk/Wool: Medium heat
- Cotton/Linen: High heat
Plug the iron into a standard electrical outlet. The power indicator light will illuminate, indicating the iron is heating. It will turn off when the selected temperature is reached.
Steam Ironing
- Fill the water tank as described in the "Setup" section.
- Set the steam/dry selector to the desired steam level (e.g., "Steam" or "Max Steam").
- Set the temperature control dial to a steam-compatible setting (typically 4-6 for cotton/linen). Steam will not be produced at lower temperatures.
- Allow the iron to heat until the power indicator light turns off.
- Begin ironing.
Dry Ironing
- Ensure the water tank is empty or set the steam/dry selector to "Dry".
- Set the temperature control dial to the desired fabric setting.
- Allow the iron to heat until the power indicator light turns off.
- Begin ironing.
Spray and Burst of Steam Functions
- Spray: Press the spray button to emit a fine mist of water, useful for dampening stubborn wrinkles.
- Burst of Steam: Press the burst of steam button for an extra surge of steam, effective for heavy fabrics or vertical steaming. Ensure the iron is at a high temperature setting for optimal performance.
Maintenance
Cleaning Your Iron
- Always unplug the iron and allow it to cool completely before cleaning.
- Wipe the soleplate with a damp cloth and a non-abrasive cleaner if needed. Do not use harsh scouring pads or metallic cleaners.
- Wipe the exterior of the iron with a soft, damp cloth.
- Do not immerse the iron in water or any other liquid.
Storage
- Ensure the iron is completely cool and empty the water tank before storing.
- Wrap the power cord loosely around the heel rest or secure it with a cord strap.
- Store the iron upright on its heel rest in a safe, dry place.

Image: The iron shown resting securely on its heel, ready for storage or cooling.
Troubleshooting
| Problem | Possible Cause | Solution |
|---|---|---|
| Iron does not heat up. | Not plugged in; power outlet not working; temperature dial set to OFF. | Ensure iron is securely plugged in; check power outlet; turn temperature dial to a heat setting. |
| No steam or insufficient steam. | Water tank empty; temperature too low; steam/dry selector set to DRY. | Fill water tank; set temperature to a higher, steam-compatible setting; set steam/dry selector to STEAM. |
| Water leaks from soleplate. | Temperature too low for steam; water tank overfilled. | Increase temperature to a steam setting; do not overfill water tank. |
| Soleplate is sticking or dirty. | Residue buildup from starch or fabric. | Clean soleplate as described in the "Maintenance" section. |
Specifications
- Model: D340
- Voltage: 230 Volts
- Item Weight: Approximately 1.96 pounds (0.89 kg)
- Base Material: Stainless Steel, Non-Stick
- Dimensions (Package): 10.83 x 8.43 x 4.57 inches (27.5 x 21.4 x 11.6 cm)
- UPC: 050875813601
Warranty and Support
For warranty information or product support, please refer to the warranty card included with your purchase or visit the official BLACK+DECKER website. Keep your proof of purchase for warranty claims.
Online Support: www.blackanddecker.com/support