
1. Introduction
This manual provides comprehensive instructions for the safe and efficient operation of your Moonshan MS-3L-2 Liquid Filling Machine. Please read this manual thoroughly before initial use to ensure proper setup, operation, and maintenance. Retain this manual for future reference.
2. Safety Information
Always observe the following safety precautions to prevent injury or damage to the machine:
- Ensure the machine is placed on a stable, level surface.
- Connect the machine to a grounded power outlet with the correct voltage.
- Do not operate the machine with wet hands or in wet conditions.
- Keep children and unauthorized personnel away from the operating machine.
- Only use the machine for its intended purpose: filling low-viscosity, non-corrosive, particle-free liquids.
- Disconnect power before cleaning or performing any maintenance.
- Wear appropriate personal protective equipment (PPE) if handling hazardous liquids.
3. Package Contents
Verify that all components are present upon unpacking:
- Moonshan MS-3L-2 Liquid Filling Machine (Main Unit)
- Foot Pedal
- Stainless Steel Filling Nozzle and Stand
- Silicone Tubing (2 sets)
- Discharge Nozzles (2 units)
- Power Cable
- User Manual (this document)
4. Product Overview
The Moonshan MS-3L-2 is a digital control liquid filling machine designed for precise and consistent filling of low-viscosity liquids. It features a diaphragm pump and supports both semi-automatic (foot pedal) and fully automatic (conveyor belt, not included) operation.

Figure 4.1: Overview of the Moonshan MS-3L-2 Liquid Filling Machine.
4.1. Key Components
- Control Panel: Digital display and buttons for setting filling parameters.
- Filling Nozzle: Dispenses liquid into containers. Adjustable height.
- Diaphragm Pump: Provides consistent liquid flow.
- Foot Pedal: For semi-automatic operation, triggering each fill cycle.
- Tubing: Food-grade silicone tubing for liquid intake and output.
- Input/Output Ports: Connections for the liquid intake and output tubes.

Figure 4.2: Detailed view of the machine's digital control panel.

Figure 4.3: The adjustable stainless steel pipe, extended by 10cm for accommodating taller bottles.
5. Specifications
| Feature | Specification |
|---|---|
| Model Number | MS-3L-2 |
| Filling Capacity Range | 1-100 Fl Oz (approximately 30-3000 ml) |
| Pump Type | Diaphragm Pump |
| Max Flow Rate | 100 Fl Oz/Min |
| Repetitive Error | <1% |
| Time Accuracy | 0.1 Sec |
| Suitable Liquids | Very thin, non-corrosive, non-viscous, particle-free liquids (e.g., wine, juice, milk, perfume, makeup remover) |
| Unsuitable Liquids | Fragrance oil, viscous liquids, thin oil, honey, sauce, gel, essential oil, rich foam fluid, corrosive fluid |
| Package Dimensions | 13.74 x 8.07 x 6.22 inches |
| Item Weight | 4 pounds |
| Manufacturer | Moonshan |

Figure 5.1: Guide to suitable and unsuitable liquid types for the MS-3L-2 machine.
6. Setup
6.1. Unpacking and Placement
- Carefully remove all components from the packaging.
- Place the main unit on a stable, flat, and dry surface.
6.2. Connecting Tubing

Figure 6.1: Quick connection points for input and output tubes.
- Connect one end of the silicone tubing to the 'IN' port (liquid intake) on the machine. Place the other end into your liquid supply container.
- Connect the second piece of silicone tubing to the 'OUT' port (liquid output) on the machine. This tube will lead to the filling nozzle.
6.3. Attaching Filling Nozzle
- Attach the filling nozzle to the output tubing.
- Mount the nozzle onto the adjustable stand. Adjust the height of the nozzle to suit your bottle size, ensuring it is positioned correctly above the bottle opening.
6.4. Connecting Foot Pedal (for Semi-Automatic Mode)

Figure 6.2: Connection points for semi-automatic (foot pedal) and fully automatic (conveyor belt) operation.
- Locate the foot pedal connection port on the rear of the machine.
- Plug the foot pedal into this port.
6.5. Power Connection
- Connect the power cable to the machine and then to a suitable power outlet.
- Turn on the main power switch, usually located on the back or side of the unit.
7. Operation
7.1. Control Panel Overview
The control panel allows you to set various parameters for filling. Refer to Figure 4.2 for button layout.
- Filling Capacity Set: Adjusts the target volume for each fill.
- Delay Time: Sets the pause between fill cycles in automatic mode.
- Filling Speed: Controls the pump speed.
- Jog/Add Button: Used for priming the pump or manually dispensing a small amount of liquid.
- Sensor Button: Activates the sensor input for automatic operation (e.g., with a conveyor belt sensor).
7.2. Setting Filling Parameters
- Set Filling Capacity: Use the 'Up' and 'Down' buttons to adjust the desired filling volume. The machine uses volume-based filling, eliminating the need to estimate time based on viscosity.
- Set Filling Speed: Adjust the pump speed according to the liquid's viscosity and desired filling rate.
- Set Delay Time: If operating in automatic mode, set the delay between consecutive fills.

Figure 7.1: Setting the desired filling capacity on the digital display.
7.3. Calibration
Before first use or if accuracy issues arise, calibrate the machine:
- Fill a known volume into a measuring cup.
- Adjust the calibration factor on the control panel until the dispensed volume matches the set capacity.
7.4. Priming the Pump
Before starting filling, prime the pump to remove air from the tubing:
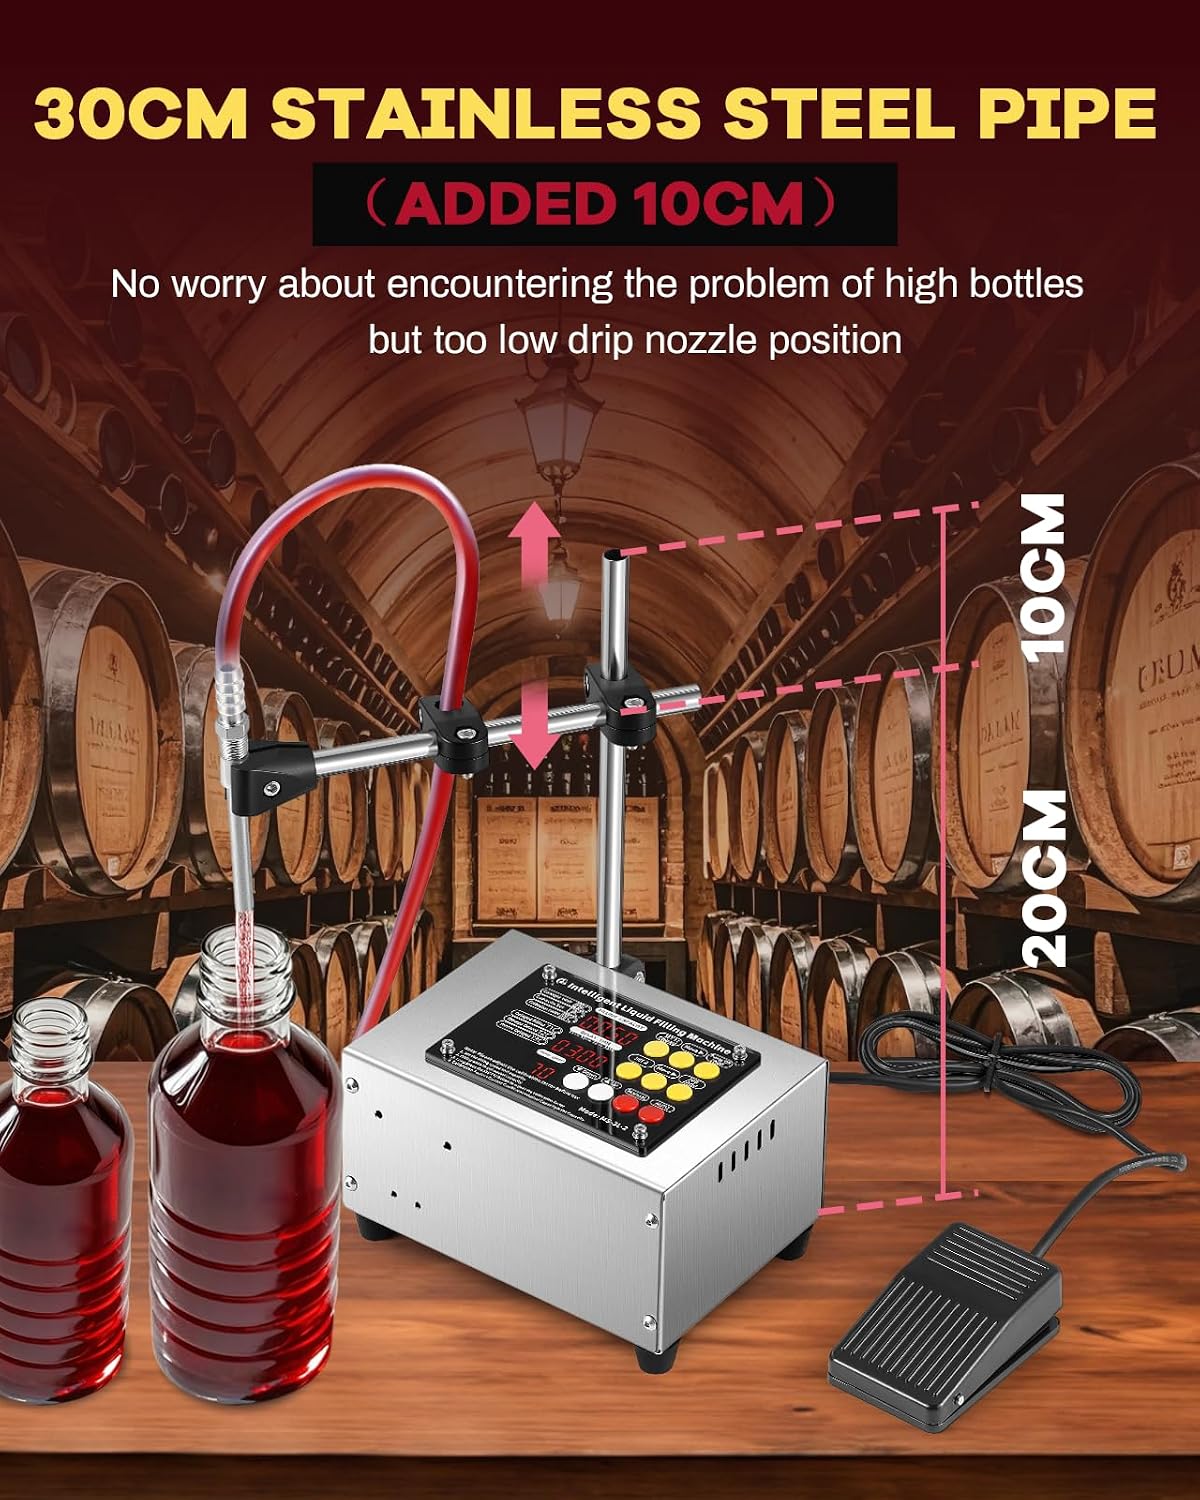
Figure 7.2: Using the Jog/Add button to prime the pump and clear air from the tubes.
- Place the output nozzle into a waste container.
- Press and hold the 'Jog/Add' button until liquid flows smoothly without air bubbles.
7.5. Filling Modes
The MS-3L-2 supports two operational modes:
- Semi-Automatic Mode: Press the foot pedal to initiate each filling cycle. Ensure the 'Sensor' button is not active.
- Fully Automatic Mode: Connect an optional conveyor belt and sensor. Press the 'Sensor' button to activate. The machine will automatically fill bottles detected by the sensor.
8. Maintenance
8.1. Cleaning the Tubing and Nozzle
Regular cleaning is essential to prevent contamination and ensure proper function:
- After each use, especially when changing liquids, flush the system with clean water.
- Disconnect the tubing and nozzle. Wash them thoroughly with warm, soapy water.
- Rinse all components with clean water and allow them to air dry completely before reassembly or storage.
- The 'Jog/Add' button can be used to assist in flushing cleaning solutions through the system.
8.2. General Cleaning
Wipe the exterior of the machine with a damp cloth. Do not use abrasive cleaners or immerse the main unit in water.
9. Troubleshooting
If you encounter issues, refer to the following common problems and solutions:
| Problem | Possible Cause | Solution |
|---|---|---|
| Machine does not power on | No power, loose connection, faulty power switch | Check power cable connection, ensure outlet is functional, verify main power switch is ON. |
| Liquid not dispensing or slow flow | Air in tubing, clogged tubing/nozzle, liquid too viscous, pump speed too low | Prime the pump using 'Jog/Add' button. Clean tubing and nozzle. Ensure liquid is suitable (low viscosity). Increase pump speed setting. |
| Inaccurate filling volume | Needs calibration, air bubbles in liquid, inconsistent liquid supply | Perform calibration as described in Section 7.3. Ensure liquid supply is consistent and free of air. |
| Dripping from nozzle | Nozzle not fully closed, worn nozzle, liquid properties | Ensure nozzle is properly installed. Replace nozzle if worn. Note that some very thin liquids may exhibit minor dripping. |
| Foot pedal not working | Loose connection, 'Sensor' mode active | Check foot pedal connection. Ensure 'Sensor' button is OFF for semi-automatic mode. |
10. Warranty and Support
For warranty information or technical support, please contact Moonshan customer service through your purchase platform or the contact details provided with your product packaging. Please have your model number (MS-3L-2) and purchase date available when contacting support.
11. Video Resources
No official product videos could be embedded due to missing video URLs or creator type information in the provided data. Please refer to the manufacturer's website or product page for any available video demonstrations.

