1. Introduction
Welcome to the ISUDAR SU6901 Car Subwoofer instruction manual. This document provides essential information for the proper installation, operation, and maintenance of your new active car subwoofer. Please read this manual thoroughly before use to ensure optimal performance and safety.
2. Product Overview
The ISUDAR SU6901 is an active car subwoofer designed to enhance your vehicle's audio system with powerful bass. It features an integrated amplifier and a compact design for flexible installation.
Main Components
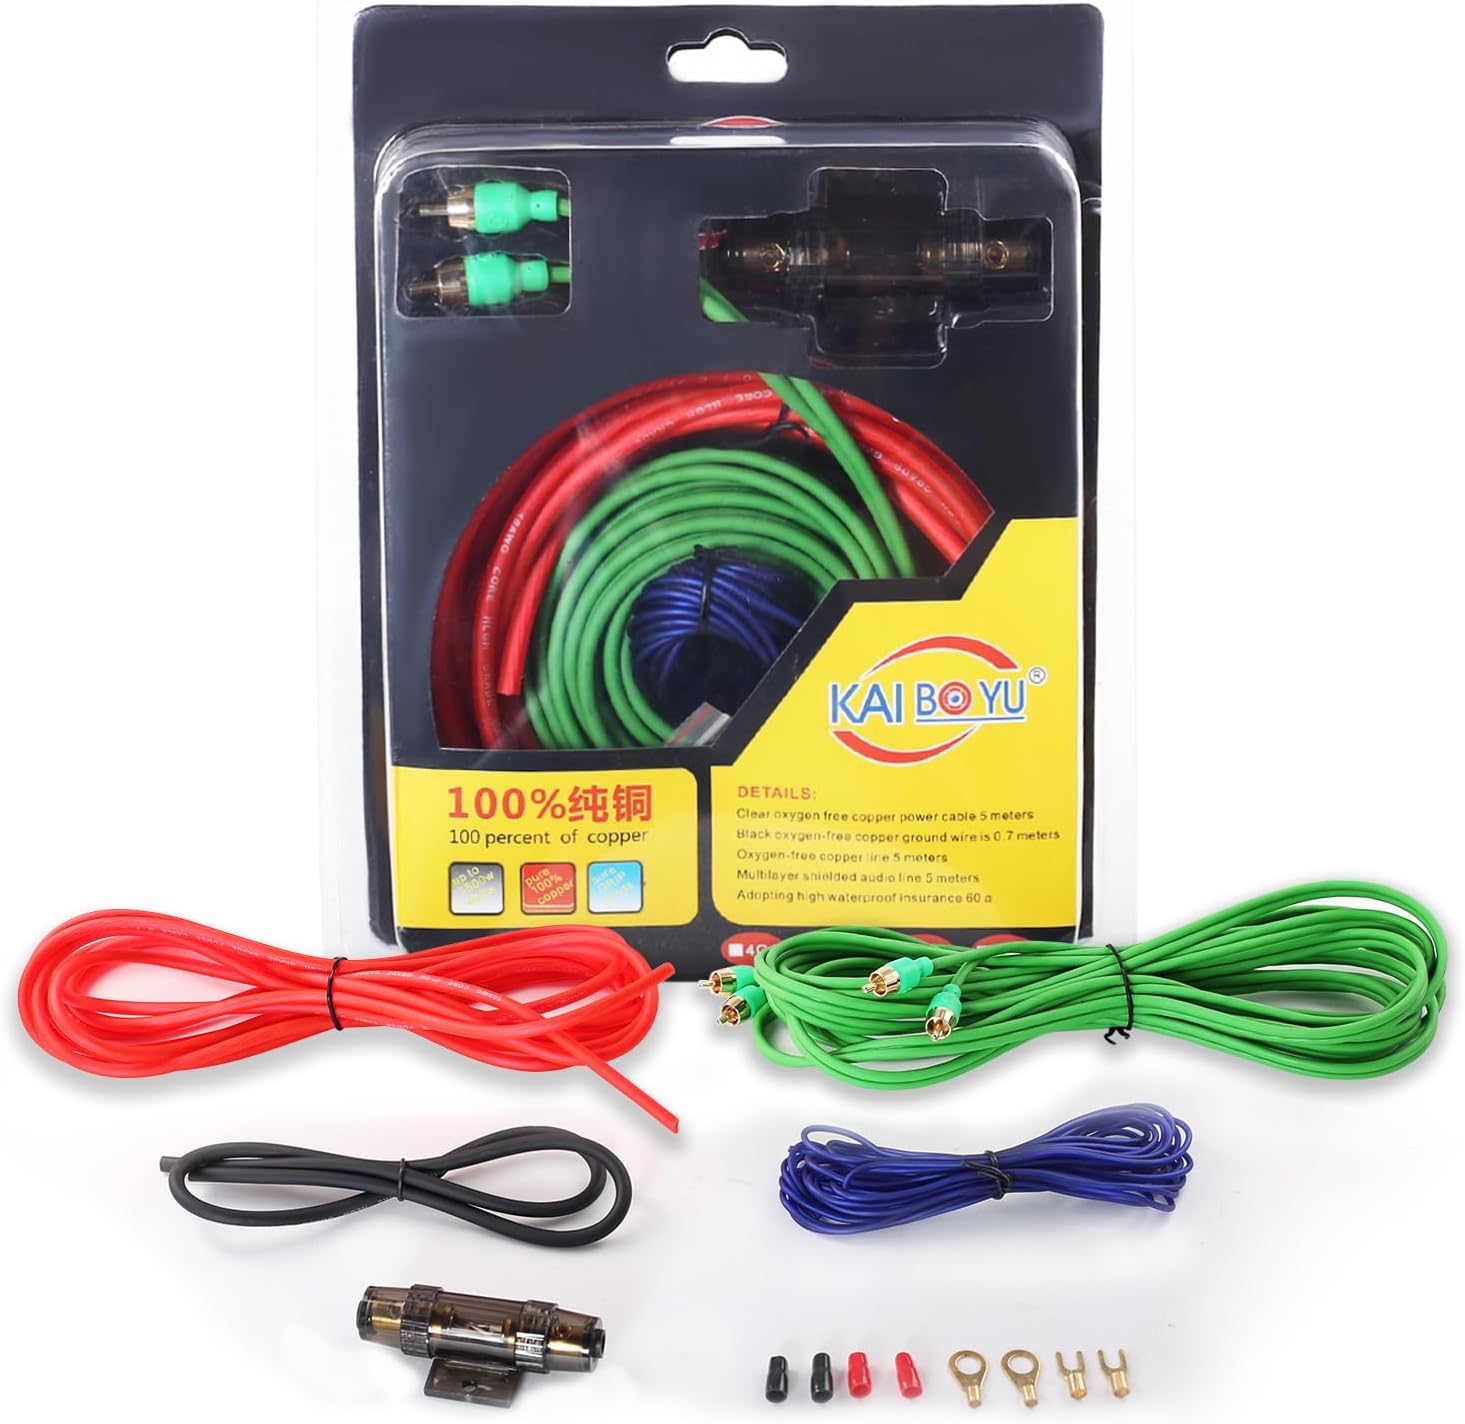
Figure 2.1: Overall view of the ISUDAR SU6901 active car subwoofer.

Figure 2.2: The control panel on the side of the subwoofer provides access to power connections, input options, and audio adjustments.
3. Key Features
- Integrated Power Amplifier: Delivers 150 watts of bass output.
- Durable Aluminum Construction: Full die-cast aluminum molds ensure rapid heat dissipation and minimize noise-causing vibrations.
- High-Level Input: Allows connection to both aftermarket and original equipment stereo systems, making it a perfect addition to your car's factory audio.
- Ultra-Slim, Space-Saving Design: Compact dimensions enable installation under most car seats, preserving passenger legroom.
- Variable Low-Pass Filter: Provides control over level, frequency, and phase settings for customized bass response.
- Remote Bass Control: Included remote allows easy adjustment of bass levels from the driver's seat.
4. Package Contents
Please verify that all items are present in the package:

Figure 4.1: Components included with your ISUDAR SU6901 subwoofer.
- ISUDAR SU6901 Active Car Subwoofer
- Power Wire (480cm)
- Audio Cable (500cm)
- Fuse
- Ground Wire
- Control Wire (500cm)
- Remote Bass Control
- Various Connectors and Mounting Hardware
5. Technical Specifications
| Feature | Specification |
|---|---|
| Brand | ISUDAR |
| Max Speaker Output Power | 150 Watts |
| Frequency Response | 10 GHz |
| Connectivity Technology | Wired |
| Audio Output Mode | Stereo |
| Input Voltage | 12 Volts (DC) |
| Mounting Type | Mounting Bracket |
| Material | Aluminum |
| Model Name | ISUDAR SU6901 |
| Speaker Type | Coaxial |
| Control Method | Remote Control |
| Speaker Size | 293 Millimeters (6 Inches) |
| Impedance | 4 Ohms |
| Compatible Vehicle Type | Car |
| Power Source | DC Power |
| Number of Audio Channels | 2.1 |
| Water Resistance Level | Not waterproof |
| Warranty Type | Limited Warranty |
6. Installation Guide
Safety Precautions
- Disconnect the vehicle's negative battery terminal before starting installation.
- Ensure all wiring is properly insulated to prevent short circuits.
- Mount the subwoofer securely to prevent movement during driving.
- Consult a professional if you are unsure about any installation steps.
Recommended Placement
The compact design of the ISUDAR SU6901 allows for flexible placement. The most common and recommended location is under a car seat to save space and provide optimal bass distribution. Ensure there is adequate ventilation around the unit.
Wiring Instructions
The subwoofer requires power, ground, and a remote turn-on signal, in addition to audio input.
Power Connection

Figure 6.1: Power and ground wiring connections.
- Connect the red power wire (typically 480cm) to the positive (+) terminal of your car battery. Install the included fuse holder as close to the battery as possible.
- Connect the black ground wire to a clean, unpainted metal surface on the vehicle's chassis. Ensure a good electrical connection.
- Connect the blue remote turn-on wire to the remote output of your car's head unit. This wire tells the subwoofer to turn on and off with your stereo.
Audio Input Connection
The ISUDAR SU6901 supports both low-level (RCA) and high-level (speaker wire) inputs.
Low-Level Input (RCA)
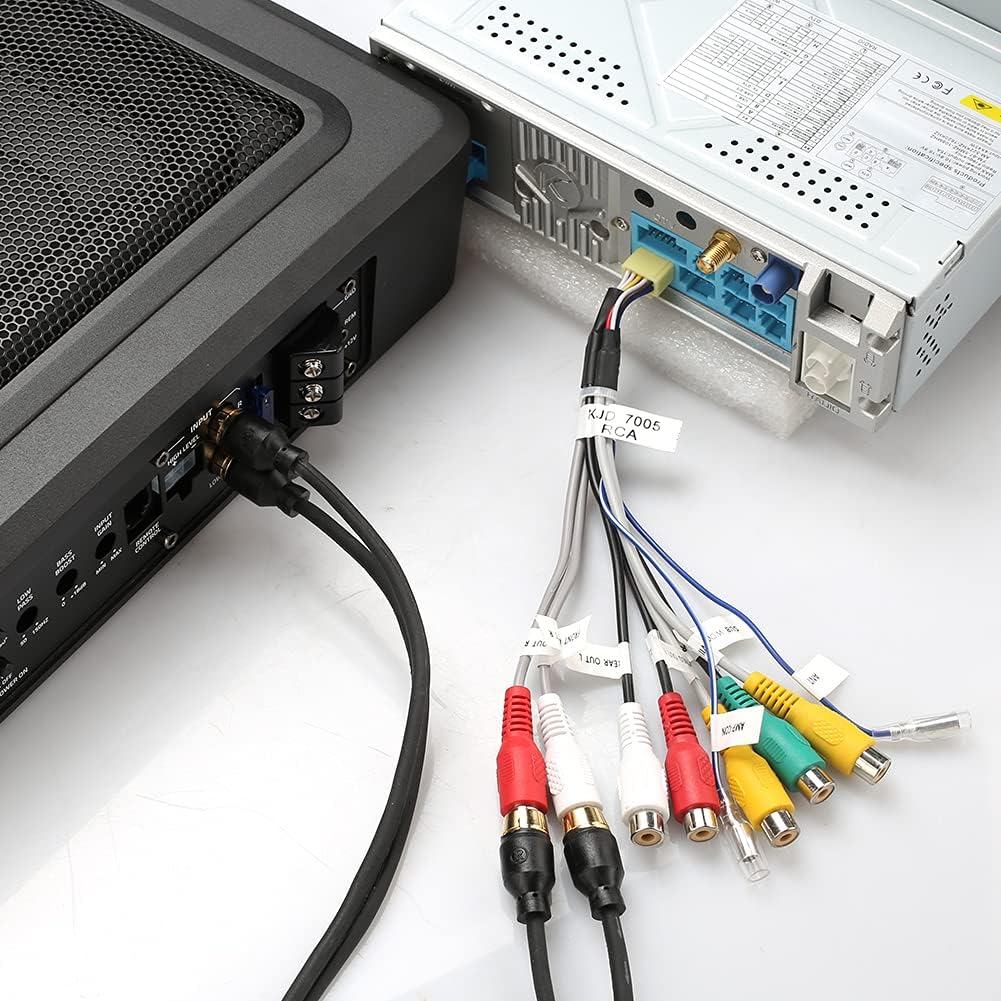
Figure 6.2: RCA audio input connection.
If your head unit has RCA pre-outs, connect the supplied audio cable (500cm) from the head unit's RCA outputs to the "INPUT" RCA jacks on the subwoofer. This provides the best signal quality.
High-Level Input (Speaker Wire)

Figure 6.3: High-level speaker wire input connection.
If your head unit does not have RCA outputs, use the high-level input. Connect the speaker wires from your head unit's speaker outputs to the high-level input terminal on the subwoofer. Refer to your head unit's manual for speaker wire polarity.
Input Level Switch
On the control panel (refer to Figure 2.2), locate the "INPUT LEVEL" switch. Set it to "RCA" if using low-level inputs or "SPK" if using high-level inputs.
7. Operation
Initial Setup and Adjustments
After installation, turn on your car's audio system. The subwoofer should power on automatically if the remote wire is connected correctly.
Figure 7.1: Subwoofer control panel for adjustments.
Gain Control (MIN/MAX)
- Adjust the "GAIN" knob to match the output level of your head unit. Start at minimum and slowly increase until the bass blends well with your main speakers without distortion.
Low Pass Filter (LOW PASS 50-150Hz)
- This filter controls the upper frequency limit of the subwoofer. Adjust it to blend smoothly with your main speakers. A common starting point is 80-100Hz.
Bass Boost (0-12dB)
- Use the "BASS BOOST" knob to increase the bass output at a specific frequency. Use sparingly to avoid distortion.
Phase Control (0°/180°)
- The "PHASE" switch helps to align the subwoofer's output with your main speakers. Listen to music with strong bass and switch between 0° and 180° to find the setting that provides the most impactful and cohesive bass.
Remote Bass Control
- The included remote bass control allows you to adjust the subwoofer's output level conveniently from the driver's seat without accessing the main unit.
8. Maintenance
- Keep the subwoofer clean and free from dust and debris. Use a soft, dry cloth for cleaning.
- Ensure all connections remain secure. Periodically check wiring for any signs of wear or damage.
- Avoid exposing the subwoofer to extreme temperatures or moisture.
- Do not block the speaker grille or any ventilation openings.
9. Troubleshooting
| Problem | Possible Cause | Solution |
|---|---|---|
| No Sound | No power to the subwoofer. | Check power, ground, and remote wire connections. Ensure the fuse is intact. |
| No Sound | Incorrect input level setting. | Verify the "INPUT LEVEL" switch is set correctly (RCA or SPK). |
| No Sound | Audio input cables are loose or faulty. | Check RCA or speaker wire connections. |
| Distorted Sound | Gain set too high. | Reduce the "GAIN" setting. |
| Distorted Sound | Bass Boost set too high. | Reduce the "BASS BOOST" setting. |
| Weak Bass | Incorrect phase setting. | Toggle the "PHASE" switch between 0° and 180°. |
| Weak Bass | Low Pass Filter set too low. | Adjust the "LOW PASS" frequency higher. |
| Subwoofer turns off randomly | Overheating or protection mode activated. | Ensure adequate ventilation. Check for short circuits in wiring. Reduce volume/gain. |
| Fuse blows repeatedly | Short circuit in power wiring or internal fault. | Inspect power and ground wires for damage or short circuits. If the issue persists, seek professional assistance. |
If you continue to experience issues, please contact ISUDAR customer support.
10. Warranty Information
The ISUDAR SU6901 Car Subwoofer comes with a limited warranty. Please refer to the warranty card included in your package for specific terms and conditions. Keep your proof of purchase for warranty claims.
11. Customer Support
For further assistance, technical support, or warranty inquiries, please visit the official ISUDAR store or contact their customer service.