KETOTEK KT3100
Digital Thermostat Outlet Plug Instruction Manual
Brand: KETOTEK
Model: KT3100
1. Introduction
Thank you for choosing the KETOTEK Digital Thermostat Outlet Plug. This device is designed to provide precise temperature control for a wide range of applications, automatically switching between heating and cooling modes based on your set parameters. Its plug-and-play design and versatile modes make it an ideal solution for maintaining optimal environmental conditions.

Image 1.1: KETOTEK Digital Thermostat Outlet Plug with display showing measured, start, and stop temperatures.
2. Key Features
- Plug-and-Play Simplicity: Easy to set up and use, simply plug in your device and set desired temperatures.
- High-Accuracy Real-Time Temperature Monitoring: Equipped with a 3-meter NTC 10K temperature sensor for reliable tracking.
- Versatile 5 Modes: Includes Temperature Control mode, F01 Cycle Timer mode, F02 Countdown ON mode, F03 Countdown OFF mode, and F04 Countdown ON and Countdown OFF mode.
- Temperature Range: Operates within -40°F to 248°F (-40°C to 120°C).
- User-Friendly Display: Supports Celsius (°C) and Fahrenheit (°F) display.
- Built-in Memory Function: Retains settings during power outages.
- Temperature Calibration: Ensures accurate temperature measurement and control.
- Reset Function: Allows for a fresh start when needed.
- Durable Construction: Made with fire-resistant materials for safety and longevity.

Image 2.1: Visual representation of the thermostat's multiple functions, including heating/cooling, C/F switchable, cycle timing, countdown, temperature calibration, memory, and reset.
3. Package Contents
Upon opening your package, please ensure all items are present and in good condition:
- 1 x KETOTEK Digital Thermostat Plug Outlet
- 1 x User Manual
4. Setup and Initial Configuration
The KETOTEK Digital Thermostat Outlet Plug is designed for straightforward setup. Follow these steps to begin using your device:
- Plug In: Insert the thermostat plug into a standard 120V AC outlet.
- Connect Device: Plug the appliance you wish to control (e.g., heater, fan) into the thermostat's outlet.
- Position Sensor: Place the 3-meter NTC 10K temperature sensor in the area where you want to monitor and control the temperature. Ensure it is not directly exposed to heat sources or drafts that could skew readings.
- Select Temperature Unit (°C/°F): To switch between Celsius and Fahrenheit, press and hold the 'UP' button for approximately 3 seconds. The display will change units.
- Set Temperature Control Mode: Press the 'MODE' button repeatedly until the display shows the 'Measured Temperature', 'Start Temperature (ON)', and 'Stop Temperature (OFF)' fields. This is the default Temperature Control Mode.
- Set Start Temperature (ON): Press the 'SET' button once. The 'Start Temperature' value will flash. Use the 'UP' or 'DOWN' buttons to adjust the desired temperature at which your device should turn ON.
- Set Stop Temperature (OFF): Press the 'SET' button again. The 'Stop Temperature' value will flash. Use the 'UP' or 'DOWN' buttons to adjust the desired temperature at which your device should turn OFF.
- Save Settings: Press the 'MODE' button to confirm and save your settings. The display will return to showing the current measured temperature and your set points.
Example: Keeping Temperature Between 20°C and 25°C
- 1. Press "MODE" to switch to temperature control mode.
- 2. Press "SET" to set Start Temperature. Use "UP" or "DOWN" key to set the value to 20.0.
- 3. Press "SET" to set Stop Temperature. Use "UP" or "DOWN" key to set the value to 25.0.
- 4. Press "MODE" to save the settings.
When measured temperature < 20°C, KT3100 starts to work in heating mode. When temperature ≥ 25°C, KT3100 stops working. Until the temperature drops below 20°C again, KT3100 will start to work again.

Image 4.1: Step-by-step guide on the device display for setting the desired temperature range.
Video 4.1: Official KETOTEK video demonstrating the Temperature Control Mode Setting.
5. Operating Modes
The KETOTEK Digital Thermostat Outlet Plug offers five distinct operating modes to suit various needs. Press the 'MODE' button to cycle through these modes:

Image 5.1: Overview of the 5 available modes: Temperature Control, F01 Cycle Timer, F02 Countdown ON, F03 Countdown OFF, and F04 Countdown ON/OFF.
5.1. Temperature Control Mode
This is the primary mode for maintaining a desired temperature range. The device automatically switches between heating and cooling based on your set 'Start Temperature' and 'Stop Temperature'.
- Heating Mode: If 'Start Temperature' < 'Stop Temperature', the device will activate when the measured temperature drops below the 'Start Temperature' and deactivate when it reaches or exceeds the 'Stop Temperature'.
- Cooling Mode: If 'Start Temperature' > 'Stop Temperature', the device will activate when the measured temperature rises above the 'Start Temperature' and deactivate when it drops to or below the 'Stop Temperature'.

Image 5.2: Examples of the thermostat operating in heating mode (connected to a heater) and cooling mode (connected to a fan).
5.2. F01 Cycle Timer Mode
This mode allows for periodic on/off cycling of the connected device. You can set the duration for both ON time and OFF time, and the device will repeat this pattern continuously.
- Setting: Press 'MODE' until F01 is displayed. Use 'SET' to toggle between ON and OFF time settings. Use 'UP'/'DOWN' to adjust hours and minutes.
- Example: Set ON = 2 minutes, OFF = 1 minute. KT3100 starts to work for 2 minutes, stops working for 1 minute, then starts to work again for 2 minutes, stops working for 1 minute, and continues cycling.

Image 5.3: Close-up of the thermostat display in F01 mode, showing ON and OFF time settings.
5.3. F02 Countdown ON Mode
In this mode, the device will start working after a set countdown period. This is useful for delayed activation.
- Setting: Press 'MODE' until F02 is displayed. Use 'SET' to adjust the countdown time in hours and minutes.
- Example: Set CD ON = 2 minutes. KT3100 will start to work after 2 minutes.

Image 5.4: Close-up of the thermostat display in F02 mode, showing the countdown ON time.
5.4. F03 Countdown OFF Mode
This mode allows the device to stop working after a set countdown period. This is useful for delayed deactivation.
- Setting: Press 'MODE' until F03 is displayed. Use 'SET' to adjust the countdown time in hours and minutes.
- Example: Set CD OFF = 2 minutes. KT3100 will stop working after 2 minutes.

Image 5.5: Close-up of the thermostat display in F03 mode, showing the countdown OFF time.
5.5. F04 Countdown ON and Countdown OFF Mode
This mode combines delayed activation and delayed deactivation. The device will start after a set ON countdown and then stop after a set OFF countdown from the start of its operation.
- Setting: Press 'MODE' until F04 is displayed. Use 'SET' to adjust both CD ON and CD OFF times in hours and minutes.
- Example: Set CD ON = 2 minutes, CD OFF = 1 minute. KT3100 will start to work after 2 minutes, and stop working after 1 minute of working.

Image 5.6: Close-up of the thermostat display in F04 mode, showing both countdown ON and OFF times.
Video 5.7: Official KETOTEK video demonstrating the F01-F04 Mode Settings.
6. Versatile Applications
The KETOTEK Digital Thermostat Outlet Plug is suitable for a wide array of temperature-controlled environments, ensuring optimal conditions for various needs.
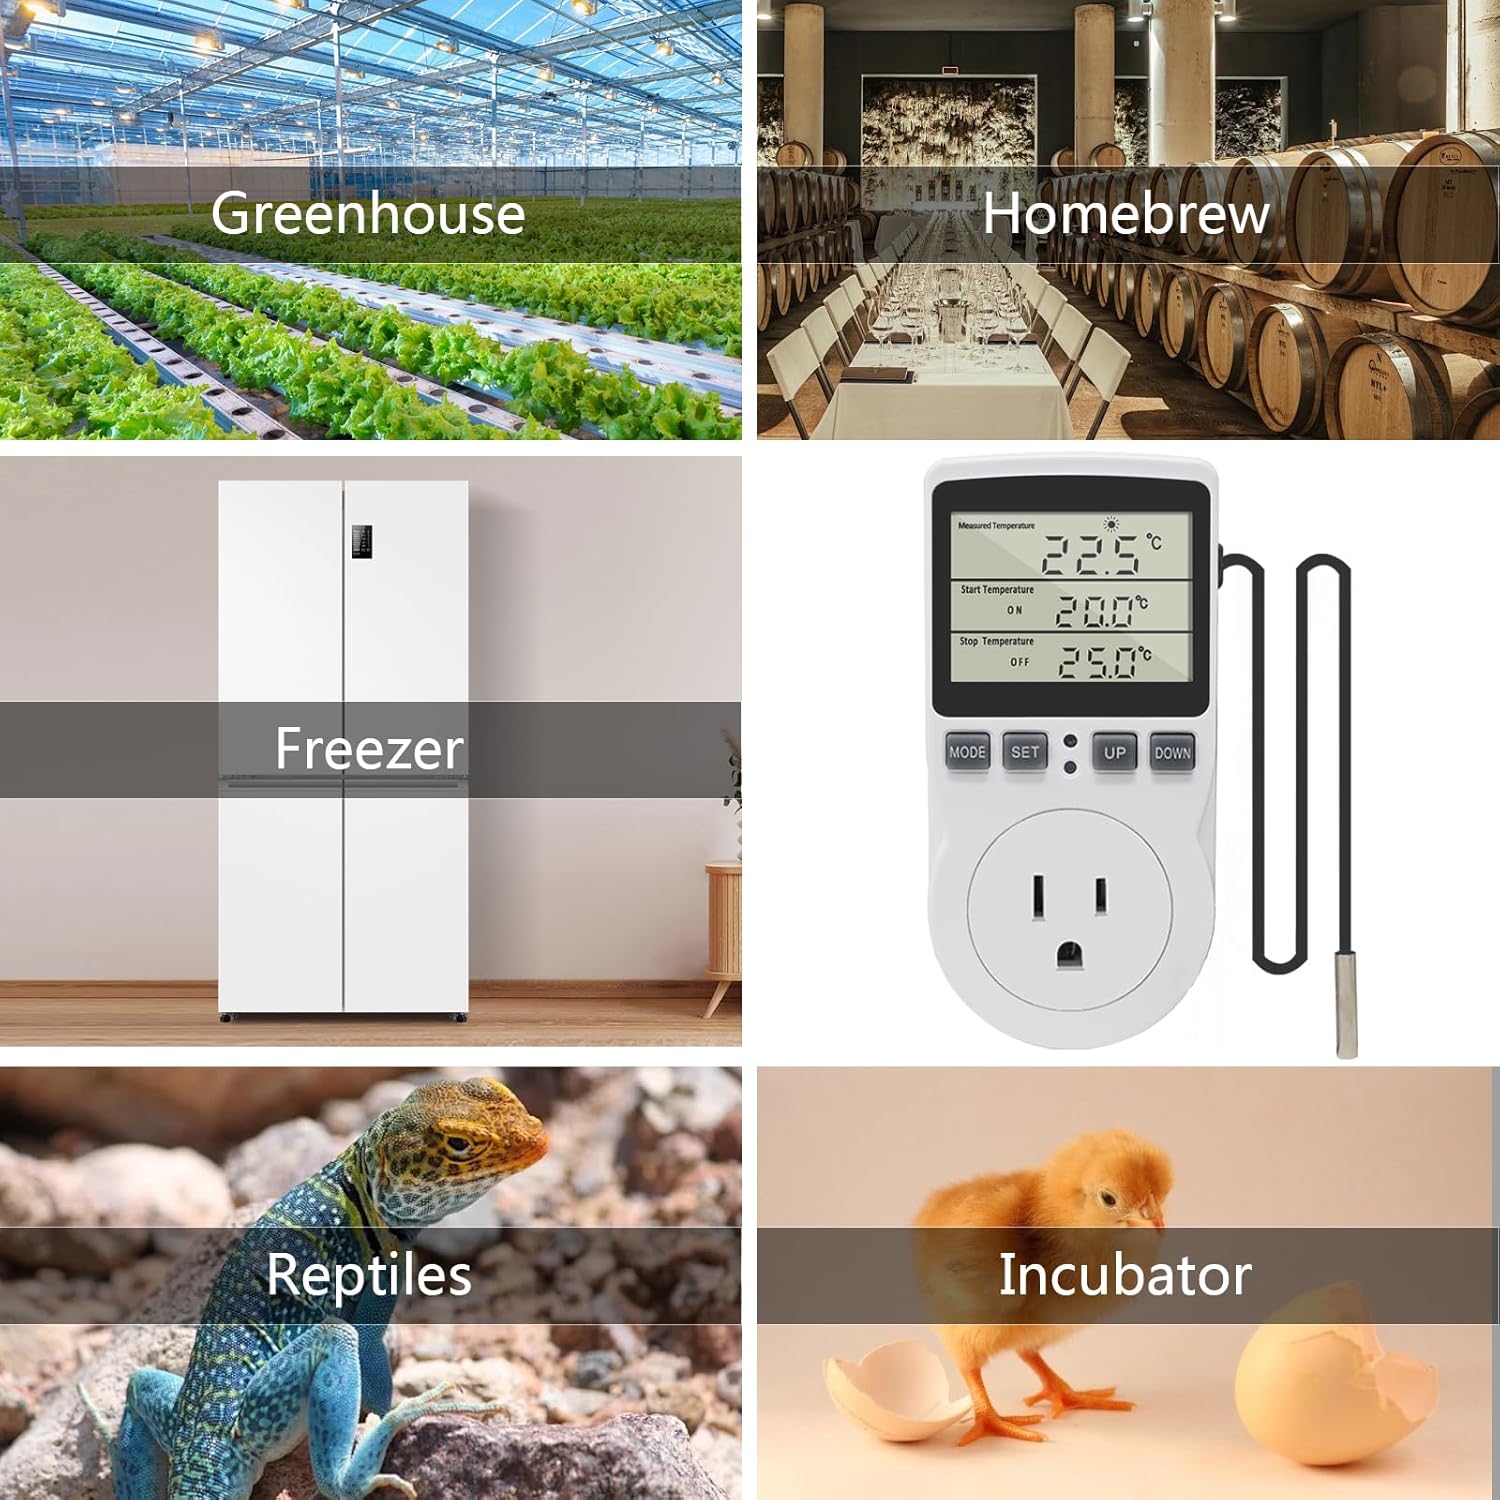
Image 6.1: Examples of common applications for the thermostat, such as greenhouses, homebrewing, freezers, reptile habitats, and incubators.

Image 6.2: The thermostat in use, controlling a heat mat for plant propagation, demonstrating its practical application.
7. Specifications
| Feature | Specification |
|---|---|
| Model Number | KT3100 |
| Power Source | AC |
| Voltage | 120V |
| Max Output | 15A/120V |
| Temperature Range | -40°F ~ 248°F (-40°C ~ 120°C) |
| Temperature Sensor | NTC 10K, 3-meter length |
| Display Type | LCD |
| Dimensions (L x W x H) | 2.28 x 1.54 x 4.72 inches (5.8 x 3.9 x 12 cm) |
| Item Weight | 7.2 ounces |
| Country of Origin | China |

Image 7.1: Detailed dimensions of the thermostat plug and its temperature sensor cable.
8. Troubleshooting
If you encounter issues with your KETOTEK Digital Thermostat Outlet Plug, please refer to the common problems and solutions below:
- Device Not Turning On/Off as Expected:
- Ensure the 'Start Temperature' and 'Stop Temperature' are set correctly for your desired heating or cooling operation. For heating, the 'ON' temperature should be lower than the 'OFF' temperature. For cooling, the 'ON' temperature should be higher than the 'OFF' temperature.
- Verify that the connected appliance is functioning correctly and is within the thermostat's maximum load capacity (Max 15A/120V).
- Check the temperature sensor placement. It should be in the area where temperature control is needed, not directly on the heating/cooling element.
- Inaccurate Temperature Readings:
- Use the temperature calibration function to fine-tune the sensor's accuracy. Refer to the manual's detailed instructions for calibration.
- Ensure the sensor is clean and free from debris that might affect its readings.
- Settings Lost After Power Outage:
- The device has a built-in memory function. If settings are lost, ensure the power outage was not prolonged or that the device was not manually reset. Re-enter your desired settings.
- Display Not Working:
- Check the power connection.
- If the display is completely blank, try plugging the unit into a different working outlet.
- Resetting the Device:
- If the device is behaving erratically, a factory reset may resolve the issue. Refer to the manual for specific reset instructions (usually involves pressing and holding a combination of buttons).
9. Maintenance
To ensure the longevity and optimal performance of your KETOTEK Digital Thermostat Outlet Plug, follow these simple maintenance guidelines:
- Cleaning: Wipe the device and sensor with a soft, dry cloth. Do not use abrasive cleaners, solvents, or immerse the unit in water.
- Sensor Care: Keep the temperature sensor clean and free from dust or debris. Avoid bending or kinking the sensor cable excessively.
- Storage: If storing the device for an extended period, unplug it from the power outlet and store it in a cool, dry place away from direct sunlight and extreme temperatures.
- Inspection: Periodically inspect the power cord and the sensor cable for any signs of damage. If any damage is found, discontinue use and contact customer support.
10. Warranty and Support
KETOTEK products are manufactured to high-quality standards. For any warranty claims or technical support, please contact the manufacturer directly through their official channels or the retailer from whom you purchased the product. Please have your model number (KT3100) and purchase information ready when contacting support.
For further assistance or inquiries, please visit the KETOTEK official website or contact their customer service department.
Related Documents - KT3100
 |
KETOTEK KT3100 US Plug-in Thermostat Instruction Manual Learn how to operate the KETOTEK KT3100 US Plug-in Thermostat. This manual covers temperature control (heating/cooling), timing modes (cycling, countdown), calibration, and specifications for intelligent temperature management. |
 |
KETOTEK KT3100 US Plug-in Thermostat Instruction Manual Learn how to operate the KETOTEK KT3100 US Plug-in Thermostat, a versatile temperature controller for heating, cooling, and timing applications in homes, greenhouses, and aquaculture. This manual covers setup, temperature control, timing modes, and specifications. |
 |
KETOTEK Thermostat Troubleshooting Guide | Resolve Common Issues Find solutions for common KETOTEK thermostat problems including inaccurate temperature, power issues, error codes, and timing setup. Learn about calibration and warranty support. |
 |
KETOTEK KT100 Fahrenheit Temperature Humidity Controller Operating Manual Comprehensive operating manual for the KETOTEK KT100 Fahrenheit Temperature Humidity Controller, detailing specifications, wiring, operation instructions, and calibration procedures for temperature and humidity control. |
 |
Ketotek KT3200 Plug-in Thermostat User Manual Instruction manual for the Ketotek KT3200 Plug-in Thermostat, a Day/Night Temperature Controller. Details operation modes (M1 TC, M2 TC+Timer, M3 Timer), temperature calibration, reset functions, and memory features. |
 |
KETOTEK Smart Thermostat KTF017802 User Manual User manual for the KETOTEK Smart Thermostat KTF017802, detailing installation, wiring, technical specifications, app connection, touch key functions, advanced settings, and safety information. |
Ask a question about this manual
Ask about setup, troubleshooting, compatibility, parts, safety, or missing instructions. Manuals+ will review the question and use this page’s manual context to help answer it.