Syslux SKE-JBP-J01
Syslux Aurora Projector User Manual
Model: SKE-JBP-J01
1. Introduction
Thank you for purchasing the Syslux Aurora Projector. This device is designed to transform your space into a mesmerizing Northern Lights display with a field of drifting stars. It features integrated white noise sounds, a Bluetooth speaker, and multiple control options including a remote, smart app, and voice commands via Alexa or Google Assistant. Please read this manual carefully to ensure proper setup, operation, and maintenance.
2. Safety Information
- Do not disassemble the product. Unauthorized repairs can void the warranty and cause damage.
- Keep the device away from water and moisture.
- Use only the provided power adapter or one with compatible specifications (DC 5V).
- Avoid direct eye exposure to the laser light.
- Keep out of reach of children.
- Ensure proper ventilation; do not cover the device during operation.
3. Package Contents
- Syslux Aurora Projector
- Remote Control
- USB Cable (Power Adapter not included)
- User Manual
4. Product Overview
The Syslux Aurora Projector is a compact device designed for immersive light projection. It features intuitive controls on the unit itself, along with advanced remote and smart app capabilities.
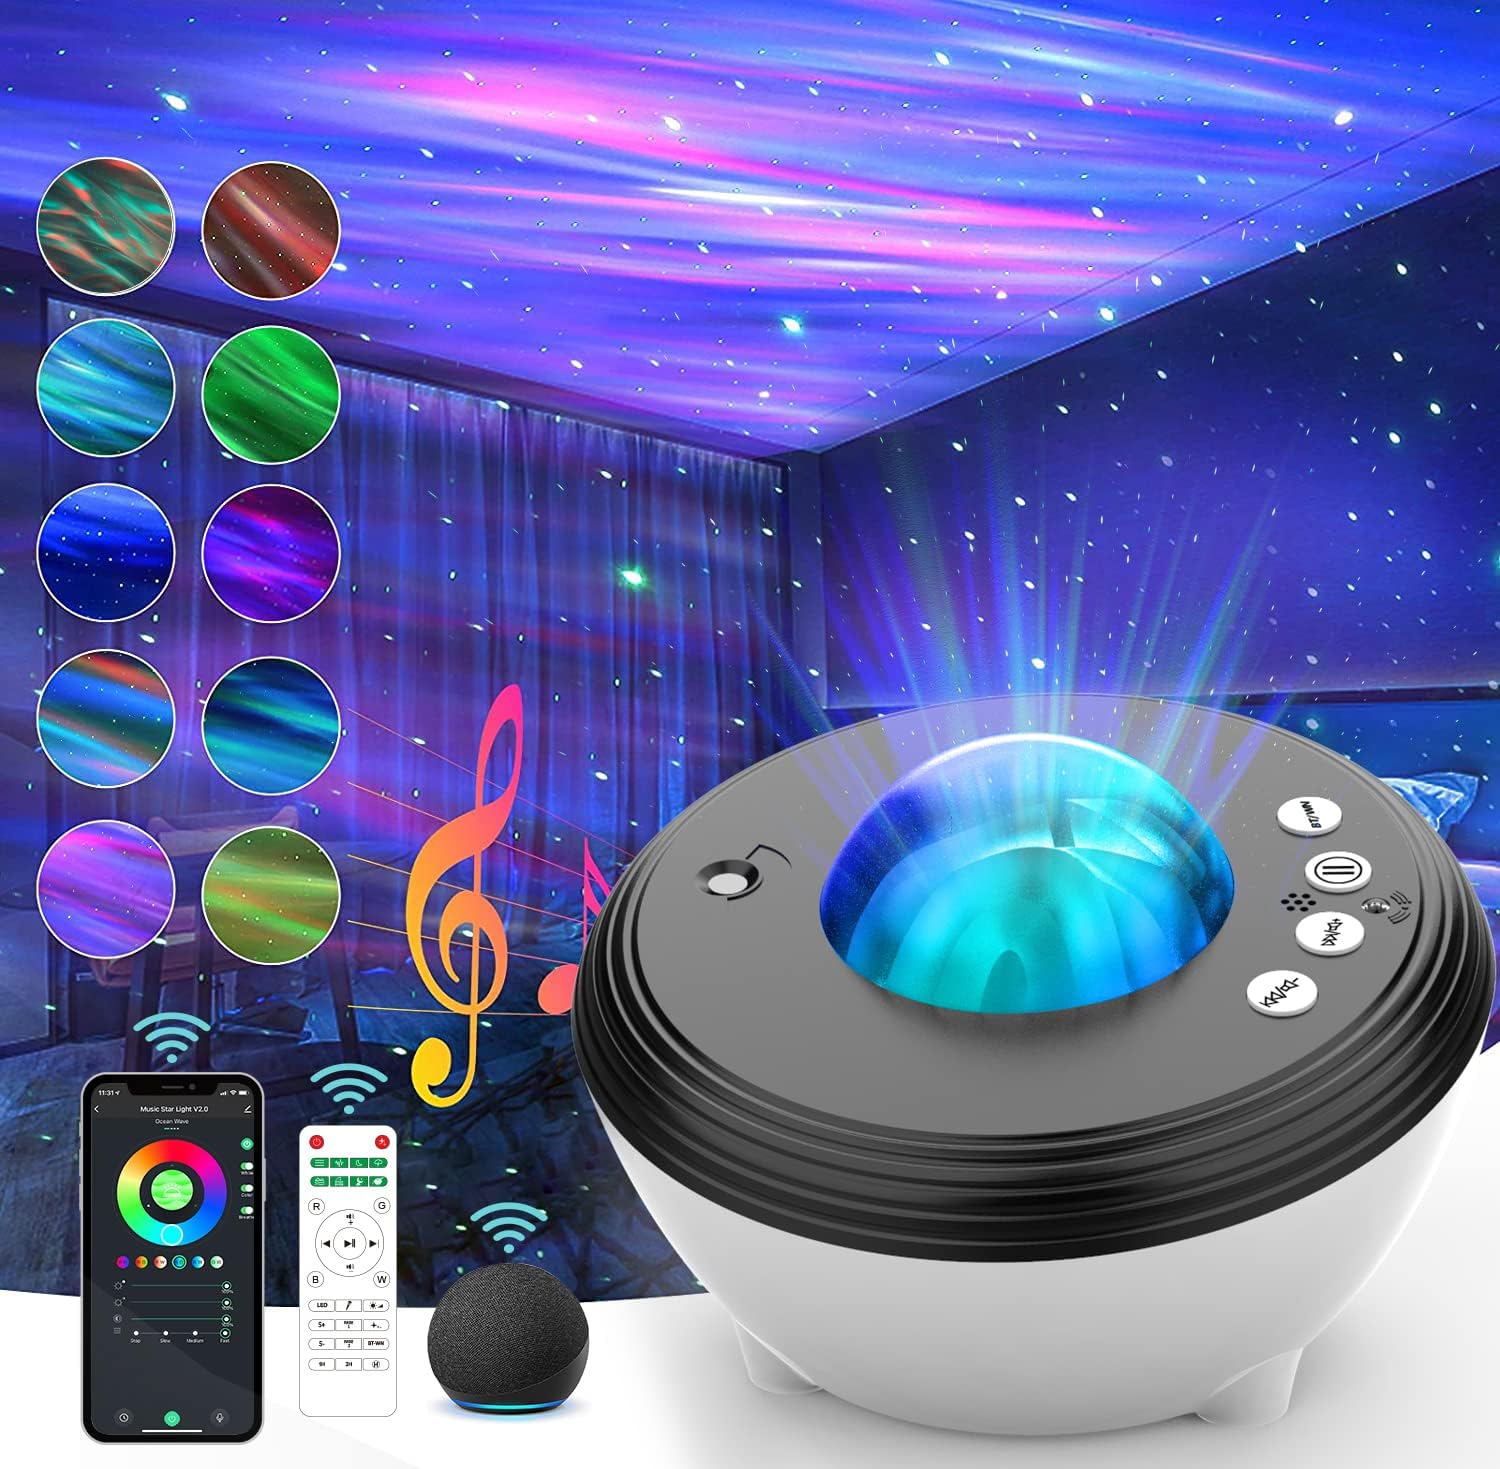
Figure 1: Syslux Aurora Projector and its control options.
Controls and Ports:
- Power Button: Turns the unit On/Off.
- Aurora/Star Button: Cycles through aurora and star projection modes.
- White Noise/Bluetooth Button (BT/WN): Switches between white noise sounds and Bluetooth mode.
- Volume Up/Down: Adjusts the audio volume.
- DC 5V Port: Power input.
- On-Off Switch: Main power switch.
- Brightness Slider: Adjusts the brightness of the projection.
5. Setup
5.1 Power Connection
- Connect the provided USB cable to the DC 5V port on the projector.
- Plug the other end of the USB cable into a compatible USB power adapter (not included) or a USB port on a computer/power bank.
- Ensure the main On-Off switch on the side of the projector is in the 'On' position.
5.2 Initial Power On
Press the Power Button on the projector or the remote control to turn on the device. The projector will start displaying the default aurora and star effects.
5.3 Smart App Connection (Smart Life App)
- Download the "Smart Life" app from your smartphone's app store (iOS or Android).
- Register or log in to your Smart Life account.
- Ensure your phone is connected to a 2.4GHz Wi-Fi network (5GHz Wi-Fi is not supported).
- Open the Smart Life app, tap '+' to add a device, and select "Lighting" > "Light Source (Wi-Fi)".
- Follow the in-app instructions to connect the projector. This usually involves putting the projector into pairing mode (refer to app for specific steps, often by pressing a button combination on the projector).
- Once connected, you can control all features via the app.

Figure 2: Controlling the projector via the Smart Life App.
5.4 Bluetooth Pairing
- Press the "BT/WN" button on the projector or the Bluetooth button on the remote control to switch to Bluetooth mode.
- On your smartphone or other Bluetooth-enabled device, search for "SKE-JBP-J01" (or similar name) in the Bluetooth settings.
- Select the projector to pair. A confirmation sound will indicate successful pairing.
- You can now play music through the projector's built-in speaker.

Figure 3: Remote control for convenient operation.
6. Operating Instructions
6.1 Projection Modes
The projector offers various aurora and star projection combinations. You can cycle through different colors, brightness levels, and flow speeds using the remote control, smart app, or on-device buttons.
- Aurora Colors: Projects 14 dynamic aurora light colors.
- Star Field: Projects a field of drifting stars.
- Combinations: Enjoy aurora and stars simultaneously.
- Brightness: Adjust 4 levels of brightness (10%, 40%, 70%, 100%).
- Flow Speed: Adjust the speed of the aurora movement.

Figure 4: Explore a wide range of aurora color options.

Figure 5: Experience 16 million color options for personalized ambiance.

Figure 6: Immerse yourself in a Northern Light World.
6.2 White Noise & Bluetooth Speaker
The projector includes 8 soothing white noise sounds and a built-in Bluetooth 5.0 speaker for playing your own music.
- White Noise Sounds: Ocean waves, summer night, thunder, stream, white noise, and 3 baby lullabies.
- Bluetooth Music: Connect your device via Bluetooth (see Section 5.4) to play any audio. The lights can sync with the music beat for a dynamic effect.

Figure 7: Eight soothing white noise options for relaxation.
Video 1: Demonstration of the Northern Light Aurora Projector with white noise machine and Bluetooth speaker functionality.
6.3 Timer Function
Set an auto-off timer for 1 hour, 2 hours, or customize the off time via the smart app for energy saving and convenience.

Figure 8: Adjust brightness and set the auto-off timer.
6.4 Smart App & Voice Control (Alexa/Google Assistant)
Beyond manual and remote control, the projector can be fully managed through the Smart Life app and integrated with voice assistants.
- Smart Life App: Access 16 million vision effects, adjust brightness, switch white noise/Bluetooth, and customize 48 scenarios.
- Voice Control: Link the Smart Life app to Amazon Alexa or Google Assistant. Use voice commands like "Alexa, turn on Music Star Light" to control power, dimming, and color settings.

Figure 9: Comprehensive control via the Smart WiFi APP.

Figure 10: Seamless integration with Alexa and Echo devices.
7. Maintenance
- Cleaning: Use a soft, dry cloth to clean the surface of the projector. Do not use abrasive cleaners or solvents.
- Storage: When not in use for extended periods, store the projector in a cool, dry place, away from direct sunlight and extreme temperatures.
8. Troubleshooting
| Problem | Possible Cause | Solution |
|---|---|---|
| Projector does not turn on. | No power, loose connection, main switch off. | Check power cable connection. Ensure main On-Off switch is on. Try a different power source. |
| Remote control not working. | Battery depleted, obstruction, not pointed correctly. | Replace remote battery. Ensure no obstructions between remote and projector. Point remote directly at the sensor. |
| Cannot connect to Smart Life App. | Incorrect Wi-Fi band, incorrect pairing mode, network issues. | Ensure your phone is on a 2.4GHz Wi-Fi network. Follow app instructions carefully for pairing mode. Restart router and projector. |
| Bluetooth connection unstable or not pairing. | Device too far, interference, projector not in Bluetooth mode. | Move device closer to the projector. Ensure projector is in Bluetooth mode (press BT/WN button). Disconnect from other Bluetooth devices. |
| Projection is dim or unclear. | Brightness setting too low, dirty lens, too much ambient light. | Increase brightness via remote/app/slider. Gently clean the projection lens with a soft cloth. Reduce ambient light in the room. |
9. Specifications
| Feature | Detail |
|---|---|
| Model Number | SKE-JBP-J01 |
| Dimensions | 6.38"D x 6.18"W x 4.53"H |
| Weight | 1.28 pounds |
| Power Source | DC 5V |
| Wattage | 10 watts |
| Light Source | LED |
| Connectivity | Bluetooth, Wi-Fi (2.4GHz) |
| Control Methods | On-device buttons, Remote Control, Smart App, Voice Control (Alexa, Google Assistant) |
| White Noise Sounds | 8 types (Ocean waves, summer night, thunder, stream, white noise, 3 baby lullabies) |
10. Warranty and Support
Syslux products come with a standard manufacturer's warranty. For detailed warranty information, technical support, or customer service inquiries, please refer to the contact information provided on the product packaging or visit the official Syslux website. Please retain your proof of purchase for warranty claims.