SUNSUL SUNSUL-10W-12V
SUNSUL 10 Watt 12V Solar Panel Kit Instruction Manual
Model: SUNSUL-10W-12V
1. Introduction
This manual provides detailed instructions for the installation, operation, and maintenance of your SUNSUL 10 Watt 12V Solar Panel Kit. This kit is designed to provide a reliable power source for various 12V DC applications, including battery charging systems for RVs, cars, boats, and more. The high-efficiency monocrystalline solar panel, combined with a waterproof 5A 12V/24V PWM solar charge controller, ensures optimal performance and battery longevity.
Key features include a high-efficiency solar panel with up to 23% conversion rate, durable construction with low iron tempered glass and an aluminum frame, and a smart 4-stage PWM charging controller with intelligent protection features.
2. Safety Information
Please read all safety instructions carefully before installing or operating the solar panel kit. Failure to follow these instructions may result in injury or damage to the product.
- Always wear appropriate personal protective equipment (PPE), including safety glasses and gloves, during installation.
- Do not attempt to disassemble or modify the solar panel or charge controller. Refer all servicing to qualified personnel.
- Ensure all electrical connections are secure and properly insulated to prevent short circuits.
- Avoid touching the solar panel surface with sharp objects.
- Keep the solar panel and charge controller away from flammable materials and sources of excessive heat.
- When connecting to a battery, ensure correct polarity (+ to + and - to -) to prevent damage to the battery or controller.
- The solar panel can generate electricity even in low light conditions. Treat it as a live electrical device.
3. Package Contents
Verify that all components are present and undamaged upon opening the package.
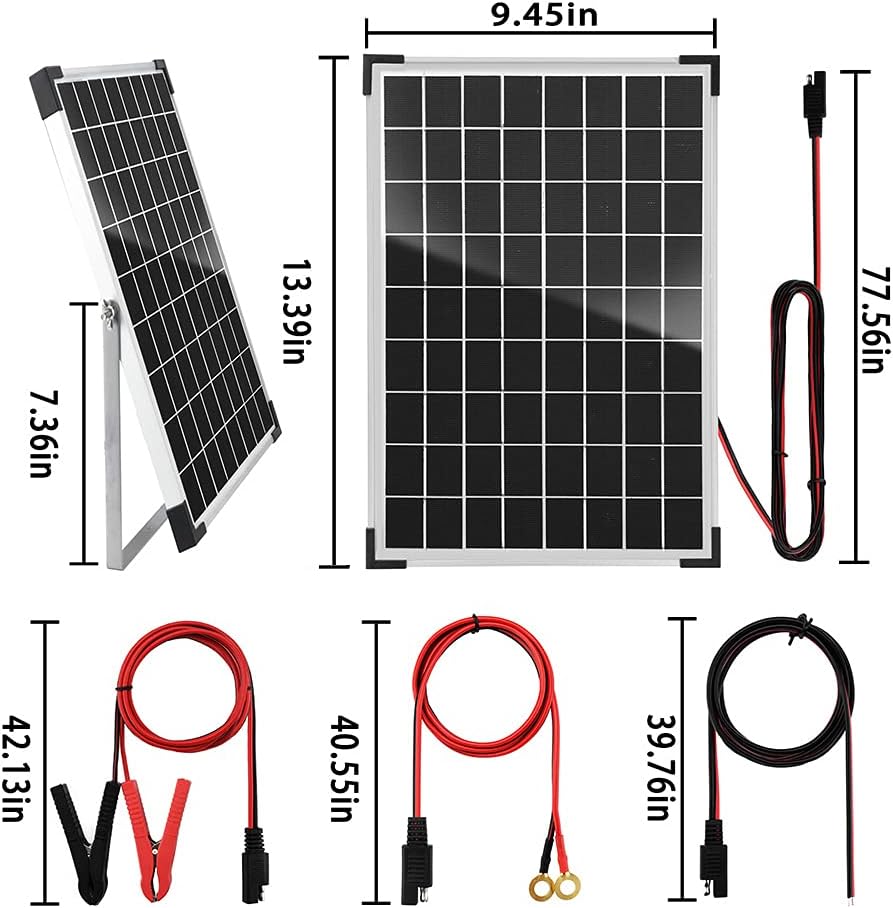
Figure 3.1: Overview of the SUNSUL 10 Watt Solar Panel Kit components, including the solar panel, charge controller, extension cables, O-ring terminals, and alligator clips.
- 1 x 10 Watt Monocrystalline Solar Panel
- 1 x 12V/24V 5A PWM Solar Charge Controller
- 1 x 39.76 inch Extension Cord
- 1 x 40.55 inch Extension Cable with O-Ring Terminal
- 1 x 42.13 inch Alligator Clips Line
- Adjustable Mounting Bracket
- Mounting Hardware (screws, anchors, nuts)
4. Product Overview
The SUNSUL 10 Watt Solar Panel Kit is designed for efficient and reliable battery charging and power supply. It consists of a durable solar panel and an intelligent charge controller.

Figure 4.1: The SUNSUL 10 Watt Solar Panel Kit, featuring the solar panel and charge controller.
4.1 Solar Panel
The 10W solar panel is constructed with high-efficiency monocrystalline cells, low iron tempered glass, weatherproof EVA film, and a robust aluminum frame. This design ensures durability and high performance, even in challenging outdoor conditions.
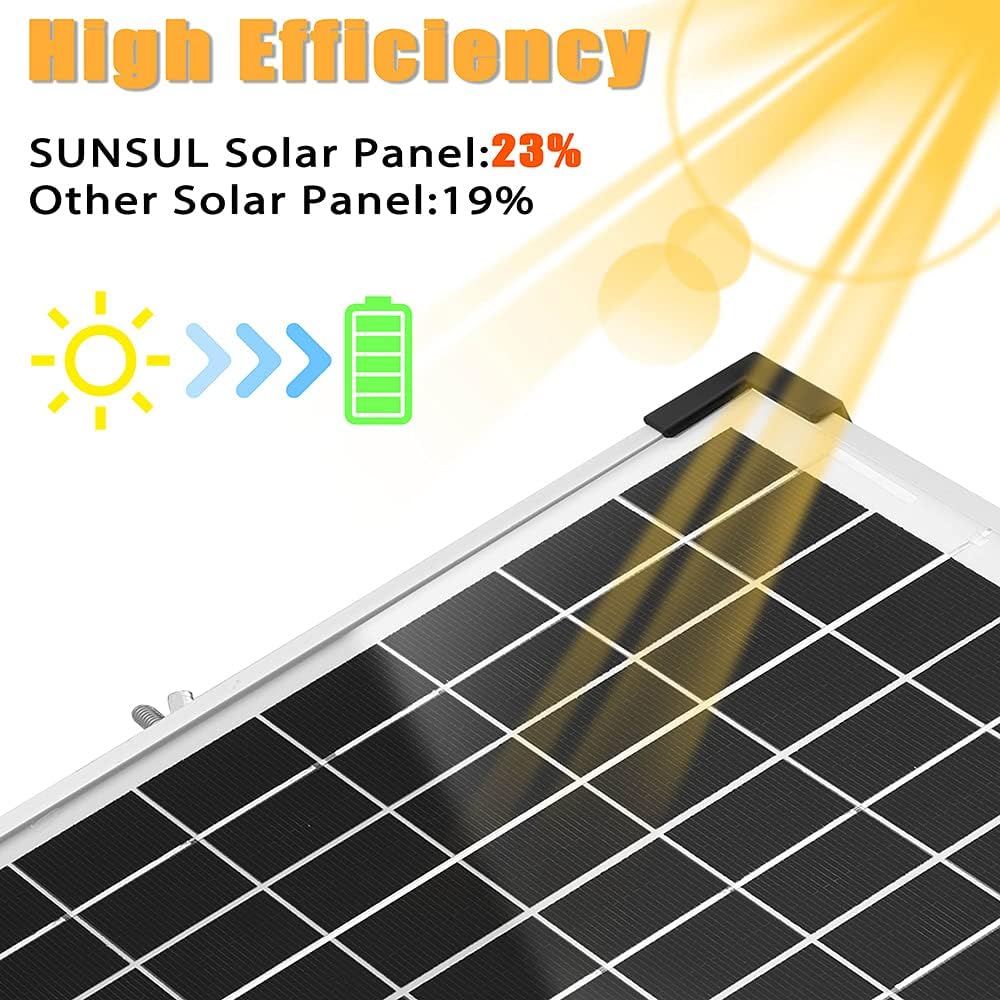
Figure 4.2: Dimensions of the 10 Watt Solar Panel and cable lengths.

Figure 4.3: High efficiency of SUNSUL solar panels, achieving up to 23% conversion rate.
4.2 Solar Charge Controller
The included 5A 12V/24V PWM solar charge controller manages the power flow from the solar panel to the battery. It features smart 4-stage PWM charging (Bulk, Boost, Float, and Equalization) to optimize battery life and system performance. It also provides intelligent protection against reverse polarity, overcharging, short-circuit, and reverse current. Two USB 5V/2A output ports are available for charging mobile devices.
5. Setup and Installation
Follow these steps for proper installation of your solar panel kit.
- Choose a Location: Select a location for the solar panel that receives maximum direct sunlight throughout the day, free from shadows. The adjustable mounting bracket allows for optimal angle positioning.
- Mount the Solar Panel: Use the adjustable mounting bracket and provided hardware to securely mount the solar panel. The pre-drilled holes on the back of the panel facilitate quick mounting. Adjust the panel angle (up to 180°) to face the sun for maximum energy absorption.

Figure 5.1: Adjustable mounting bracket for optimal sun exposure.
- Connect the Charge Controller:
- Step 1: Connect the Battery: First, connect the battery to the charge controller. Ensure correct polarity: connect the positive (+) terminal of the battery to the positive (+) terminal of the controller, and the negative (-) terminal of the battery to the negative (-) terminal of the controller. The controller display should light up.
- Step 2: Connect the Solar Panel: Next, connect the solar panel to the charge controller. Connect the positive (+) terminal of the solar panel to the positive (+) terminal of the controller, and the negative (-) terminal of the solar panel to the negative (-) terminal of the controller.
- Step 3: Connect the Load (Optional): If you are connecting a DC load (e.g., lights, inverter), connect it to the load terminals on the charge controller. Ensure correct polarity.

Figure 5.2: Wiring diagram for the solar panel system.
Important: Always connect the battery to the charge controller FIRST, and disconnect it LAST, to prevent damage to the controller.
6. Operating Instructions
Once installed, the SUNSUL solar panel kit operates largely automatically. The charge controller manages the charging process to ensure optimal battery health.
6.1 Charge Controller Functions
- Automatic Voltage Recognition: The controller automatically detects 12V or 24V battery systems.
- 4-Stage PWM Charging: The controller employs Bulk, Boost, Float, and Equalization charging stages to efficiently charge and maintain your battery, extending its lifespan.
- Protection Features: Built-in protections guard against reverse polarity, overcharging, short-circuiting, and reverse current.
- USB Output: Use the two 5V/2A USB ports to charge compatible mobile phones, tablets, or other USB-powered devices.
6.2 Indicators
Refer to the indicators on the charge controller for system status:
- Battery Indicator: Shows the current battery charge level.
- Charge Indicator: Illuminates when the solar panel is actively charging the battery.
- Load Indicator: Illuminates when the DC load output is active.
7. Maintenance
Regular maintenance ensures the longevity and optimal performance of your solar panel kit.
- Cleaning the Solar Panel: Periodically clean the surface of the solar panel with a soft, damp cloth to remove dust, dirt, and debris. A clean panel ensures maximum sunlight absorption and efficiency. Avoid abrasive cleaners or harsh chemicals.
- Check Connections: Regularly inspect all electrical connections (solar panel to controller, controller to battery, controller to load) to ensure they are tight and free from corrosion.
- Inspect for Damage: Check the solar panel, cables, and charge controller for any signs of physical damage, such as cracks, frayed wires, or water ingress.

Figure 7.1: The solar panel is designed for weather resistance, operating in temperatures from -40°F to 185°F and withstanding significant barometric pressure.
- Battery Maintenance: Follow the manufacturer's recommendations for your specific battery type regarding maintenance, such as checking electrolyte levels for flooded lead-acid batteries.
8. Troubleshooting
This section addresses common issues you might encounter with your solar panel kit.
| Problem | Possible Cause | Solution |
|---|---|---|
| Charge controller display is off. | No battery connected or battery voltage is too low. | Ensure battery is properly connected and has sufficient charge. Charge battery externally if voltage is too low. |
| Battery not charging. |
|
|
| Load not working. |
|
|
| High-pitched noise from controller. | Normal operation for some switching power supplies (coil whine). | This is generally not a functional issue. If excessively loud or concerning, ensure proper ventilation and contact support if it affects performance. |
9. Technical Specifications
| Parameter | Value |
|---|---|
| Brand | SUNSUL |
| Model Number | SUNSUL-10W-12V |
| Maximum Power | 10 Watts |
| Maximum Voltage | 12 Volts |
| AC Adapter Current | 5 Amps |
| Efficiency | High Efficiency (up to 23% conversion rate) |
| Material | Aluminum, Tempered Glass, EVA |
| Item Weight | 1.38 Kilograms (3.03 pounds) |
| Package Dimensions | 14.72 x 10.51 x 1.54 inches |
| Style | USB, Battery |
| Power Source | Battery Powered, Corded Electric |
10. Warranty and Support
SUNSUL is committed to providing high-quality products and excellent customer service. Each solar panel undergoes rigorous testing before leaving the factory to ensure quality.
For any issues, damage, or questions regarding your product, please contact SUNSUL customer service. We are dedicated to resolving any problems in a timely manner.
For more information and support, you may visit the official SUNSUL store: SUNSUL Store on Amazon.
11. Application Scenarios
The SUNSUL 10 Watt 12V Solar Panel Kit is versatile and suitable for a wide range of applications where 12V battery charging or trickle charging is required.

Figure 11.1: Examples of product applications including RVs, cars, boats, fences, security cameras, greenhouses, lawnmowers, motorcycles, jet skis, trailers, campers, and home use.
12. Product Videos
No official product videos from the seller are available in the provided data for embedding in this manual.