
1. Introduction
Thank you for choosing the Sportspower 10ft Bounce Pro Trampoline with Safety Enclosure. This manual provides essential information for the safe assembly, operation, maintenance, and troubleshooting of your trampoline. Please read all instructions carefully before assembly and retain this manual for future reference.

Image 1.1: The Sportspower 10ft Bounce Pro Trampoline with Safety Enclosure, showing the blue frame pad and black net.
2. Safety Information
Your safety is paramount. Failure to follow these safety guidelines may result in serious injury or property damage. This trampoline is designed for recreational use only. It is not intended for commercial or public use.
2.1 General Safety Guidelines
- Adult supervision is required at all times.
- Only one person should use the trampoline at a time. Multiple users increase the risk of collision and injury.
- Do not attempt somersaults or other high-risk maneuvers without proper training and supervision.
- Ensure the trampoline is placed on a level surface, at least 2 meters away from any structures, trees, or other obstacles.
- Inspect the trampoline before each use for damaged, worn, or missing parts. Do not use if any components are compromised.
- Keep the area around the trampoline clear of debris and other hazards.
- Do not use the trampoline in wet or windy conditions.
- Always enter and exit the trampoline through the safety enclosure opening.
2.2 Warning Labels
Warning labels are affixed to the trampoline frame and enclosure net. These labels contain critical safety information. Do not remove, cover, or deface these labels. If a label becomes unreadable or detached, contact Sportspower for a replacement.
3. Parts List
Before beginning assembly, ensure all parts listed below are present and undamaged. If any parts are missing or damaged, do not proceed with assembly. Contact customer support for assistance.
| Item | Description | Quantity |
|---|---|---|
| A | Top Frame Rails | 8 |
| B | Leg Base Sections | 4 |
| C | Leg Extension Poles | 8 |
| D | Jumping Mat | 1 |
| E | Springs | 56 |
| F | Frame Pad (Blue) | 1 |
| G | Enclosure Poles (Upper) | 8 |
| H | Enclosure Poles (Lower) | 8 |
| I | Enclosure Net | 1 |
| J | Pole Foam Sleeves | 8 |
| K | Spring Loading Tool | 1 |
| L | Hardware Pack (bolts, nuts, washers) | 1 set |
4. Setup Instructions
Assembly requires at least two adults. Wear appropriate safety gear, such as gloves, during assembly. Follow these steps carefully.
4.1 Before You Begin
- Choose a flat, level outdoor surface for installation.
- Ensure there is at least 2 meters of clear space around the trampoline.
- Unpack all components and verify against the parts list.
- Keep children and pets away from the assembly area.
4.2 Assembly Steps
- Assemble the Frame: Connect the Top Frame Rails (A) to form a complete circle. Secure them using the provided hardware.
- Attach Legs: Insert the Leg Base Sections (B) into the connectors on the frame. Then, attach the Leg Extension Poles (C) to the Leg Base Sections.
- Install Jumping Mat and Springs: Lay the Jumping Mat (D) in the center of the frame. Using the Spring Loading Tool (K), attach the Springs (E) to the mat and frame. Start by attaching springs at 12, 3, 6, and 9 o'clock positions, then fill in the remaining springs evenly.
- Place Frame Pad: Cover the springs and frame with the Frame Pad (F), ensuring it is securely fastened around the entire perimeter.
- Assemble Enclosure Poles: Slide the Pole Foam Sleeves (J) onto the Enclosure Poles (G and H). Connect the upper and lower sections of the enclosure poles.
- Attach Enclosure Poles to Frame: Secure the assembled enclosure poles to the trampoline frame using the provided clamps and hardware.
- Install Enclosure Net: Drape the Enclosure Net (I) over the top of the enclosure poles. Secure the bottom of the net to the V-rings of the jumping mat or the frame, as per specific design. Ensure the zipper opening aligns with an entry point.
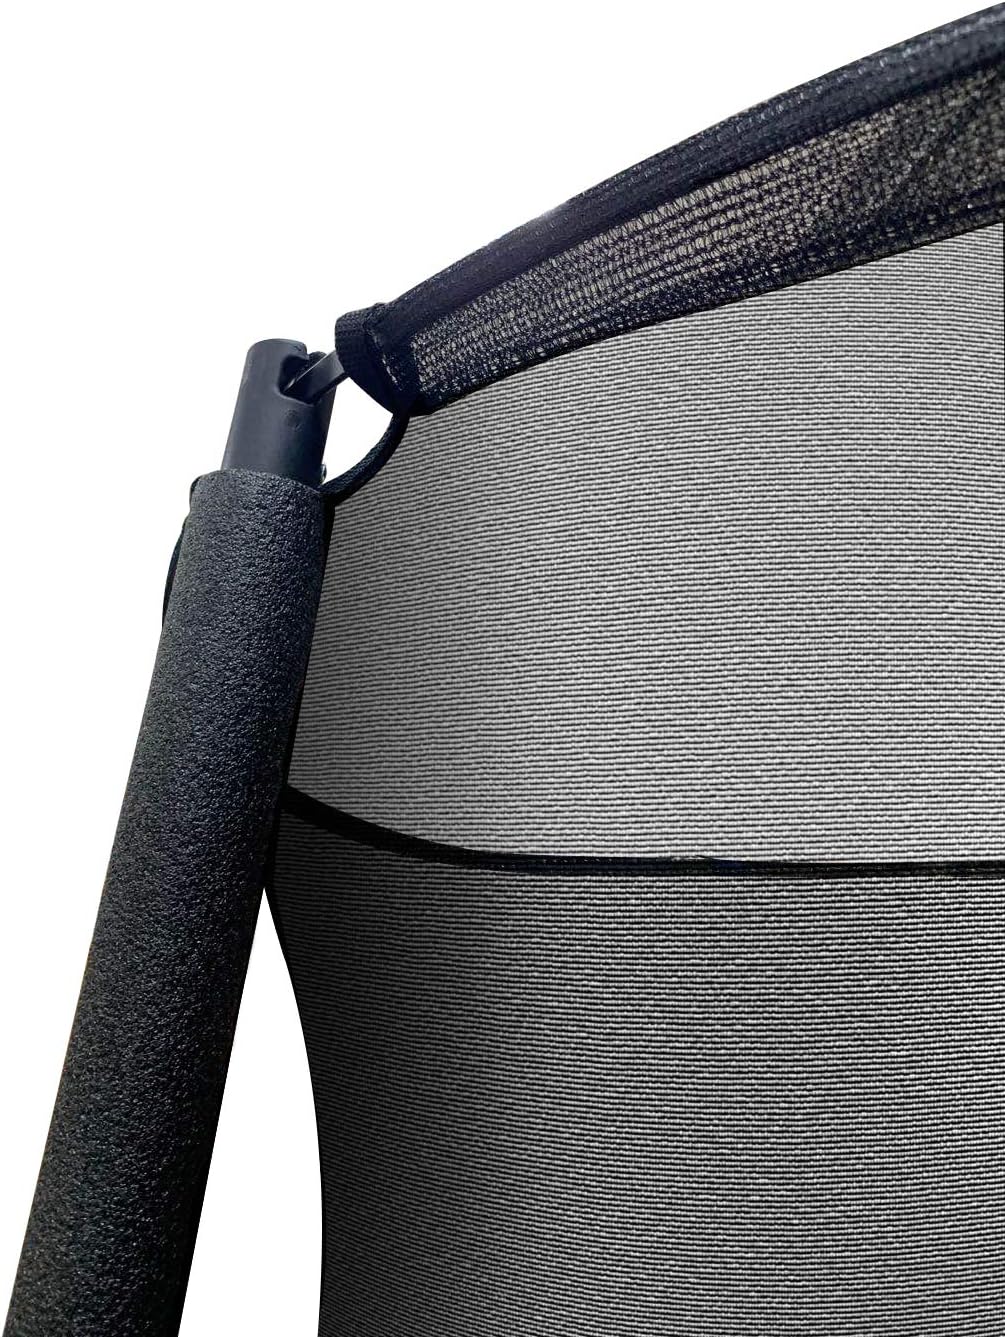
Image 4.1: Detail of the safety enclosure net and padded pole for user protection.
5. Operating Instructions
Proper use of the trampoline ensures safety and extends its lifespan.
5.1 Using Your Trampoline
- Always ensure the safety enclosure zipper is fully closed before use.
- Bounce in the center of the jumping mat.
- Avoid bouncing too high or attempting stunts beyond your skill level.
- Do not wear shoes on the trampoline.
- Remove all sharp objects from pockets before use.
5.2 Safety Enclosure Use
The safety enclosure is designed to prevent users from falling off the trampoline. Always ensure the enclosure net is properly secured and the zipper is fully closed during use.

Image 5.1: Detail of the safety enclosure's zipper and buckle closure mechanism.
6. Maintenance
Regular maintenance is crucial for the safety and longevity of your trampoline.
6.1 Regular Inspection
- Before each use: Check the jumping mat for tears or holes, springs for stretching or breakage, frame for bends or cracks, and the enclosure net for tears or loose attachments.
- Monthly: Tighten all nuts and bolts. Inspect all protective coverings and padding for wear.
- Replace any worn, defective, or missing parts immediately.
6.2 Cleaning
Clean the jumping mat and frame pad with a damp cloth and mild soap. Rinse thoroughly and allow to air dry. Do not use abrasive cleaners or harsh chemicals.
6.3 Storage
During periods of non-use, especially in harsh weather conditions (heavy snow, strong winds), it is recommended to disassemble and store the trampoline indoors. If left outdoors, ensure it is securely anchored and regularly inspected for weather damage.
7. Troubleshooting
This section addresses common issues you might encounter with your trampoline.
| Problem | Possible Cause | Solution |
|---|---|---|
| Trampoline feels unstable | Uneven ground; loose frame connections | Relocate to a level surface; tighten all bolts and nuts. |
| Jumping mat has reduced bounce | Stretched or broken springs; worn mat | Inspect and replace damaged springs; consider replacing the mat if significantly worn. |
| Enclosure net is sagging | Loose pole connections; stretched net | Tighten pole connections; re-secure net attachments; replace net if stretched beyond repair. |
| Squeaking noises during use | Friction between metal parts; dry springs | Apply a silicone-based lubricant to frame joints and spring hooks. |
8. Specifications
| Feature | Detail |
|---|---|
| Product Name | 10ft Bounce Pro Trampoline with Safety Enclosure |
| Brand | Sportspower |
| Model Name | 10ft Bounce Pro Trampoline |
| Dimensions (L x W x H) | 2.5L x 2.5W x 0.4H meters (approx. 10ft diameter) |
| Item Weight | 19 Kilograms |
| Maximum Weight Recommendation | 100 Kilograms |
| Frame Material | Alloy Steel (Galvanised) |
| Jumping Mat Material | Polypropylene (PP), UV resistant |
| Number of Springs | 56 |
| Color | Blue (frame pad) |
9. Warranty and Support
9.1 Warranty Information
This Sportspower trampoline typically comes with a limited warranty covering manufacturing defects. Please refer to the warranty card included with your purchase or visit the official Sportspower website for detailed warranty terms and conditions. Keep your proof of purchase for warranty claims.
9.2 Customer Support
For technical assistance, replacement parts, or warranty inquiries, please contact Sportspower customer support. Contact details can usually be found on the product packaging or the official Sportspower website.


