Team Associated ASC91884
Team Associated RC10B6.3 Front Top Plate and Ballstud Mount Instruction Manual
Model: ASC91884
1. Introduction
This manual provides essential information for the installation, use, and maintenance of the Team Associated RC10B6.3 Front Top Plate and Ballstud Mount, part number ASC91884. This component is designed as an option part for various Team Associated electric car and truck models, enhancing their performance and adjustability.
Compatible models include: RC10B6.1, RC10B6.1D, RC10B6.1DL, RC10B6.2, RC10B6.2D, RC10B6.3, RC10B6.3D, RC10B6.4, RC10B6.4D, RC10B64, RC10B64 Club Racer, RC10B64D, RC10B74, RC10B74.1, RC10B74.1D, RC10B74.2, RC10B74.2D, RC10SC6.1, RC10T6.1.
2. Product Overview and Components
The ASC91884 kit includes the front top plate, the ballstud mount, and a small connecting link. These components are crucial for the front suspension geometry and shock mounting points of your RC vehicle.
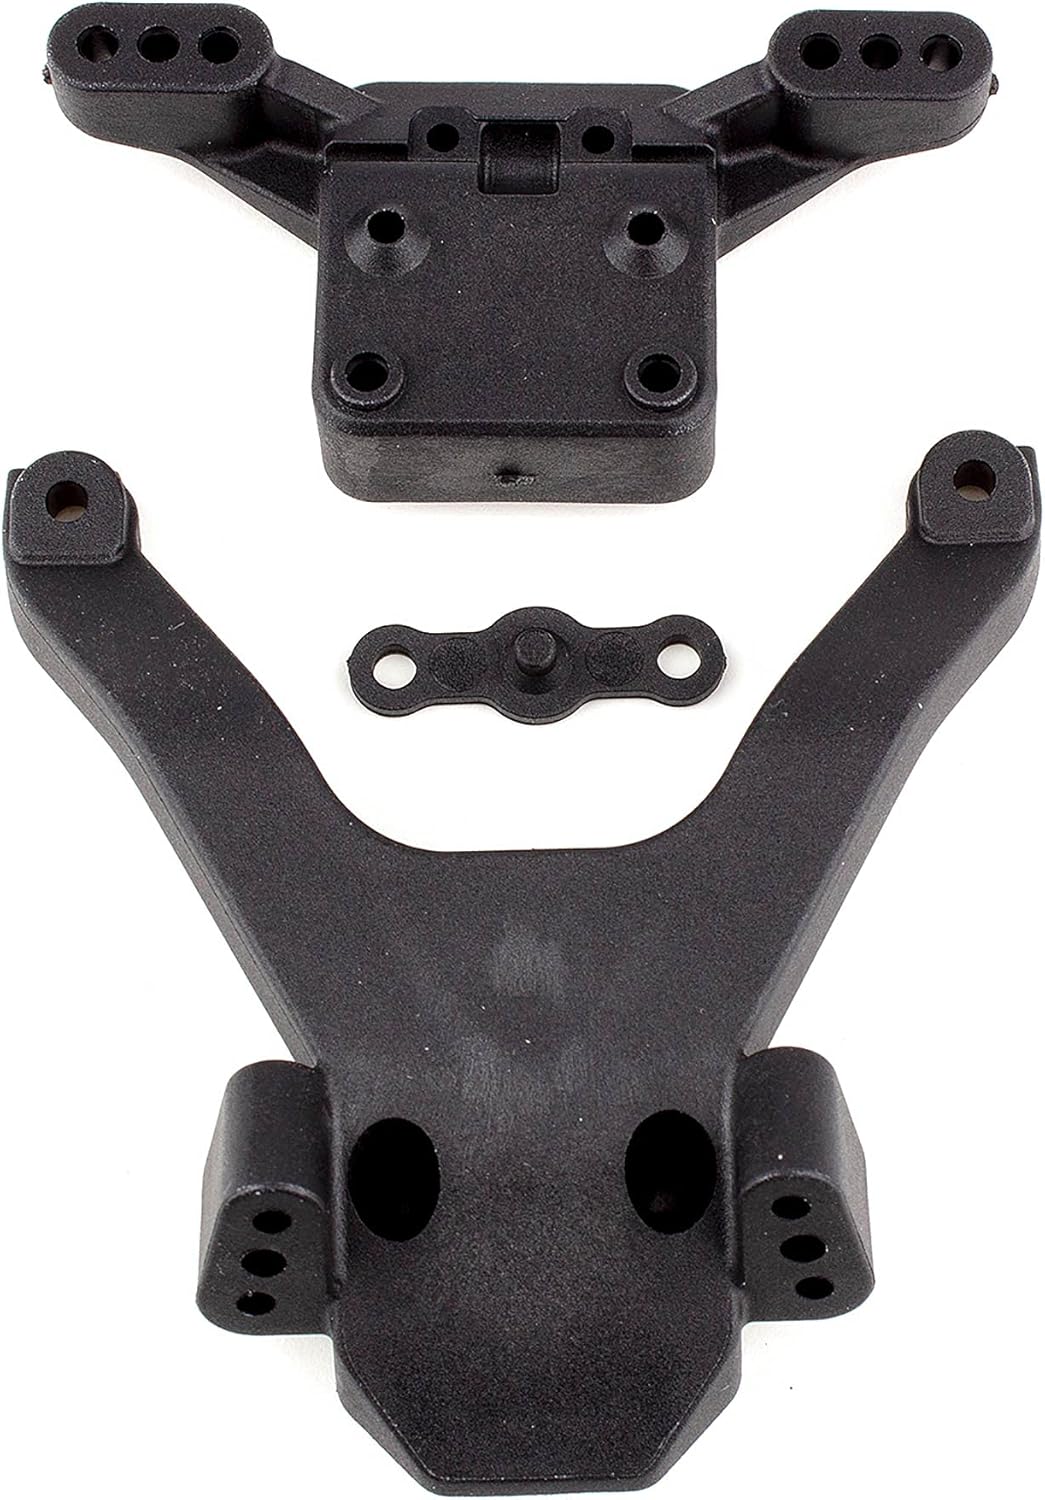
Figure 1: Components of the ASC91884 kit. The image displays the black plastic front top plate at the top, a smaller rectangular ballstud mount below it, and a small, flat, figure-eight shaped connecting link at the center.
- Front Top Plate: The main structural component that attaches to the front bulkhead and provides mounting points for the shock tower and other suspension elements.
- Ballstud Mount: A smaller, rectangular piece designed to hold the ballstuds for suspension links, allowing for precise adjustment of suspension geometry.
- Connecting Link: A small, flat component used to connect or secure specific parts within the assembly.
3. Setup and Installation
Installation of the ASC91884 requires basic RC vehicle assembly tools (e.g., hex drivers, nut drivers). Refer to your specific RC vehicle's instruction manual for detailed disassembly and reassembly procedures of the front end.
3.1. Preparation
- Ensure your workspace is clean and well-lit.
- Gather all necessary tools and the ASC91884 components.
- Carefully remove the existing front top plate and ballstud mount from your RC vehicle, noting the orientation and placement of all screws and shims.
3.2. Installation Steps
- Attach the new ballstud mount to the front top plate using the appropriate screws as indicated in your vehicle's manual. Ensure proper alignment.
- Secure the small connecting link if required by your specific vehicle model's setup.
- Mount the assembled front top plate and ballstud mount onto the front bulkhead of your RC vehicle. Use thread-locking compound on metal-to-metal screws if recommended by your vehicle's manual.
- Reattach all associated suspension components, such as shock towers, shocks, and upper suspension links, to the new top plate and ballstud mount.
- Verify that all screws are tightened securely but do not overtighten, as this can strip plastic threads.
4. Operating Considerations
Once installed, the new front top plate and ballstud mount will function as part of your vehicle's front suspension system. No specific operational procedures are required for this component itself beyond its proper installation. Ensure that all suspension components move freely without binding after installation.
5. Maintenance
Regular inspection and cleaning will prolong the life of your ASC91884 components.
- Cleaning: After each use, especially in dusty or dirty conditions, clean the components with a soft brush or compressed air to remove debris. Avoid harsh chemicals that may degrade the plastic.
- Inspection: Periodically check for cracks, stress marks, or deformation in the plastic. Replace any damaged parts immediately to maintain optimal performance and prevent further damage to your vehicle.
- Screw Tightness: Ensure all screws remain properly tightened. Vibrations during operation can loosen fasteners over time.
6. Troubleshooting
Most issues related to this component stem from improper installation or damage.
- Loose Fit/Excessive Play: Recheck all screw connections. Ensure no shims or spacers were omitted during reassembly. Verify that the correct screws are used for each mounting point.
- Binding/Restricted Movement: Ensure no wires or other components are interfering with the movement of the suspension. Check for overtightened screws that might be pinching plastic parts.
- Component Breakage: This typically occurs due to impacts or extreme stress. The only solution is to replace the broken component with a new one.
7. Specifications
| Attribute | Value |
|---|---|
| Product Model Number | ASC91884 |
| Product Dimensions | 7.5 x 3.8 x 1.1 inches |
| Item Weight | 1.12 ounces |
| Manufacturer | Team Associated |
| Material | Plastic (typically composite nylon) |
8. Warranty and Support
For specific warranty information regarding the Team Associated ASC91884 part, please refer to the official Team Associated website or contact their customer support directly. Warranty terms typically cover manufacturing defects but may not cover damage due to normal wear and tear, misuse, or impacts.
For technical support or further assistance with installation and troubleshooting, please visit the Team Associated support page or consult your local hobby shop.
Ask a question about this manual
Ask about setup, troubleshooting, compatibility, parts, safety, or missing instructions. Manuals+ will review the question and use this page’s manual context to help answer it.